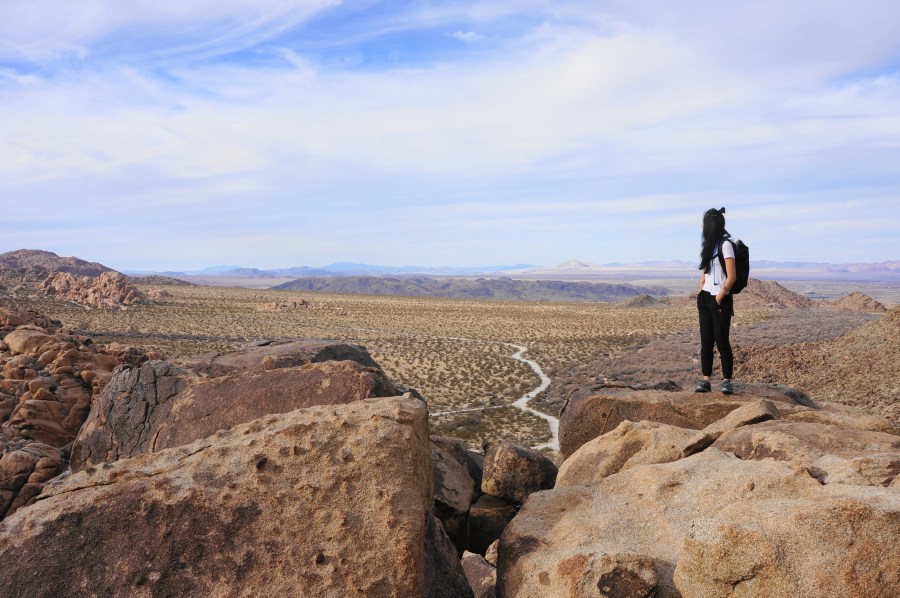

Rattlesnake Canyon in southern California’s Joshua Tree National Park is a rough-and-tumble, off-trail route that is well-known and advertised in Joshua Tree guidebooks—although perhaps it should not be. Despite its short length—the entirety of Rattlesnake Canyon upstream from the trailhead is less than two miles—the canyon floor is full of obstacles, route-finding challenges, and plenty of opportunities for first-time hikers to find themselves in trouble. Rescues—due to disorientation, heat, or broken bones—are relatively common, and the canyon is somewhat of a headache for local rangers, who warn of the dangers of the off-trail hike. As one local park official noted in 2016 after rescuing three hikers, “these people did not realize how strenuous Rattlesnake Canyon is…It is important to evaluate the hike you’re going to take…Find out a little bit about it before you just take off.” Notwithstanding these words of caution, Rattlesnake Canyon is a beautiful and rewarding destination for those with proper preparation and experience. Here the sandy wash gives way to a narrow and rugged gulch carved into the undulating monzogranite of an area called the Wonderland of Rocks. Fabulous grottos and slender slots can be found within a half-mile of the start, with additional wonders beyond as the canyon cuts deep into the boulder-strewn wilderness.
(Note: In light of the hike’s hazards, I have mixed feelings about posting information on the route. However, the canyon is truly a gem of the park, is already well-known on the Internet, and has an official NPS trailhead with complete signage (which repeats the warnings), so I have elected to do so—but add several pointers and suggestions for completing the hike safely.)
The hike
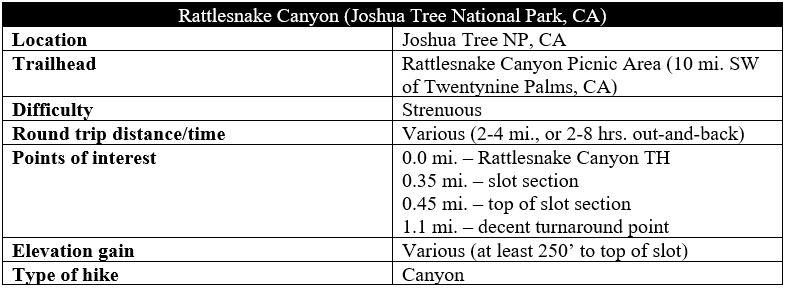
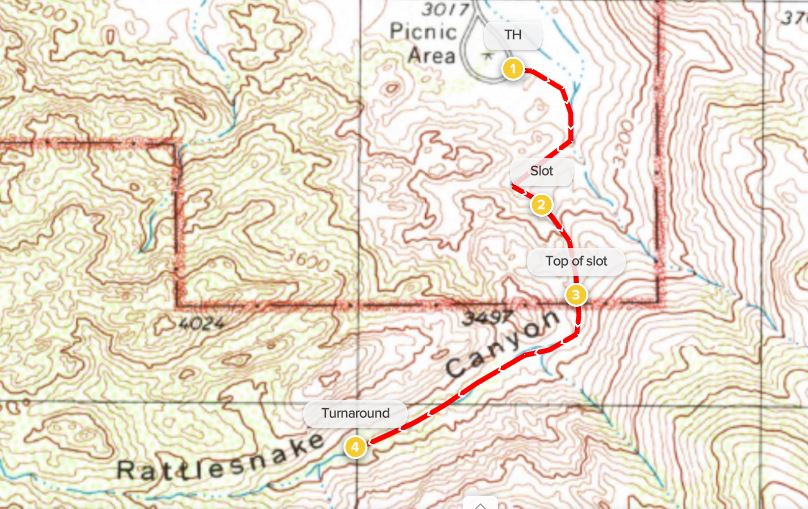
Rattlesnake Canyon is most often explored as an out-and-back hike beginning from the Rattlesnake Canyon Picnic Area, accessed by way of the Indian Cove Entrance in Joshua Tree National Park. After entering the park, follow Indian Cove Road toward the looming rocks, then stay left at three intersections in quick succession, following the road to its end (toward the picnic area, not the Indian Cove Campground). Here, amid the scrubby creosote bushes, the gravel road forms a loop; partway around the drive is a small parking area with a restroom and the trailhead sign.
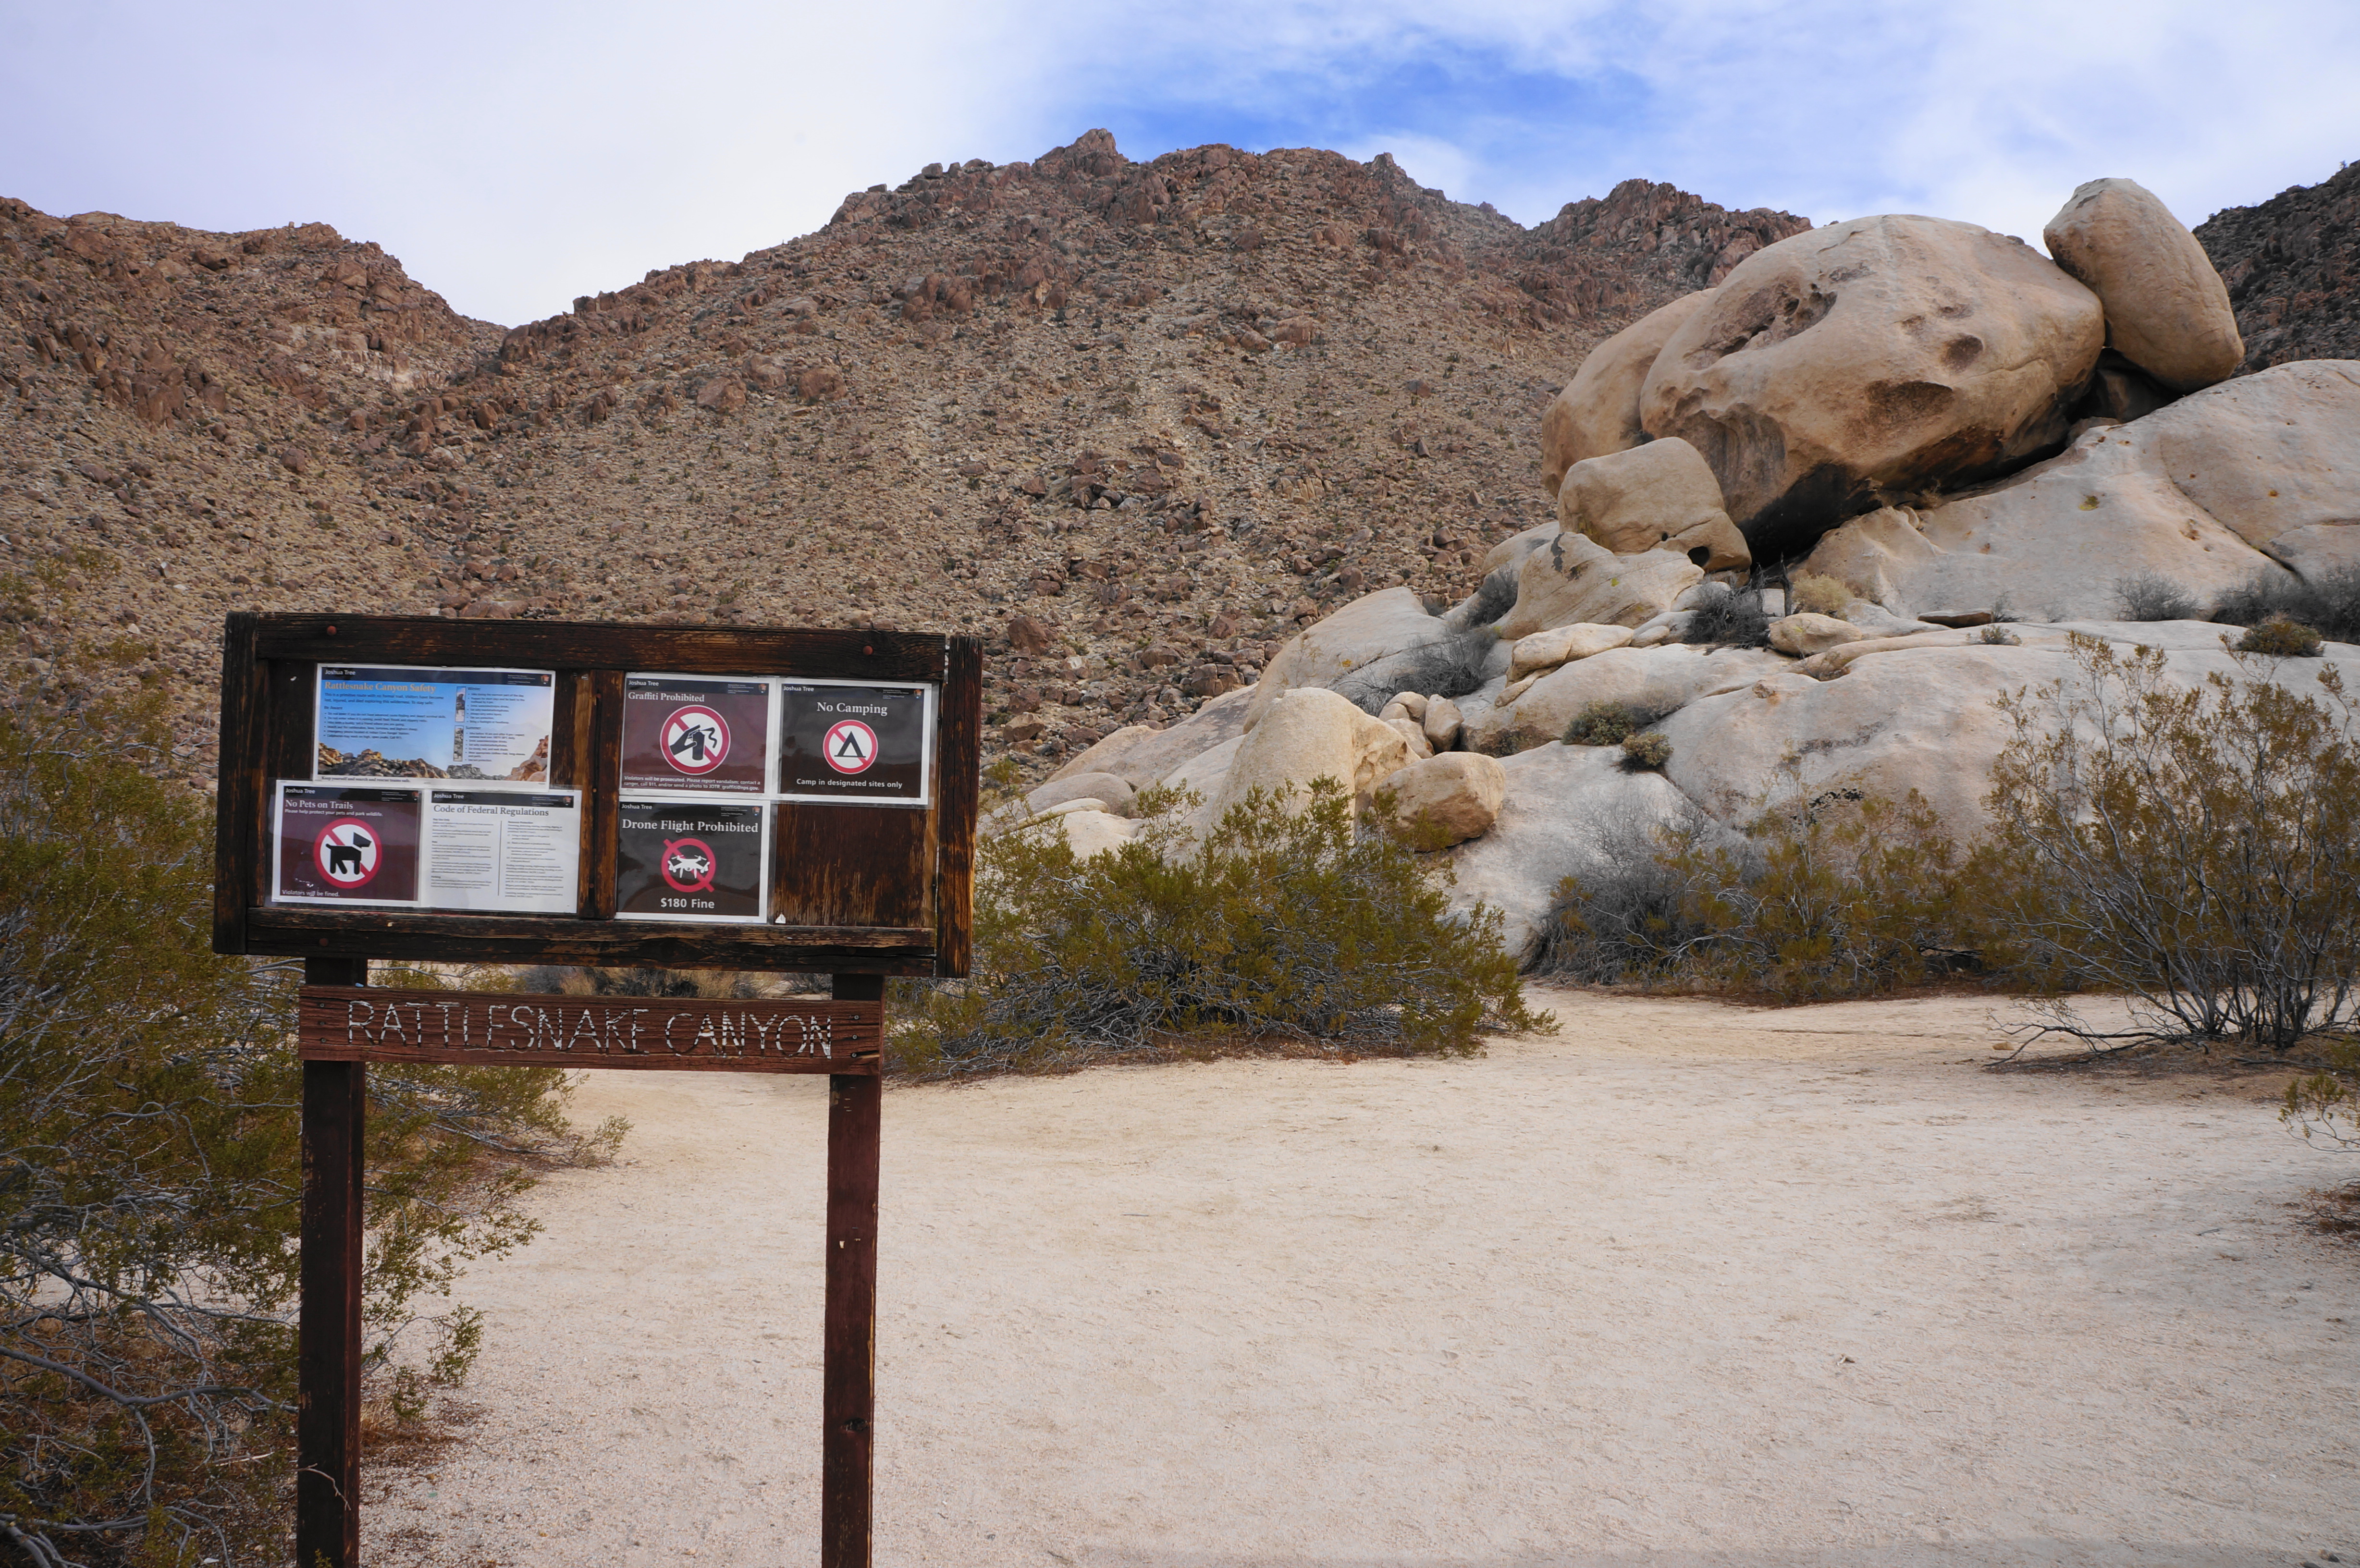
The warnings at the trailhead are many: hikers should not underestimate this unofficial, off-trail route, where route-finding is challenging, rock scrambling is required, and the heat of a summer day can be deadly. Plan to bring plenty of water—more than you think you need—as well as perhaps a GPS and, if you have them, climbing gloves. Inexperienced hikers should not try this hike (at least beyond the first 1/3 mile); there are plenty of other official hikes in the park that are not nearly as strenuous.
The trailhead is situated on a flat at the eastern fringe of a clutch of cream/orange-colored rock known as monzogranite, which makes up many of the most prominent landmarks in the northern part of the park. In the distance, behind the monzogranite, is a range of higher hillsides composed of older, darker Pinto gneiss, another igneous formation that rises to heights overlooking the Wonderland of Rocks below. The route skirts the gneiss layer but cuts firmly into the monzogranite just after the start.
From the trailhead, hikers will notice immediately that there is no signed and official path. Working your way southeast amid the creosote bush, however, a series of social trails generally empty into a broader wash; this is the main drainage through Rattlesnake Canyon, although it narrows significantly beyond the broad start.

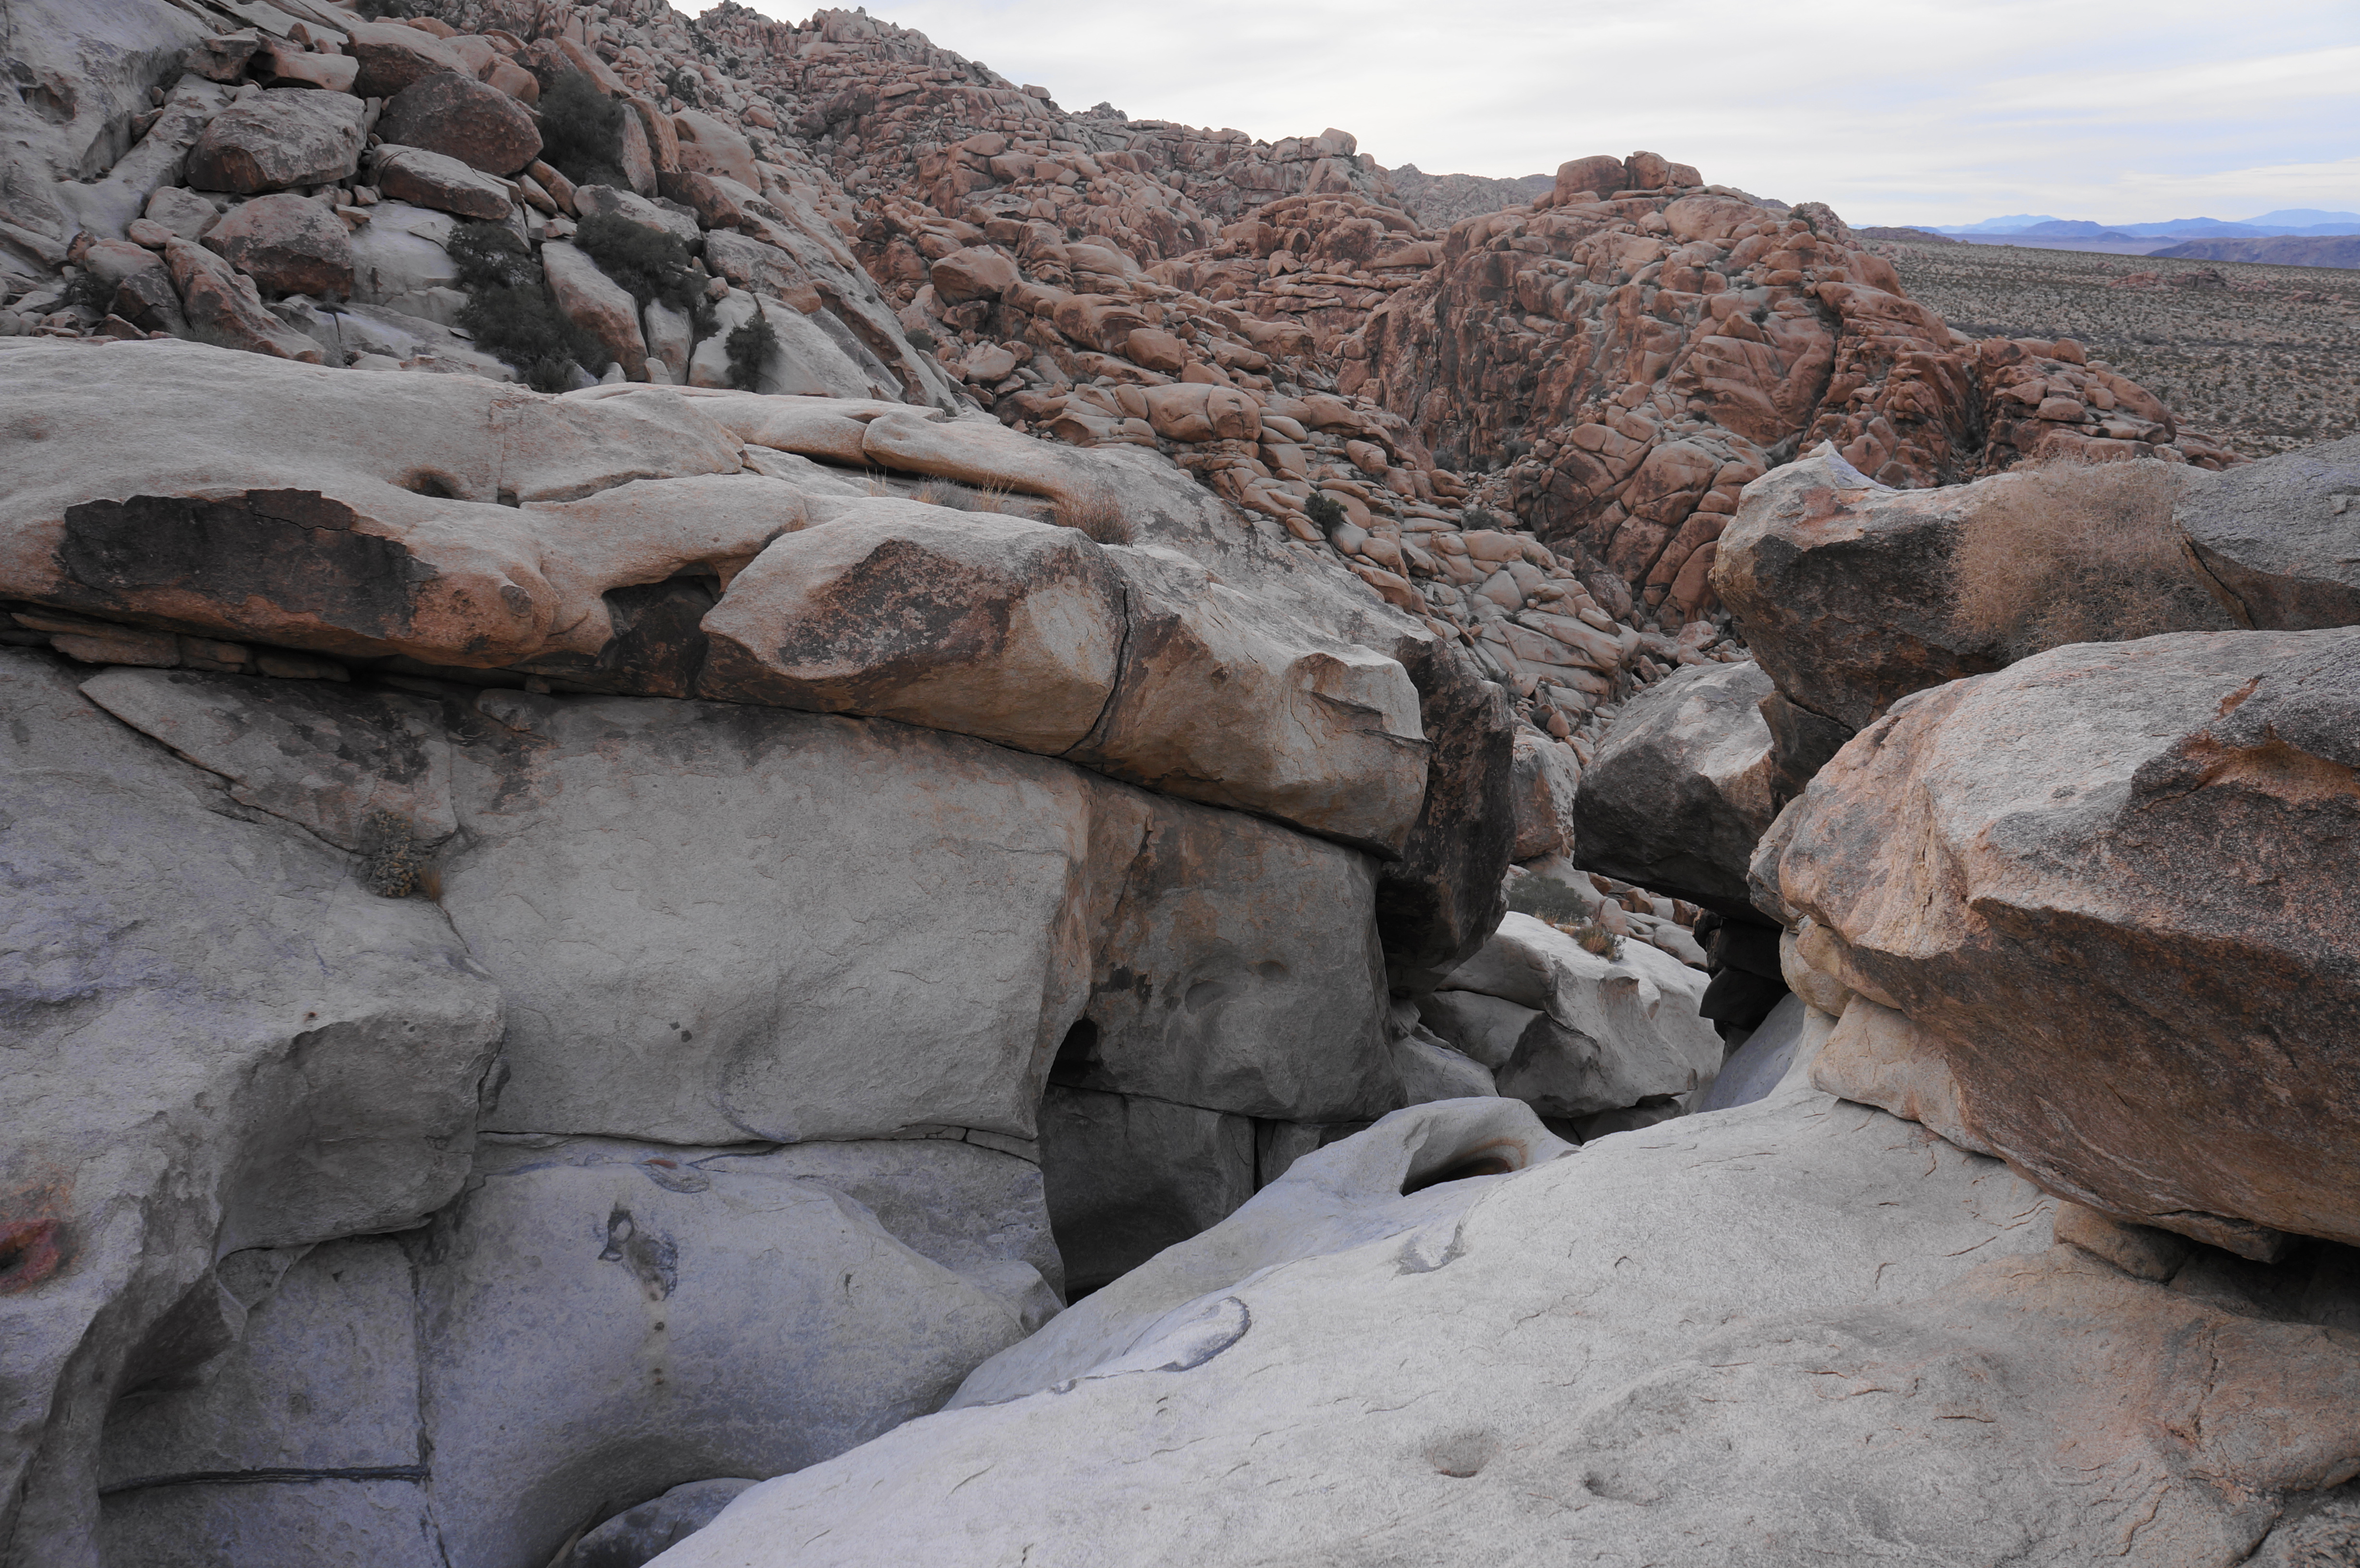
Follow the main wash upstream (though it is likely to be dry), staying amid the cream- and orange-colored monzogranite (not the dark brown gneiss). Large boulders have tumbled into the wash, requiring hikers to do some minor scrambling to navigate them; remain in the wash as it cuts in a southwesterly direction.
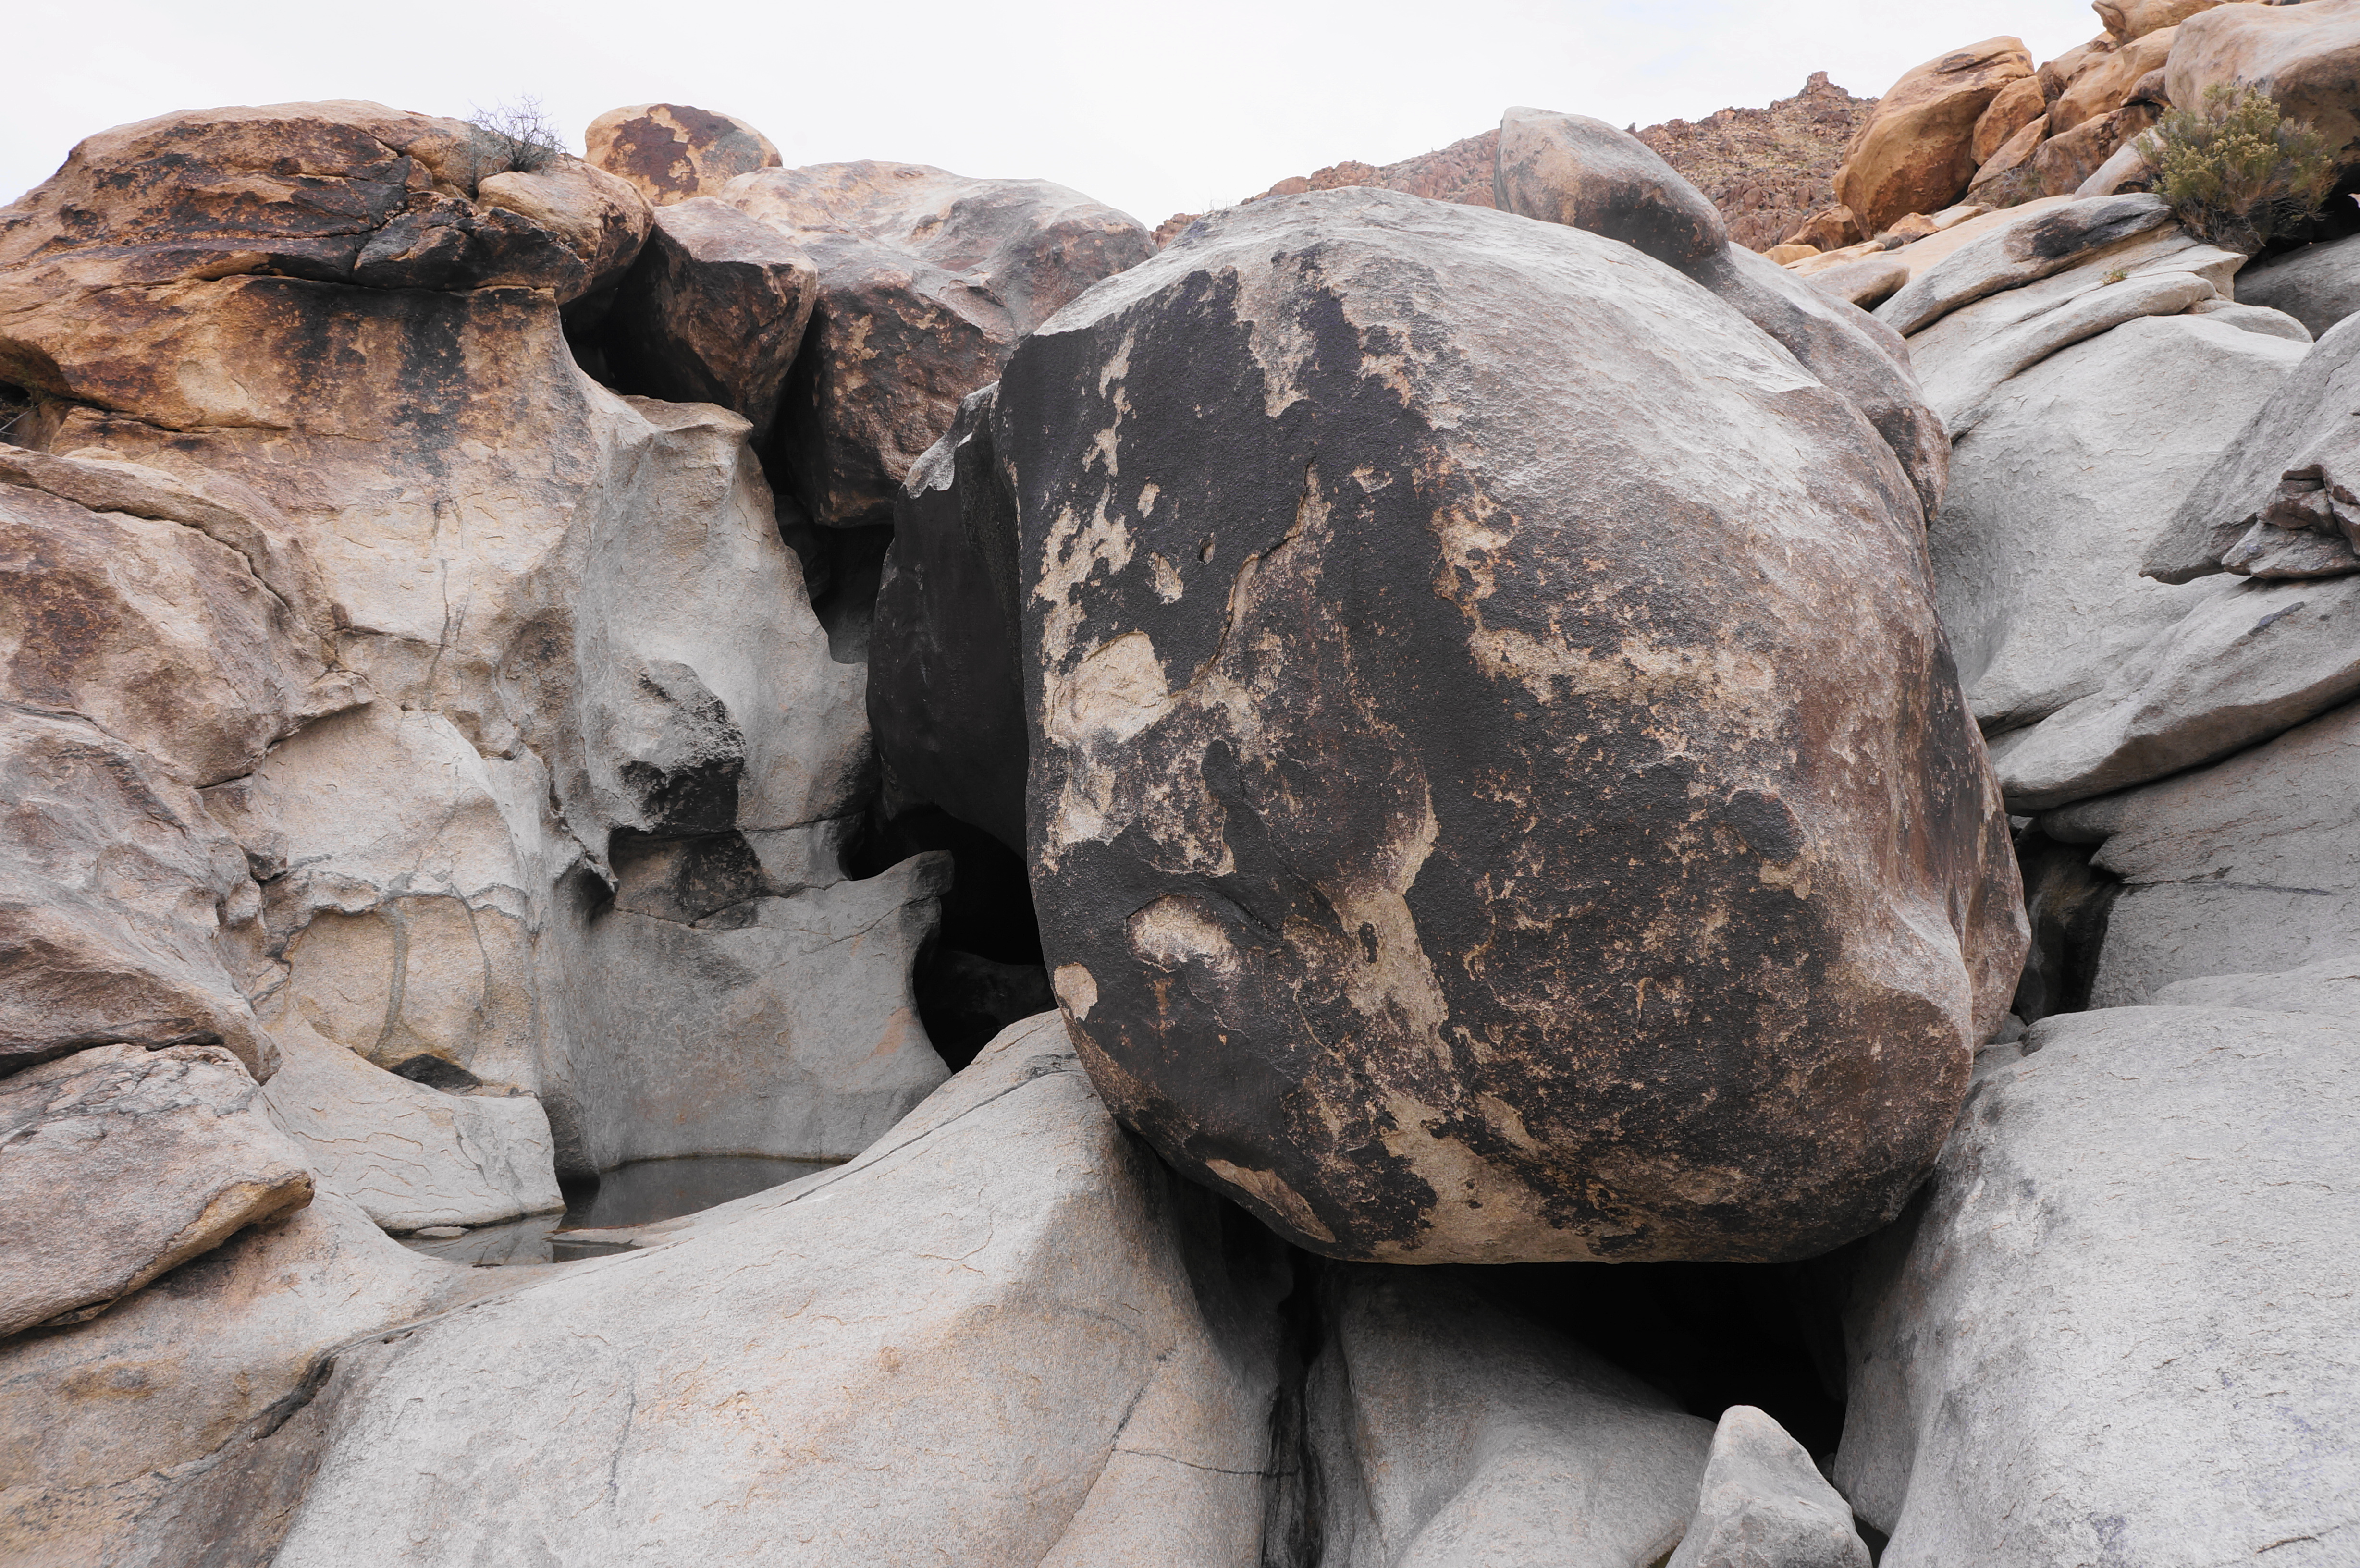
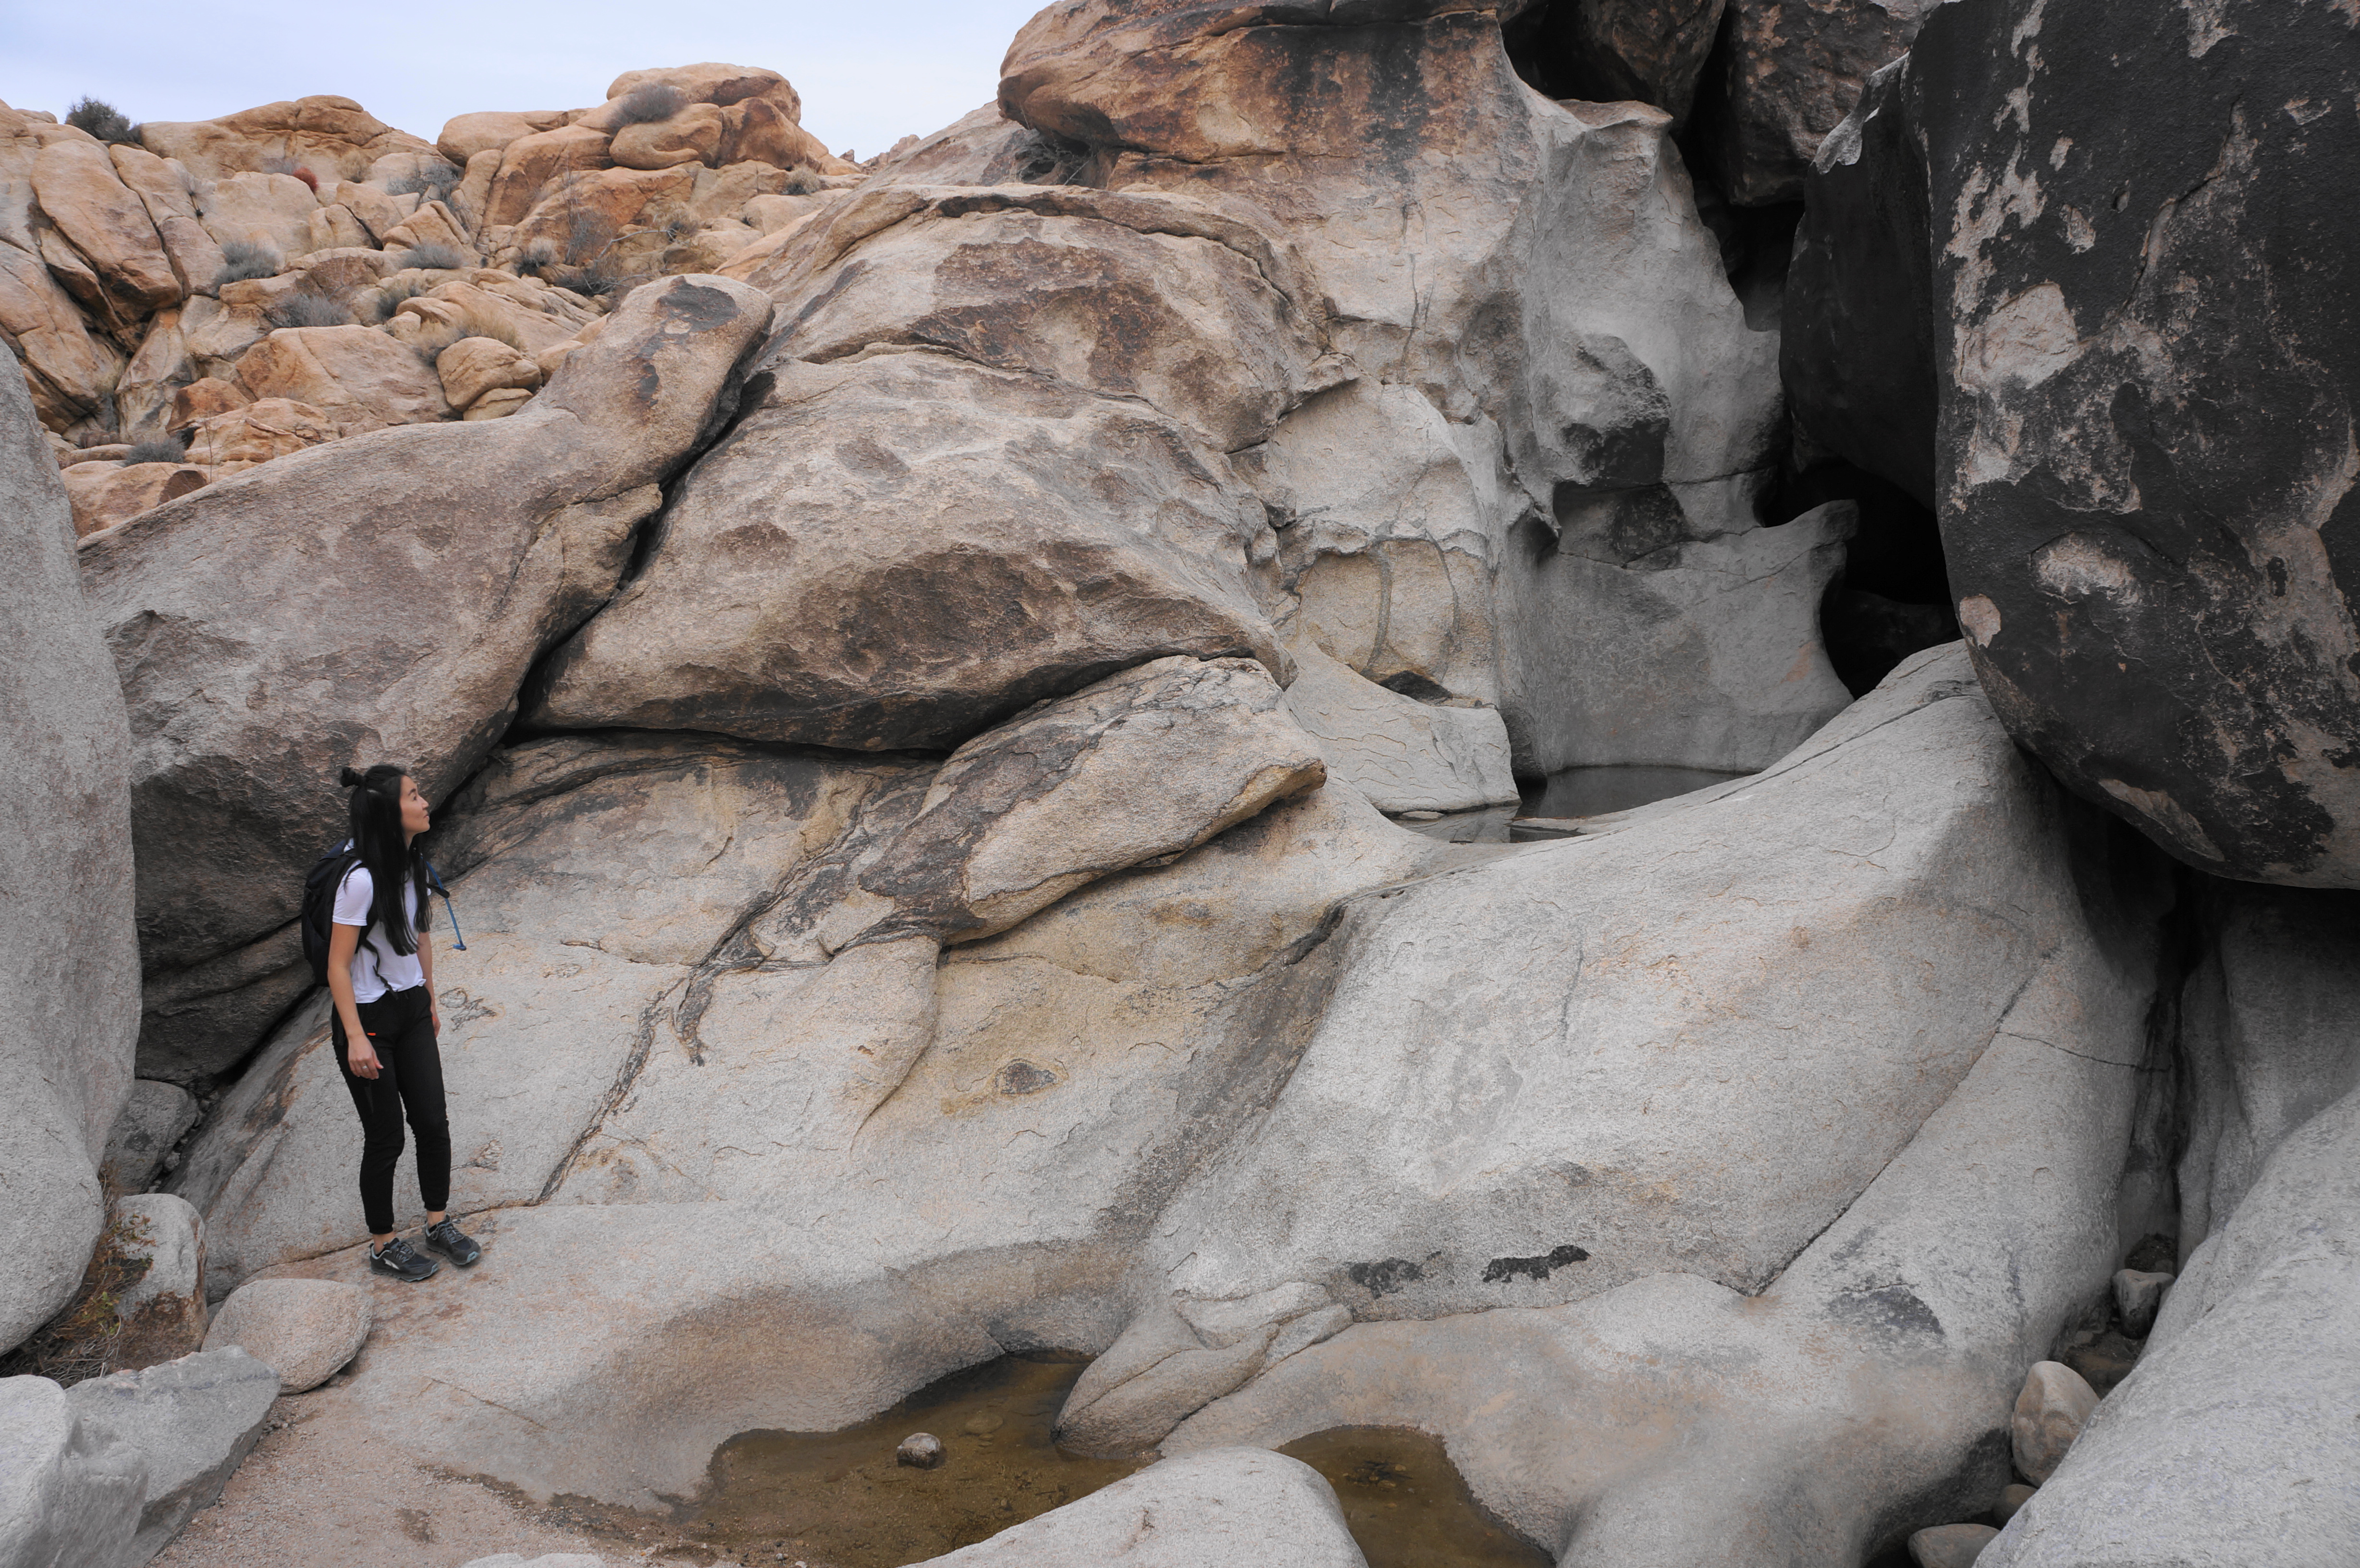

Follow the sandy drainage as it enters a dogleg left, following it around a bend to a point where onward progress in the wash is obstructed by a large chockstone and series of pools. From this pleasant grotto, the canyon rises abruptly into a narrow and undulating slot. Unless you are a premiere rock climber, continuing on will likely require deviating from the wash bottom for the first time on the hike, now about 1/3 mile from the trailhead.
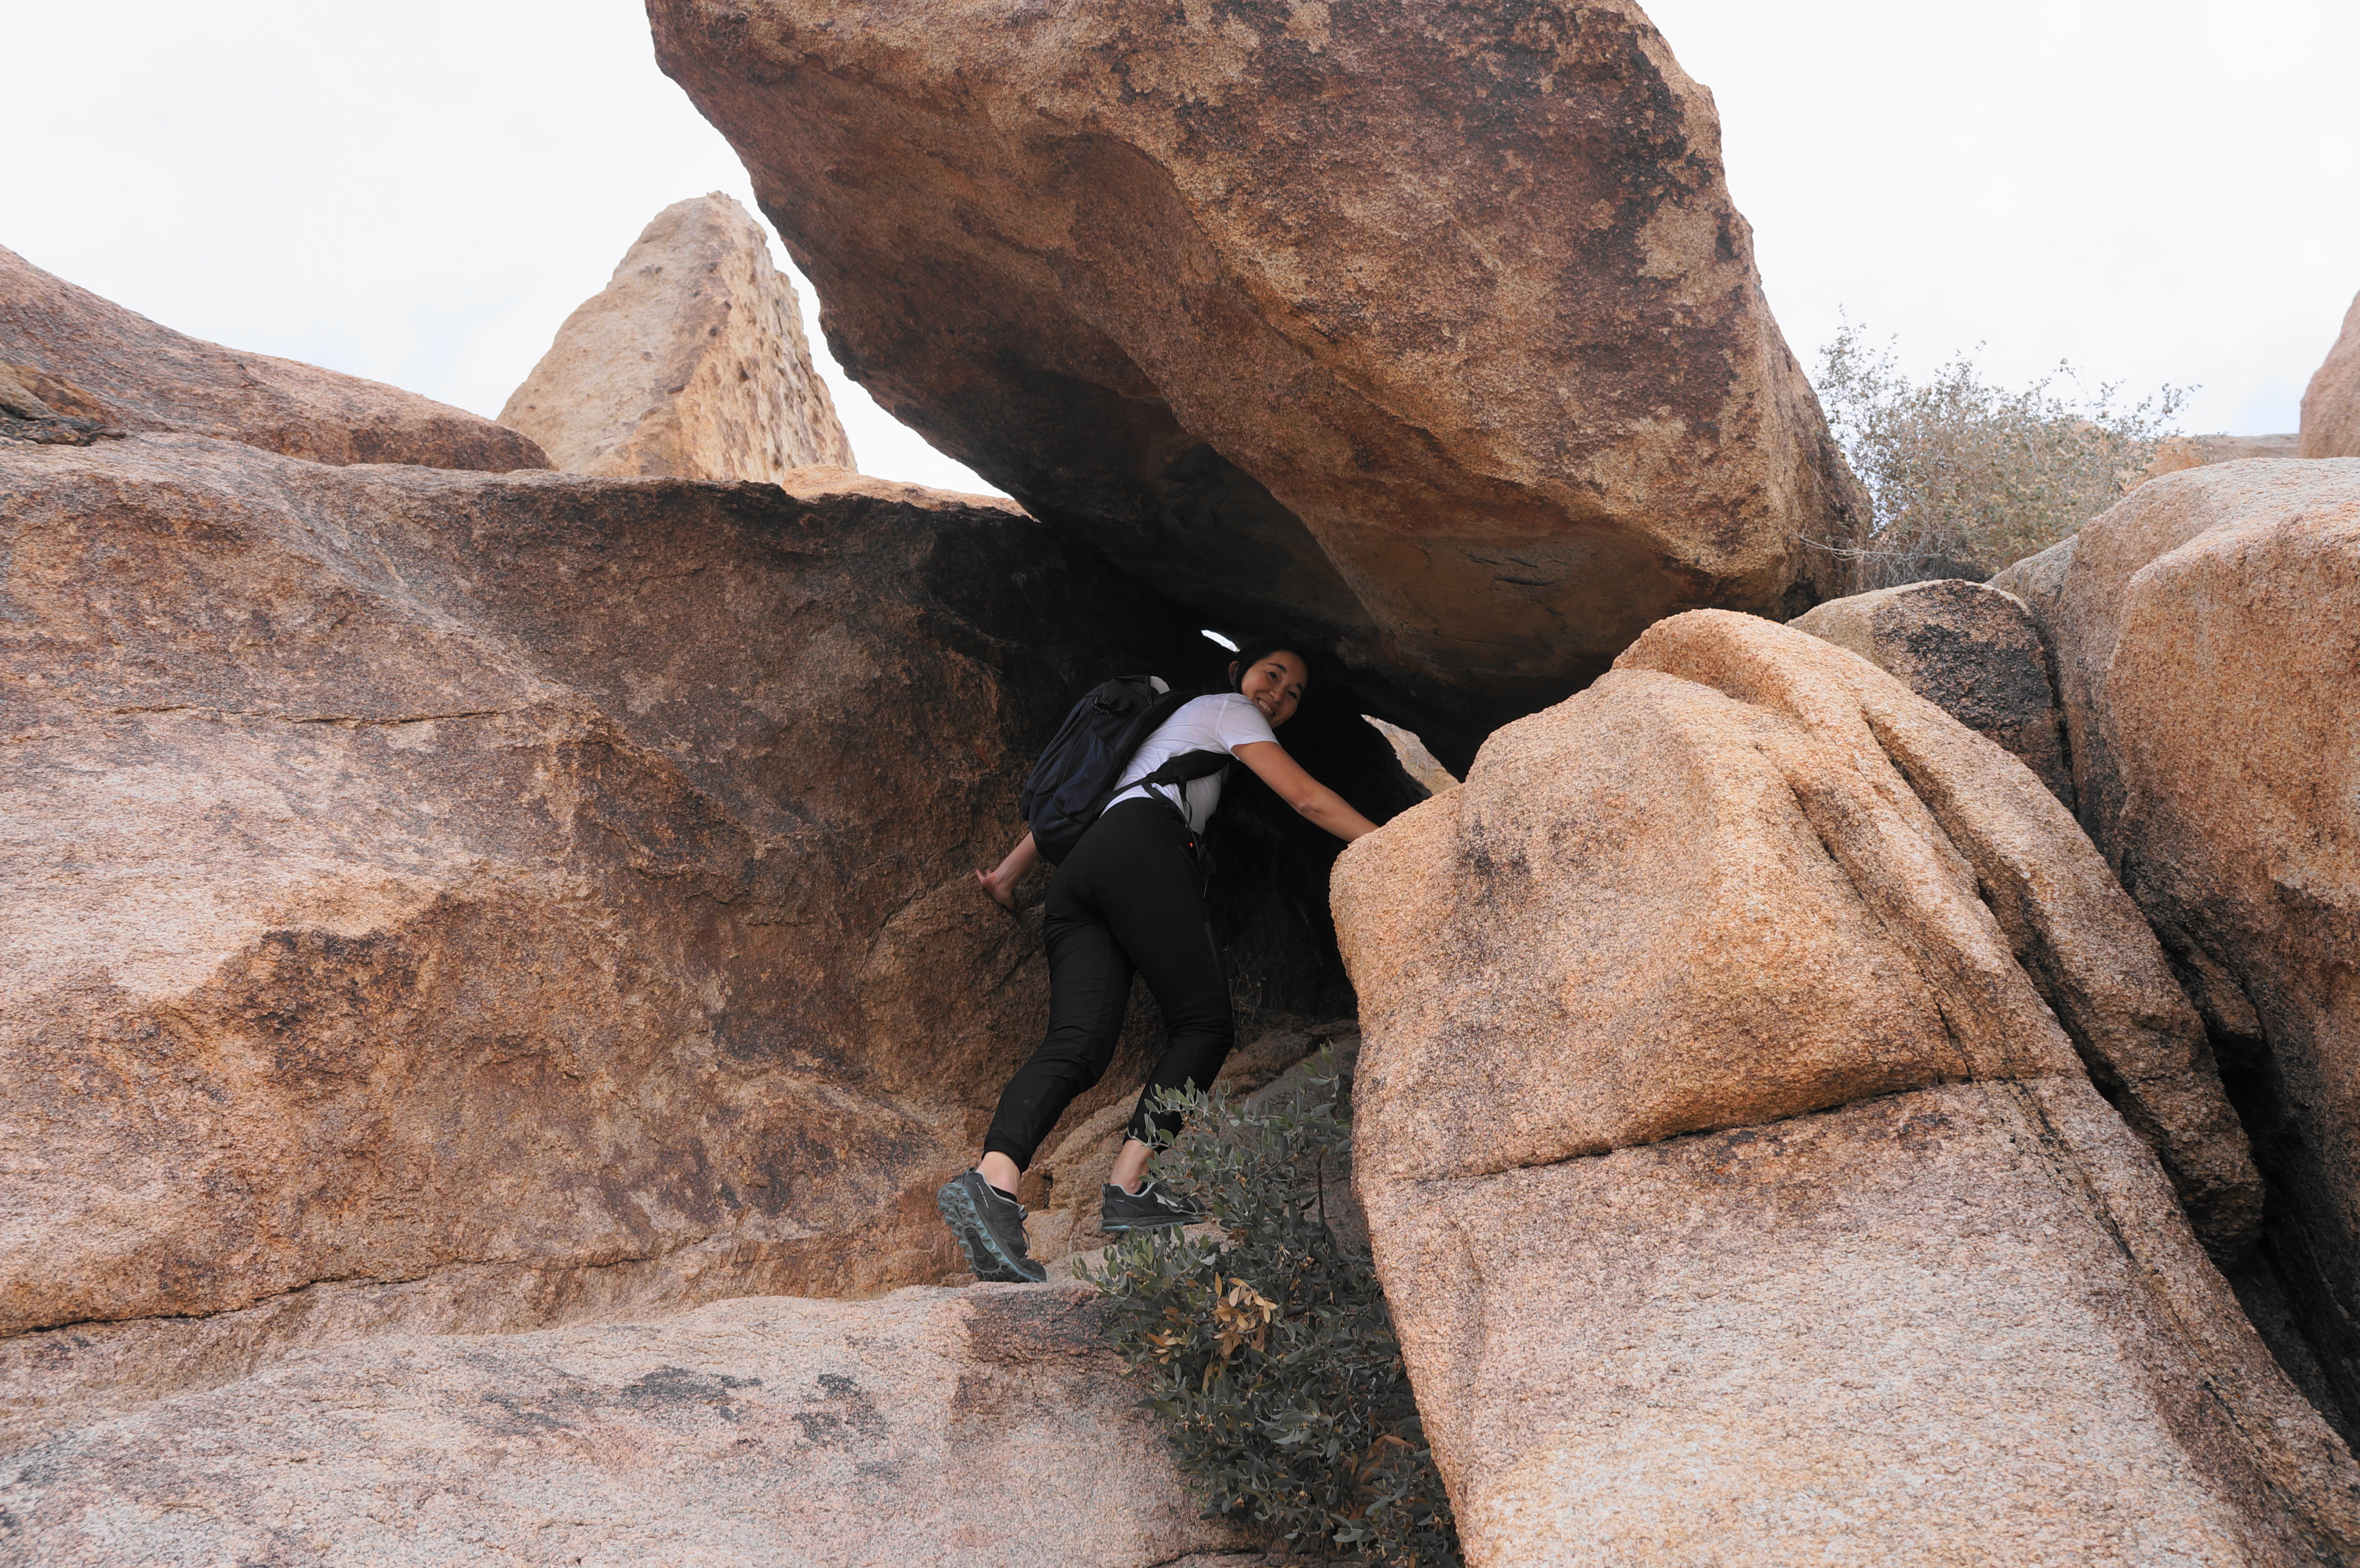

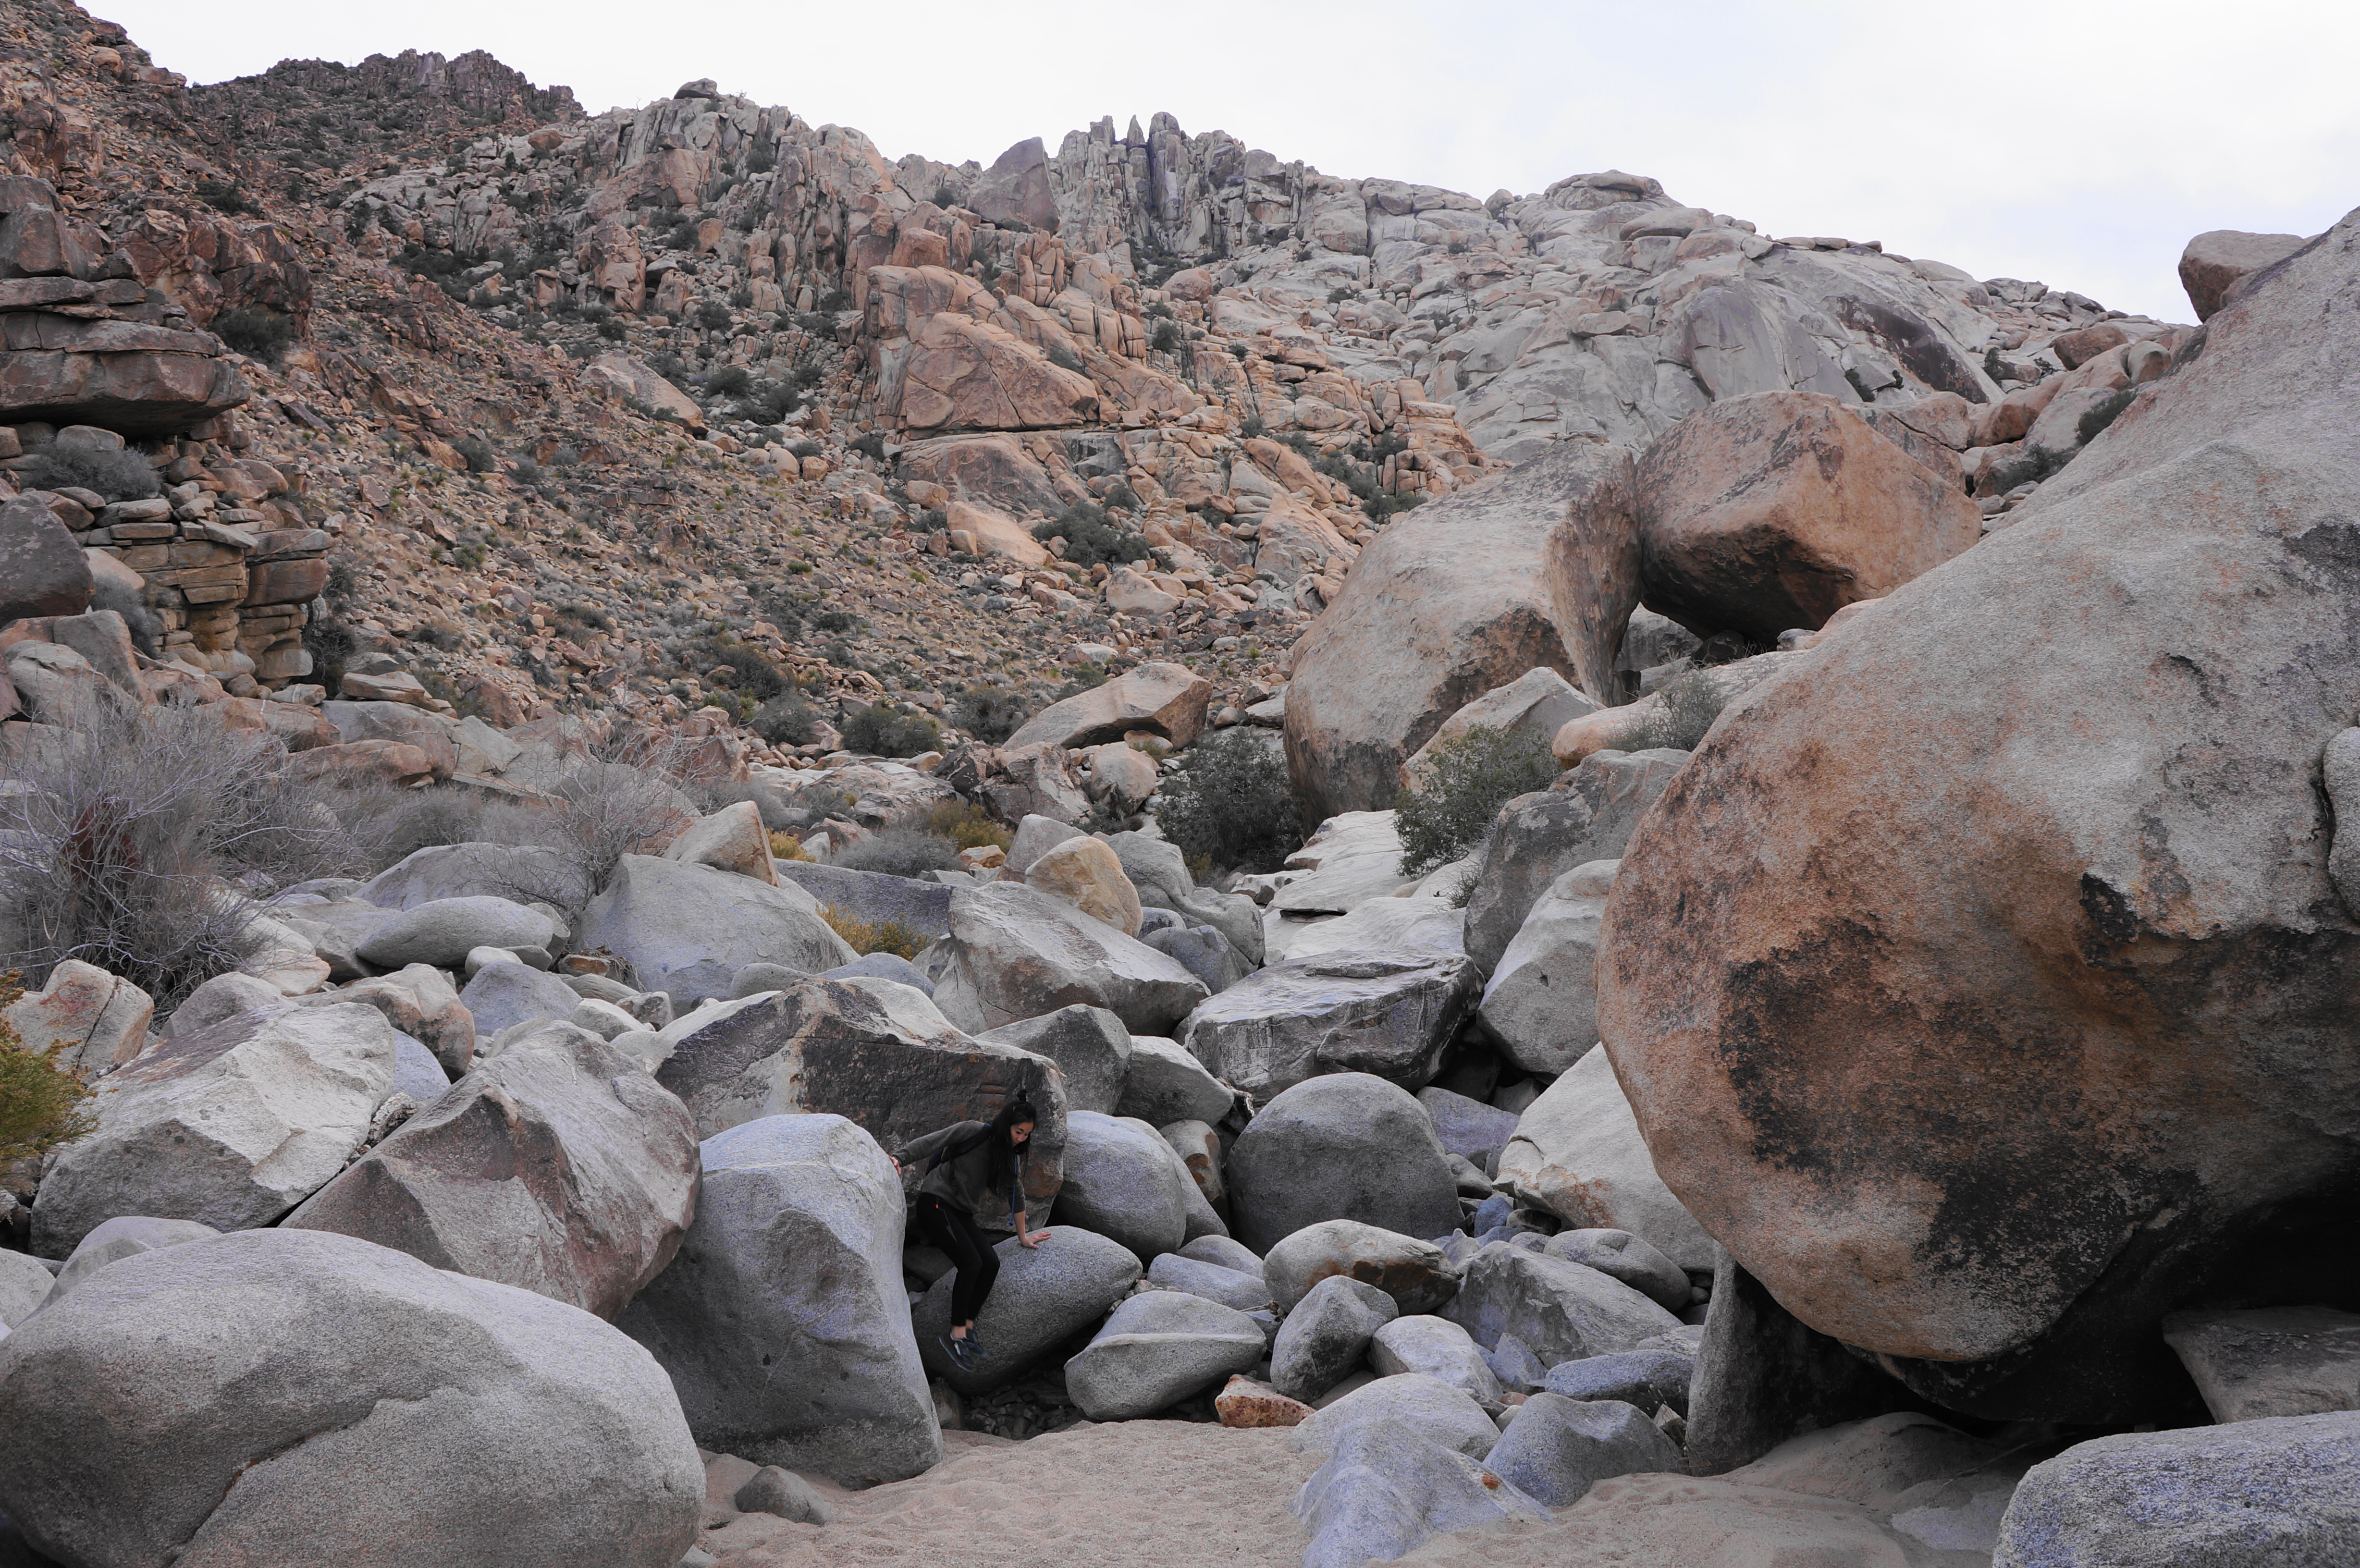
The next section is the hardest section of the hike and requires very careful footing, navigation, and judgment. It is possible to bypass the slot on the right or left, either by edging along the slickrock slopes near to the slot or by swinging further afield amid the endless boulders. The former is more straightforward but can be harrowing for those wary of heights and exposure. Never does the hiker have to do anything extremely sketchy, but steady footing is required to avoid a 10- to 20-foot fall into the narrowing canyon below. The latter option—requiring navigating the tops of boulders for 1/10 mile—can be slow and seemingly never-ending but is generally safer. (Note: We opted for a route on the left side that hugged the slot at first but then rose up through a notch that required ducking under a chockstone and ascending to the boulder section. We rose too far amid the boulders, requiring some downclimbing once past the slot. On the return route, we opted for the straighter but hairier slickrock option.)

Some hikers may choose neither option. This is probably the best choice for those who are inexperienced with Class 2+ scrambling, and turning around at the grotto still makes for a nice, short day hike. But adventurous travelers can continue further, bypassing the slot and eventually returning to the wash bottom after about 1/10 mile—and 200 feet in elevation in elevation gain. From here hikers can look back at the landscape to the north, including Yucca Valley and a series of Mojave Desert ranges beyond.

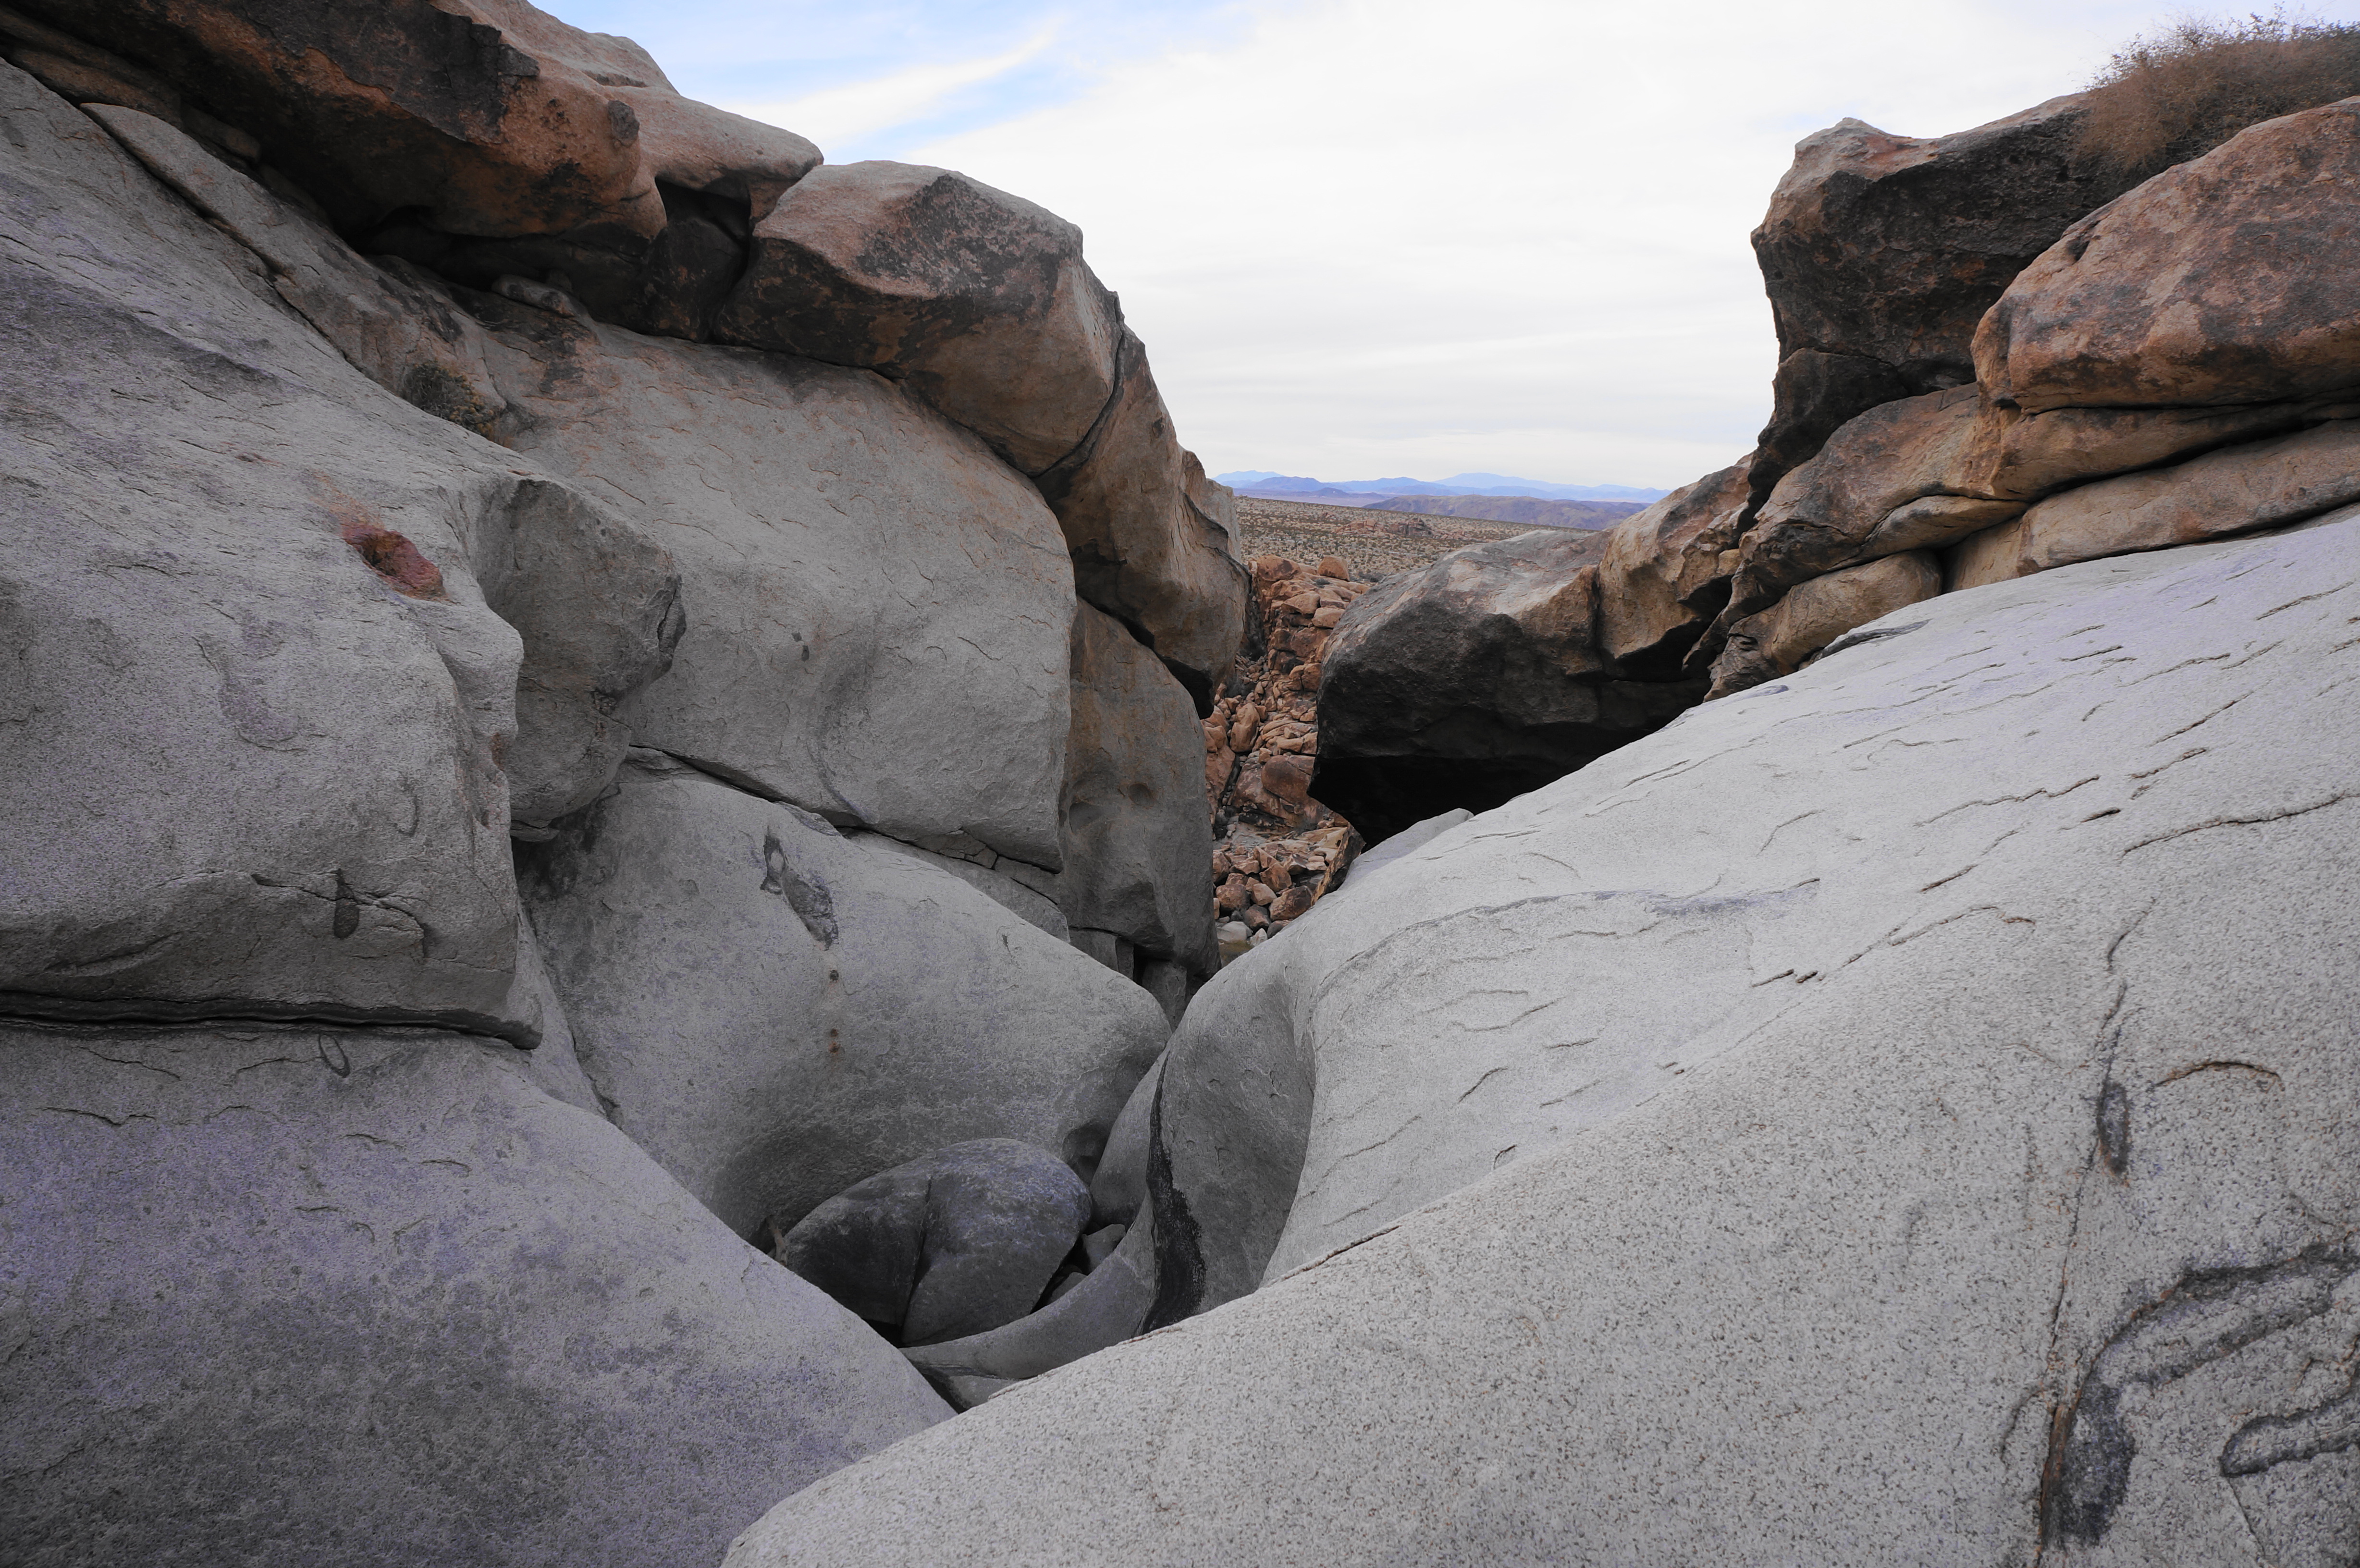
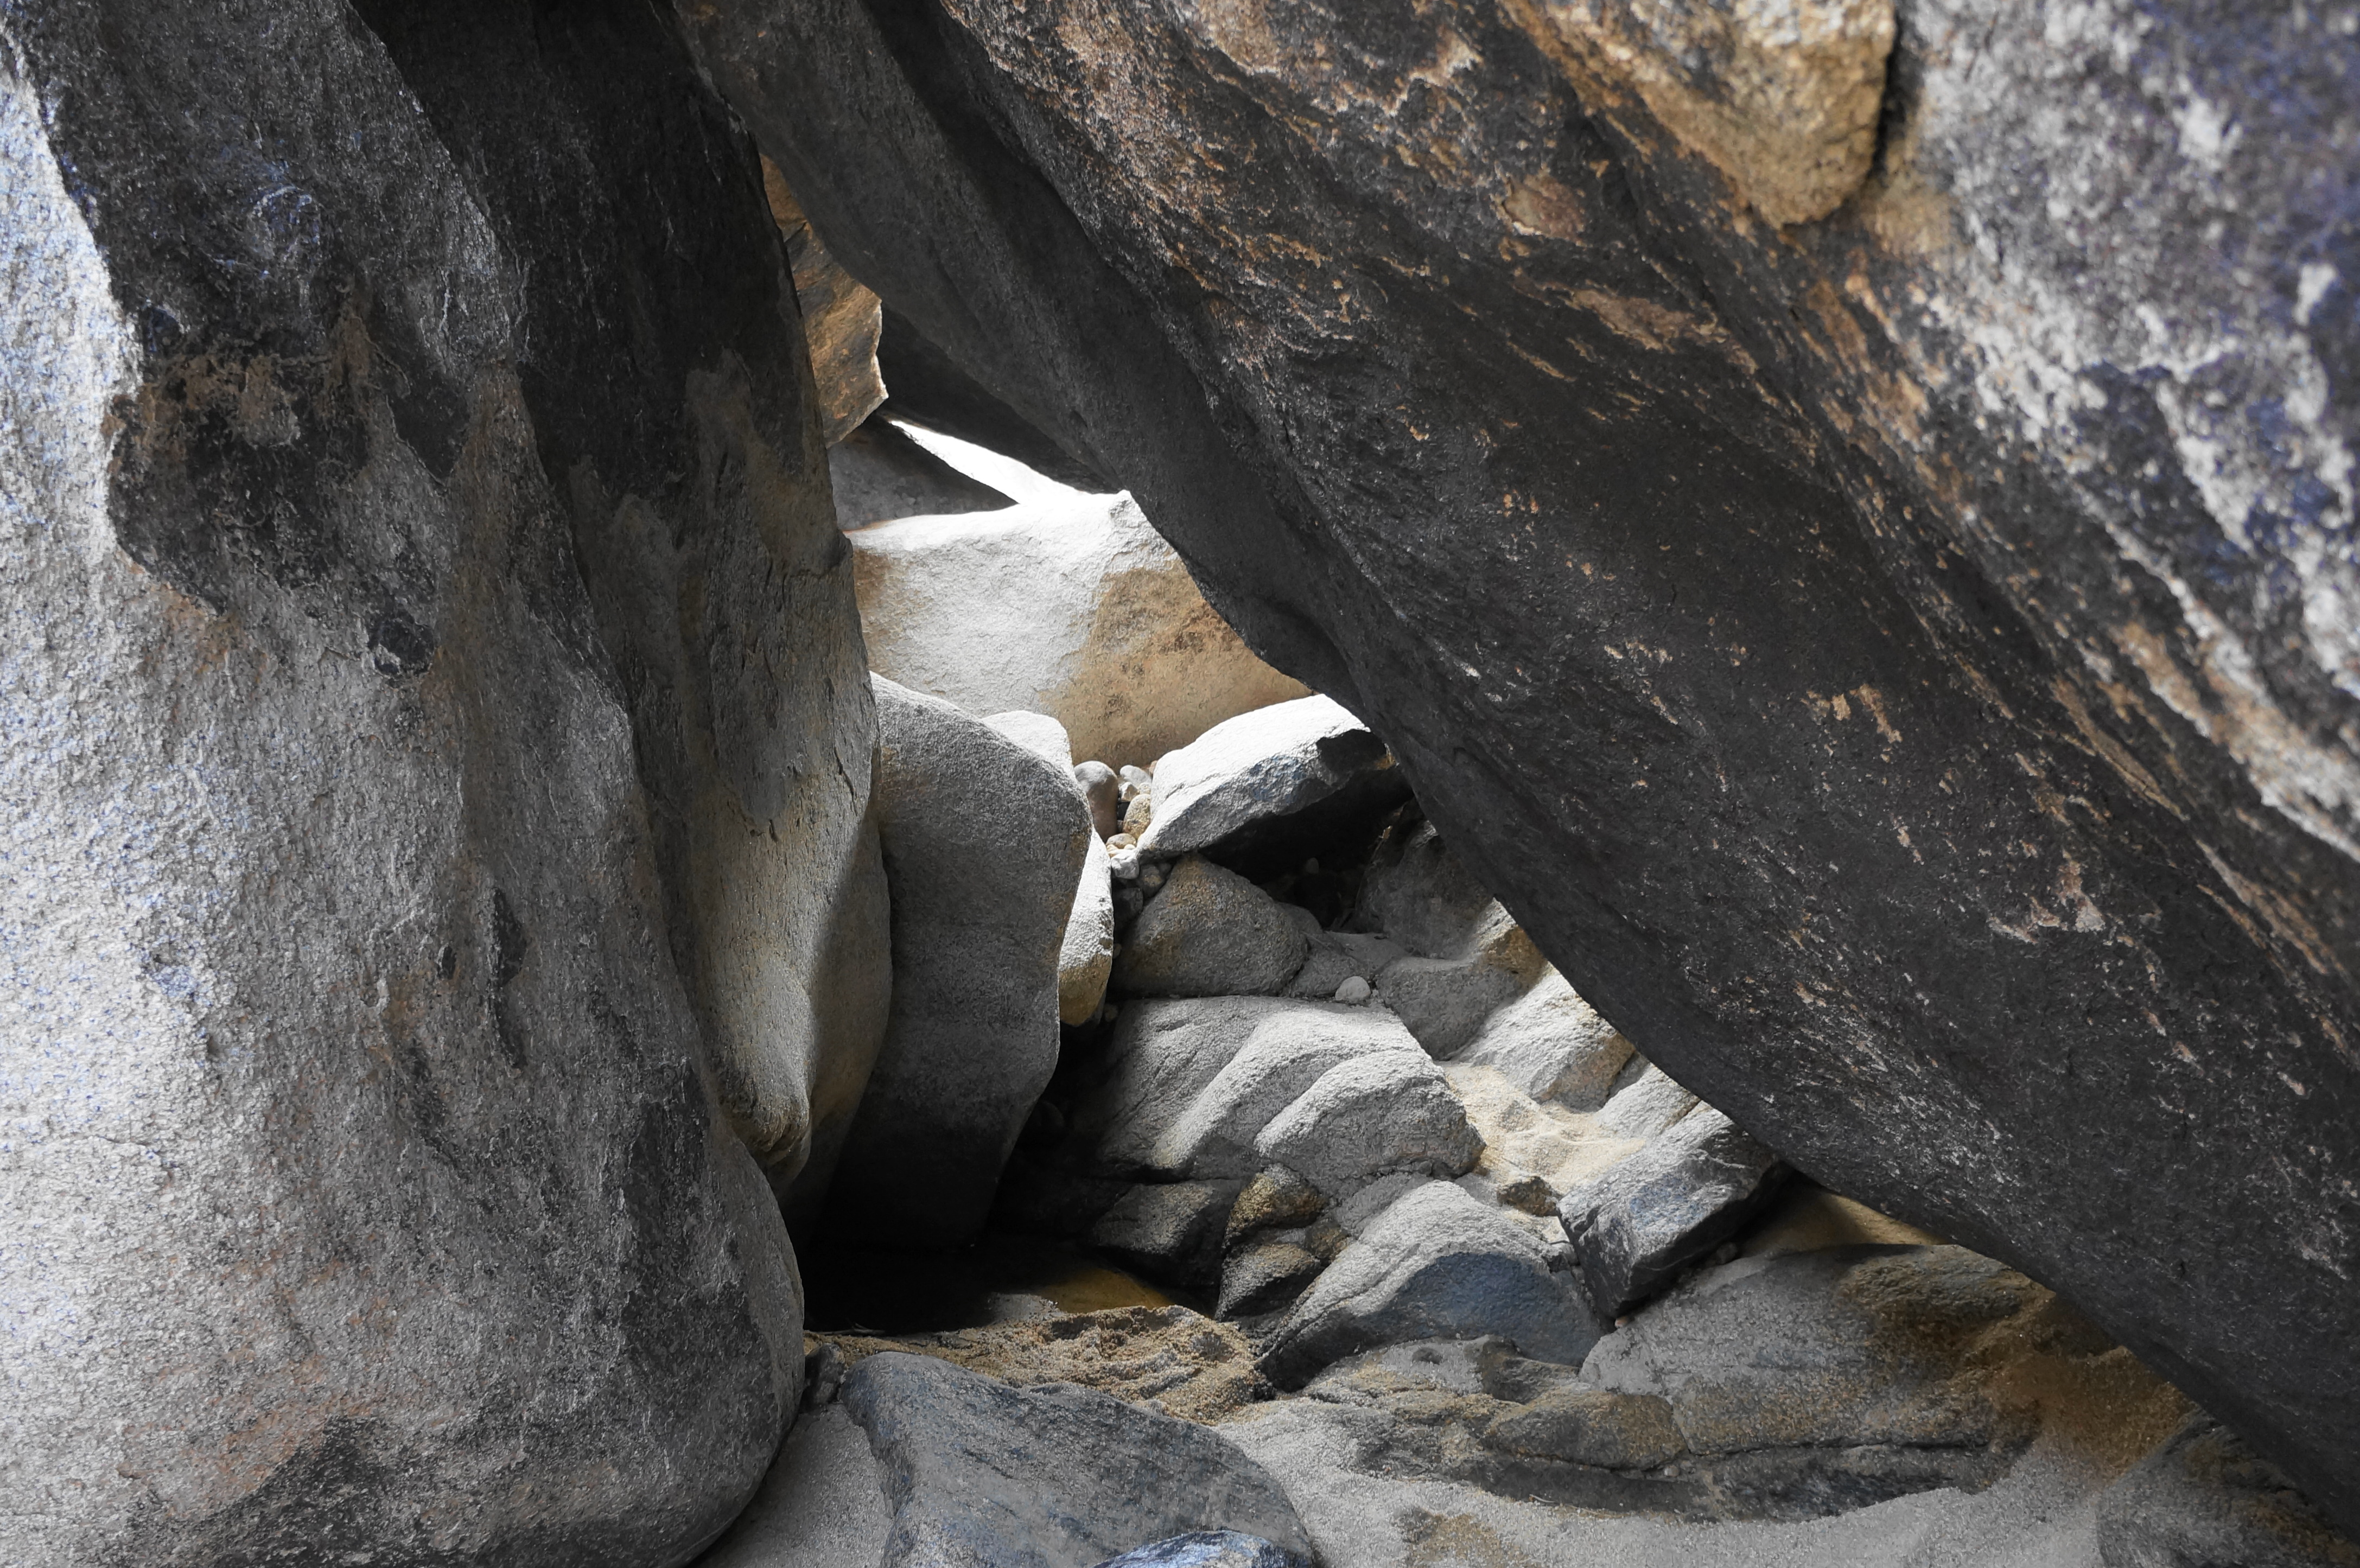
Once back in the flat wash above the slot section, continue upstream, passing a series of small potholes and short pouroffs, relatively easily bypassed without leaving the streambed. After two pouroffs, the level, sandy wash splits into several threads, interrupted by brush and occasional cottonwoods. Soon enough, the massive boulders return—with some rising 20 to 30 feet above the wash bottom. The boulder jams form small cave-like passages, all of which are relatively easily traversed.
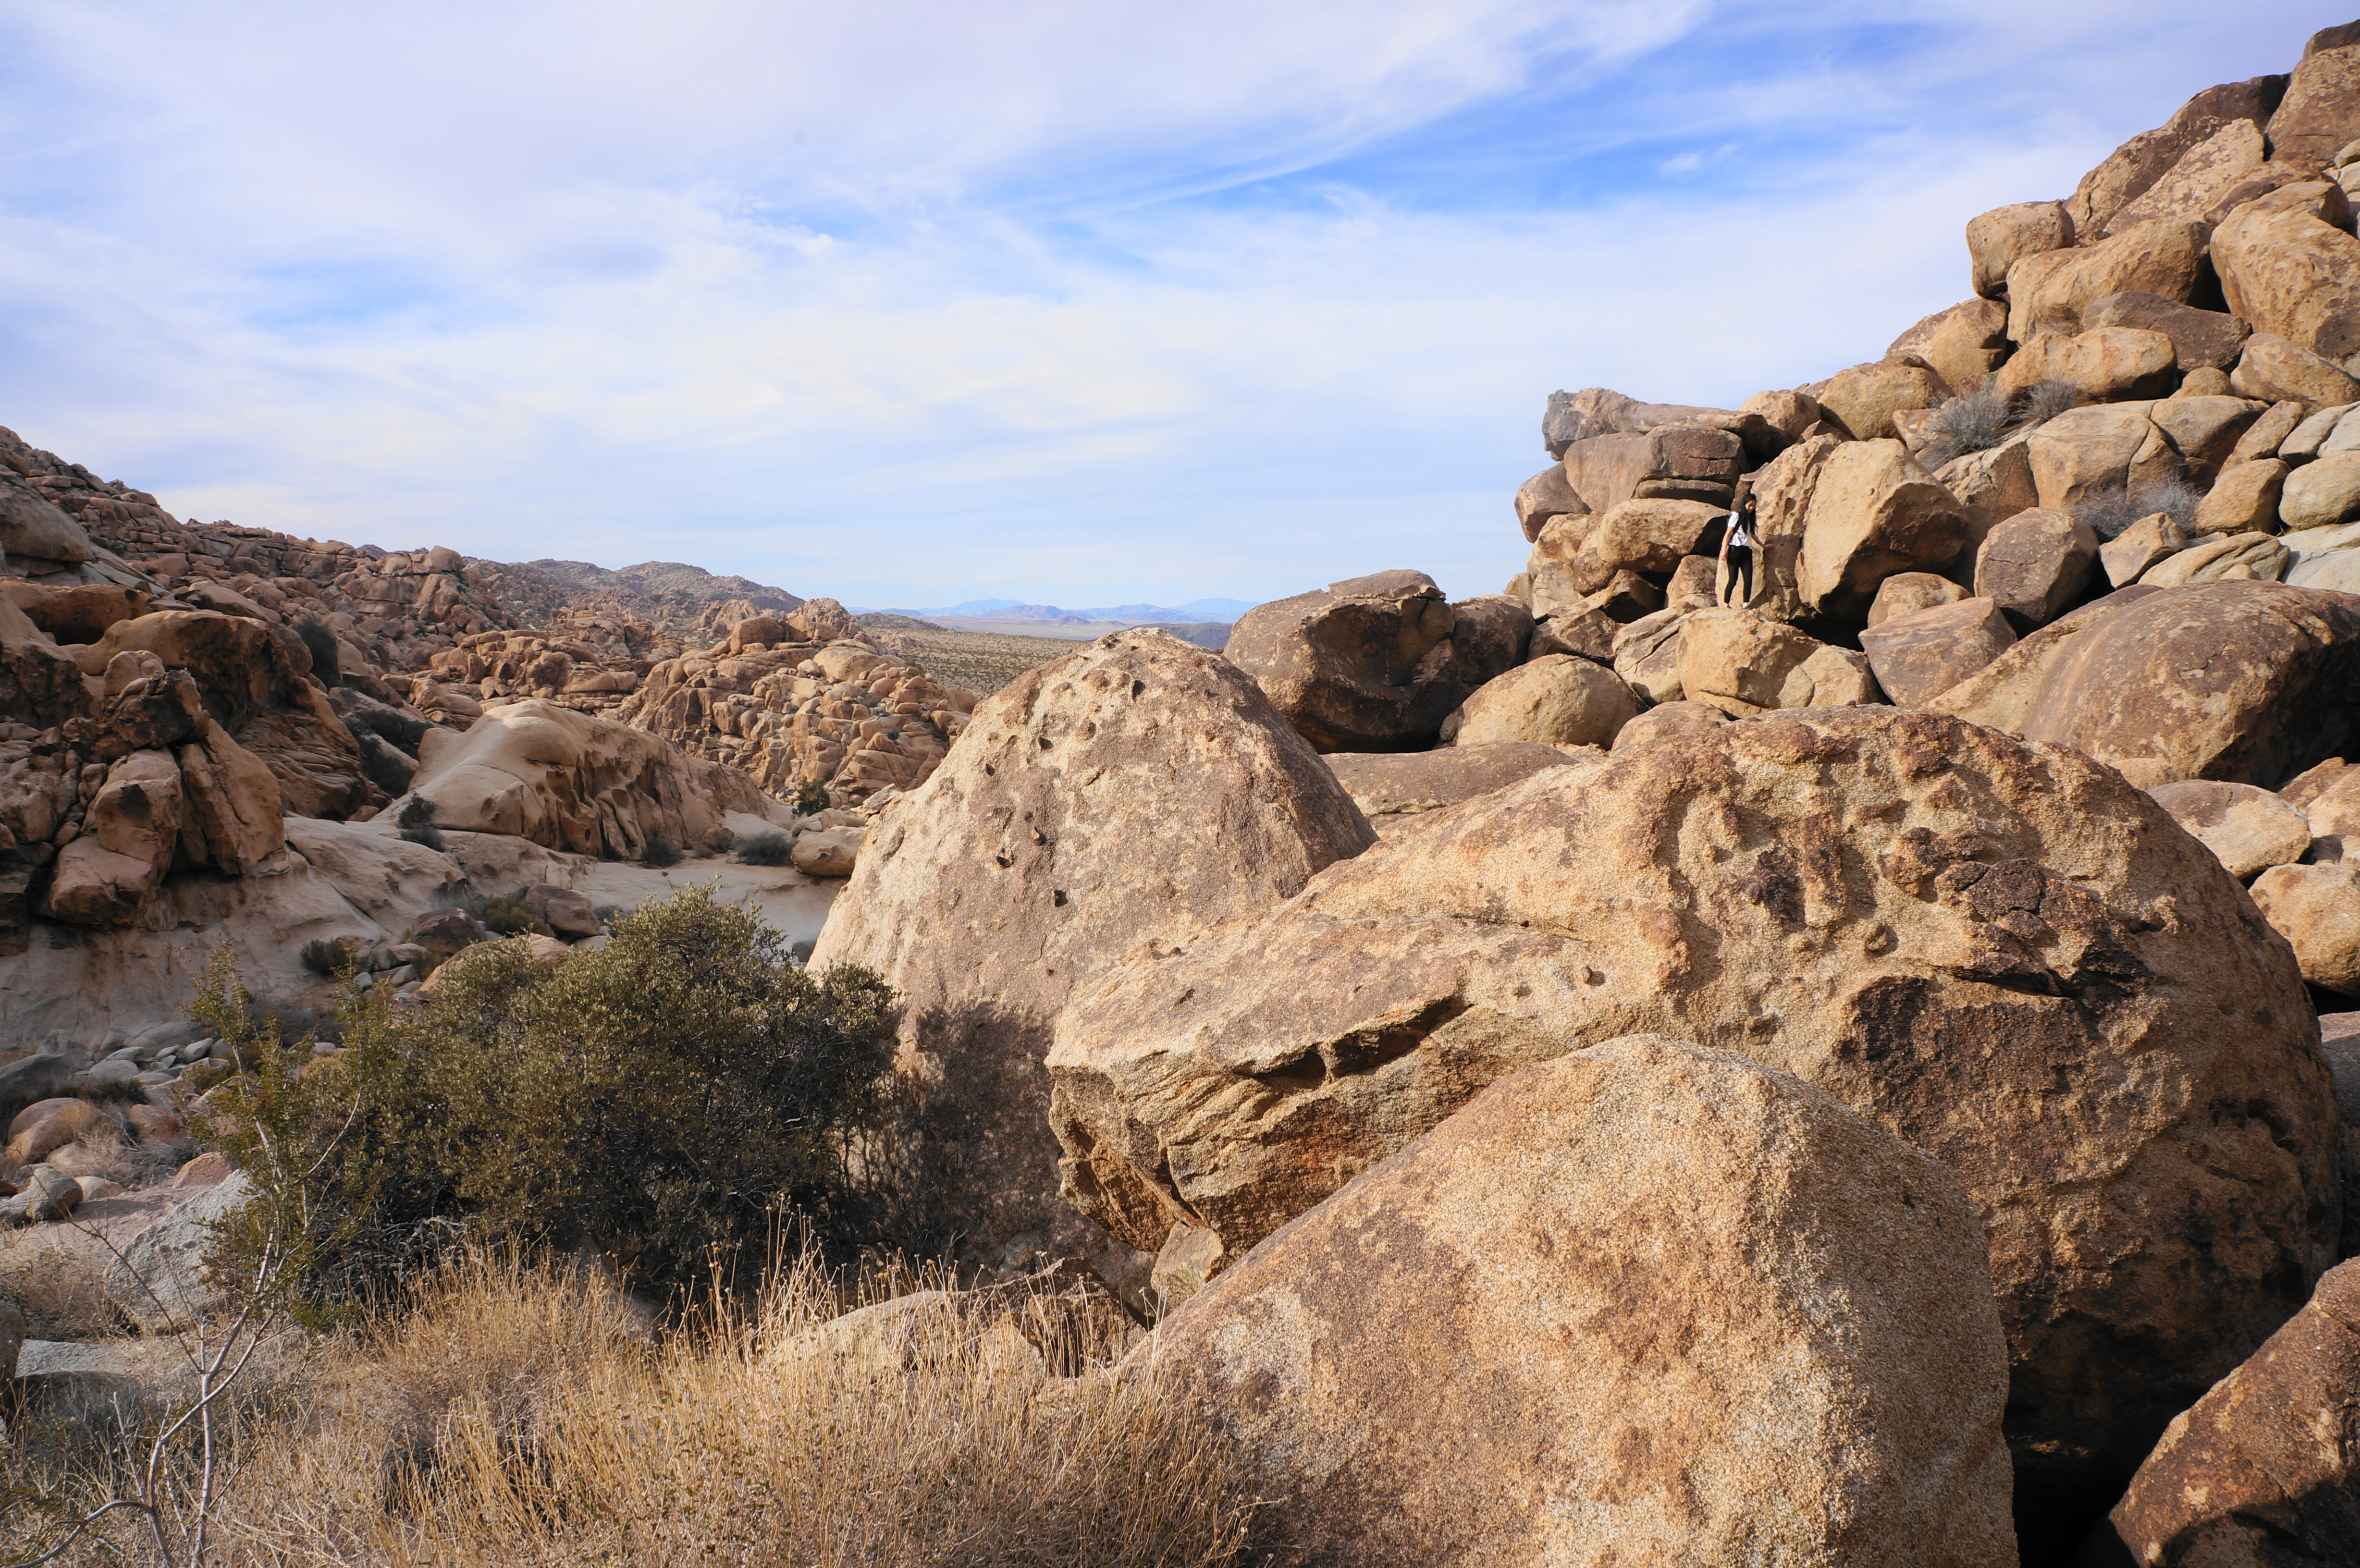

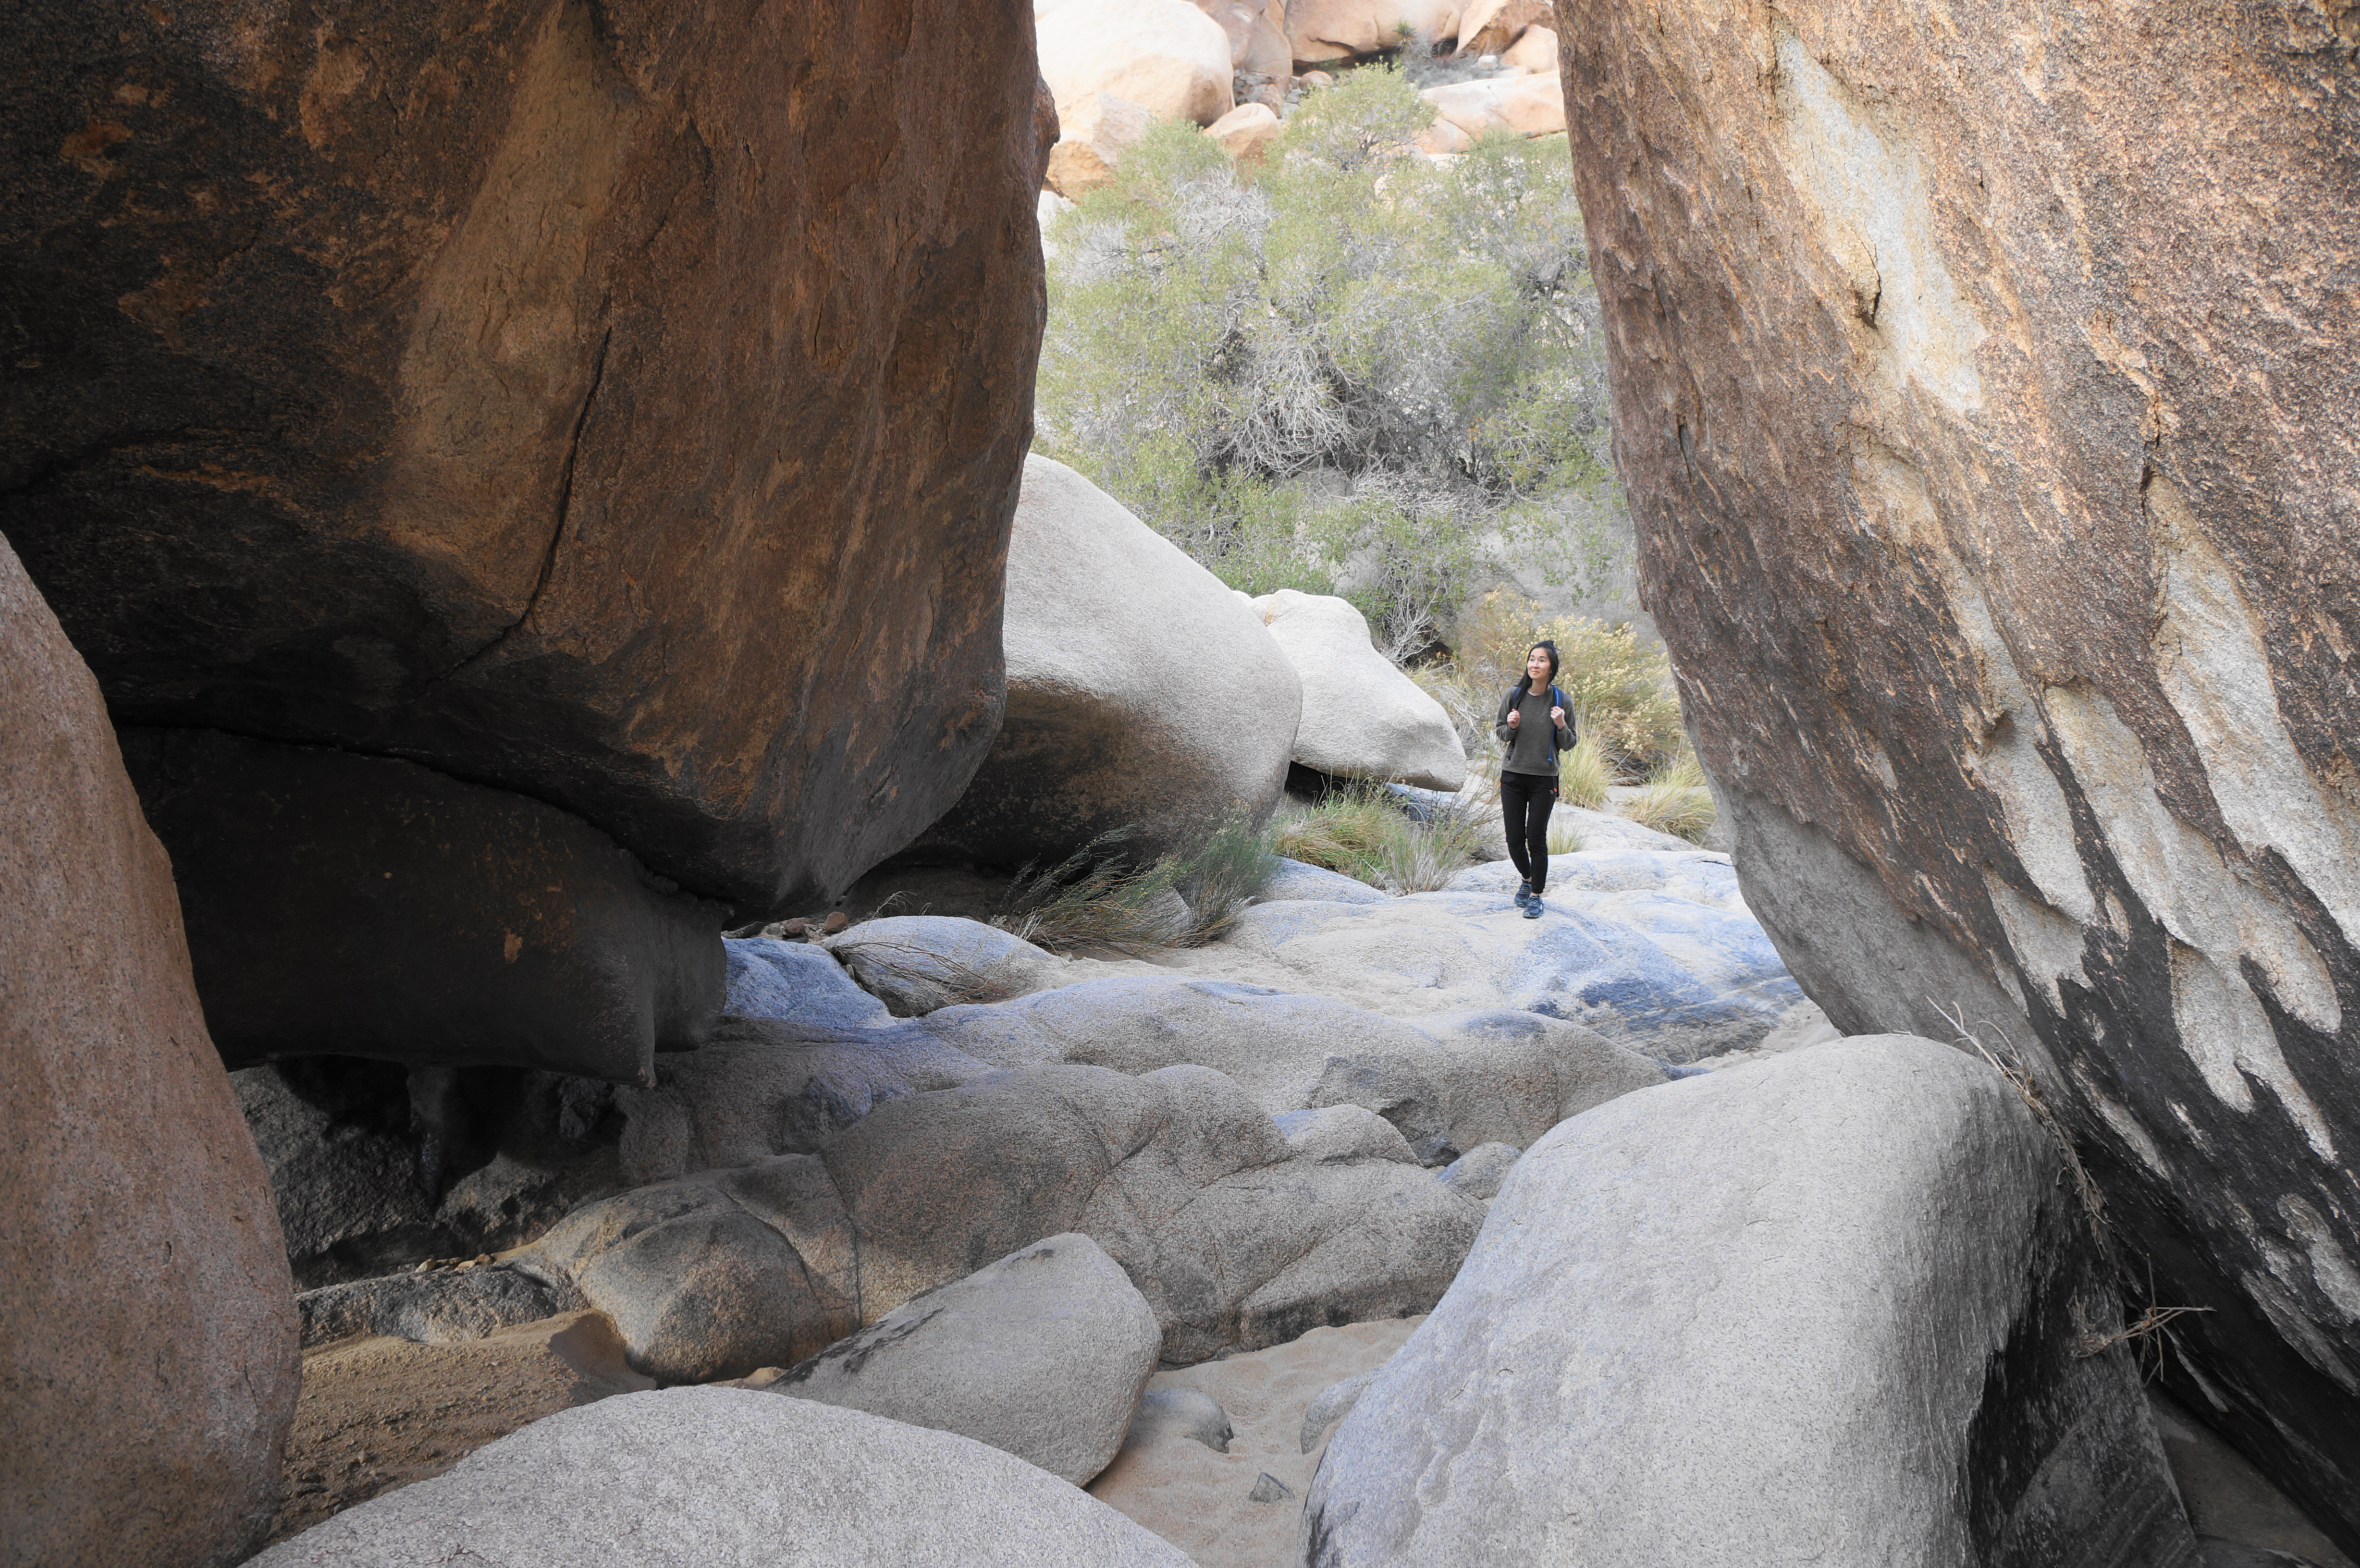
The second of two large boulder jams makes for a decent turnaround point for day hikers. Enjoy the serenity of this secluded canyon before turning back and returning the way you came. Be careful, of course, with the downclimb around the slot—descending can often be more harrowing and dangerous than ascending. Once back near the start, leave the wide drainage and follow one of the side paths to return to the trailhead.

Of course, it is possible to continue further up Rattlesnake Canyon. It is even possible to follow a side drainage from here to reach a beautiful area called Willow Hole. But most will opt for exploring a little way up from the slot before turning around. Despite the short distance (we went around two miles round-trip), progress is slow and trying; allot around 3-4 hours out-and-back, allowing for sufficient time for route-finding, scrambling, and inevitably getting a little lost amid the imposing monzogranite.

Pingback: Rattlesnake Canyon (Parc national de Joshua Tree, CA) - justaglobe.com
Pingback: Top 10 Hikes in 2022 | Live and Let Hike
great description- thank you!