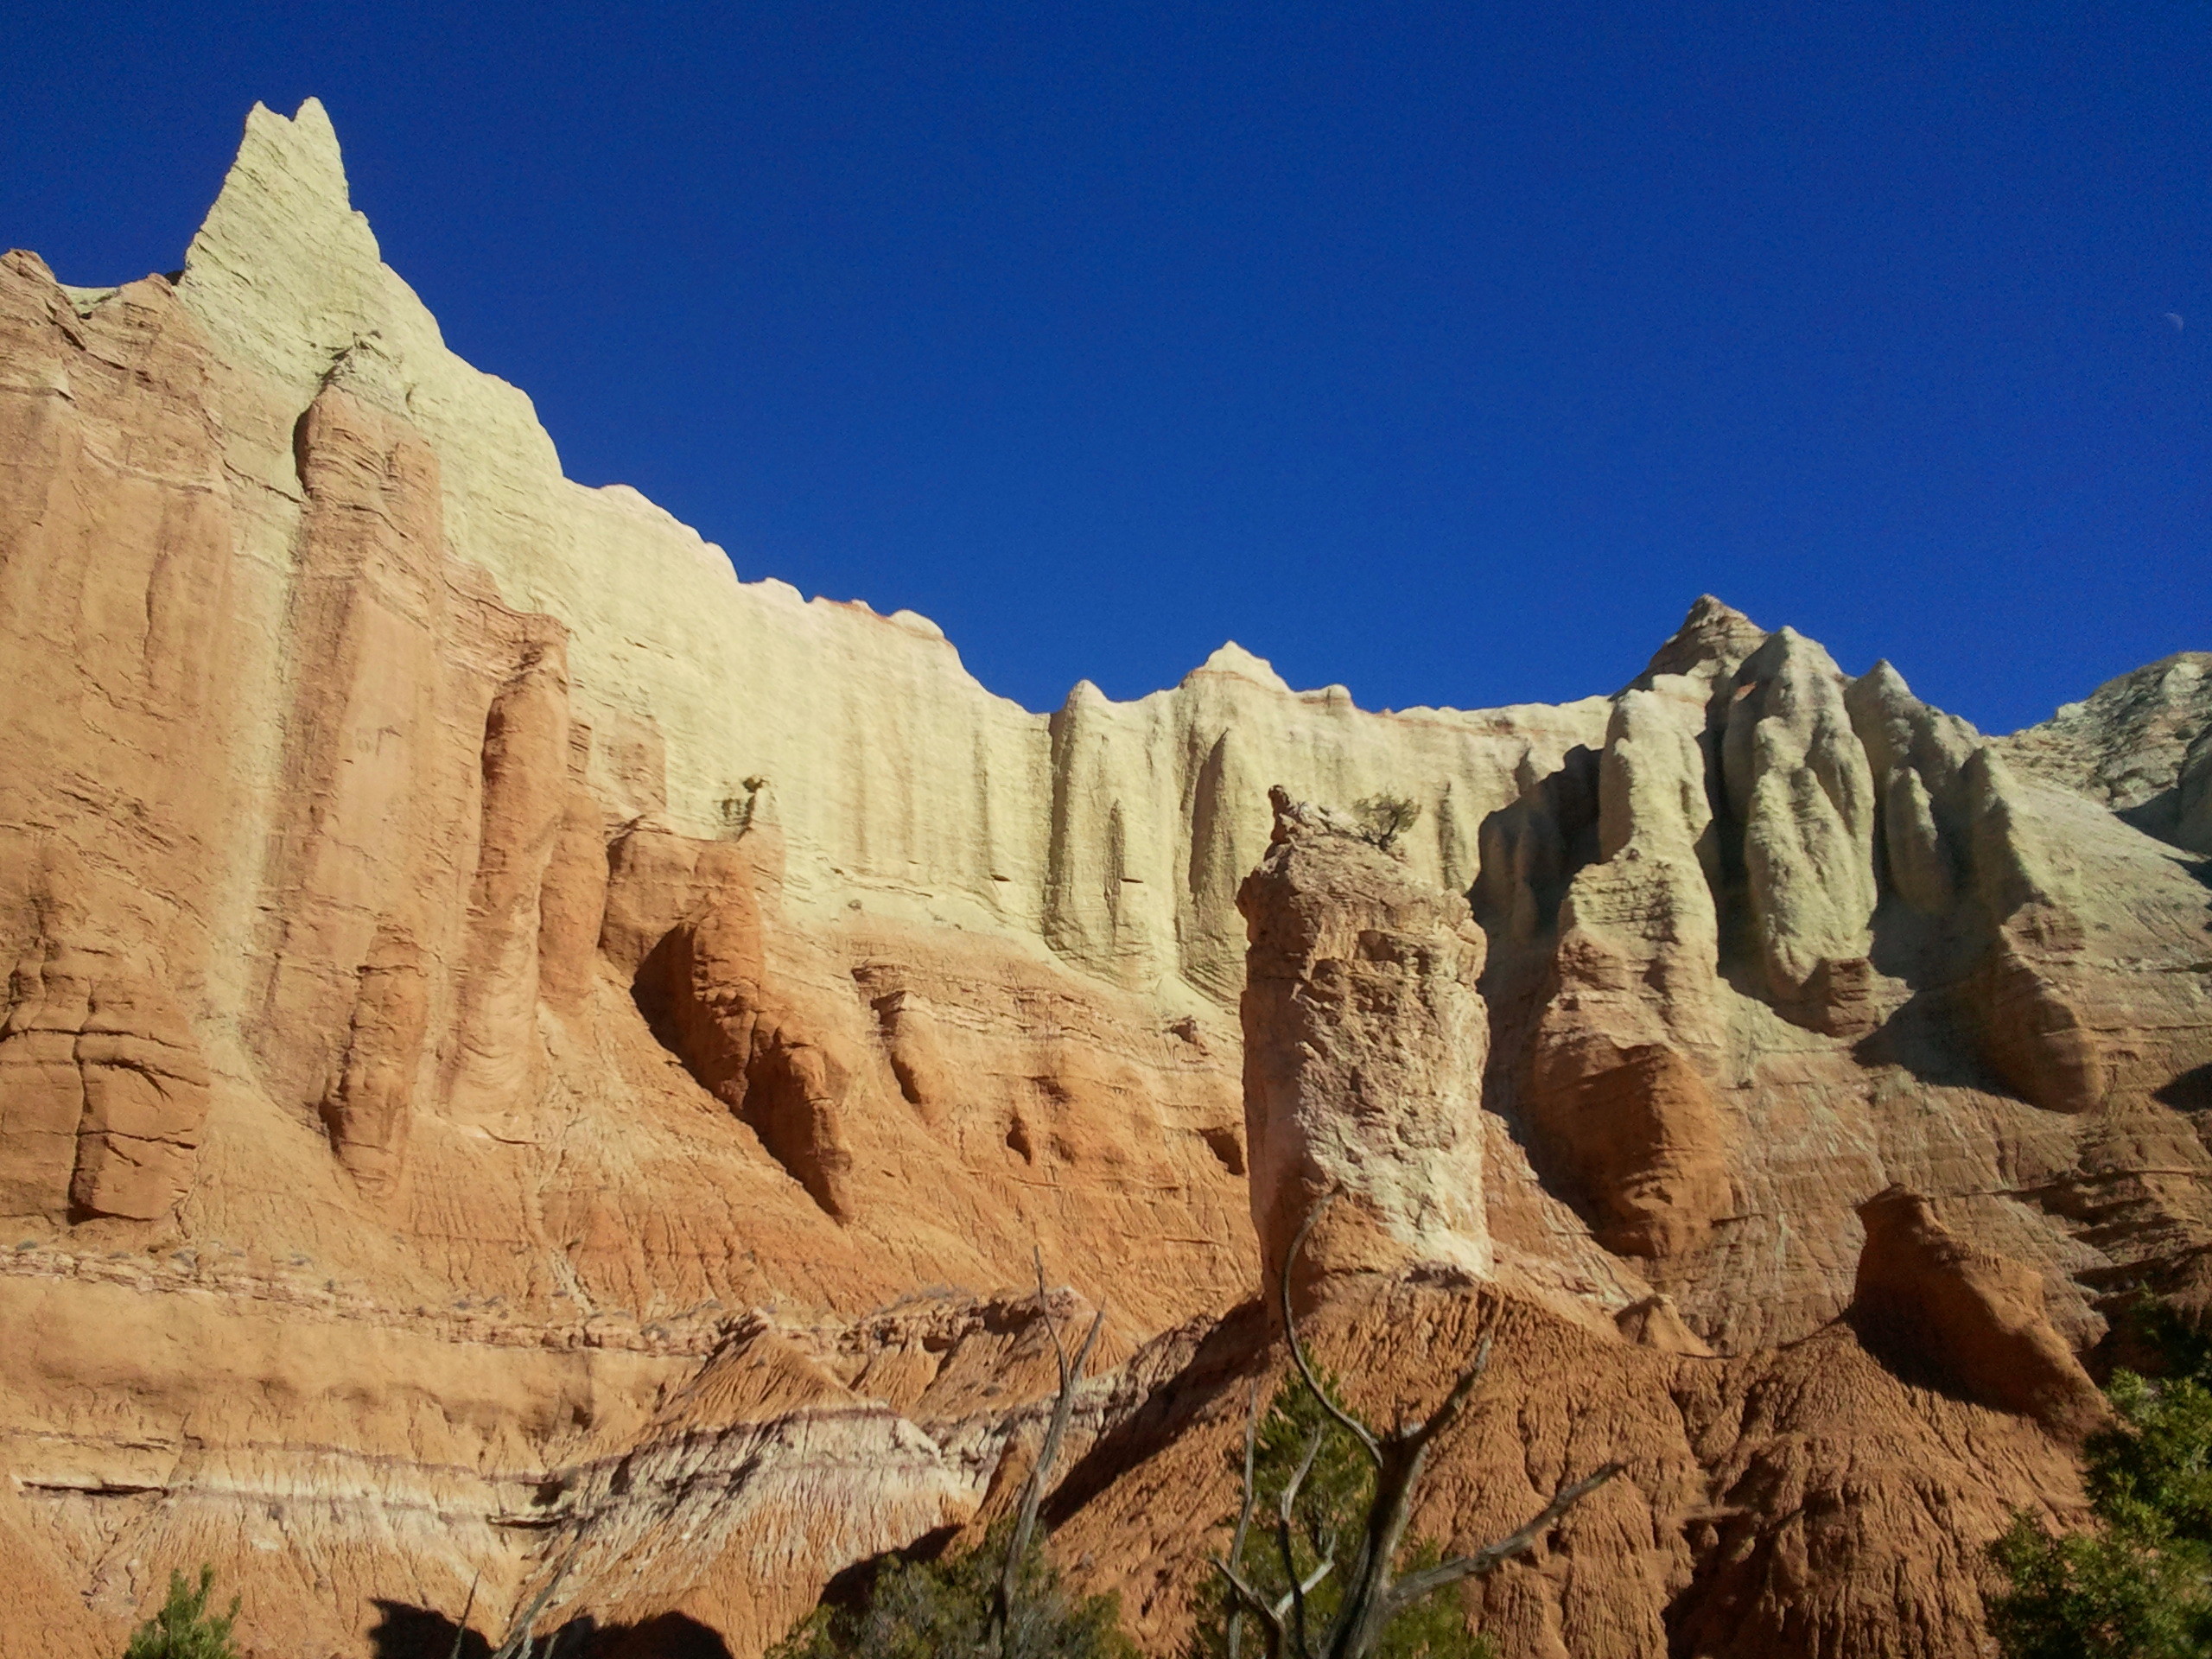
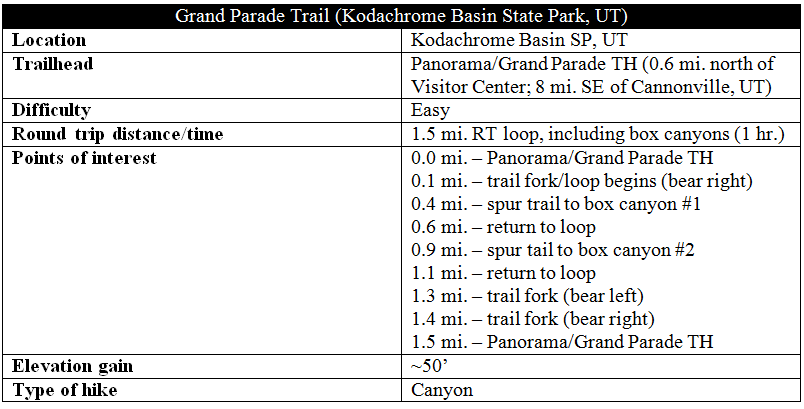
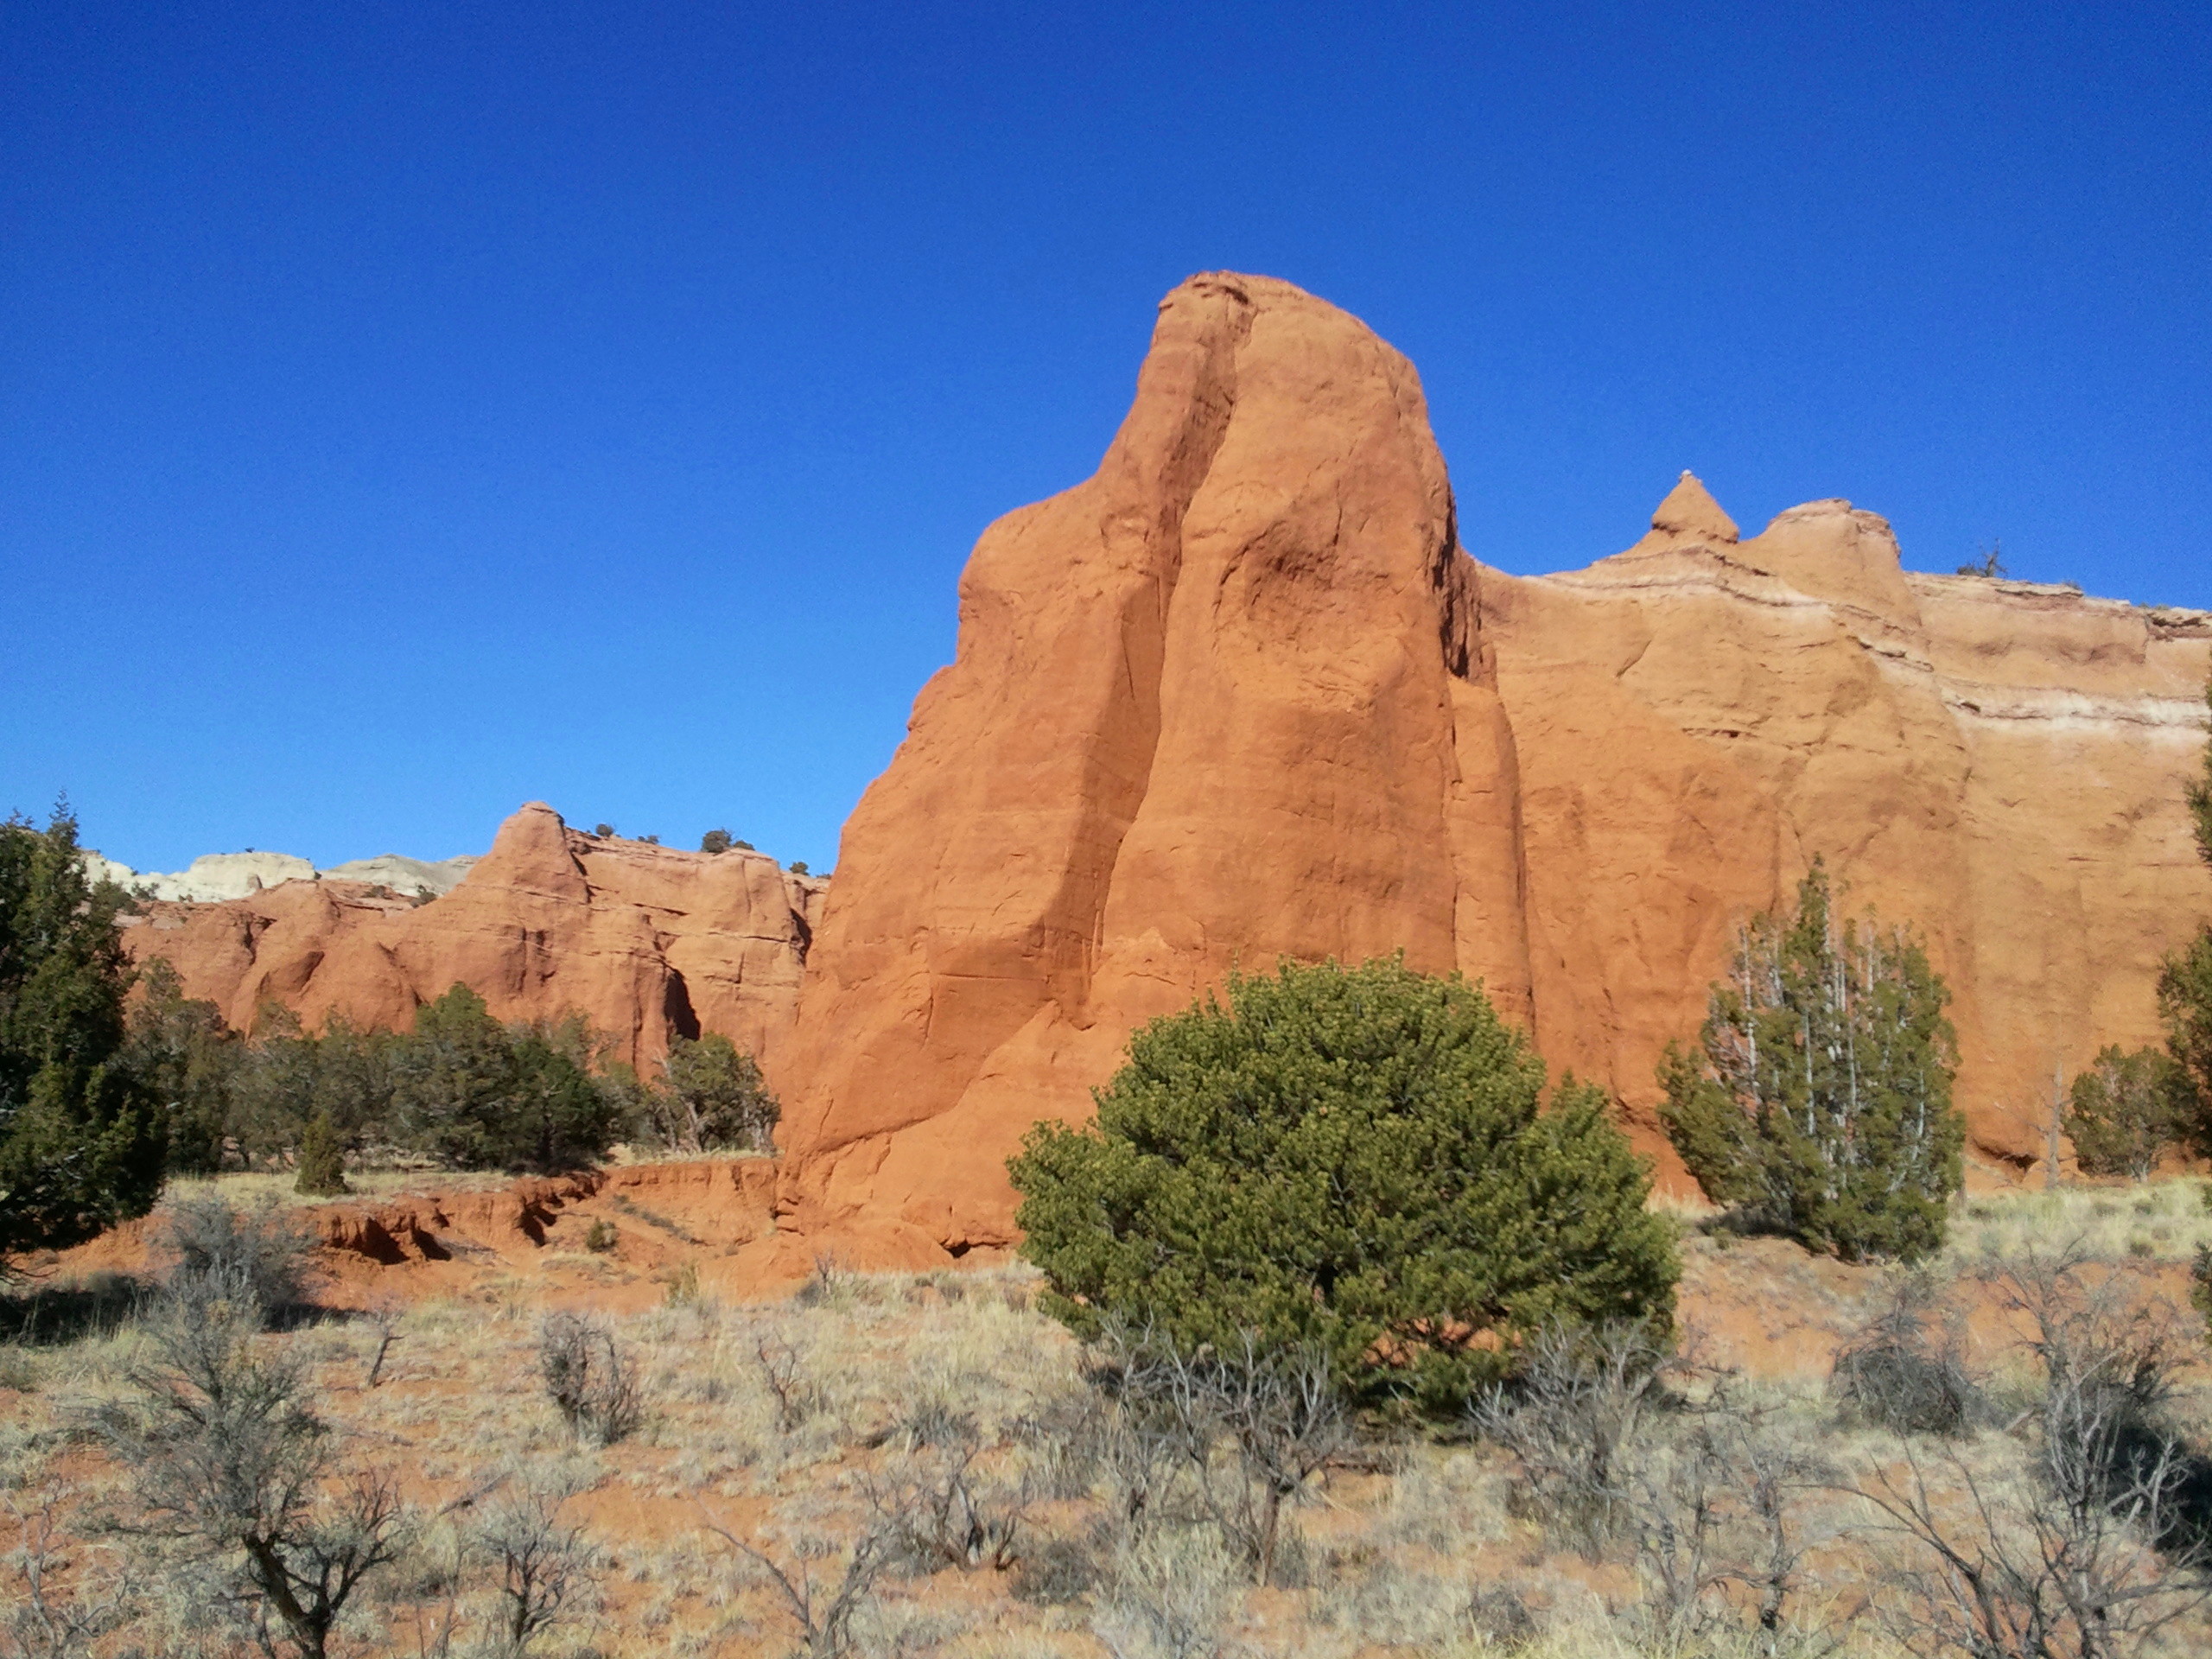
Kodachrome Basin State Park’s Grand Parade Trail is a short, pleasant loop along a wide, sandy trail with minimal elevation gain—making this hike good for families with children. The distinctive geological feature of Kodachrome Basin is the park’s collection of 67 “sedimentary pipes”—mysterious stony spires thought to be most likely formed by underground water sources—and you will see a handful of them on this hike. What makes the Grand Parade hike unique among Kodachrome trails, however, is its foray into two interesting box canyons, featuring up-close views of the ragged Gray Cliffs, which rise up to 800 feet over the basin.

The hike
The Grand Parade Trail begins at a signed parking area 0.6 mile north of the park’s visitor center on the right. This parking lot also marks the start of the popular Panorama Trail loop (which I have described in detail here). The Grand Parade route takes off to the east from the trailhead, plunging into a forest of junipers and pinyon pines.
At a little less than 0.1 mile across the flat, sandy trail, the path forks. This is the beginning of a 1.3-mile loop. To save the best views for last, head right and follow the loop counterclockwise.

The trail veers southeast in the direction of a prominent sedimentary geyser (visible easily from the road) but does not reach it. Instead, as the trail crosses a couple dry wash beds, it eventually turns east. Hugging a sheer wall of Entrada sandstone, the Grand Parade route swings left, then curves right at the entrance to a shady ravine—the first significant point of interest along the trail. Bear right at the sign marked “box canyon.”
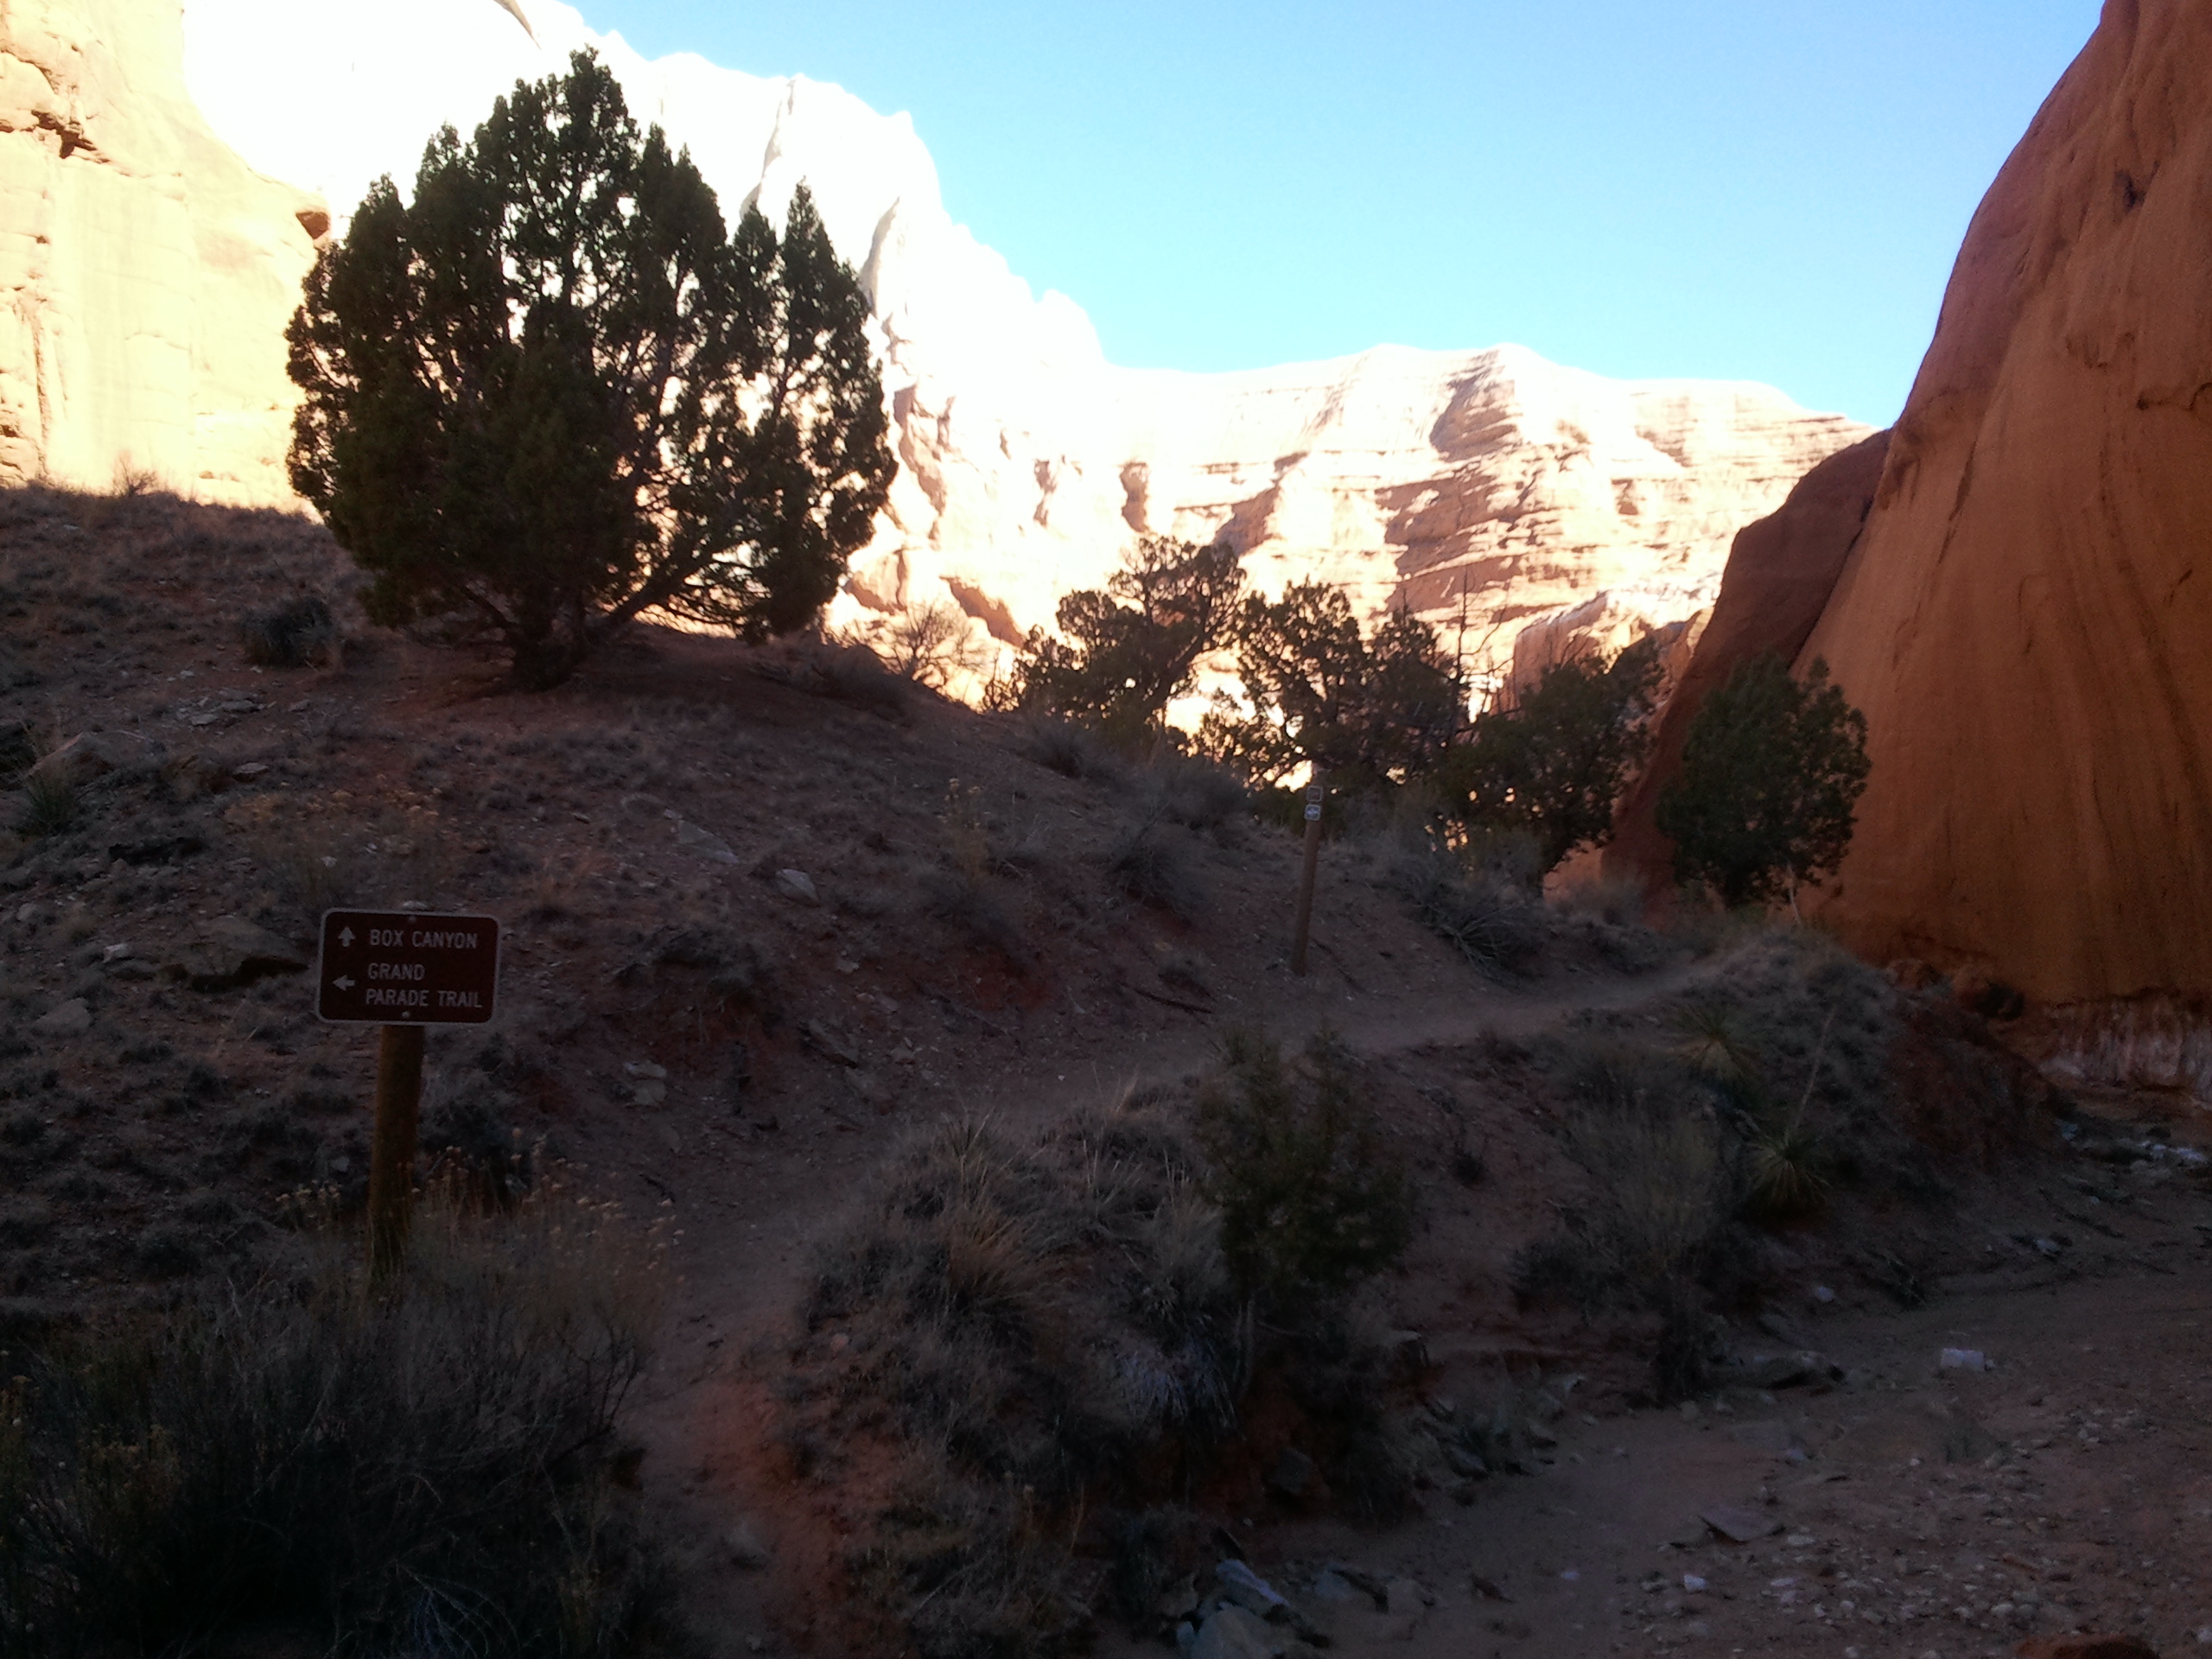
A box canyon, enclosed by high, precipitous walls on three sides, has only one entrance and exit. The Grand Parade Trail features two such canyons, each accessed by an out-and-back spur. In the first of the two, the trail fades after about 0.1 mile; from there, hikers can explore off-trail into a handful of smaller ravines, all of which end rather quickly at steep cliffs.

Returning to the main loop, the trail edges north around a couple protrusions of orange Entrada as it makes its way toward the second box canyon.

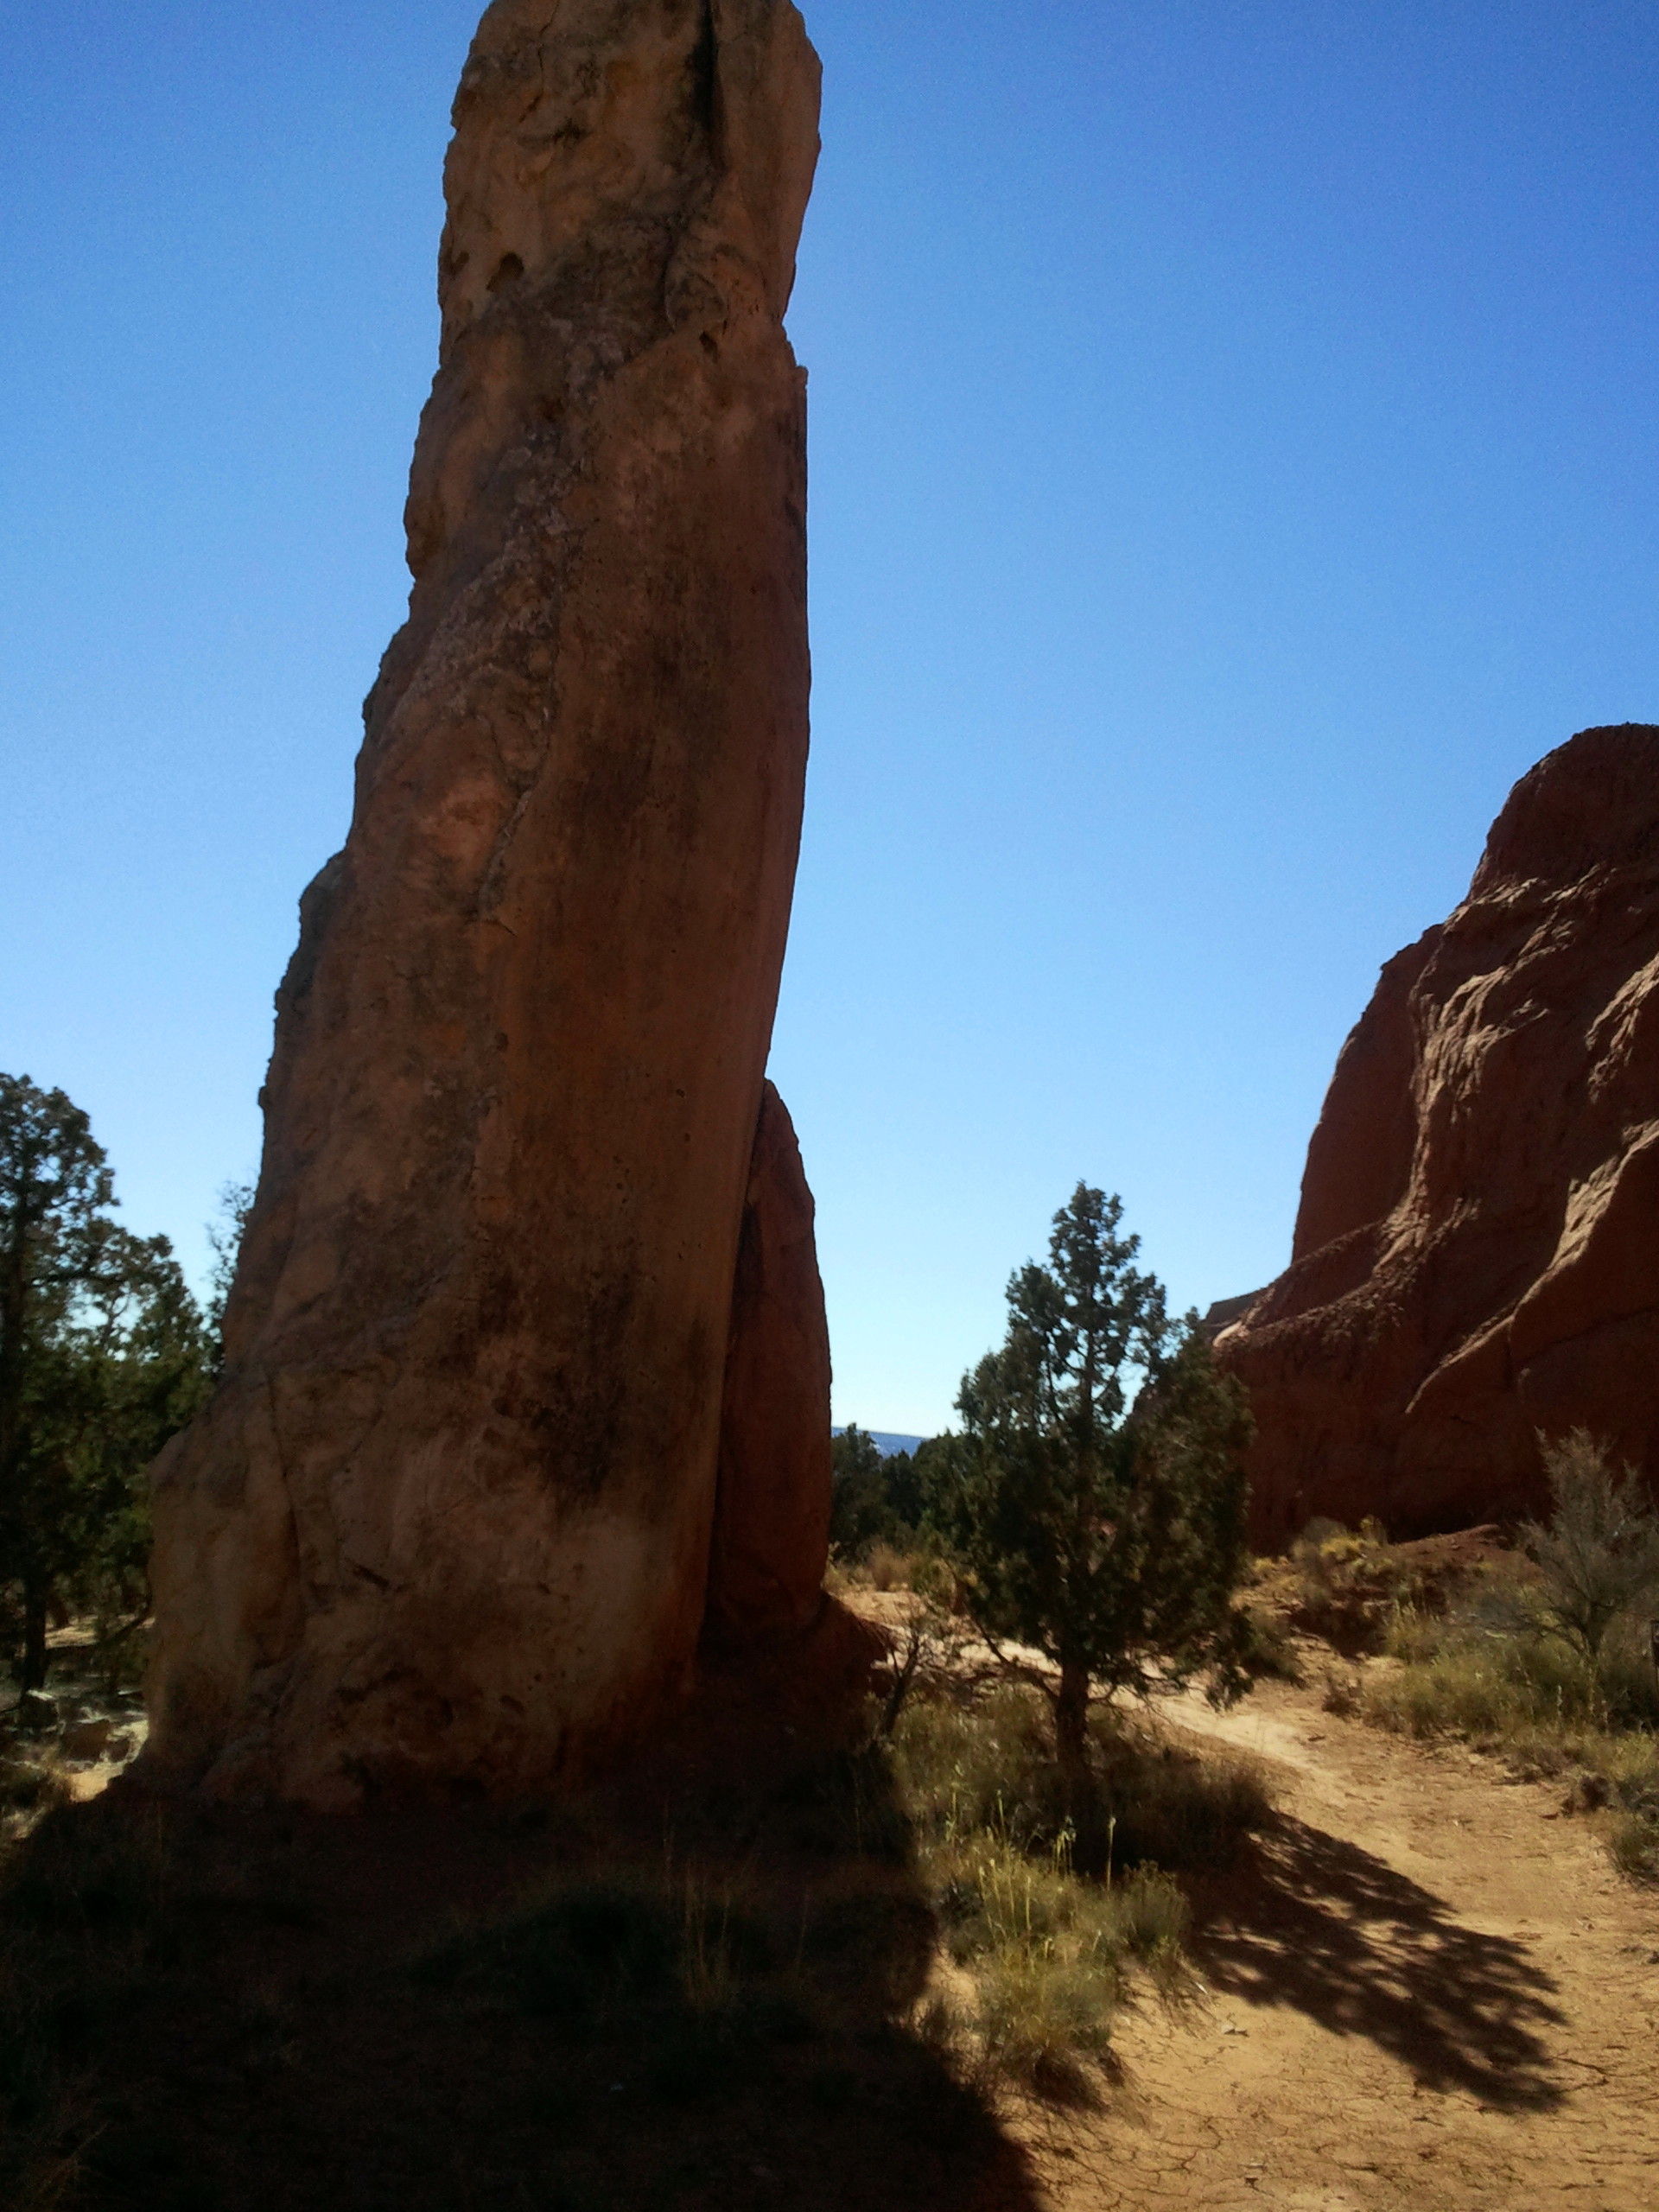
Another spur trail leads into the ravine, this one smaller but more impressive than the first. Here too the trail quickly fades and becomes hard to follow, but the canyon ends after about 0.2 miles. Two thick sedimentary pipes, producing a contrast of white on red, rise up above the canyon floor. Like the first box, there are a number of tributary ravines to explore, though they all end quickly.

After returning to the main loop again, the final significant point of interest comes 0.2 miles up the trail: a free-standing 50-70 foot rock geyser positioned just to the left of the path. Beyond this monument, it is 0.1 mile or so to a trail fork (turning right drops you off further north, near the campground; stay left to complete the loop), then another 0.1 mile to a second. Turn right at the second – this is the end of the loop. From here it is 100 yards or so back to the trailhead.

Pingback: Shakespeare Arch and the Sentinel Trail (Kodachrome Basin State Park, UT) | Live and Let Hike
Pingback: Angel’s Palace Trail (Kodachrome Basin State Park, UT) | Live and Let Hike
Pingback: Nature Trail (Kodachrome Basin State Park, UT) | Live and Let Hike