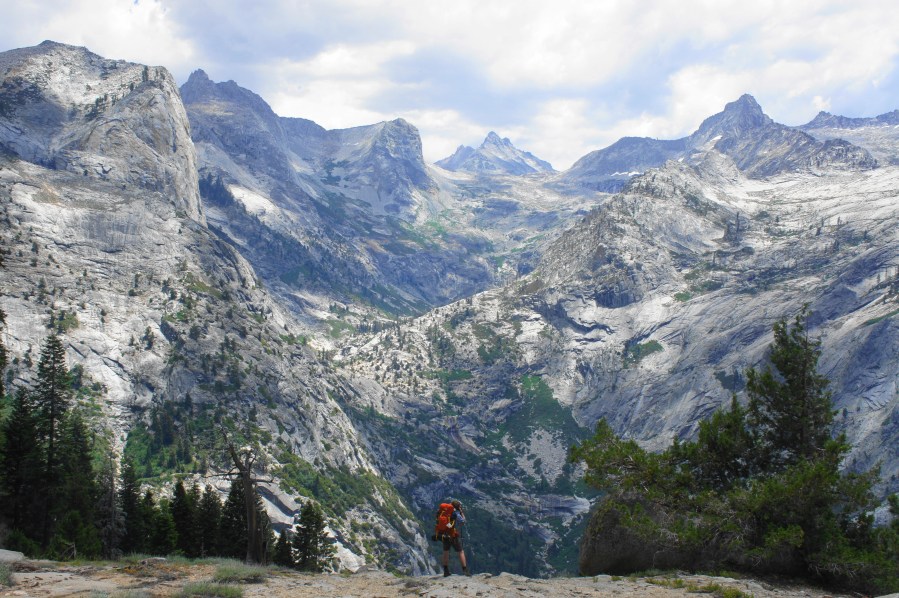

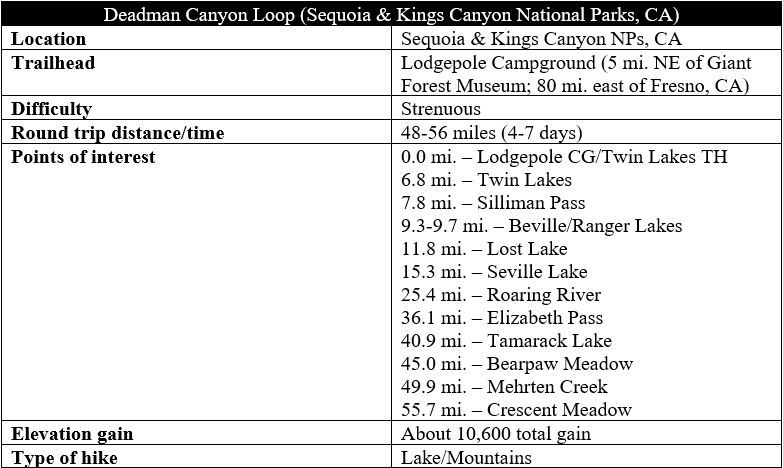
Becoming increasingly well-known as a lesser-traveled alternative to the popular John Muir Trail – Pacific Crest Trail corridor, the roughly 50- to 60-mile backpacking circuit known as the Deadman Canyon Loop (a.k.a. Elizabeth Pass Loop) traverses spectacular terrain spanning both Sequoia and Kings Canyon National Parks in the south-central Sierra Nevada. Over the course of four to seven days, the scenic circuit climbs from Lodgepole Campground, on the western flank of the Sierras, to Twin Lakes and Silliman Pass (10,160’), then drops into Sugarloaf Valley and the Roaring River drainage before ascending the namesake Deadman Canyon to Elizabeth Pass (11,371’). From here, a spectacular descent with views of craggy granite leads south to Lone Pine Creek and Bearpaw Meadow, followed by a westward jaunt through Sequoia National Park on the High Sierra Trail. Climb Panther Gap and descend back to Lodgepole, or continue southwest to Crescent Meadow and the Giant Forest for sequoia views and to pick up a shuttle that takes one back to Lodgepole.
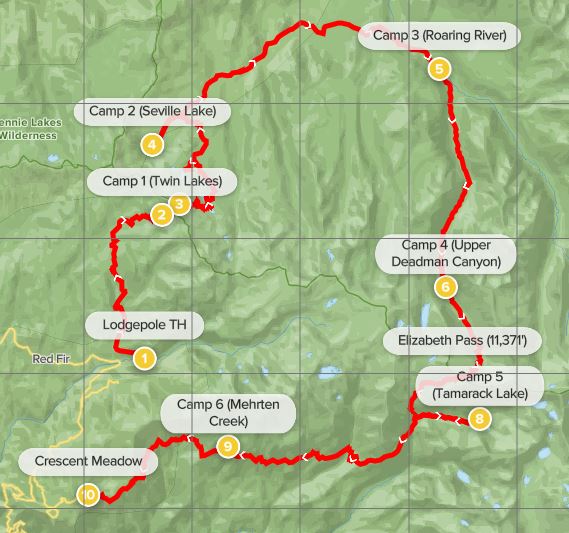
While the shortest trip traces about a 48-mile loop, the following hike description adds several worthy side trips to Beville, Ranger, Lost, Seville, and Tamarack Lakes and ends at Crescent Meadow, avoiding a perhaps unnecessary 1,500-foot climb on the final day (via Panther Gap) and instead taking the shuttle (operating seasonally) back to Lodgepole. All told, with a group of three in decent shape but taking long lunch/photo breaks, the circuit with all the aforementioned detours took us 6.5 days—but others (especially if willing to forgo the side trips) may be able to complete the hike in as little as four or five. The full 7-day itinerary is as follows: (1) Lodgepole to Twin Lakes (6.8 miles; 2,700’ net gain); (2) Twin Lakes to Seville Lake (including Beville, Ranger, & Lost Lakes) (8.5 miles; 1,600’ gain, 2,700’ loss); (3) Seville Lake to Roaring River (10.1 miles; 400’ gain, 1,800’ loss); (4) Roaring River to Upper Deadman Canyon (6.75 miles; 1,900’ net gain); (5) Upper Deadman Canyon to Tamarack Lake (via Elizabeth Pass) (8.7 miles; 3,100’ gain, 3,200’ loss); (6) Tamarack Lake to Mehrten Creek (9.0 miles; 900’ gain, 2,600’ loss); and (7) Mehrten Creek to Crescent Meadow (5.6 miles; 1,000’ net loss).
(Note: A “speedier” alternative that skips the detours but finishes in five days could be as follows: (1) Lodgepole to Twin Lakes; (2) Twin Lakes to Sugarloaf Meadow; (3) Sugarloaf Meadow to Upper Deadman Canyon; (4) Upper Deadman Canyon to Bearpaw Meadow; (5) Bearpaw Meadow to Crescent Meadow/Lodgepole. If bear boxes for food storage are important to you, they are available (as of June 2021) at the following sites: Clover Creek, Twin Lakes, Ranger Lake, Lost Lake, Seville Lake, Comanche Meadow, Sugarloaf Meadow, Roaring River, Bearpaw Meadow, Buck Canyon, Nine Mile Creek, and Mehrten Creek.)
Preparation and logistics
While more strenuous and logistically-demanding backpacking trips can be had elsewhere, completing the Deadman Canyon Loop nonetheless requires a good deal of advance planning. The terrain covered is mostly remote, with far fewer visitors than many nearby destinations (such as the Mount Whitney area or Yosemite). Be prepared to carry all of your food, lodging, etc. for 4-7 days, with heavy packs rendering the elevation gain and loss considerably more difficult than day hiking. The hike also rises to high altitudes (10,479 feet at Silliman Pass and 11,371 feet at Elizabeth Pass), so acclimating ahead of time and/or taking a slower pace is advised. While afternoon thunderstorms are slightly more infrequent than the High Sierras further east, hikers should plan to crest the high passes in the morning if possible. Bear boxes are available along the hike, but it is wise to carry a certified bear-resistant canister (there are no bear boxes between Roaring River and Bearpaw Meadow, roughly 15 miles). Camp at least 100 feet from water, and, of course, pack out everything you brought in.
Given the rising popularity of Sequoia/Kings Canyon, wilderness permits are also now subject to a quota/reservation system; reservations can be made here for the “Twin Lakes” entry point (if following the hike in a clockwise direction, as this description does). (Note: While much of the Deadman Canyon Loop is sparsely-travelled, the up-and-back to Twin Lakes is relatively popular, so booking at least a few weeks in advance is advised. There are also walk-up permits available at the Lodgepole Visitor Center or, if closed, the Giant Forest Museum.)
After acquiring your permit at the nearest issuing station (Lodgepole Visitor Center or Giant Forest Museum), make your way to Lodgepole Campground and park in the large lot next to the shuttle stop. (Note: There is also a bear locker for food storage in case you brought too much food; don’t leave it in your car!) The Twin Lakes Trail begins a couple minutes up the road.
DAY 1: Lodgepole to Twin Lakes (6.8 miles)
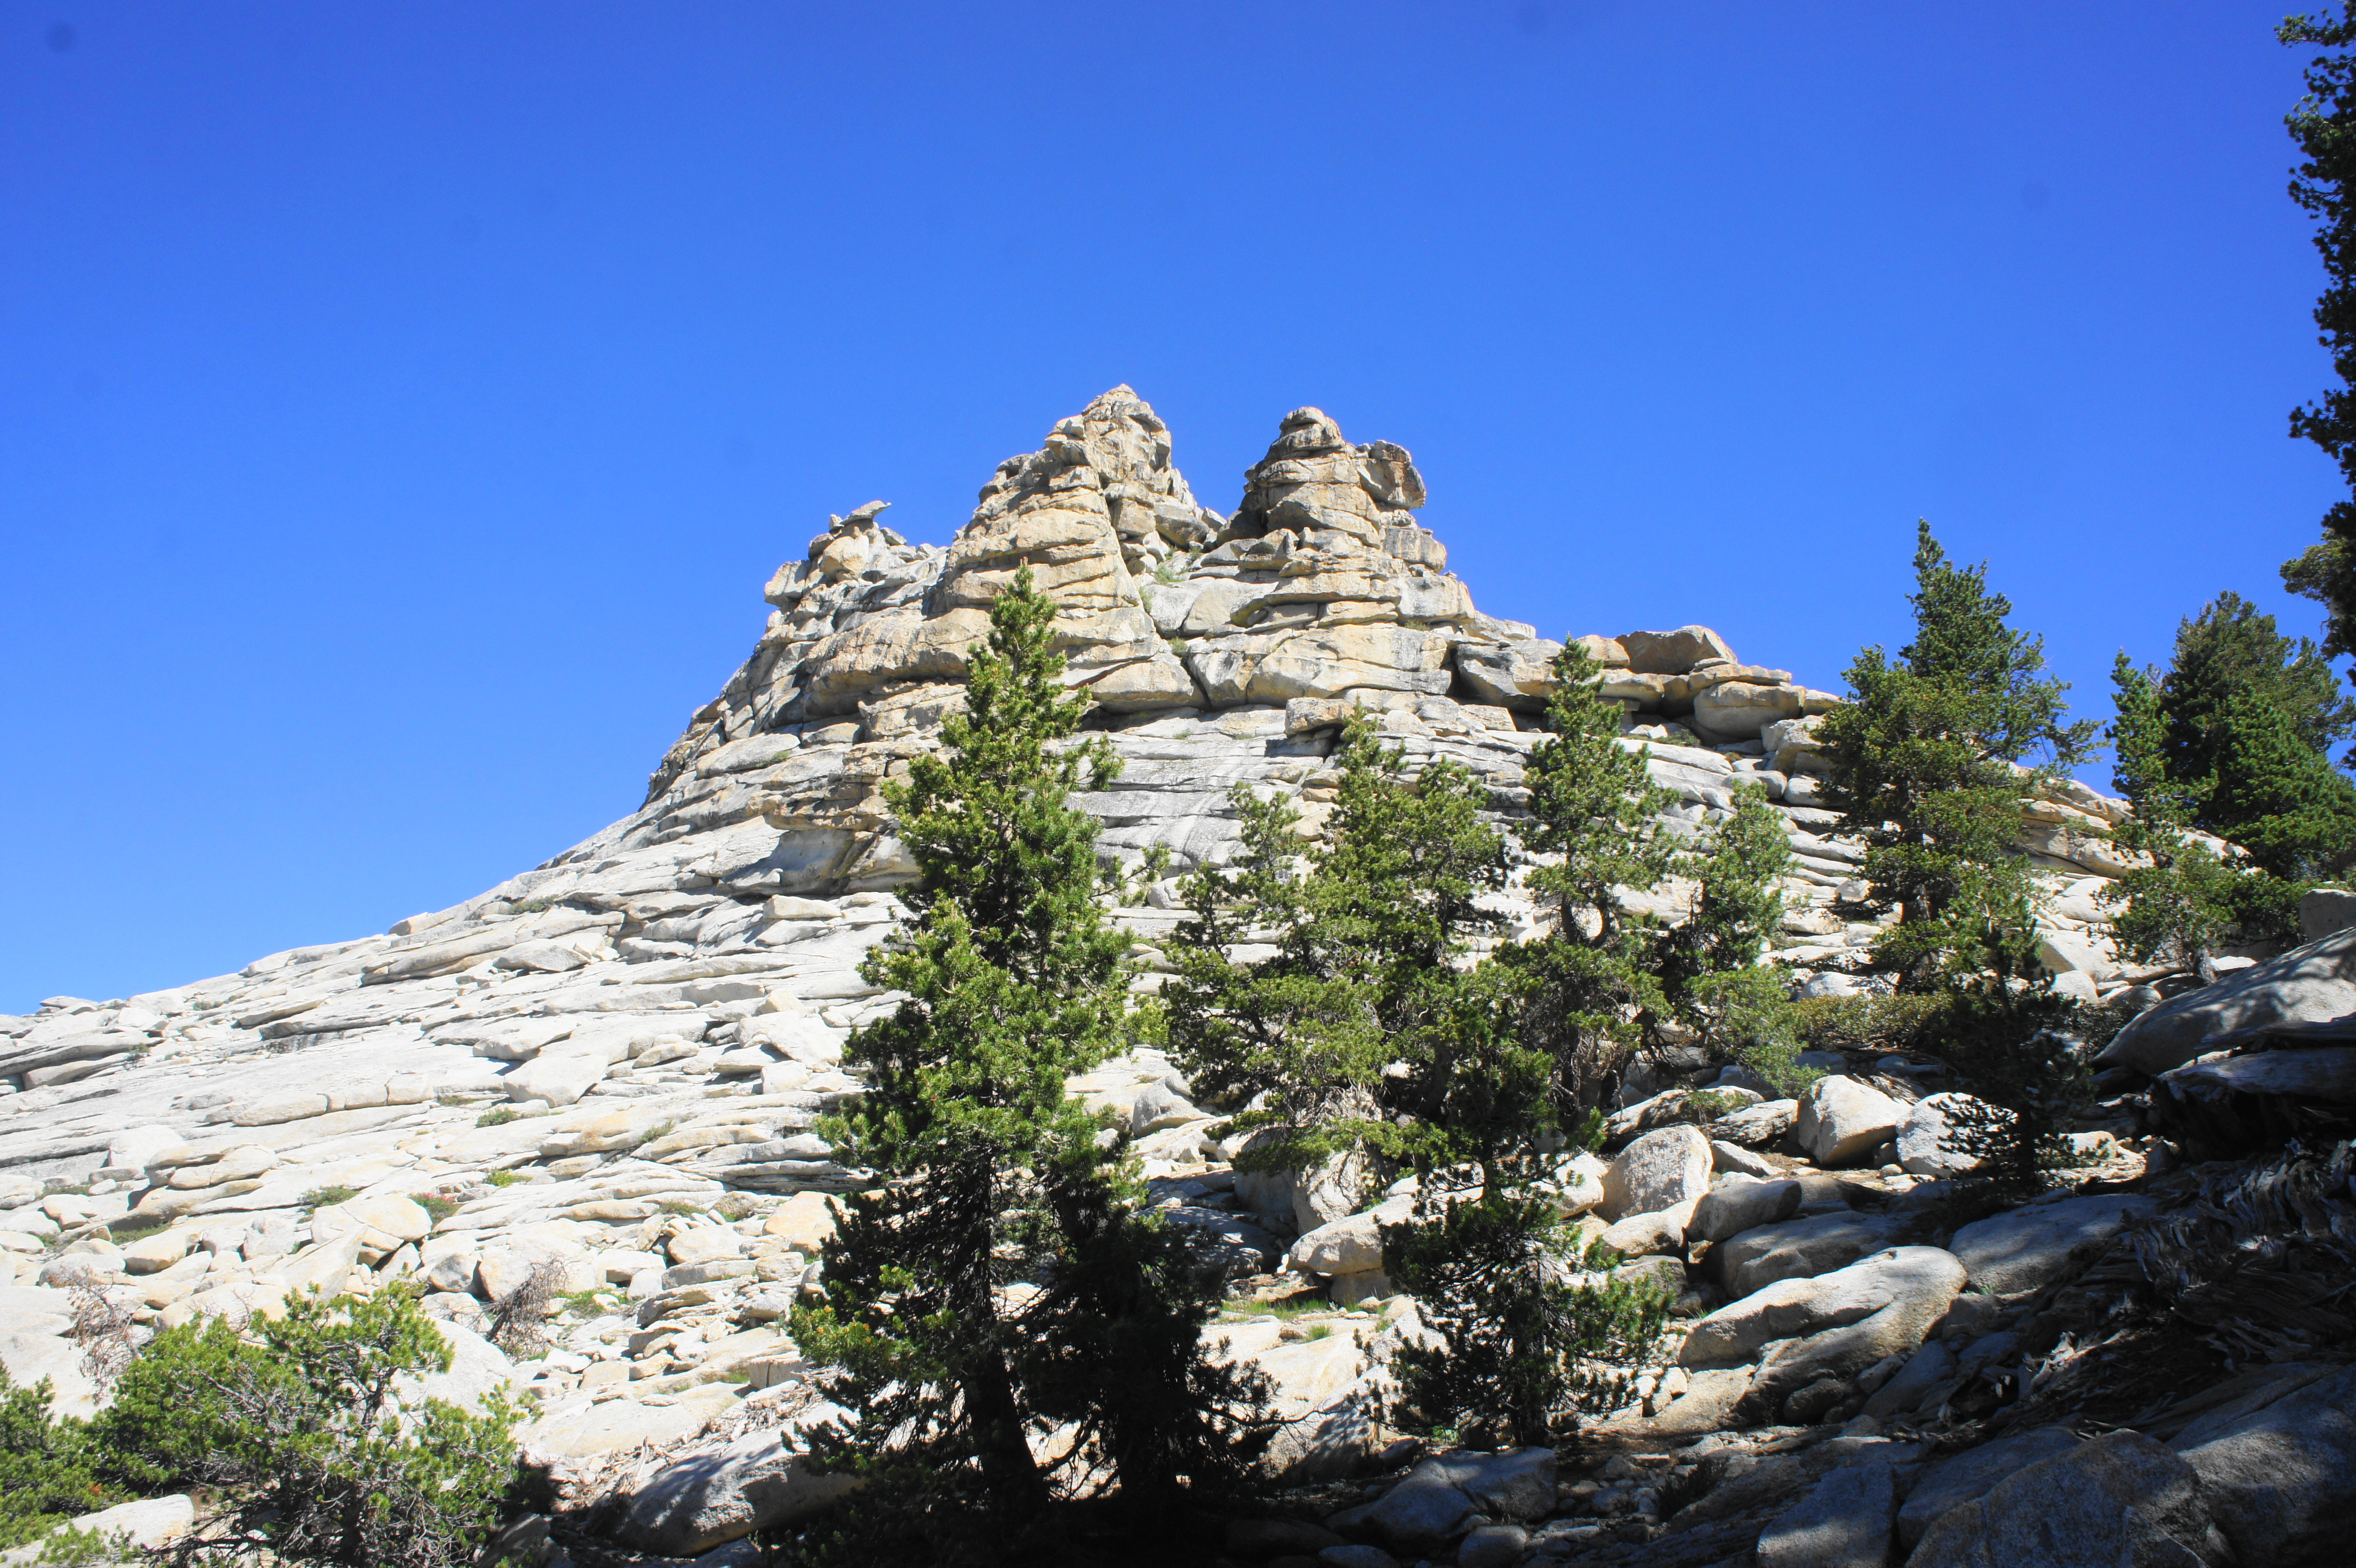
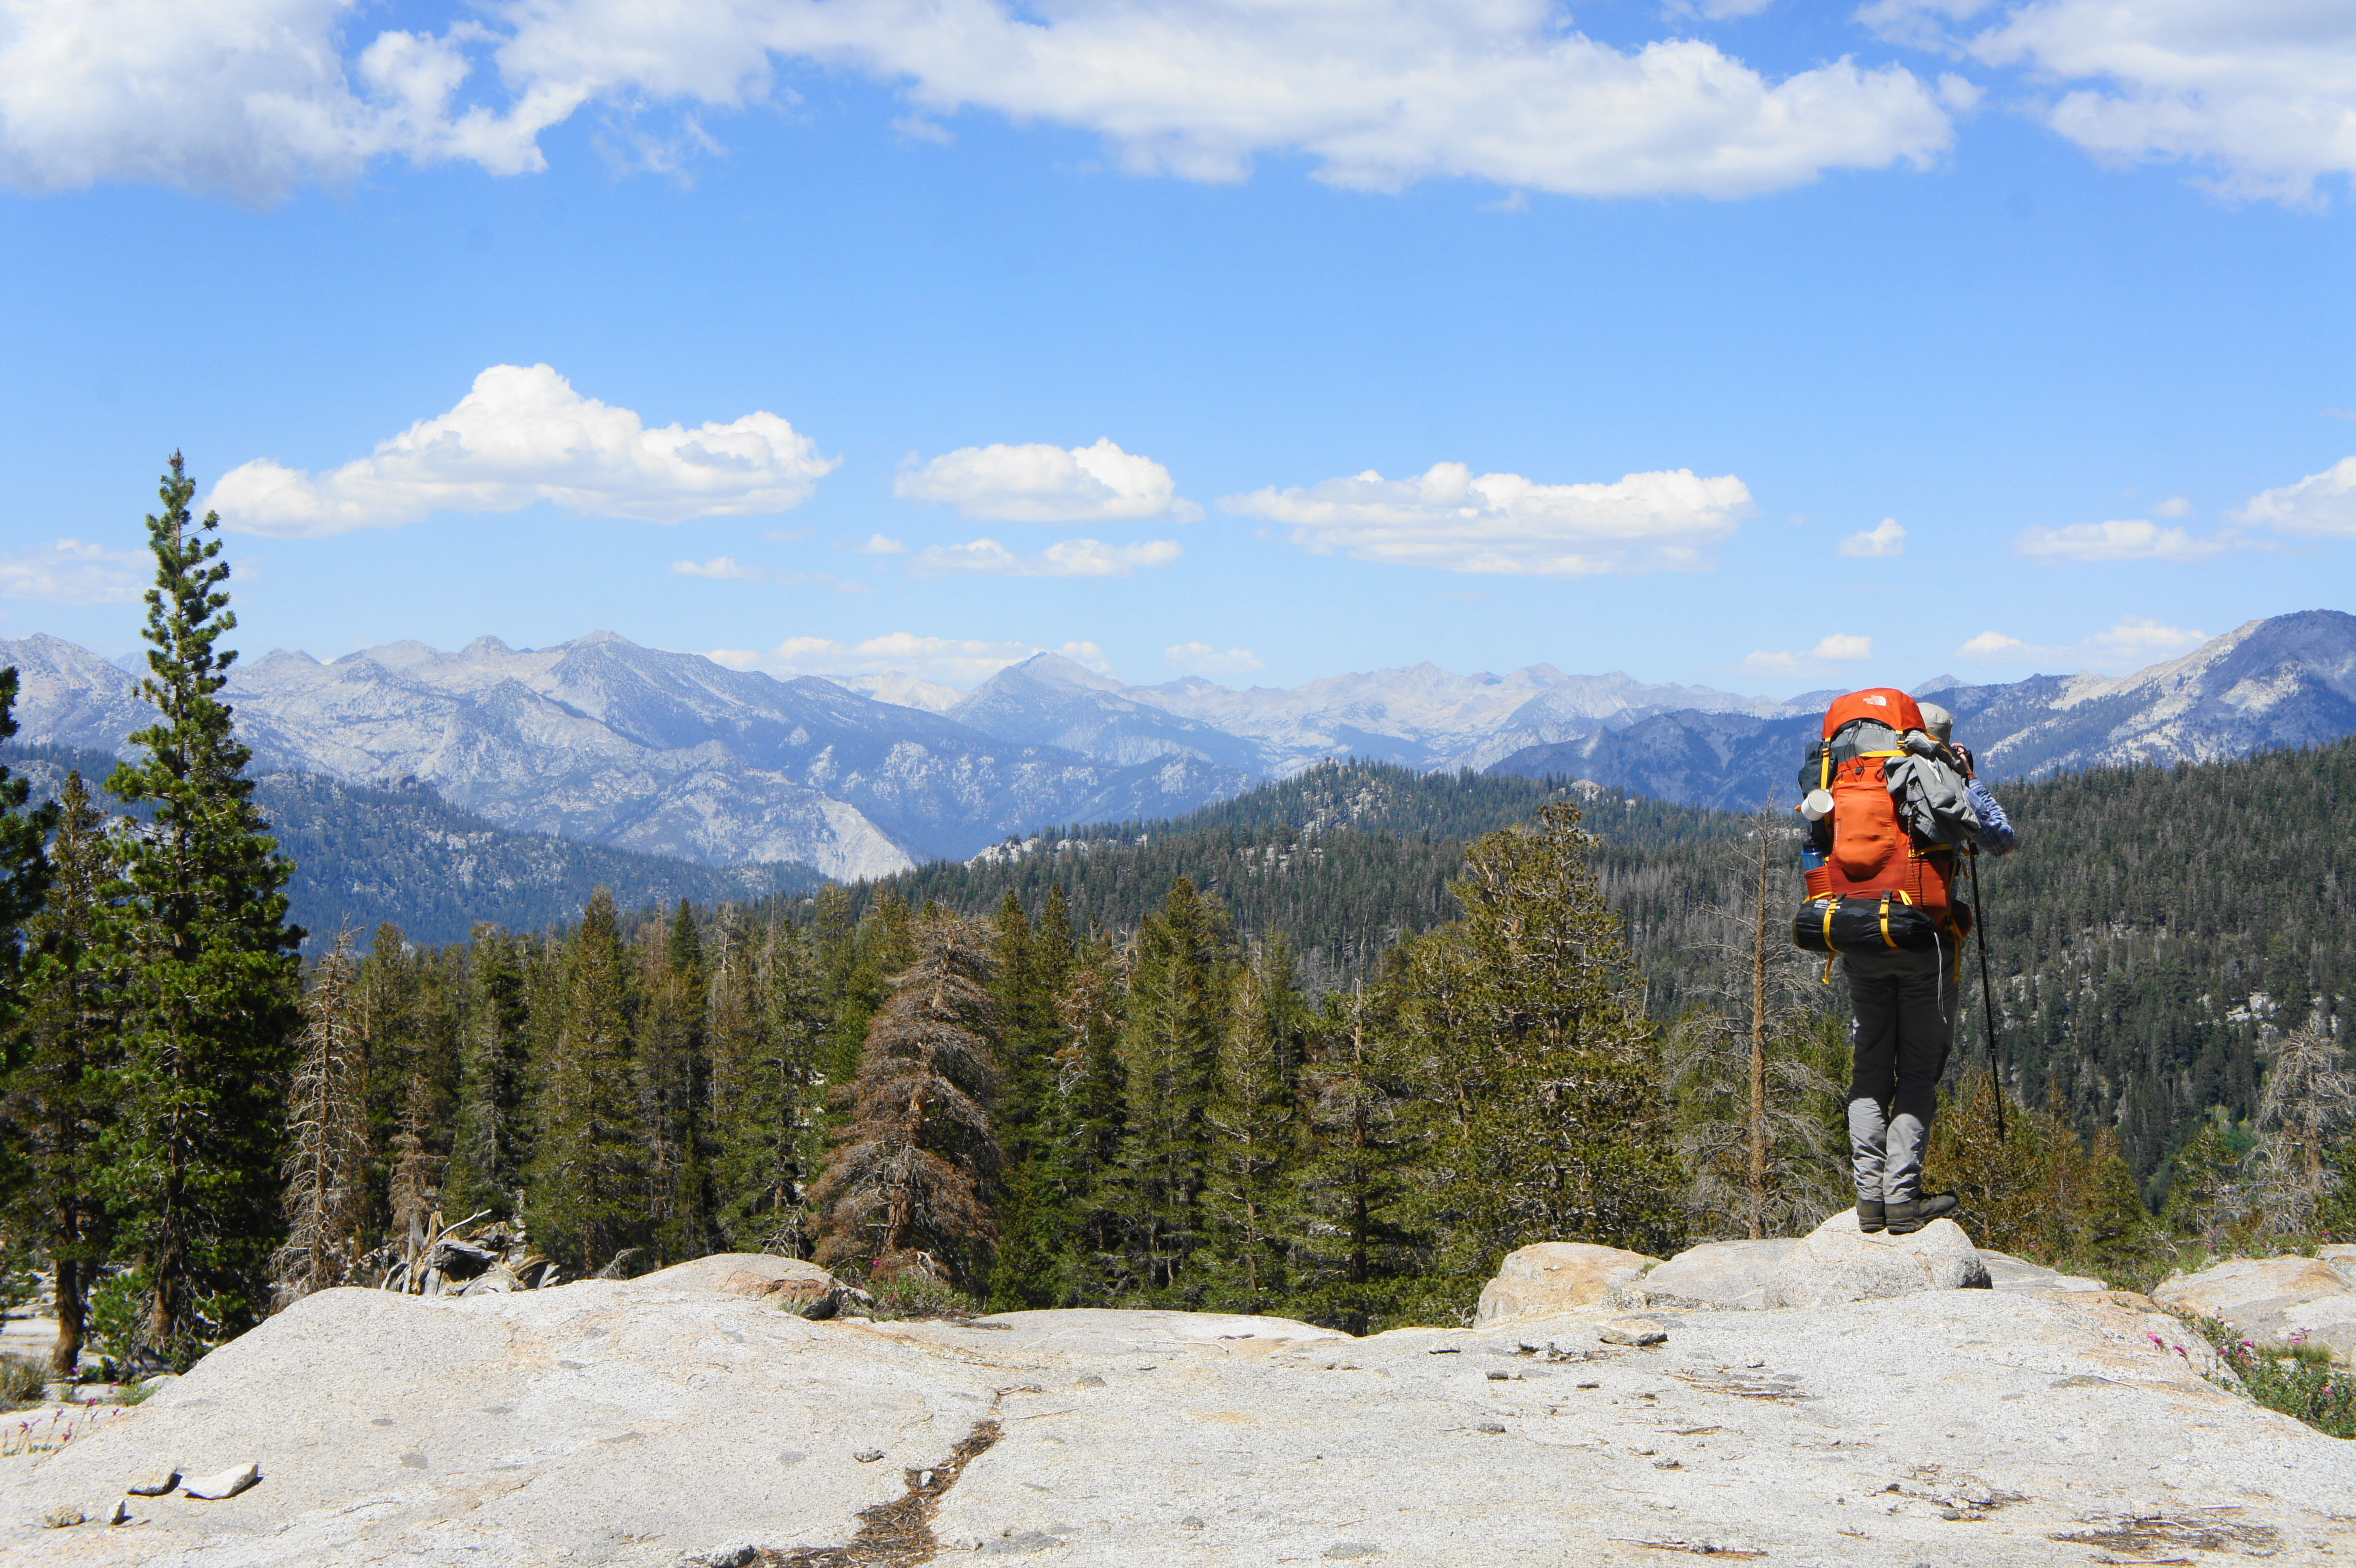
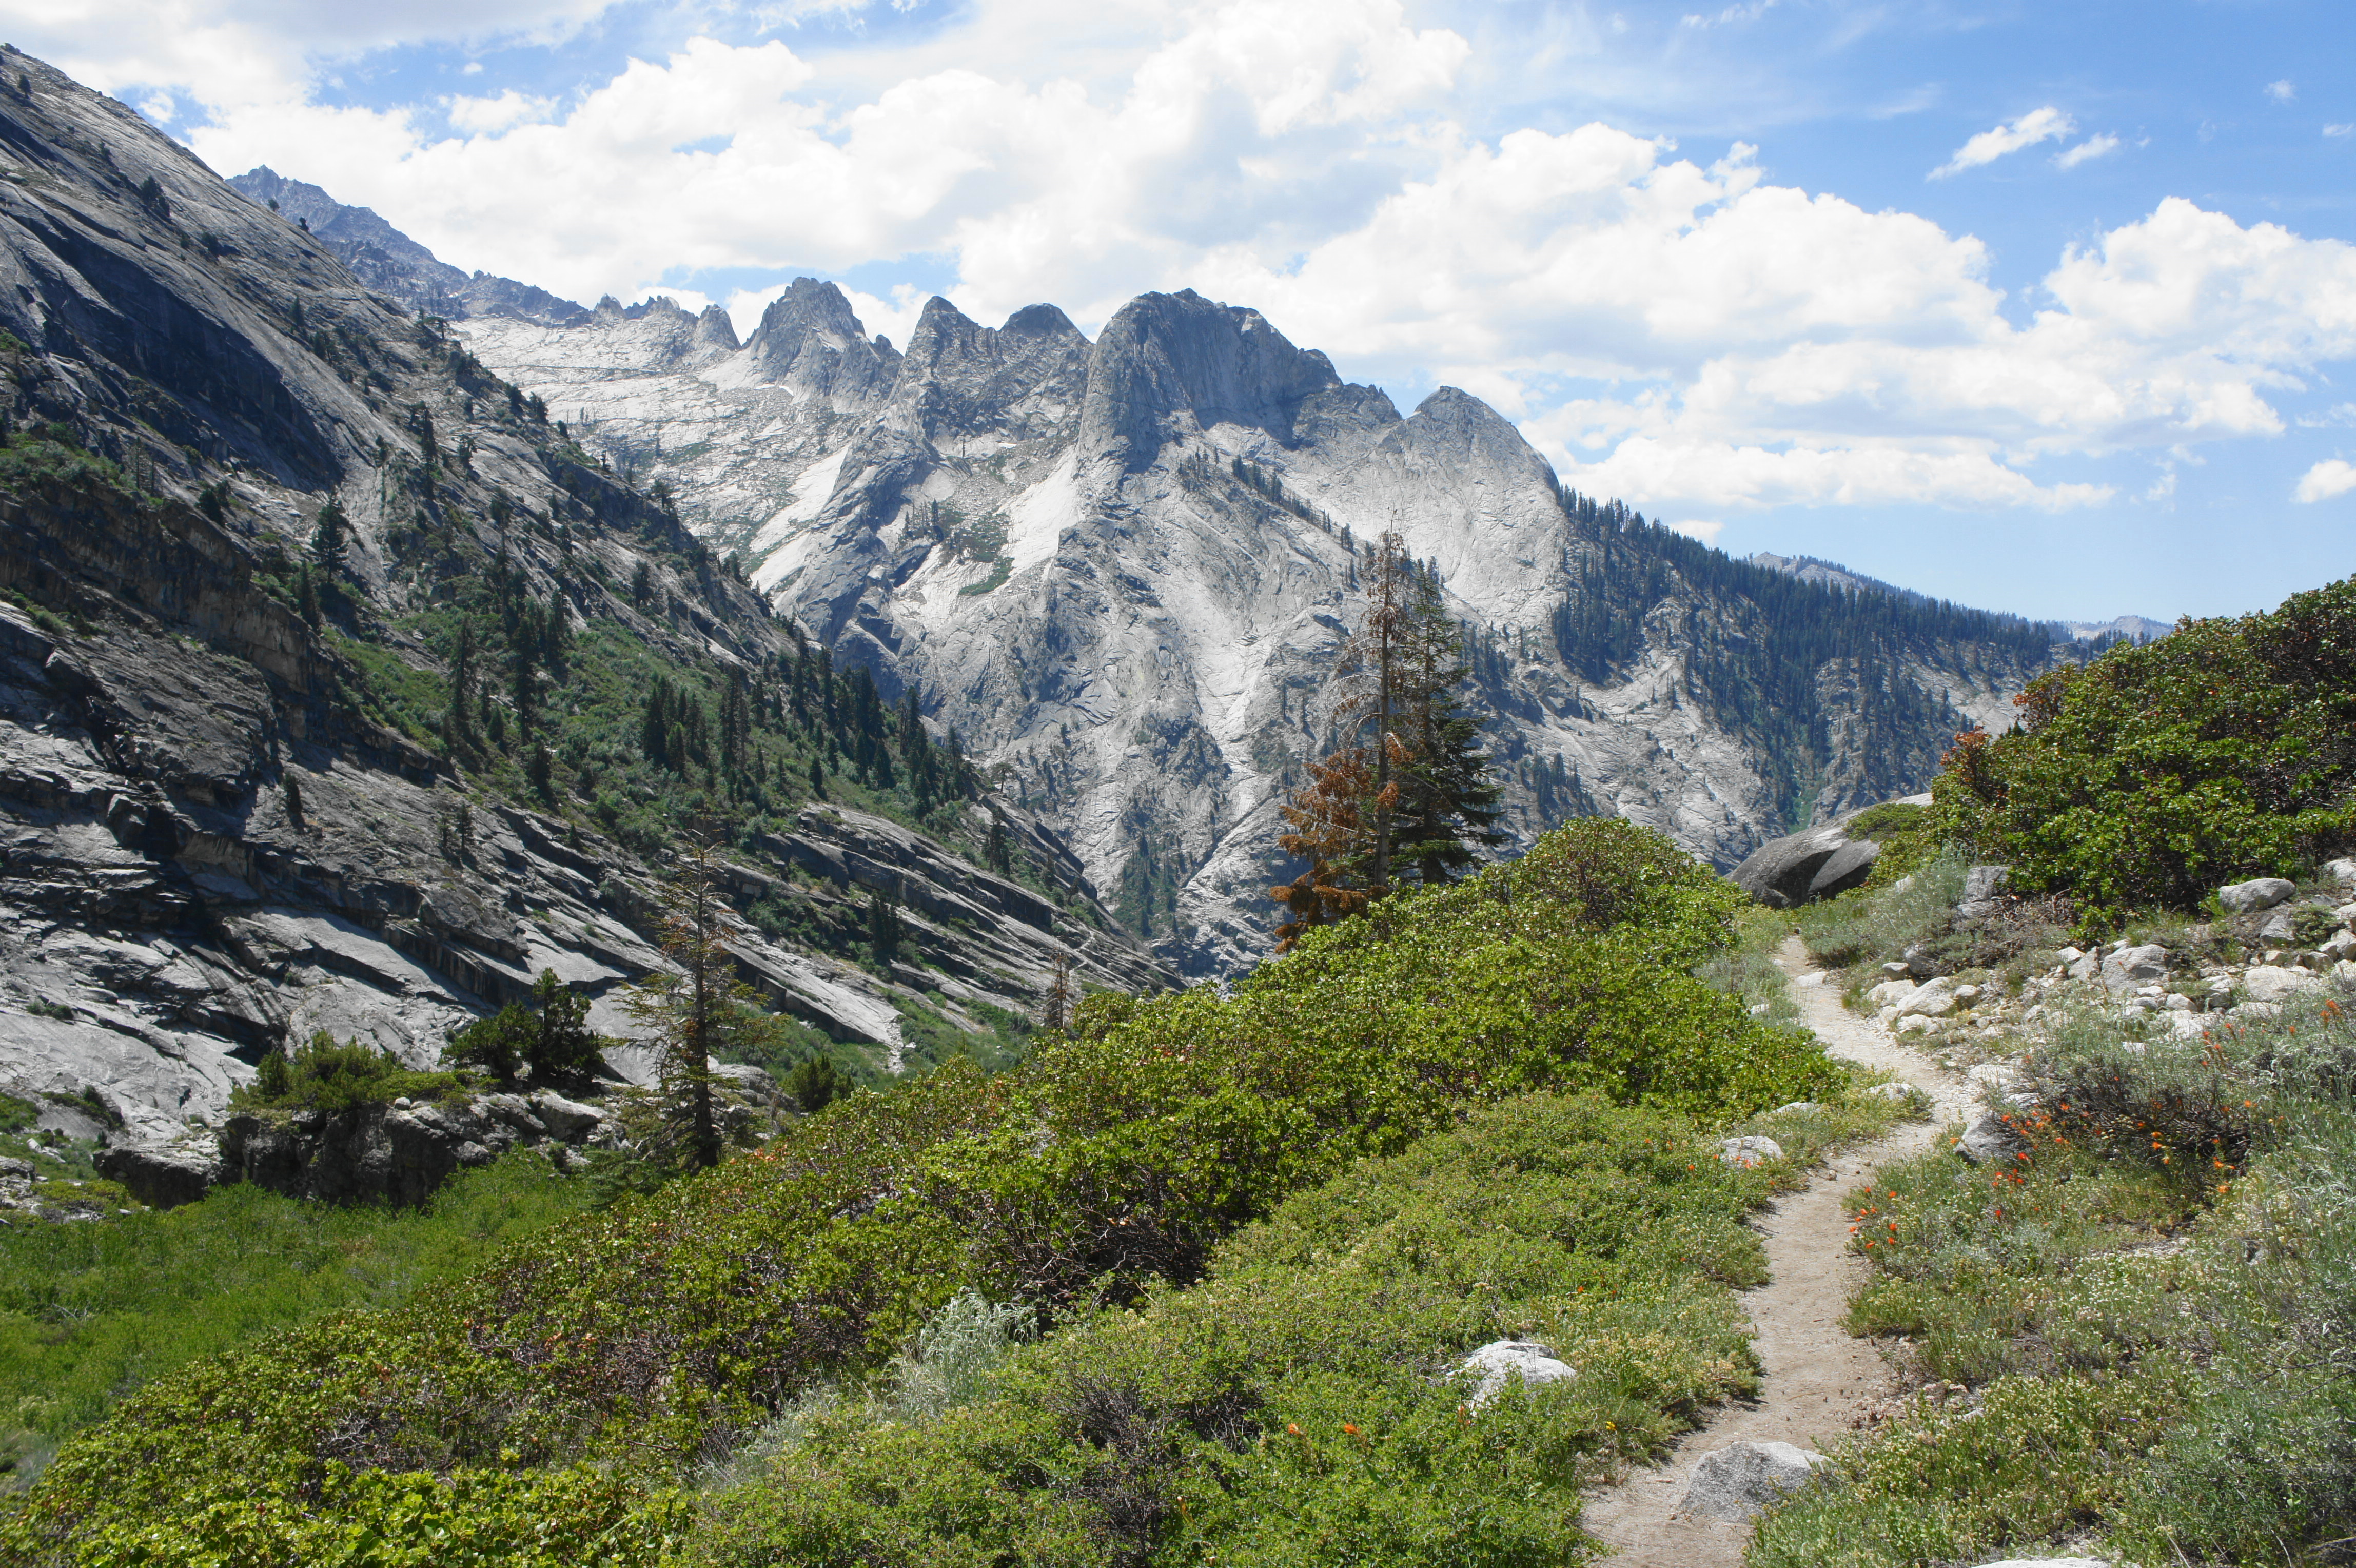
The multi-day journey begins at the Lodgepole Campground in Sequoia National Park, a mega-camp with more than 200 individual sites sprawled out across Tokopah Valley, which was carved by the Marble Fork of the Kaweah River. From the shuttle stop and large overnight parking area, make your way east along the paved road, then take the first left, following a road leading to sites 151-214. The road crosses the rumbling river and quickly intersects with two trails in quick succession. The first, the Tokopah Falls Trail, is a popular day hike to a cascading waterfall. The second is the Twin Lakes Trail, marked with a wooden sign at the base of a granite knoll, the first of many such rock outcrops one will encounter on the hike. This is your entry point into the wilderness that beckons.
The Twin Lakes Trail begins with an immediate wake-up call for backpackers carrying heavy loads, gaining around 450 feet in elevation gain in less than a mile. After rising above Lodgepole Campground, the sounds of human commotion gradually dissipate, and the wide and easy-to-follow path ascends through thick conifer forest, aiming for a woody notch carved by Silliman Creek. At about 9/10 mile, the trail flattens out briefly and bends northward, cutting through an unhealthy forest dotted with weathered and dead pines (not because of fire but seemingly due to competition amid the densely-packed trees over soil and water).
At about 1.3 miles, the Twin Lakes Trail reaches its first junction. (Note: The sign says it is 1.6 miles from Lodgepole, but this seems to be an overestimate.) Heading left returns down into the valley, culminating at Wuksachi Village. Heading right, the Twin Lakes Trail continues, coming within reach of Willow Meadows, a modest grassy patch on the right. After crossing a small (and often dry) wash, the path courses northward, eventually reaching a set of stony switchbacks and then a sudden drop to Silliman Creek, the first of several perennial streams encountered on the hike.
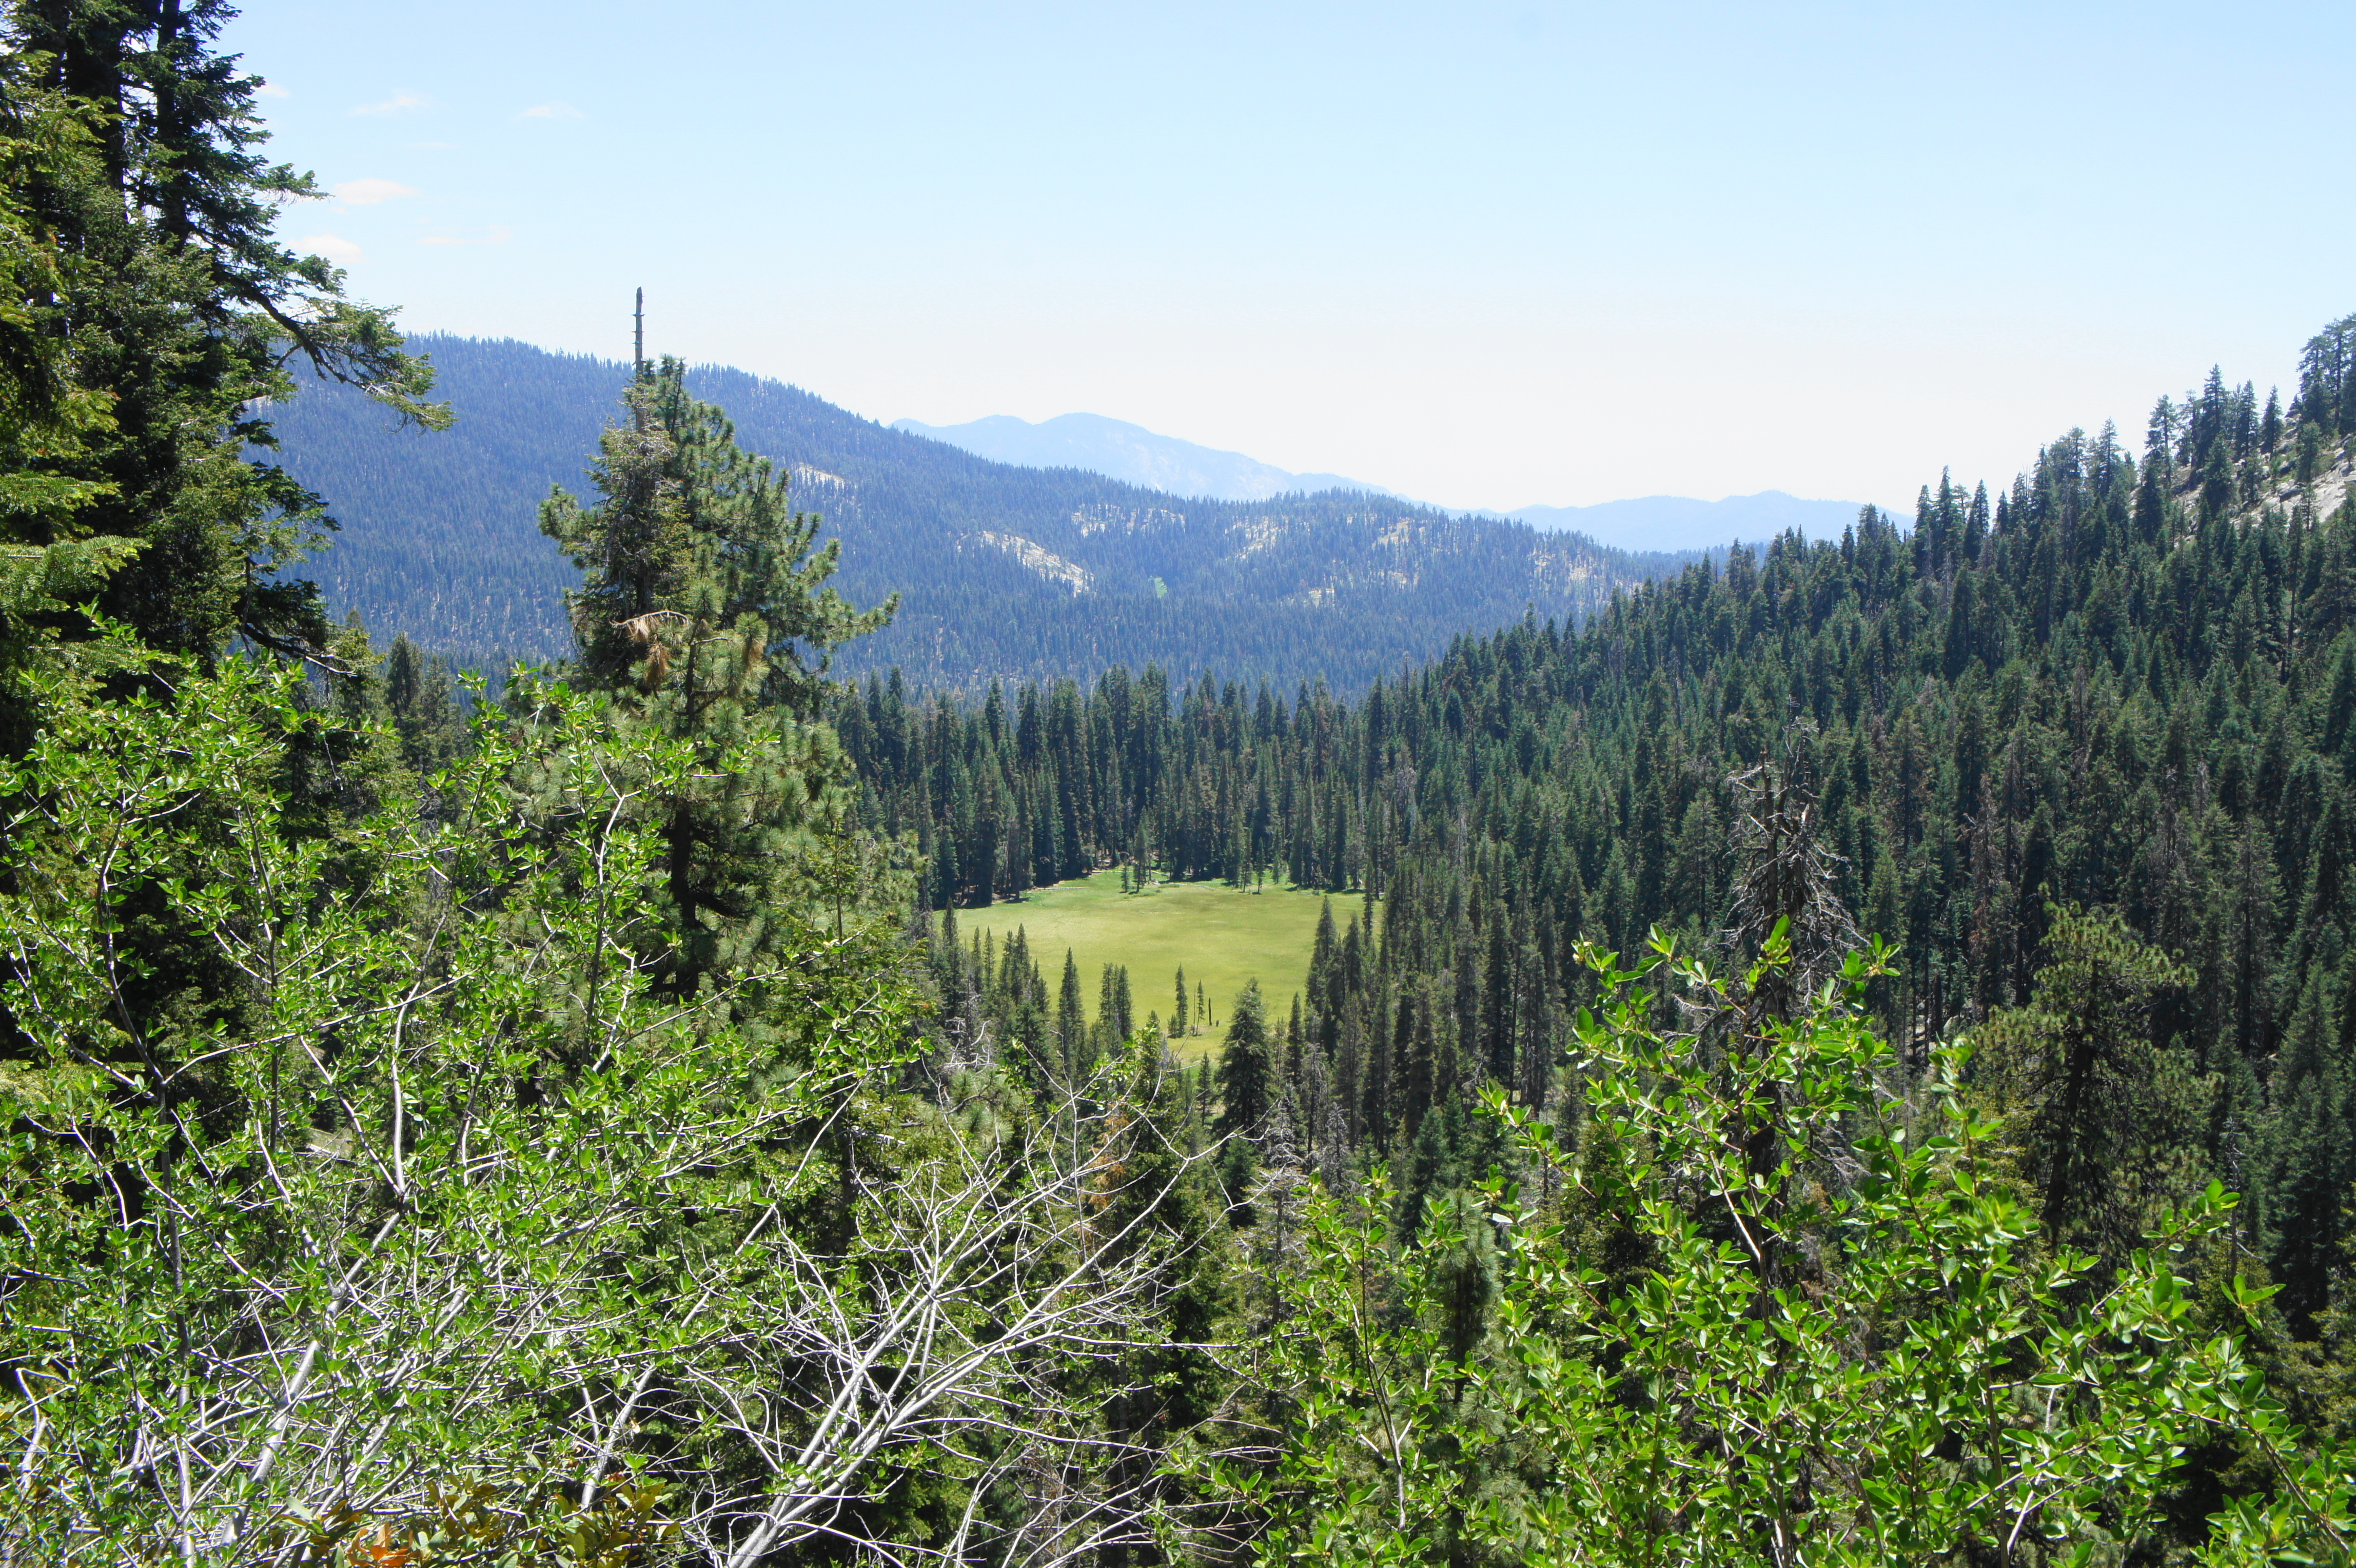
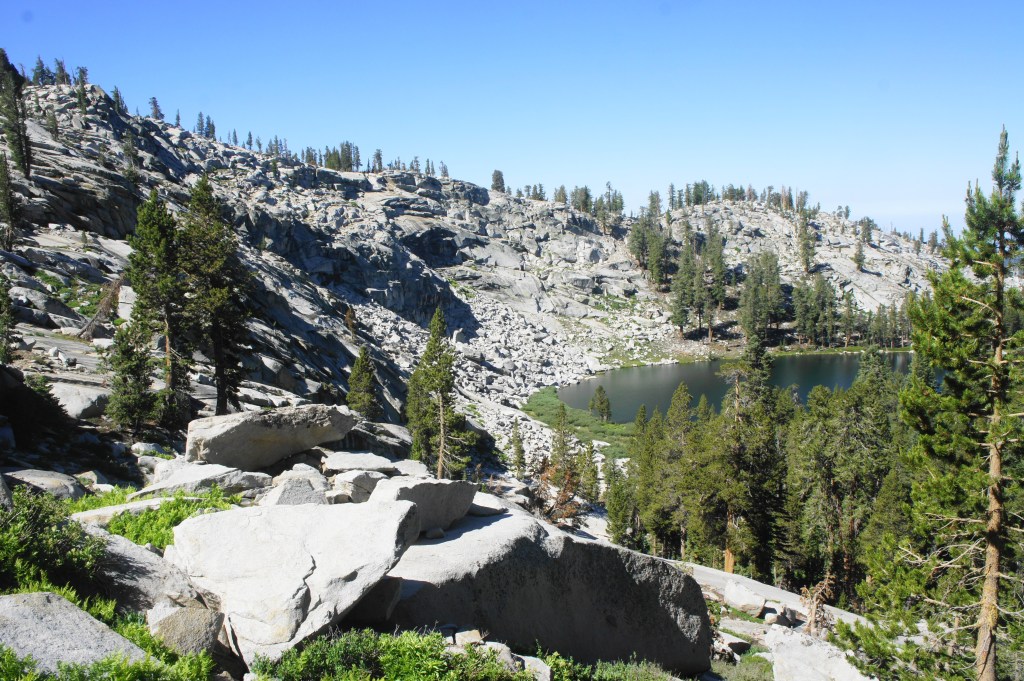
After traversing the creek, the trails enters a short but very steep stretch before easing again as the onward path bends westward, and then north again, to reach Cahoon Meadow. This broad carpet of greens and yellows is a favorite for mosquitoes but lovely outside of bloodsucker season (better by late July-August). To the north, a set of granite knobs rises to more than 9,200 feet, while another steep slope leads to outcrops off to the west that are more than 450 feet above the meadow. Cahoon Meadow makes for a decent snack/lunch break; hikers have gained nearly 1,000 feet in elevation by this point. (Note: There are a handful of campsites near the meadow.)
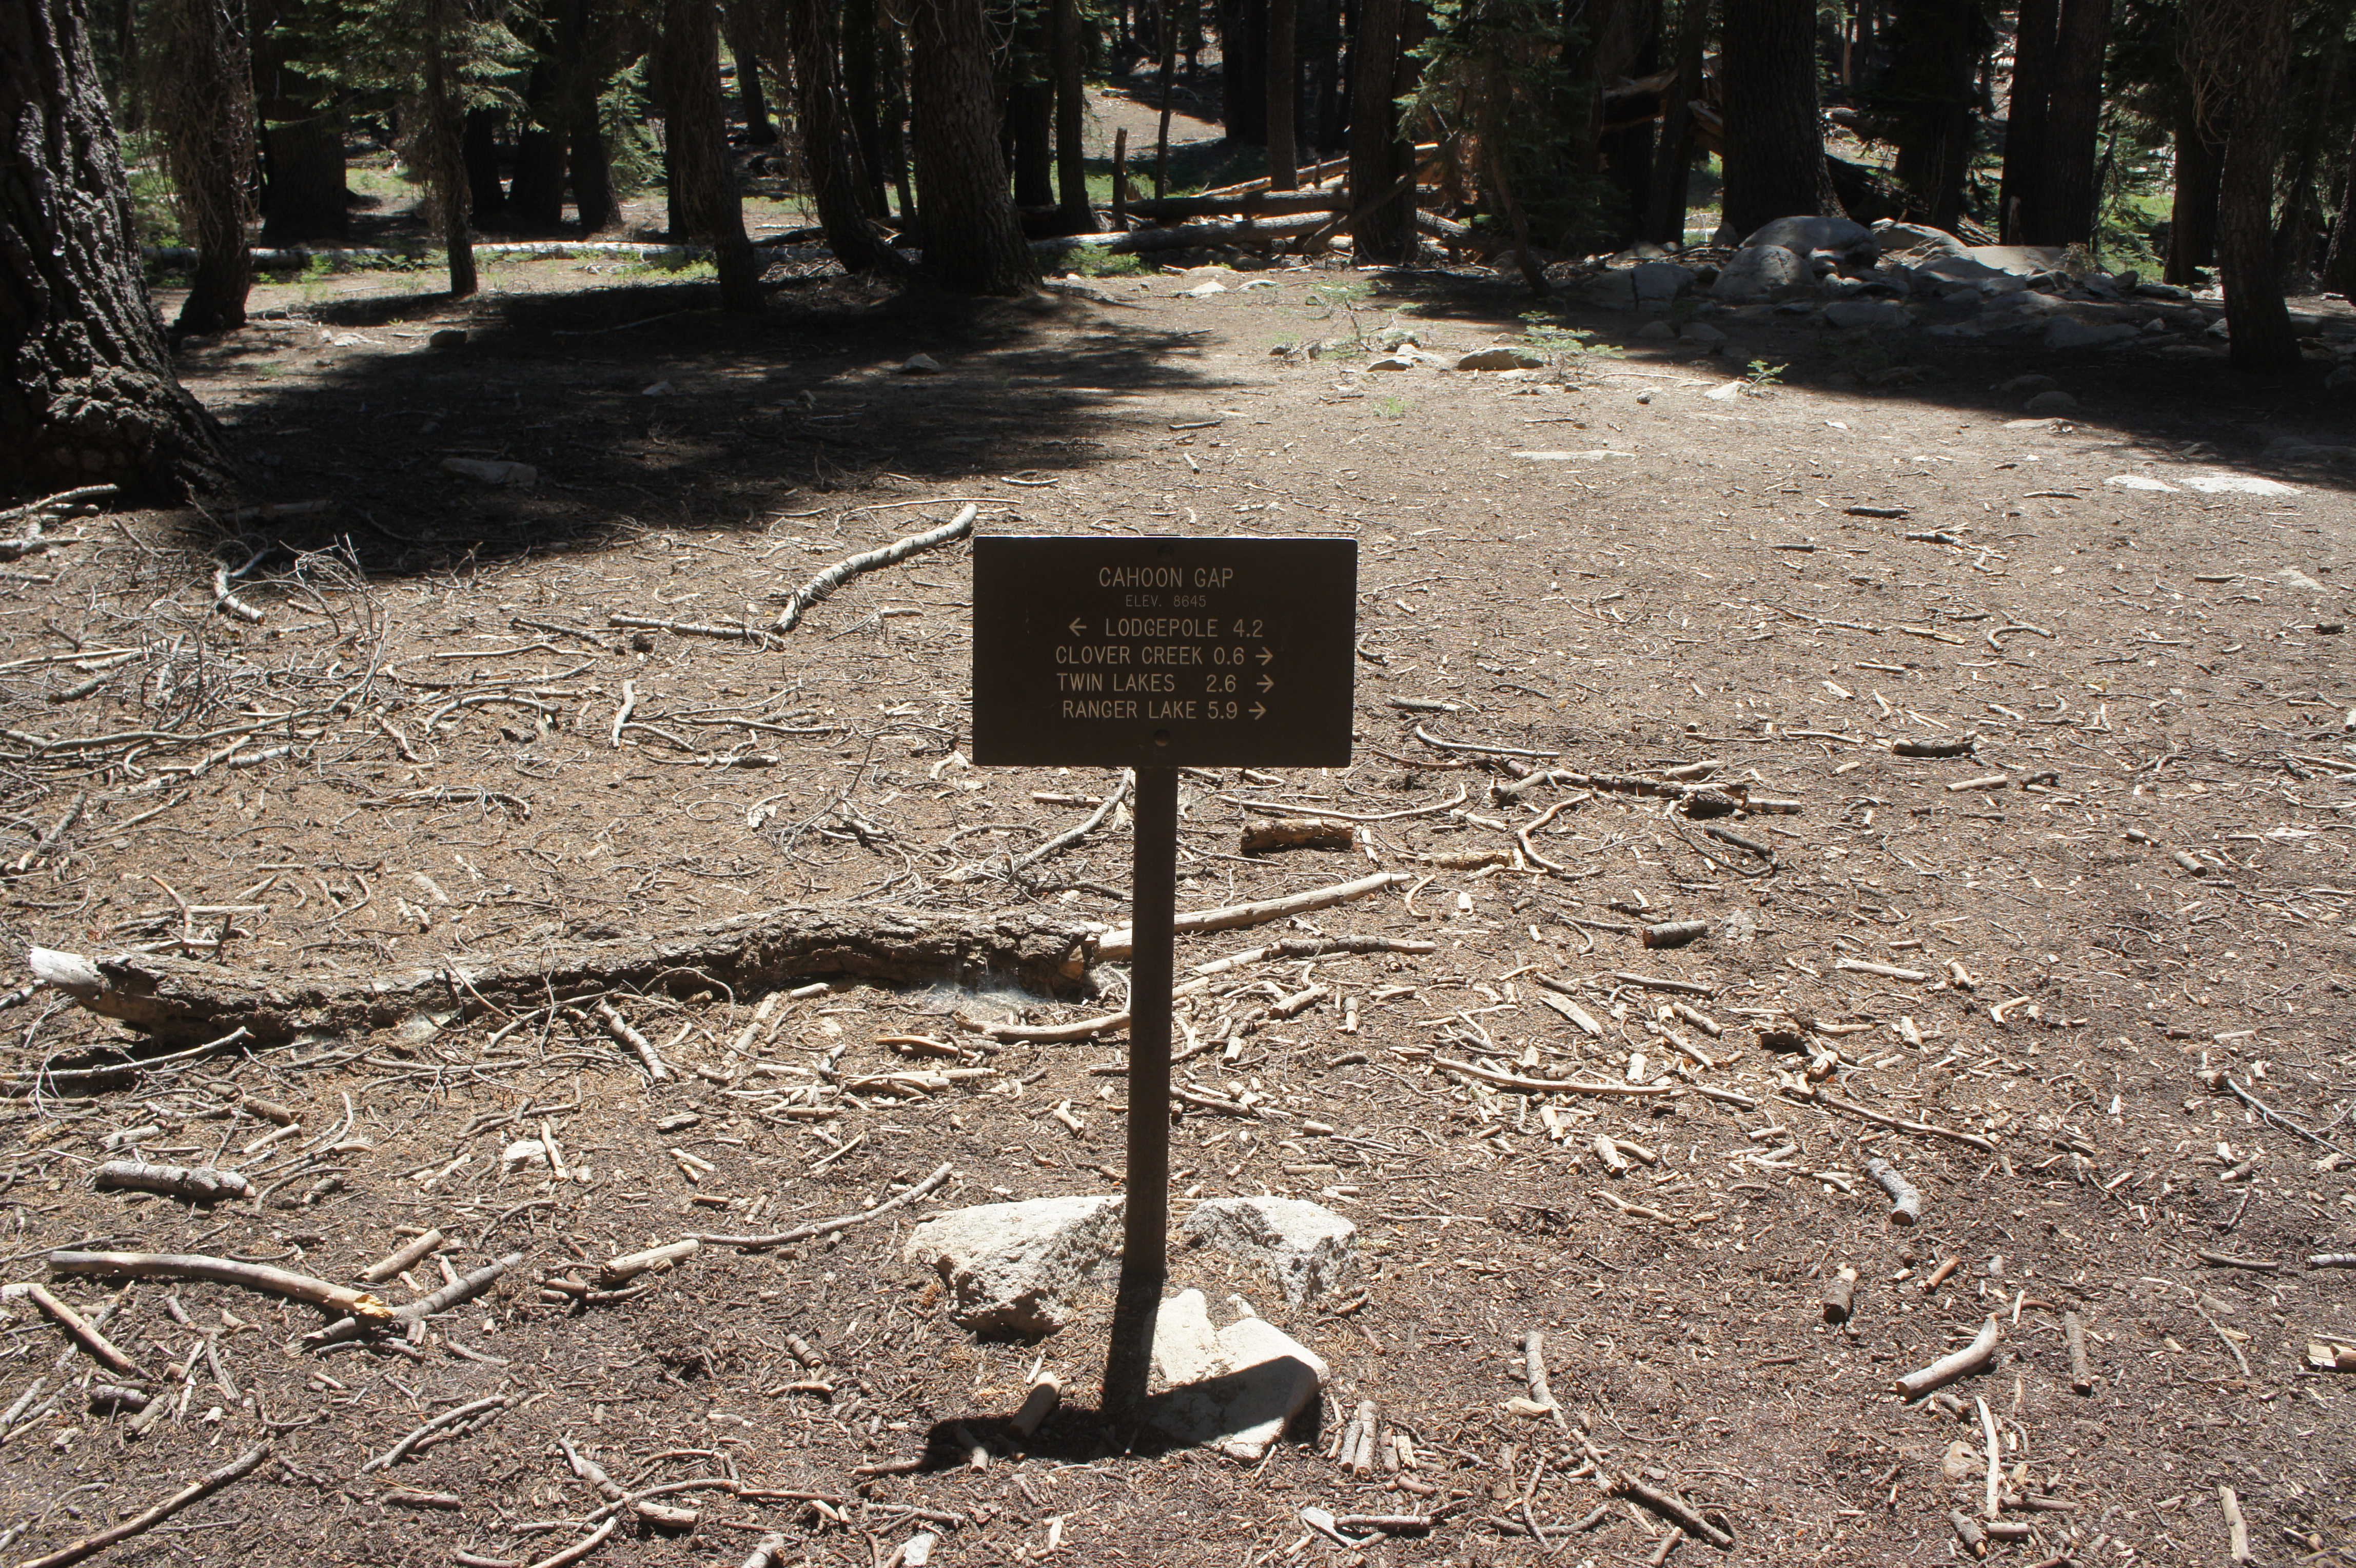
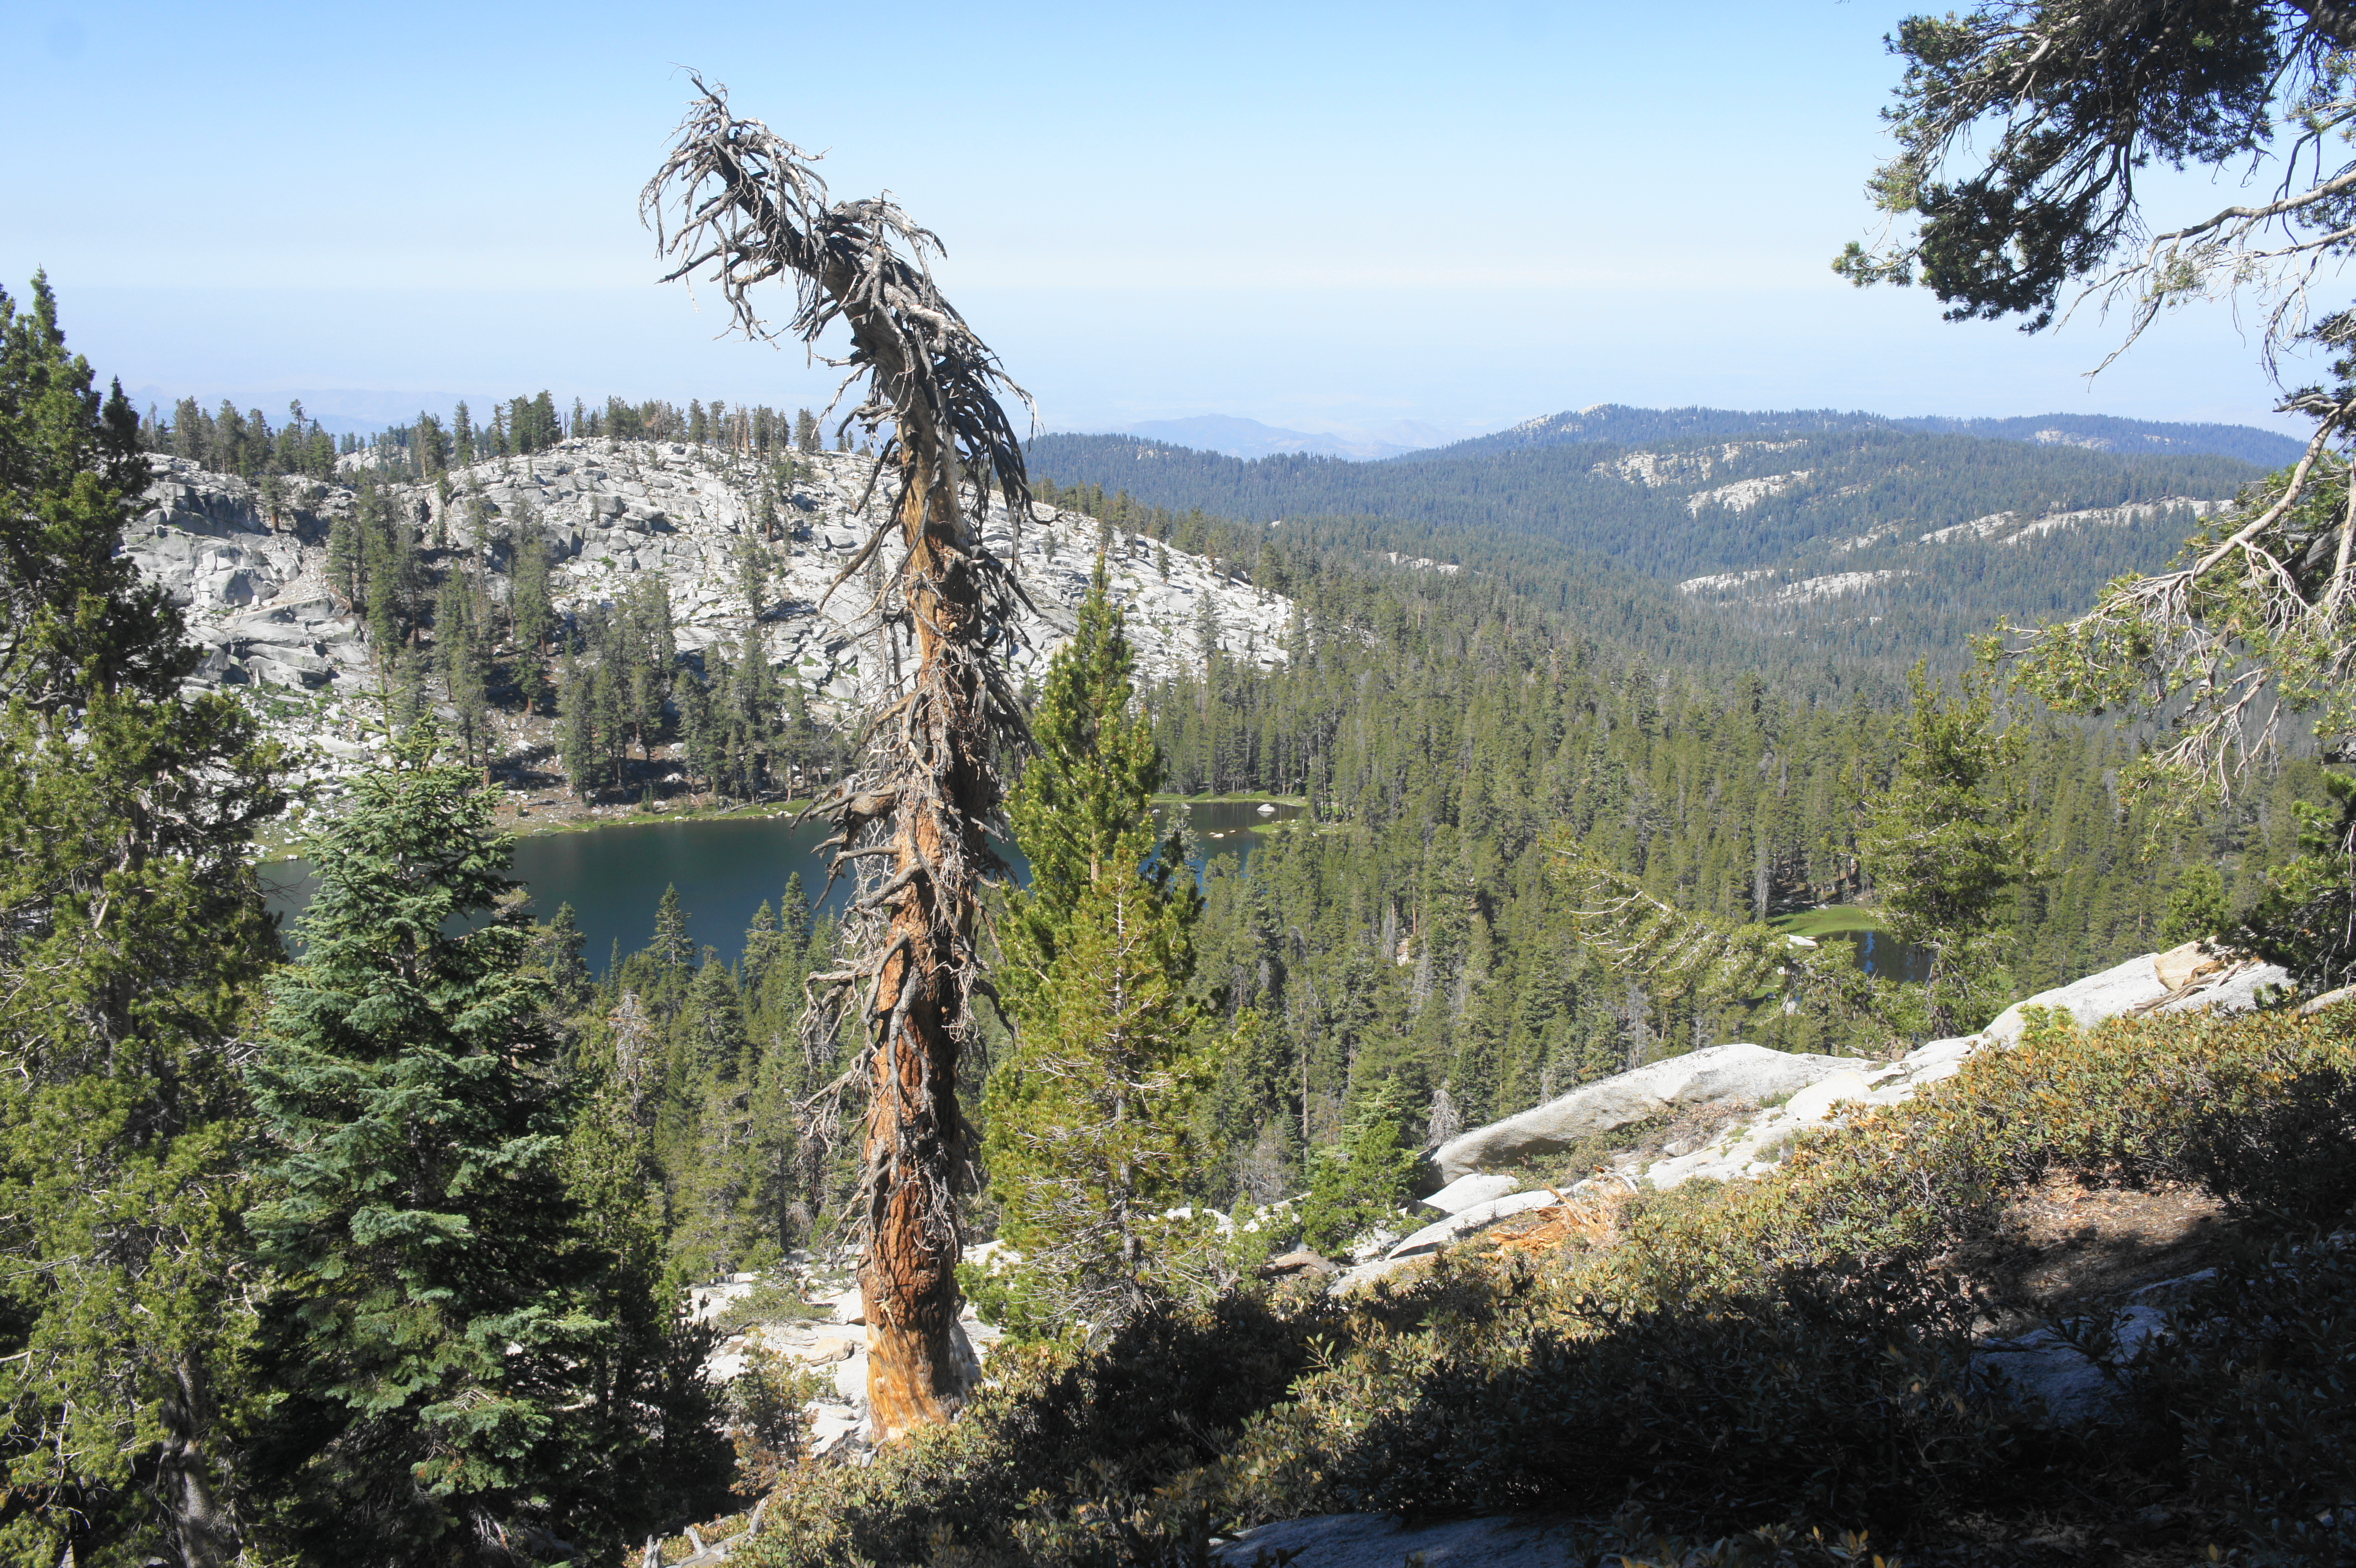
Past Cahoon Meadow, the Twin Lakes Trail enters another steady ascent at a moderate incline, eventually rising to a point with dramatic views looking back at the meadow, surrounded by pines. Tokopah Valley lurks beyond. From here it is another persistent climb to Cahoon Gap (8,645’), a vista-less pass between the Silliman and Clover Creek drainages that is located about four miles into the hike.
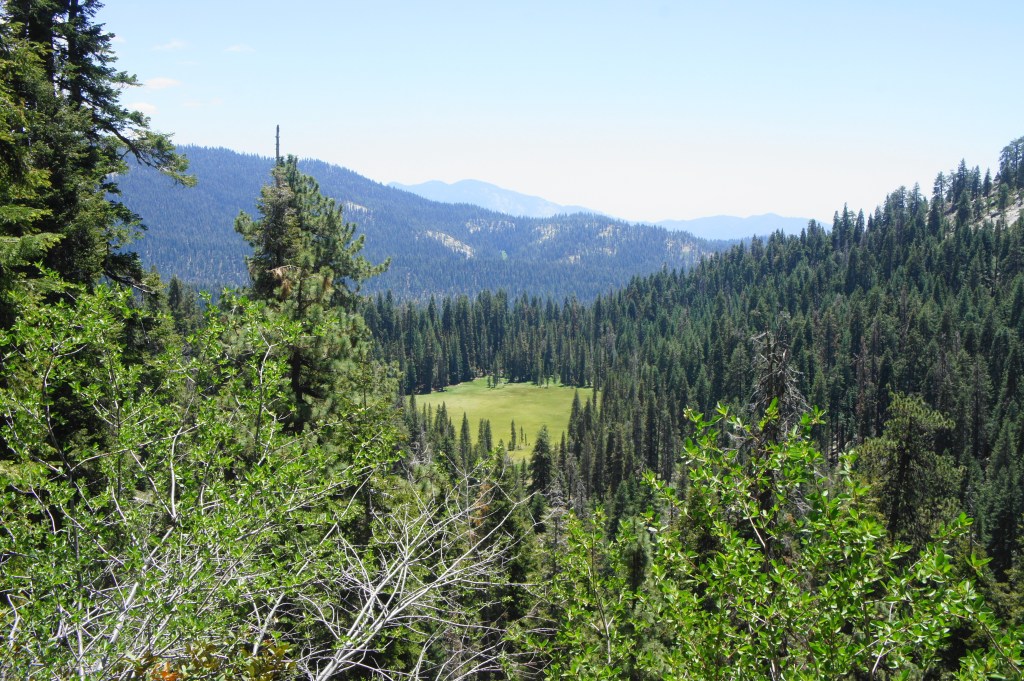
View back toward Cahoon Meadow and Lodgepole 
Marker at Cahoon Gap (8,645′)
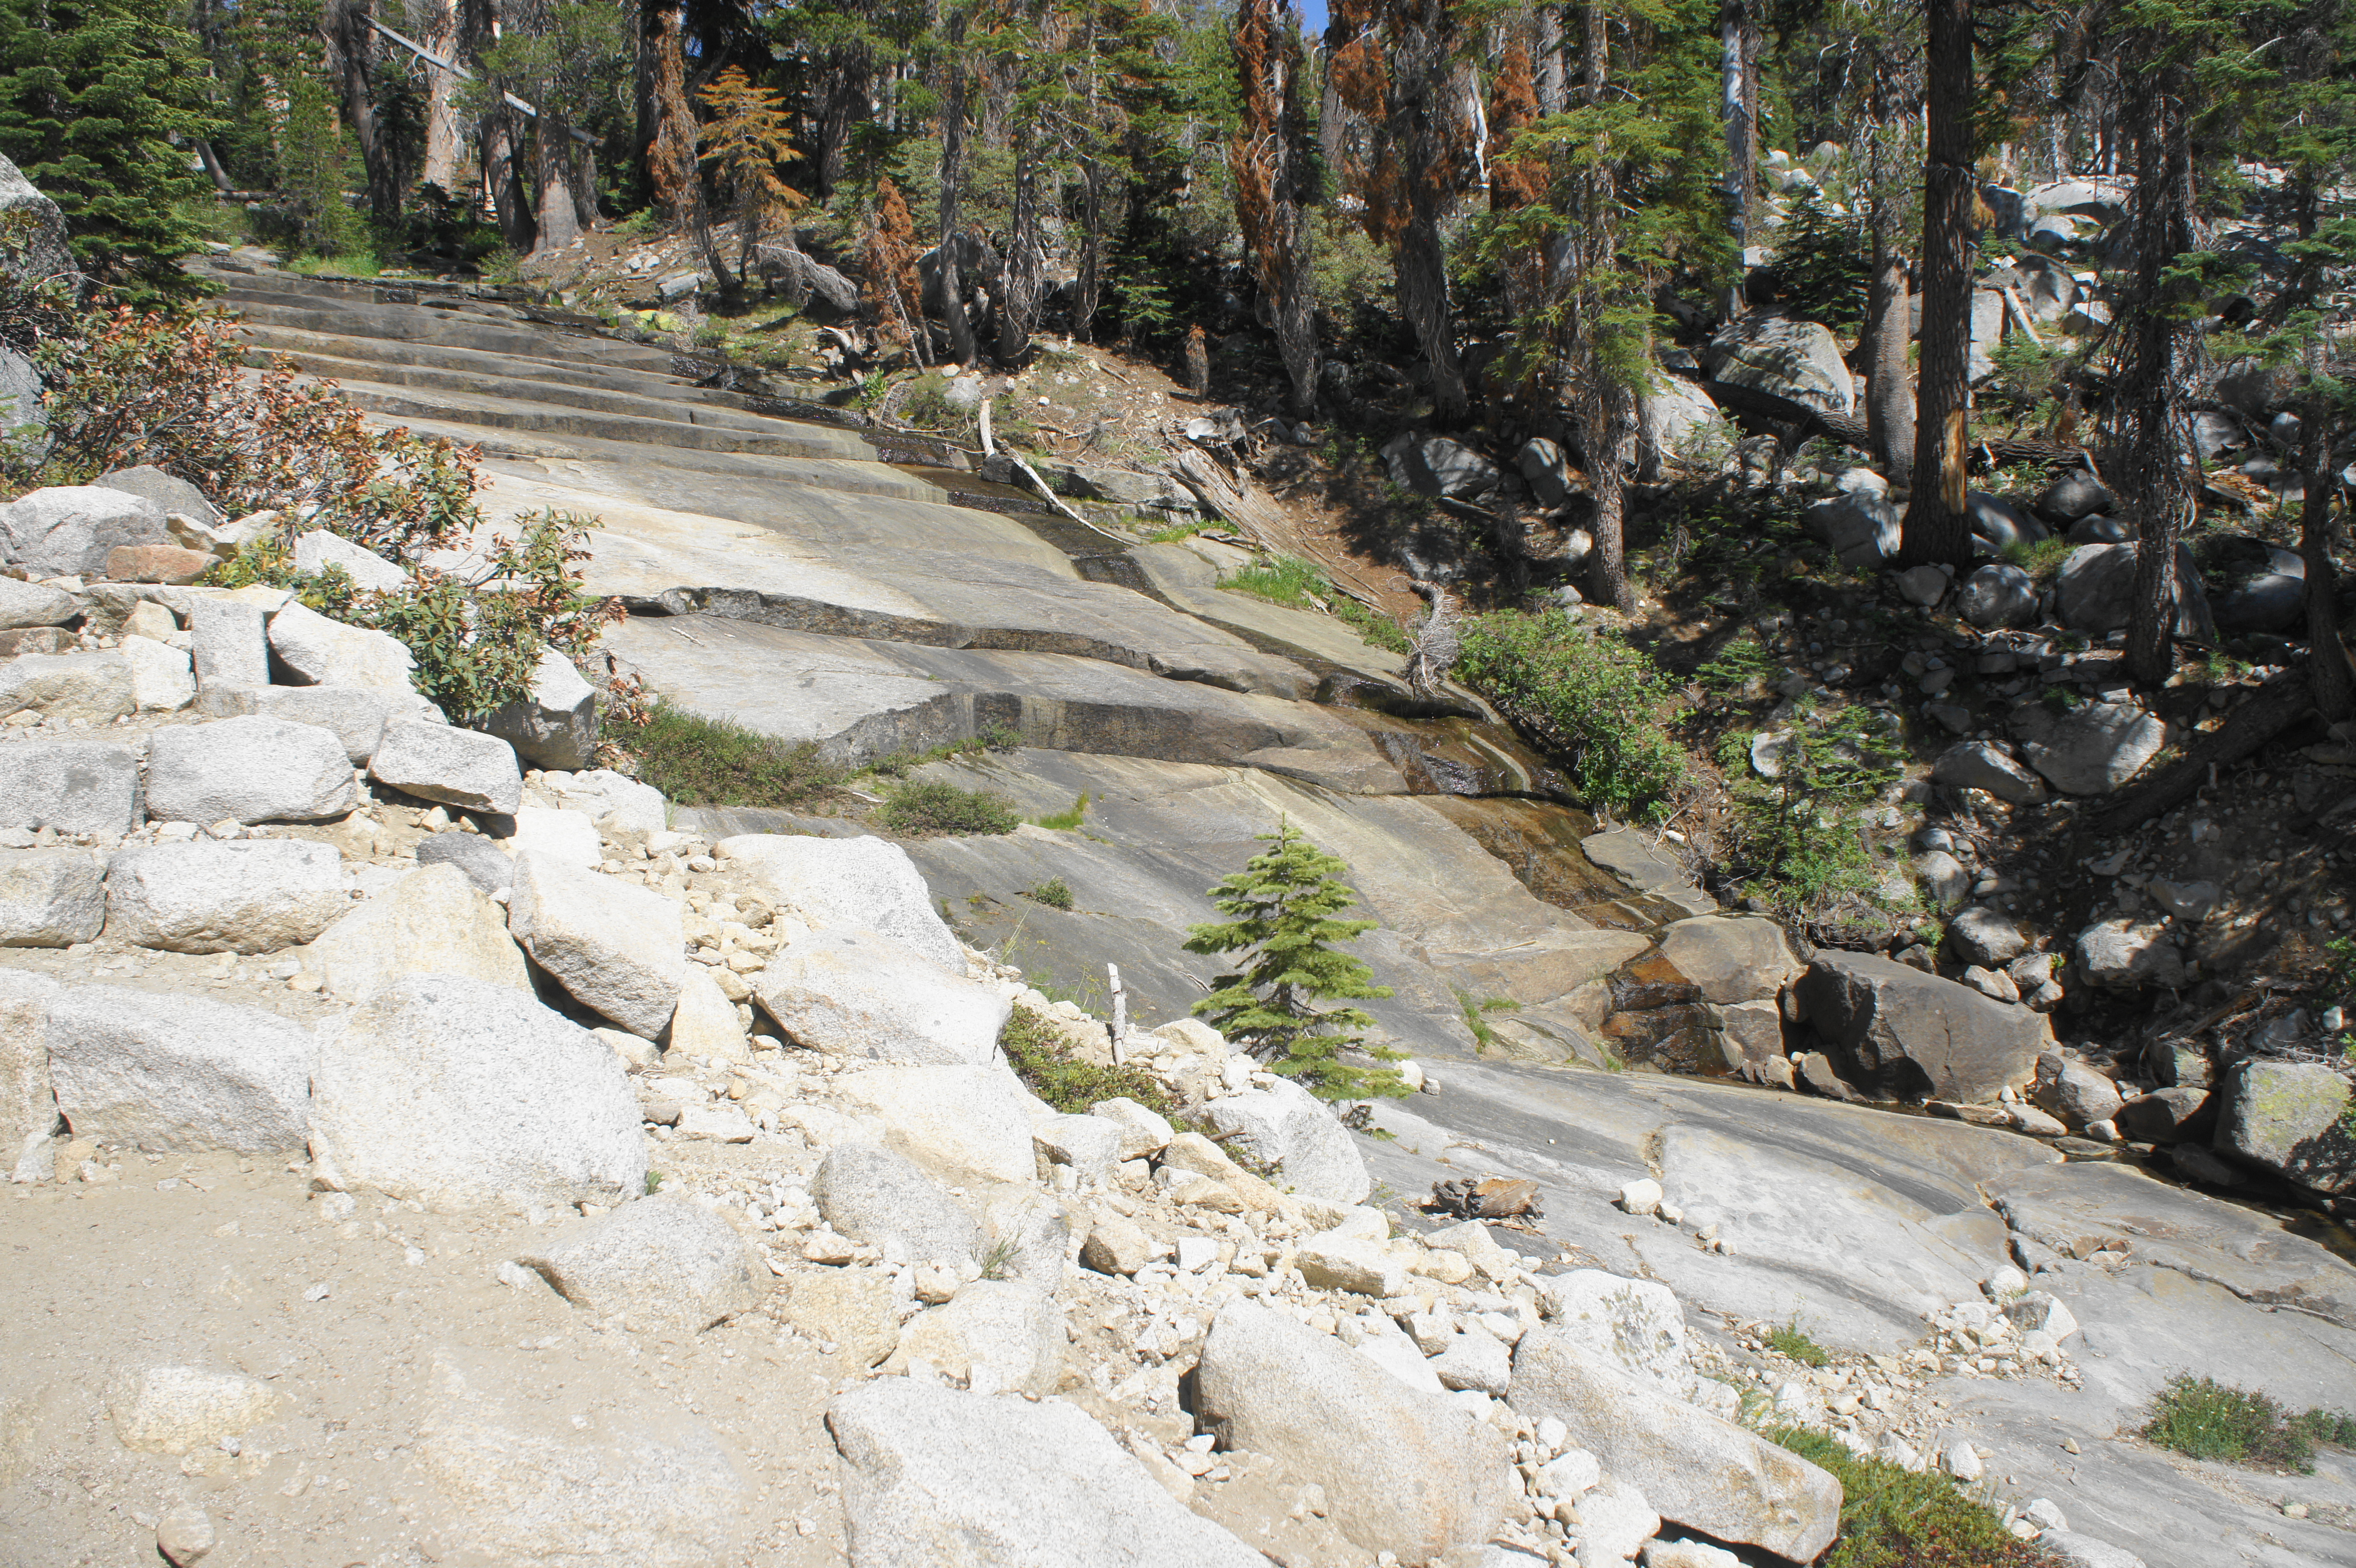
Beyond the gap, the trail sheds more than 200 feet in elevation as it drops to clear a usually-flowing tributary stream and then climbs again, reaching another trail junction at about the five-mile mark. Here a trail servicing JO Pass (9,414’) and the Jennie Lakes Wilderness comes in from the left; stay right, beginning to turn east toward Twin Lakes and the Silliman Crest, keeping the East Fork of Clover Creek off to the left. After fording the (often dry) creek, the Twin Lakes Trail continues a steady climb through dense tree cover, reaching a rocky bend at about 5.5 miles, where the trail approaches—but does not cross—a cascading drainage. This is the East Fork of Clover Creek again and, surprisingly, holds less water than the flowing tributary encountered just 30 minutes earlier. The lack of flow (especially in late summer) reveals a stair-step chute of granite, which forms the bedrock of the stream.
Beyond this point, the trail still has 700 feet in elevation gain to go before reaching Twin Lakes, and thus the grade steepens as the path ascends rocky switchbacks. This final grind covers the remaining gain in the course of just over a mile, at last emerging in a beautiful cirque nestled in the side of the Kings-Kaweah Divide, composed largely of chalky granodiorite rock.

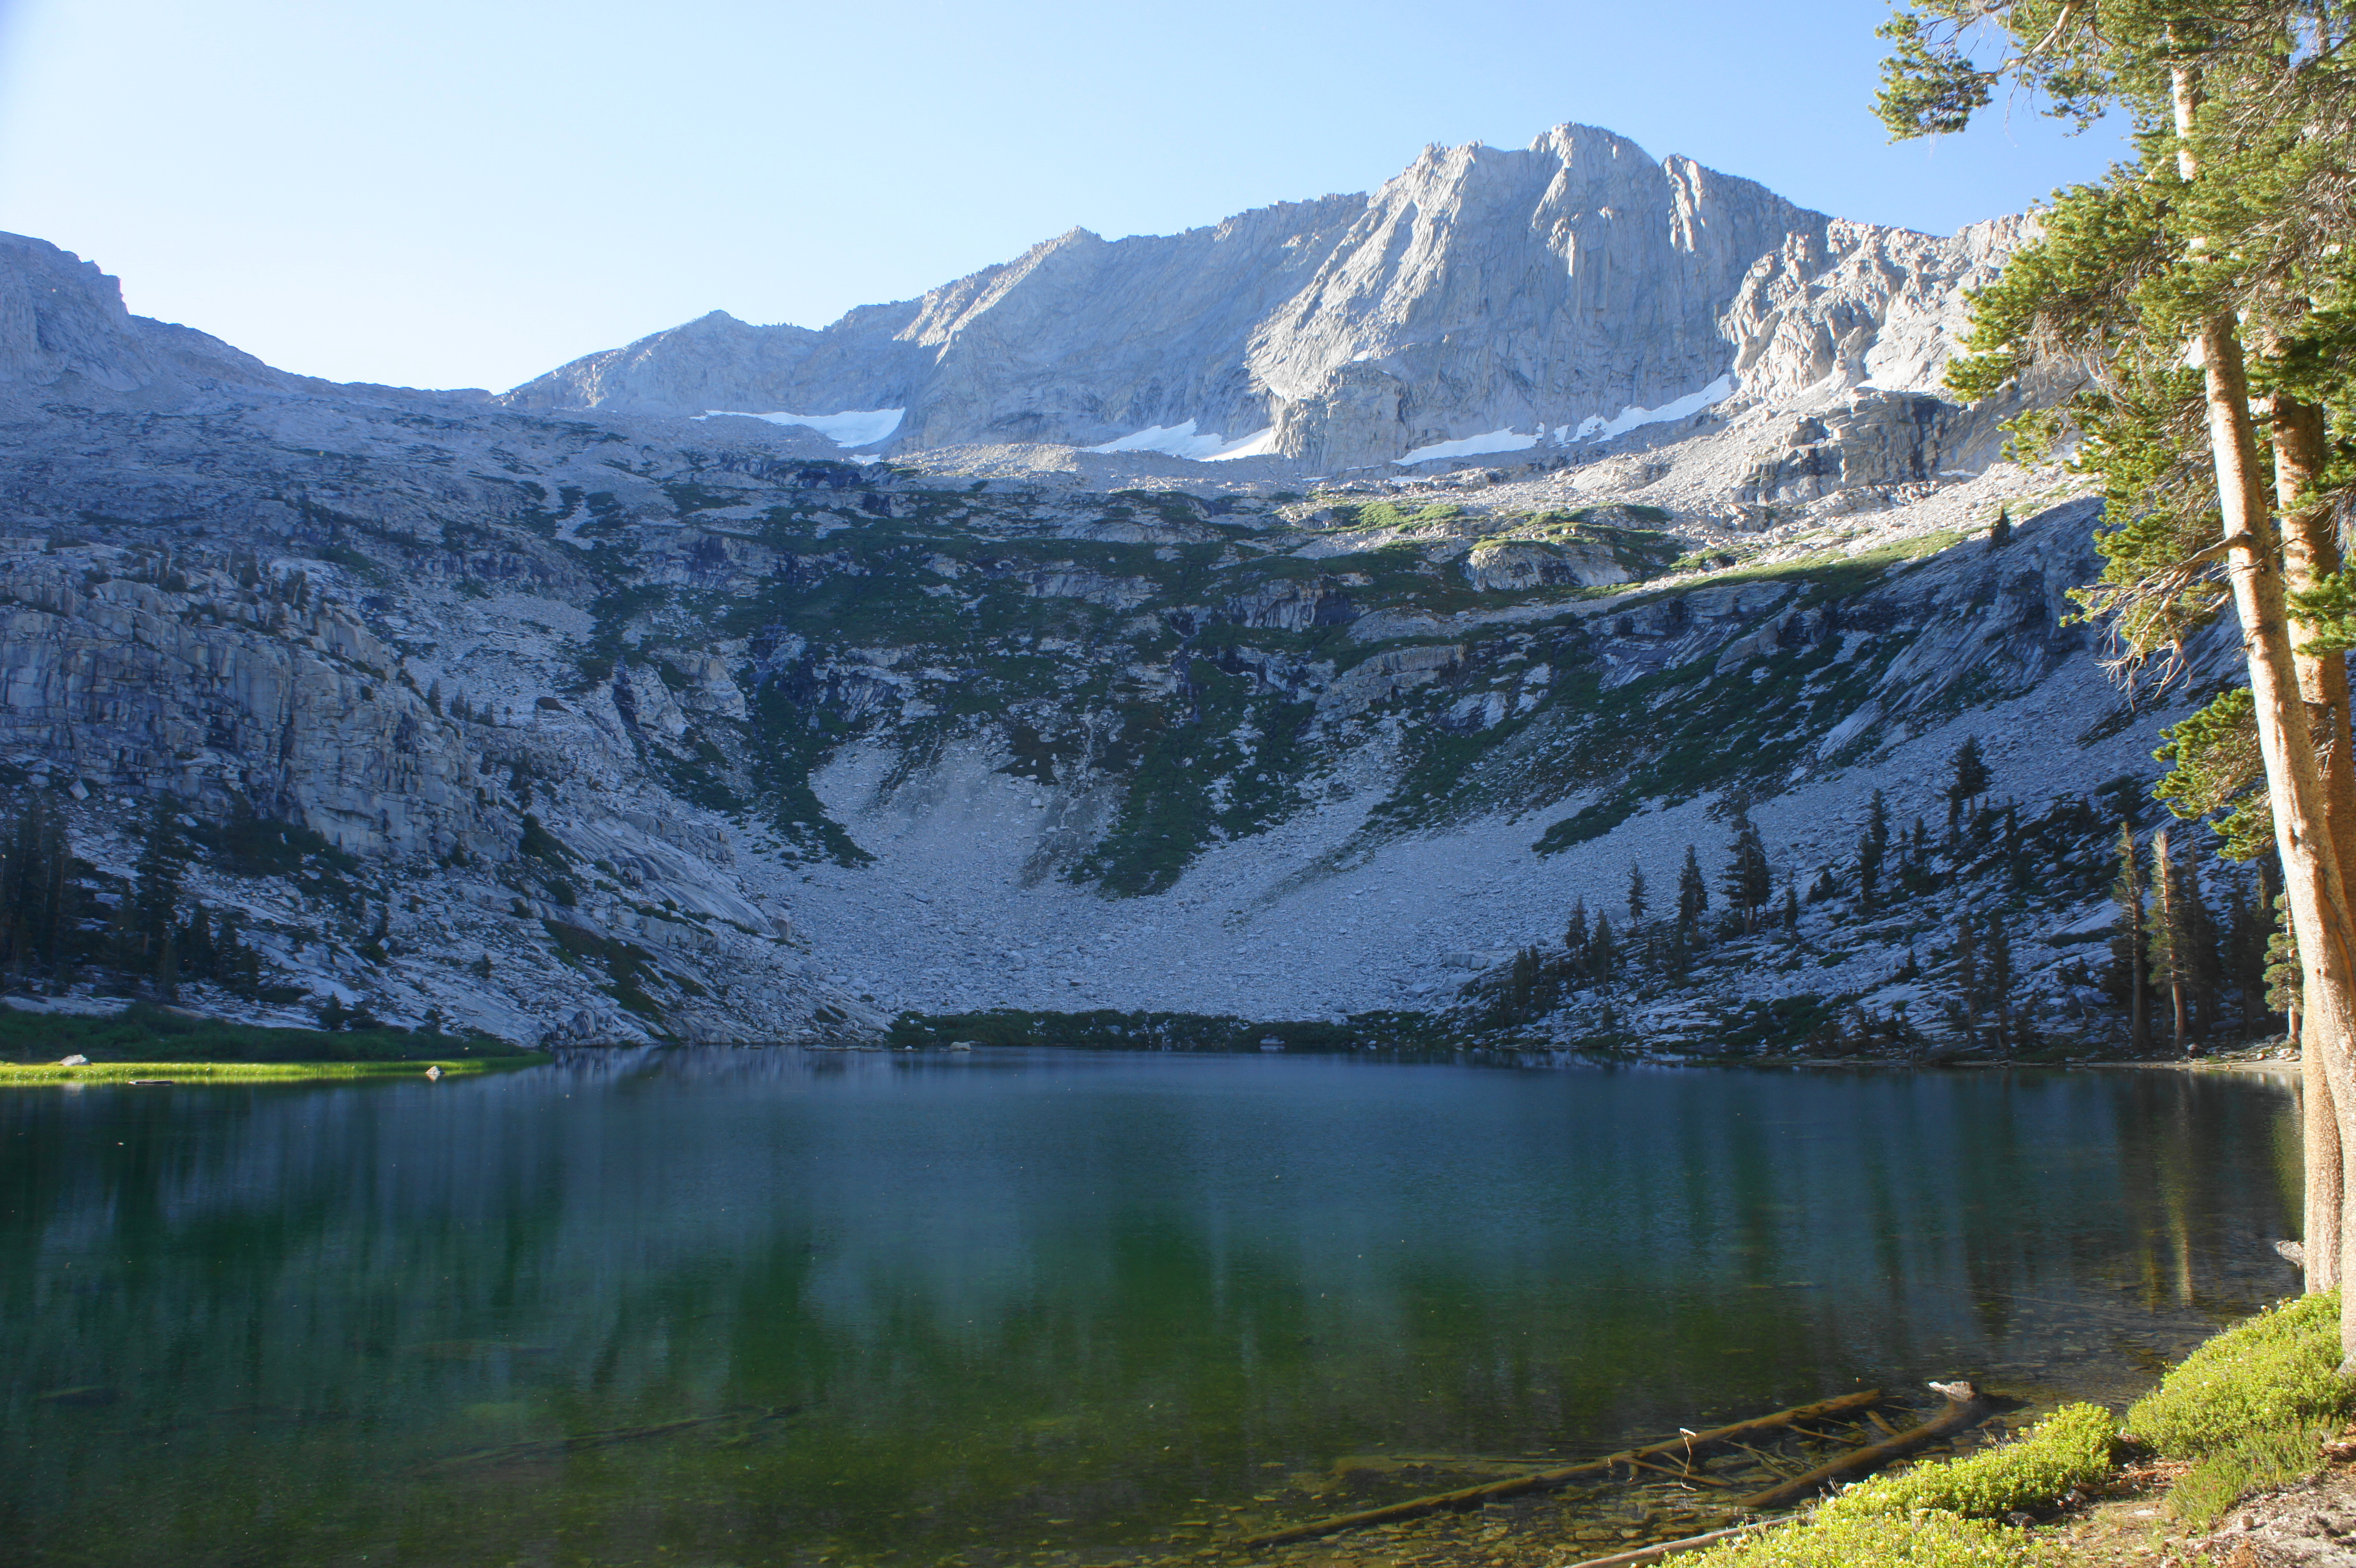
Little Twin Lake 
Big Twin Lake
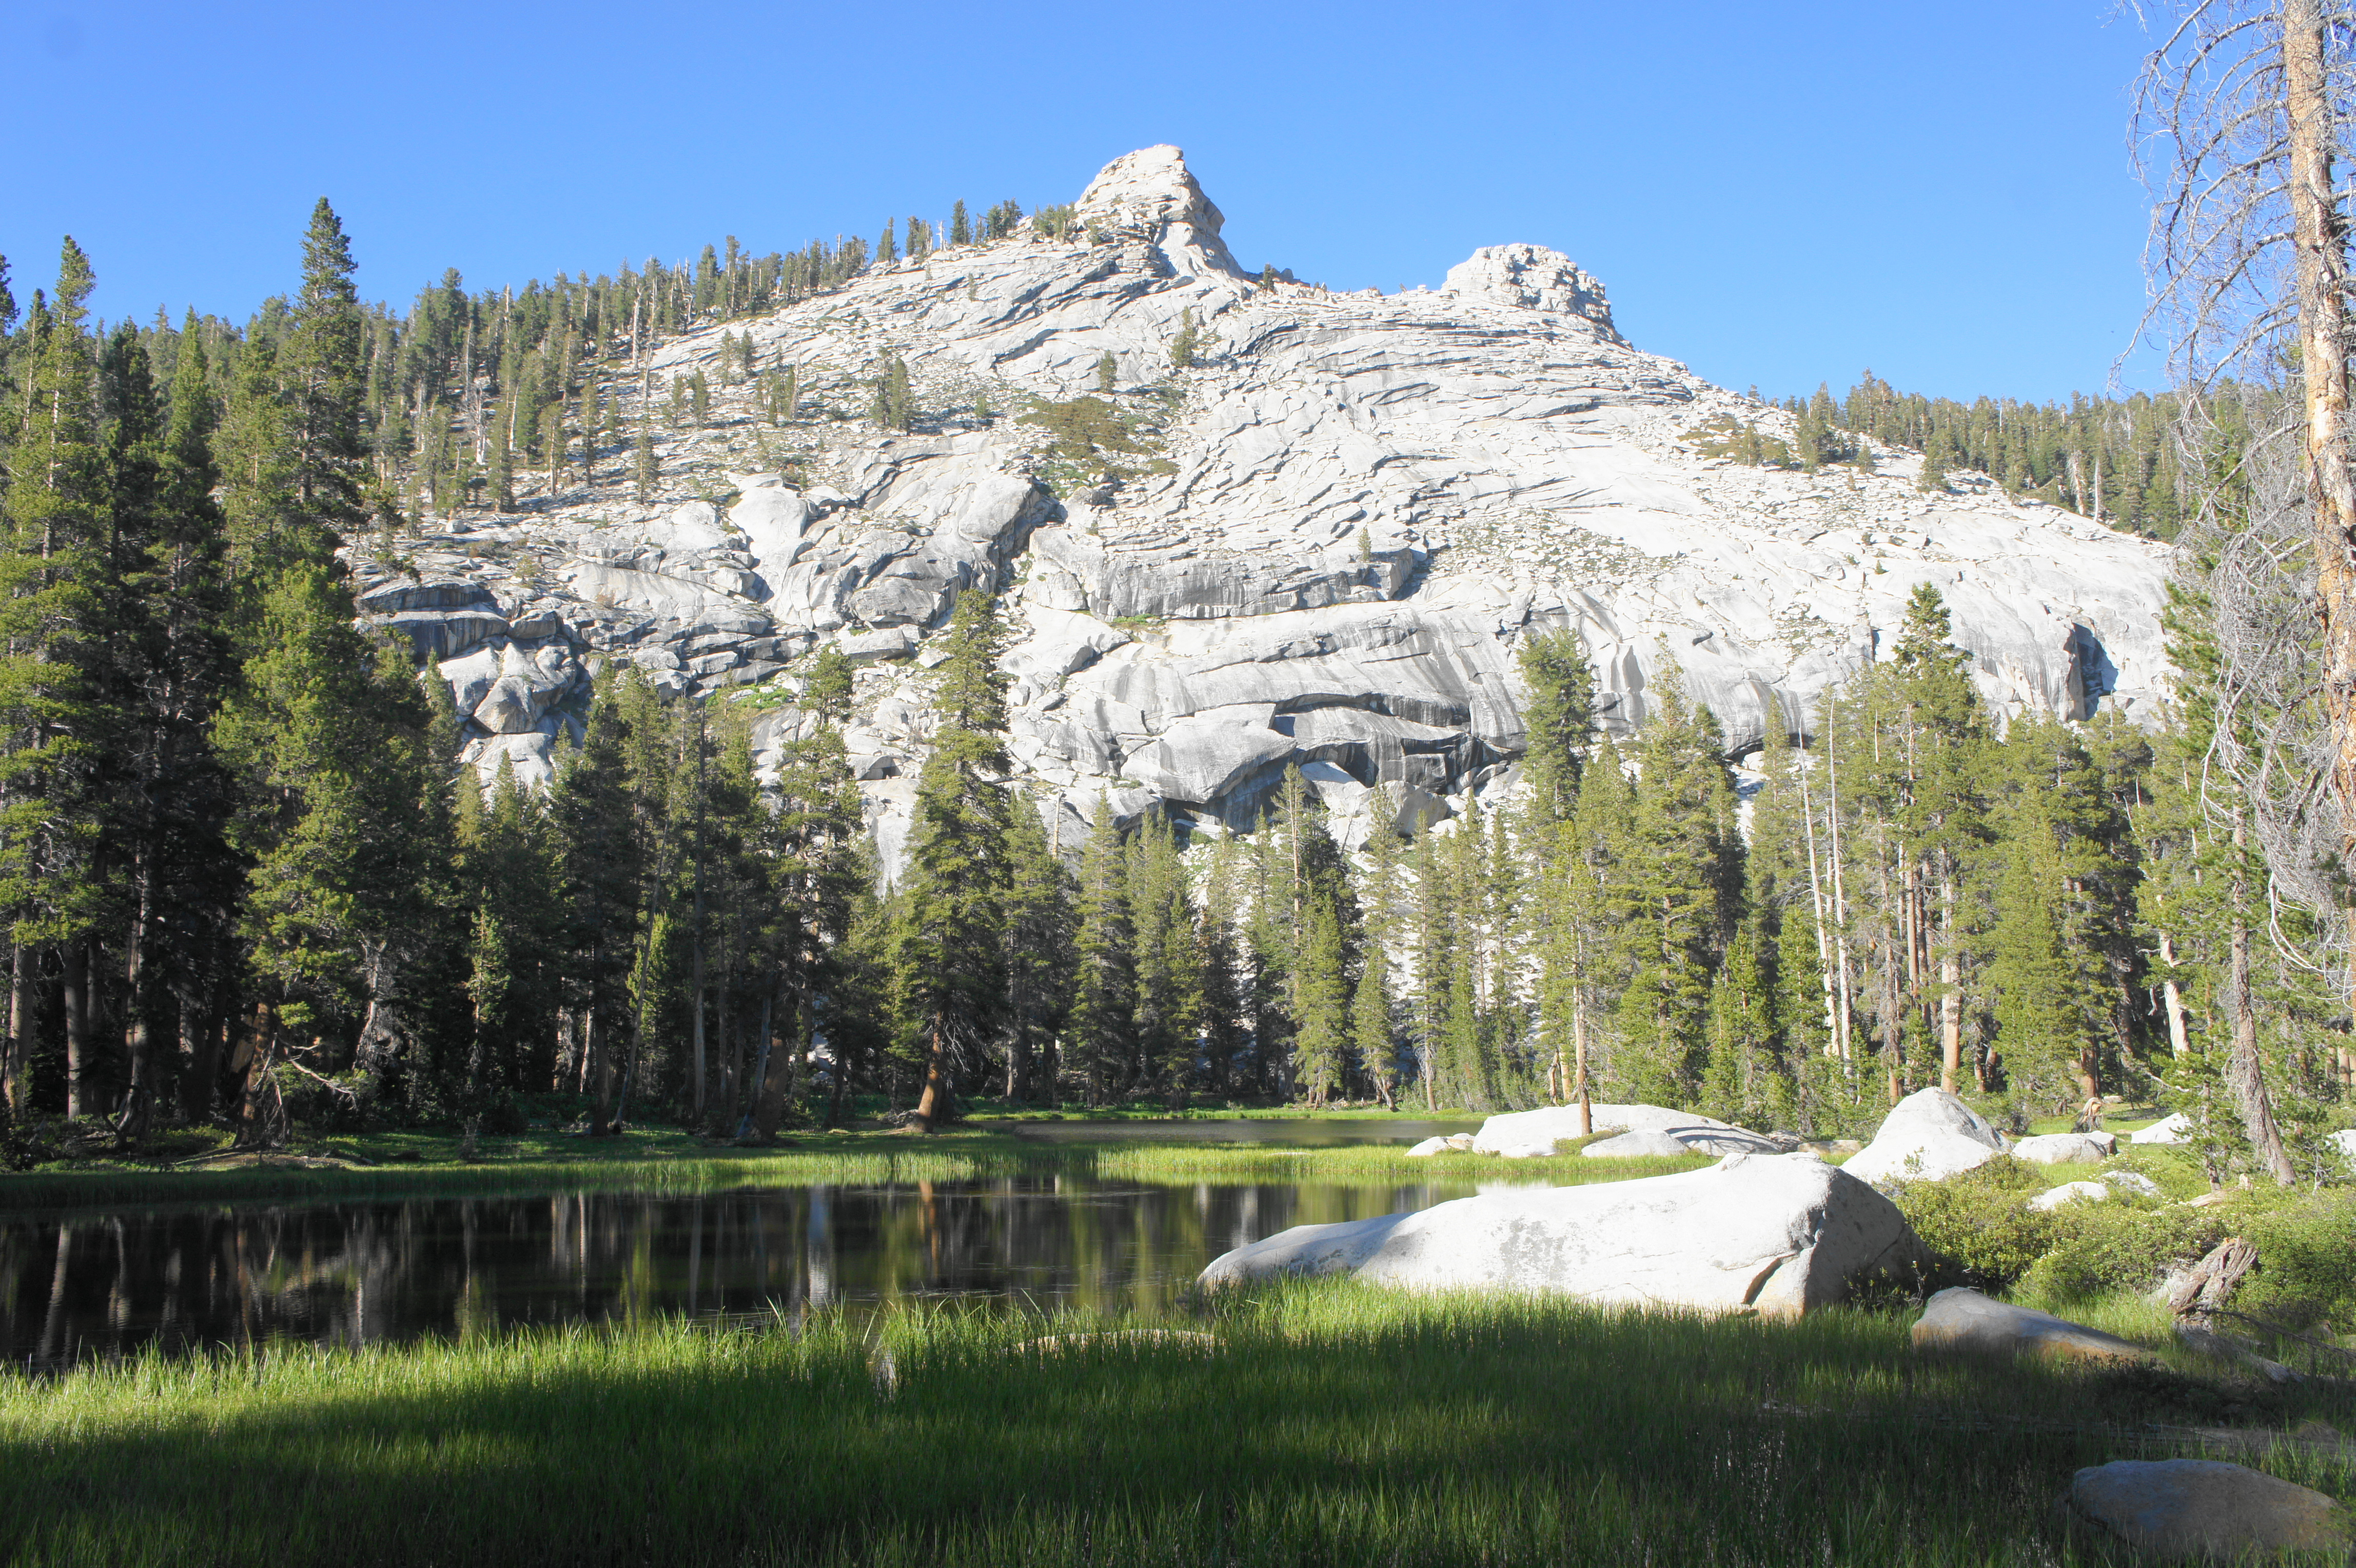
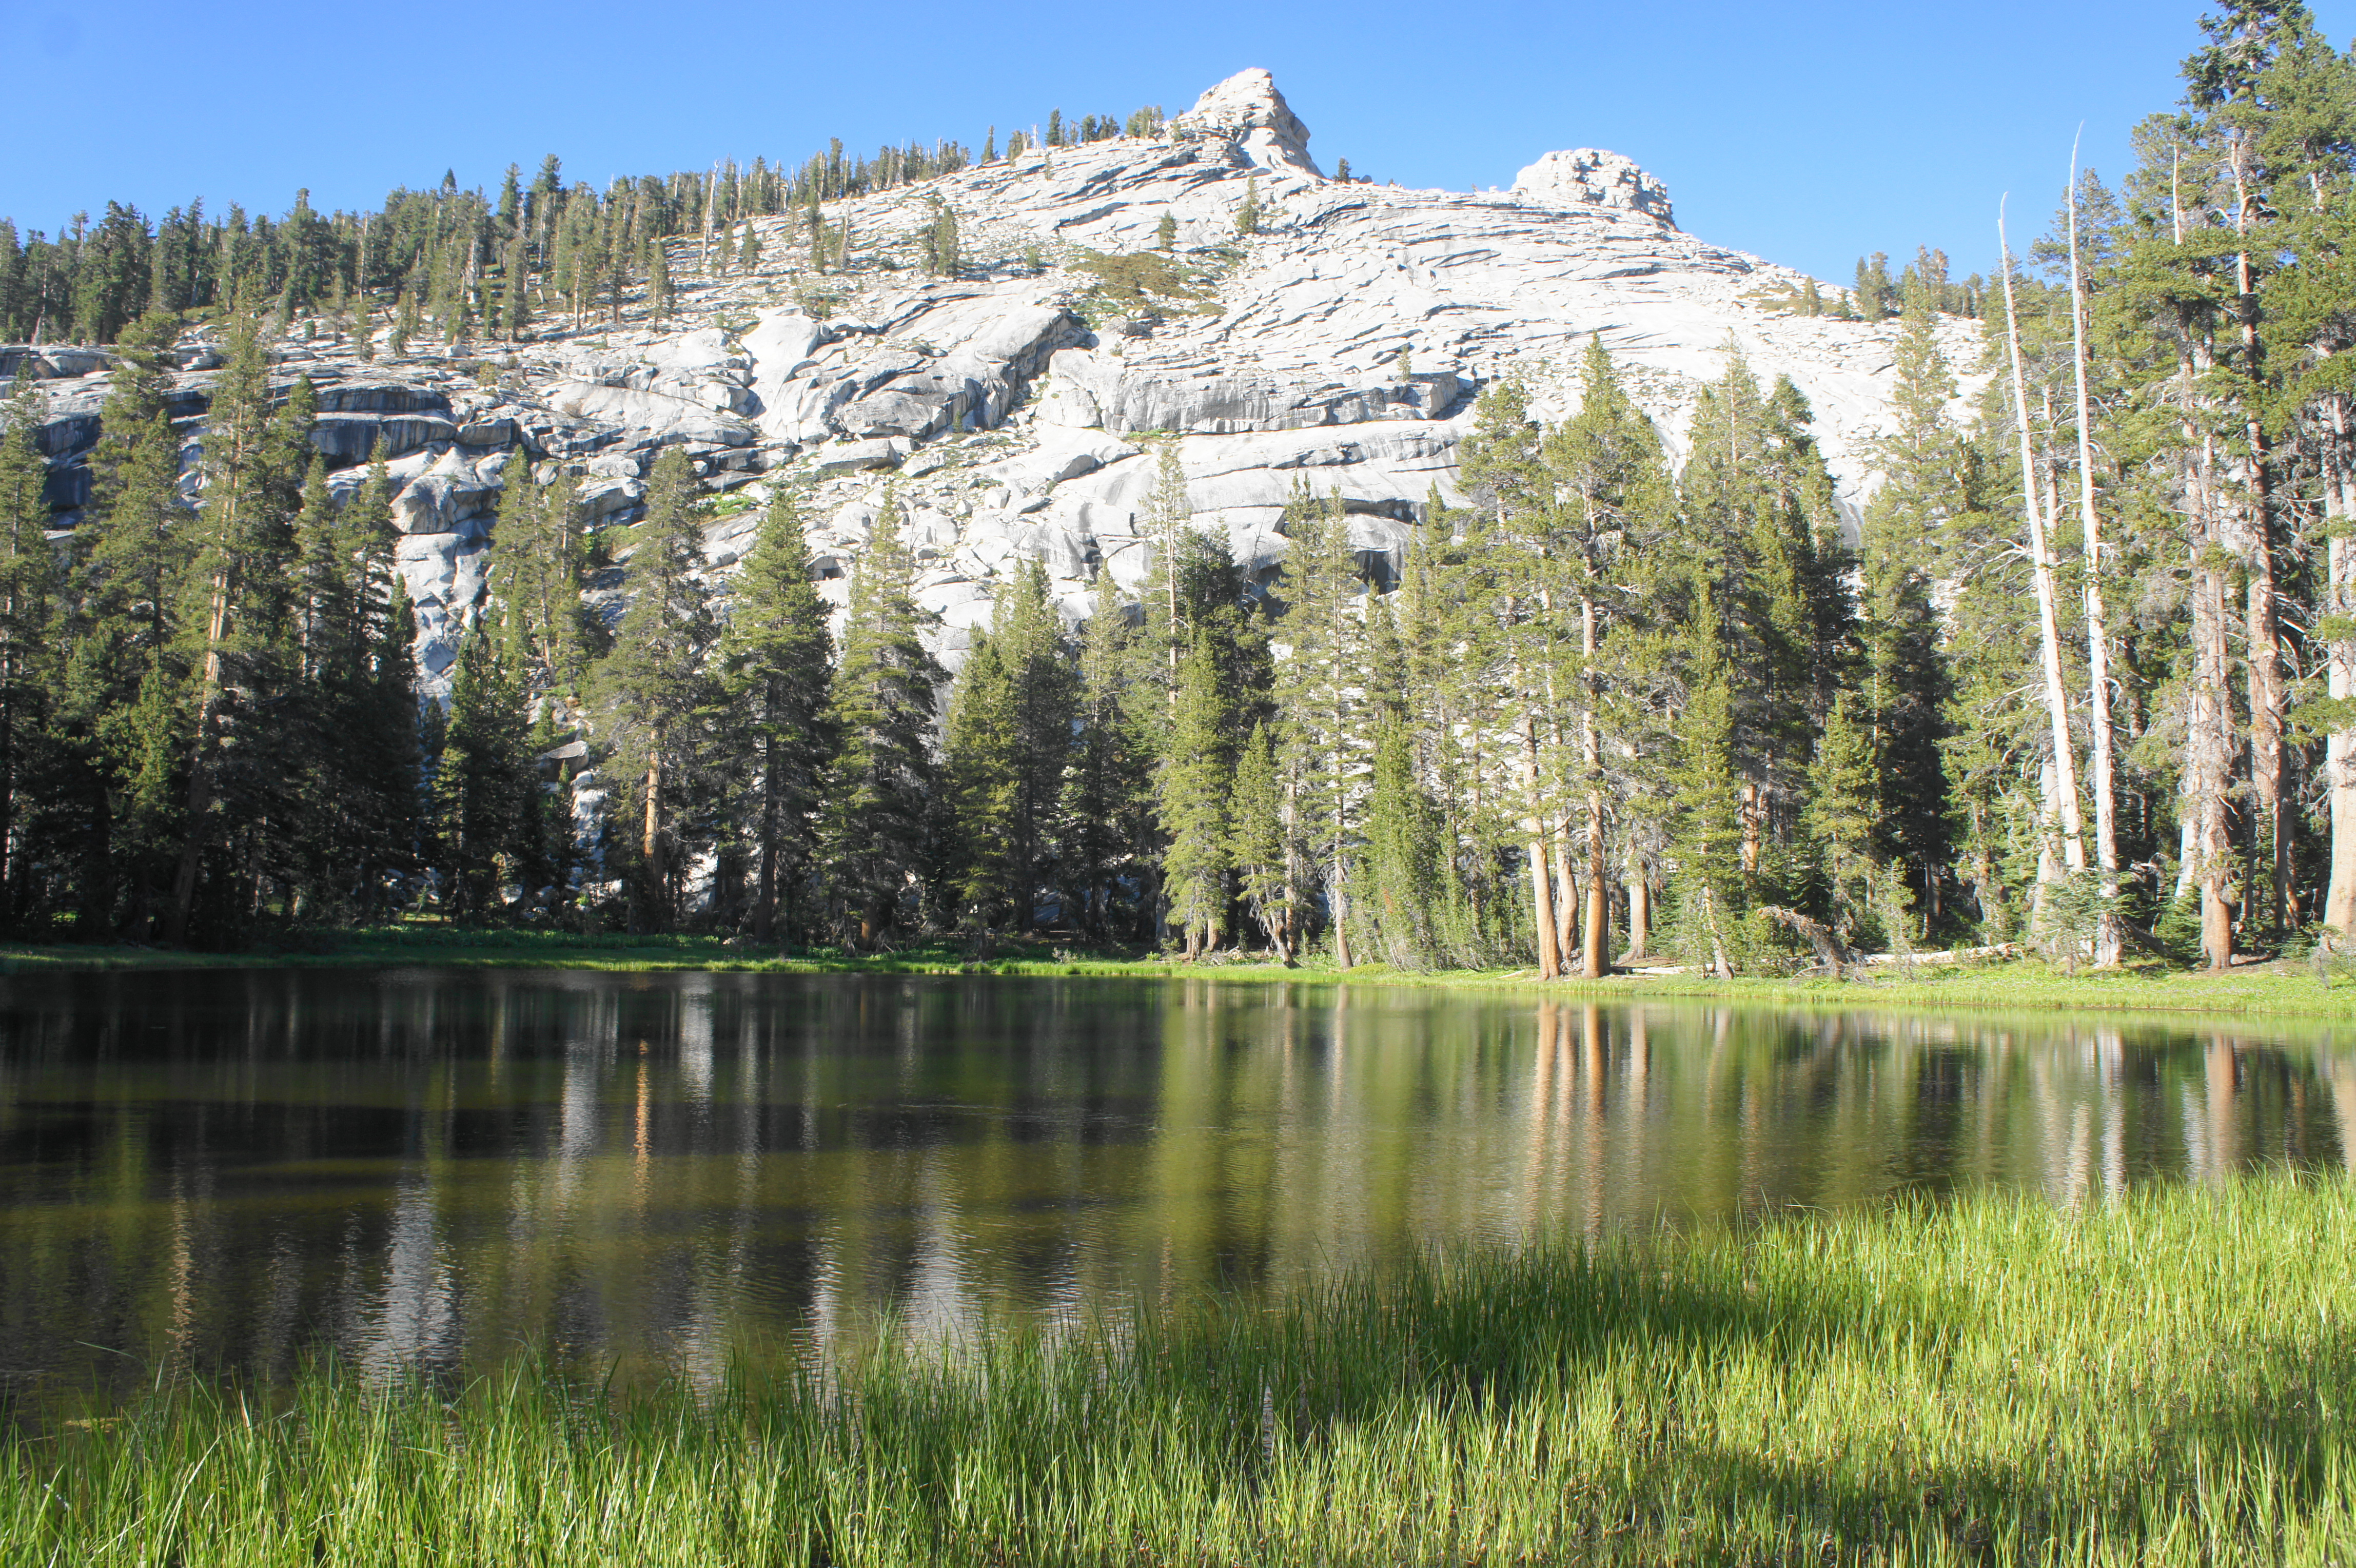
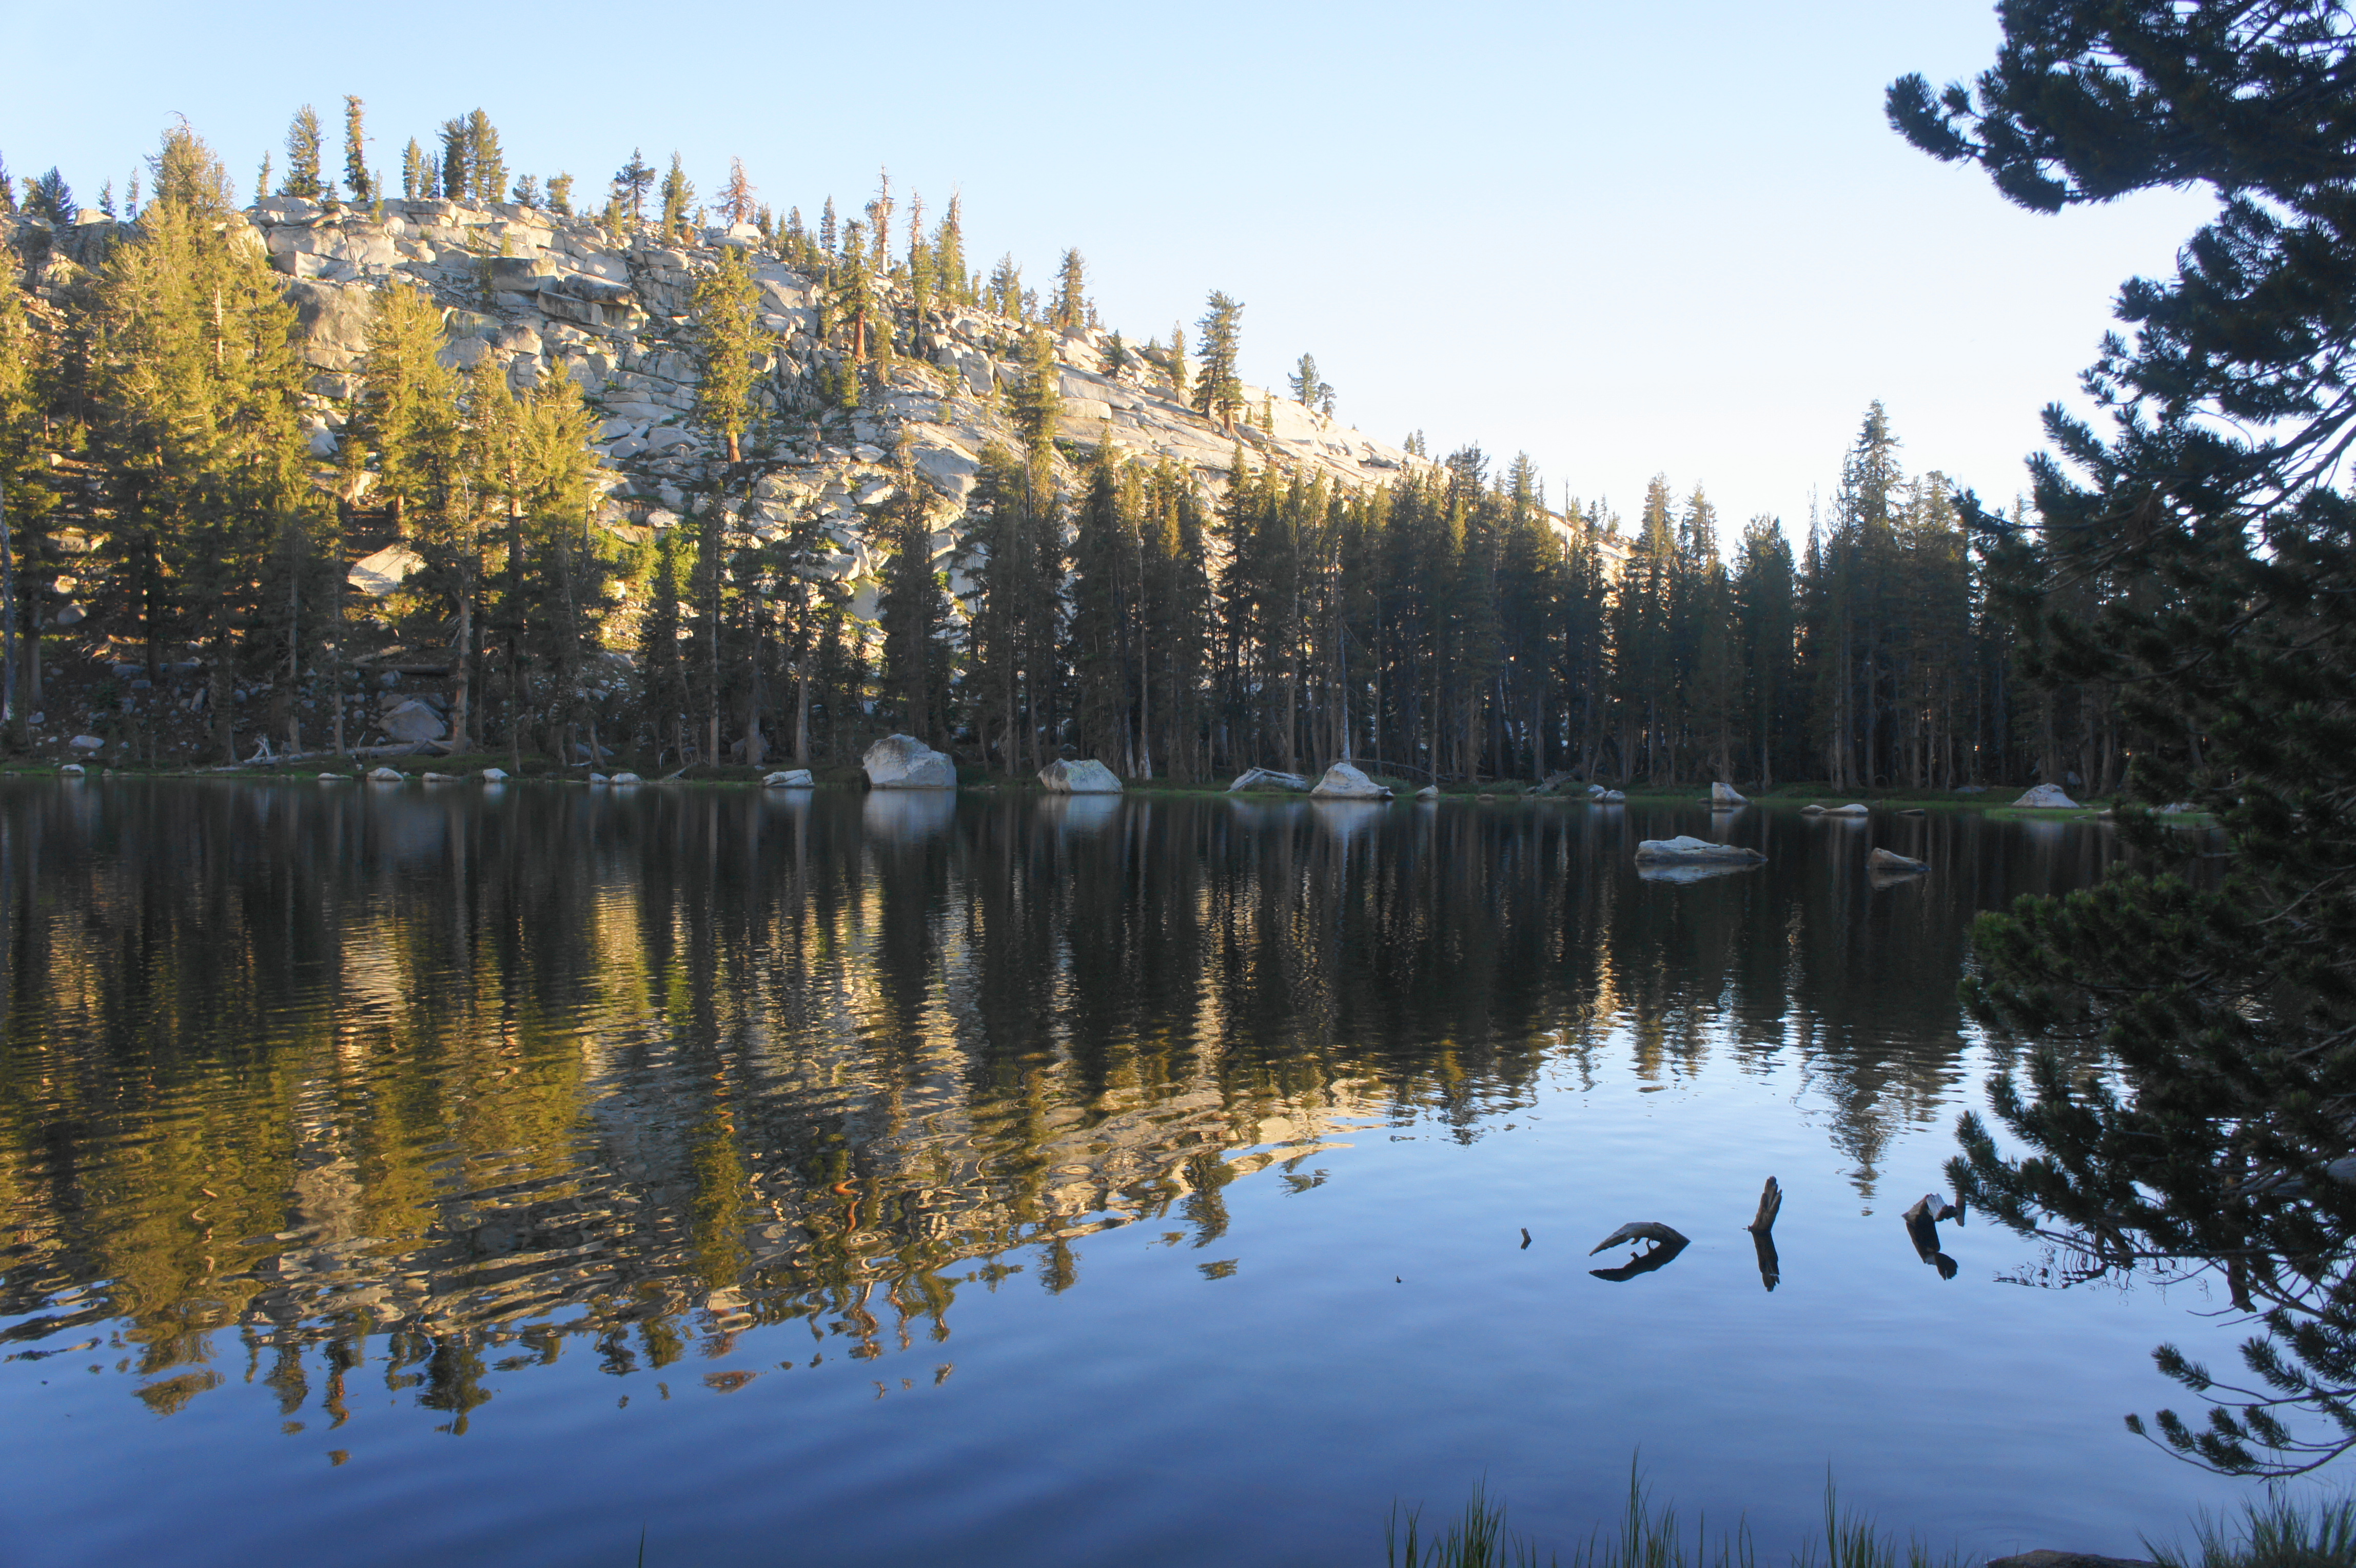
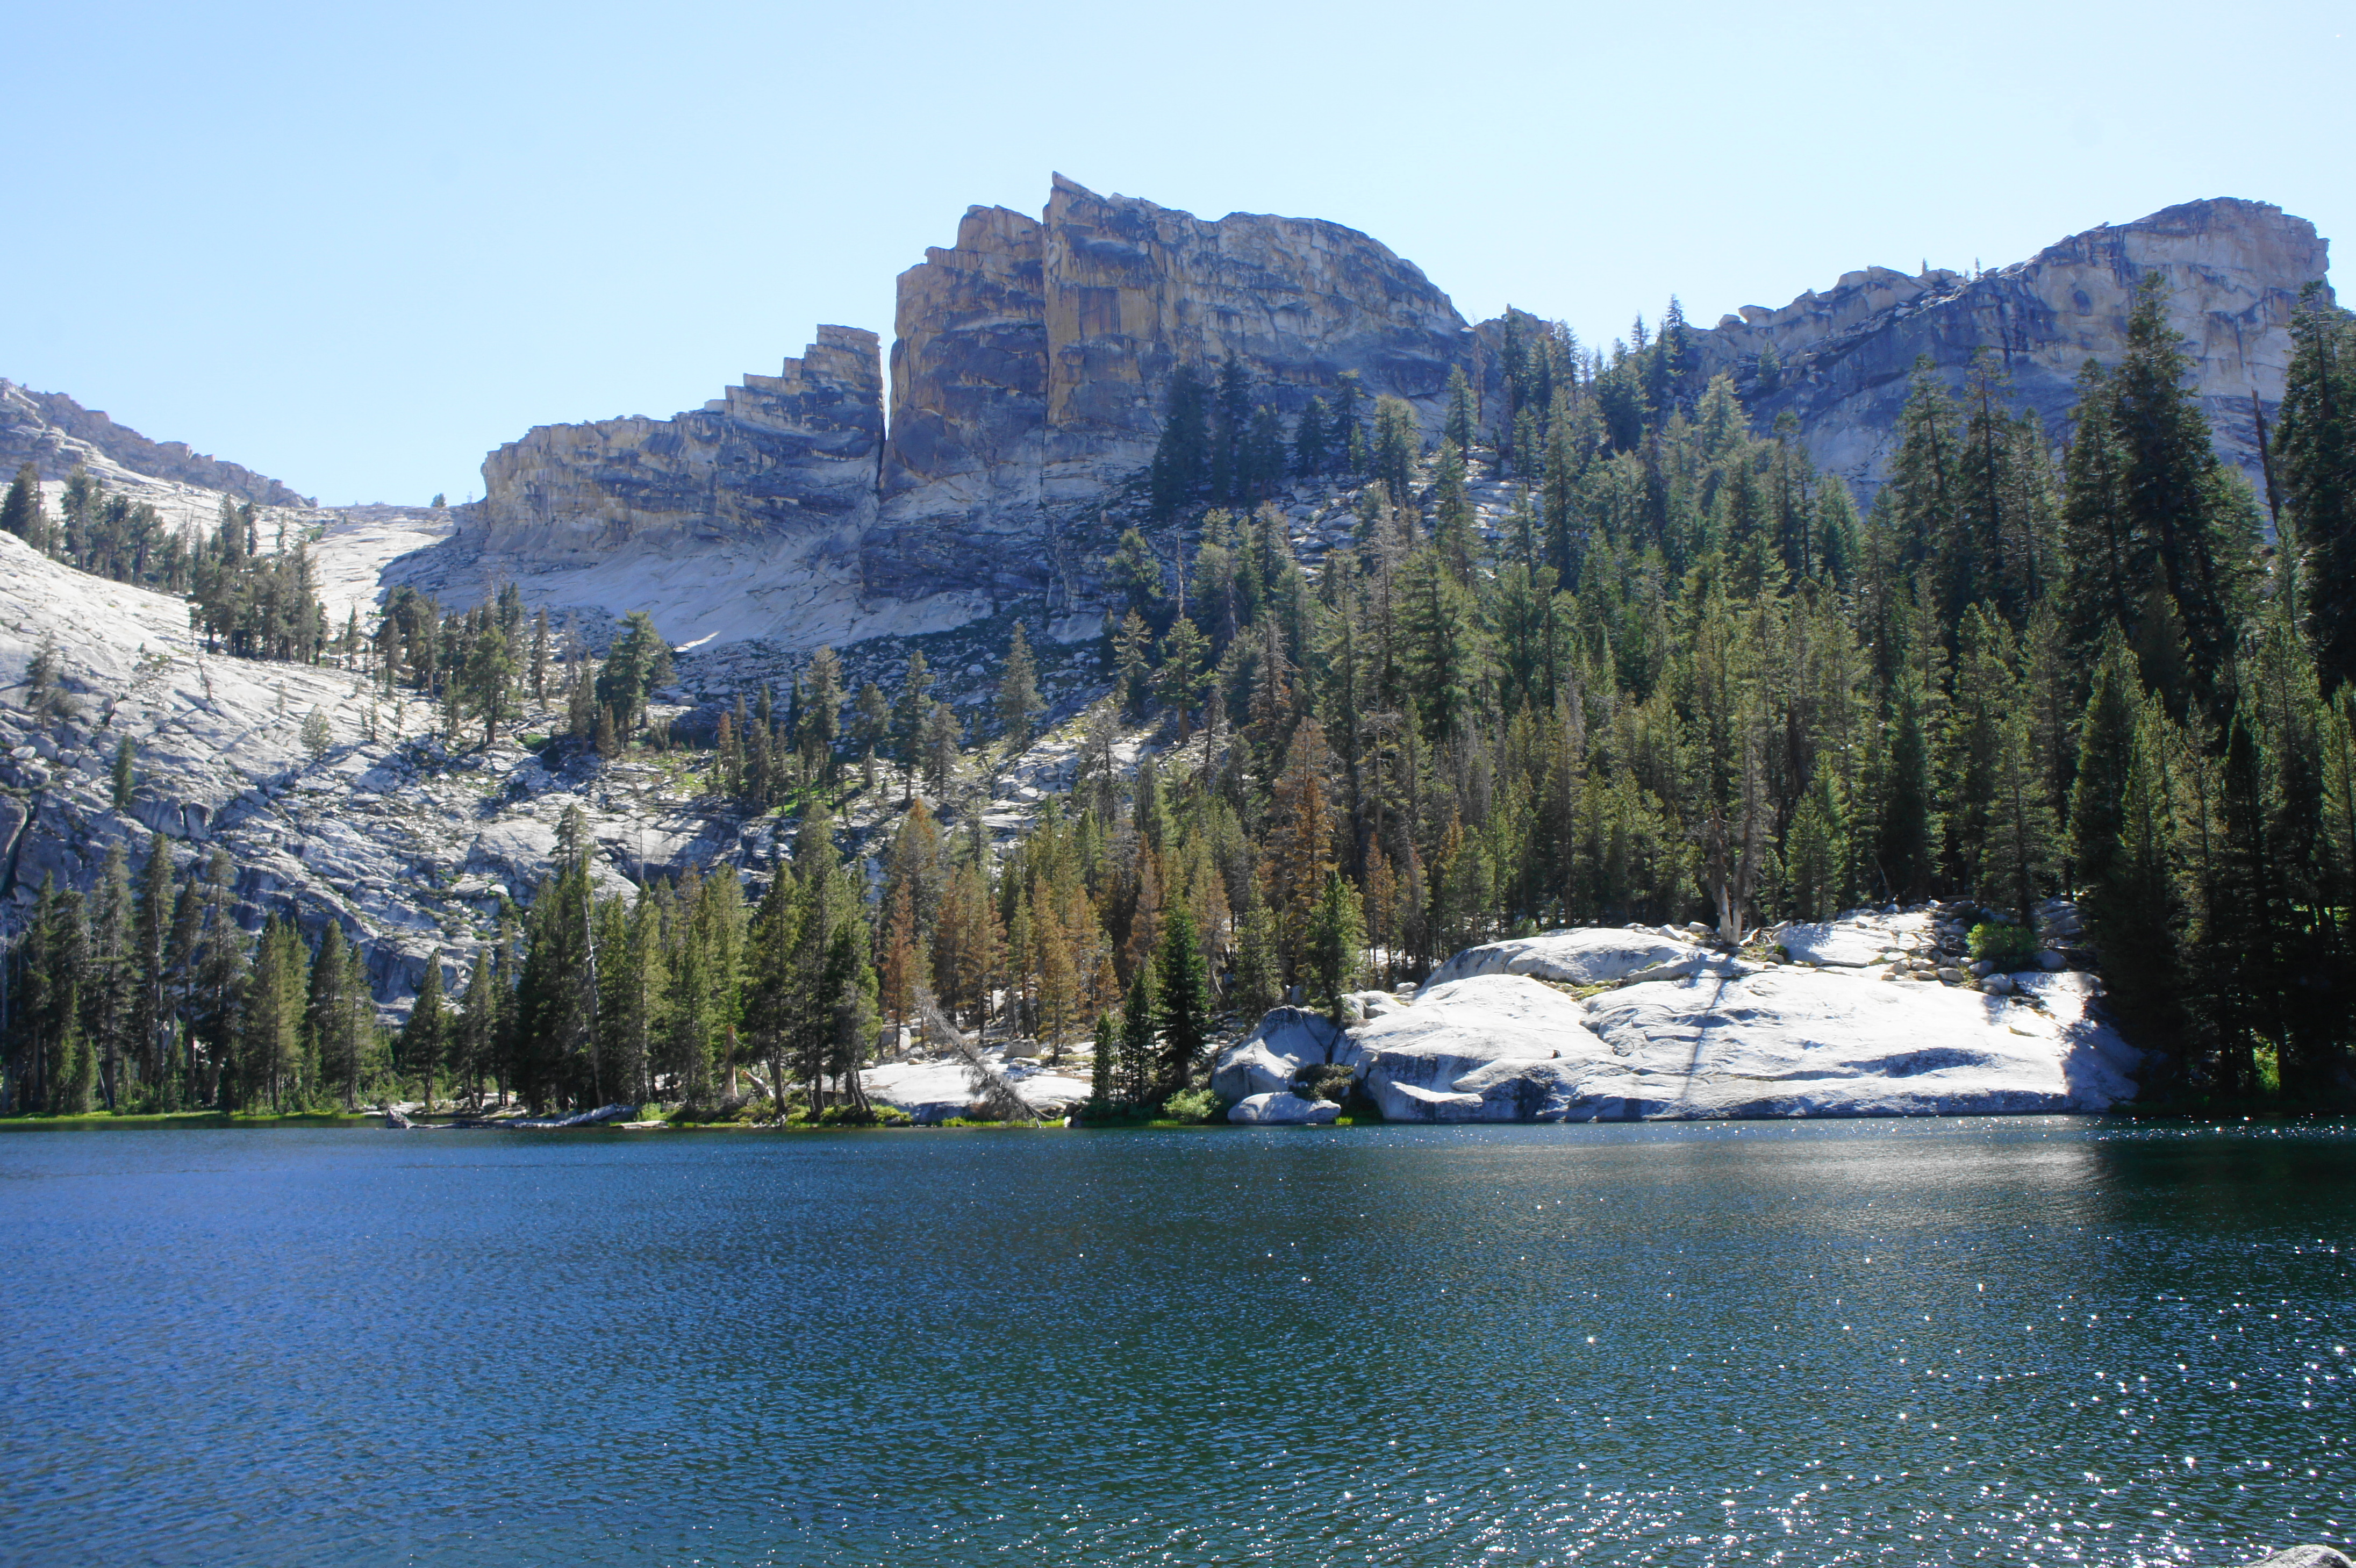
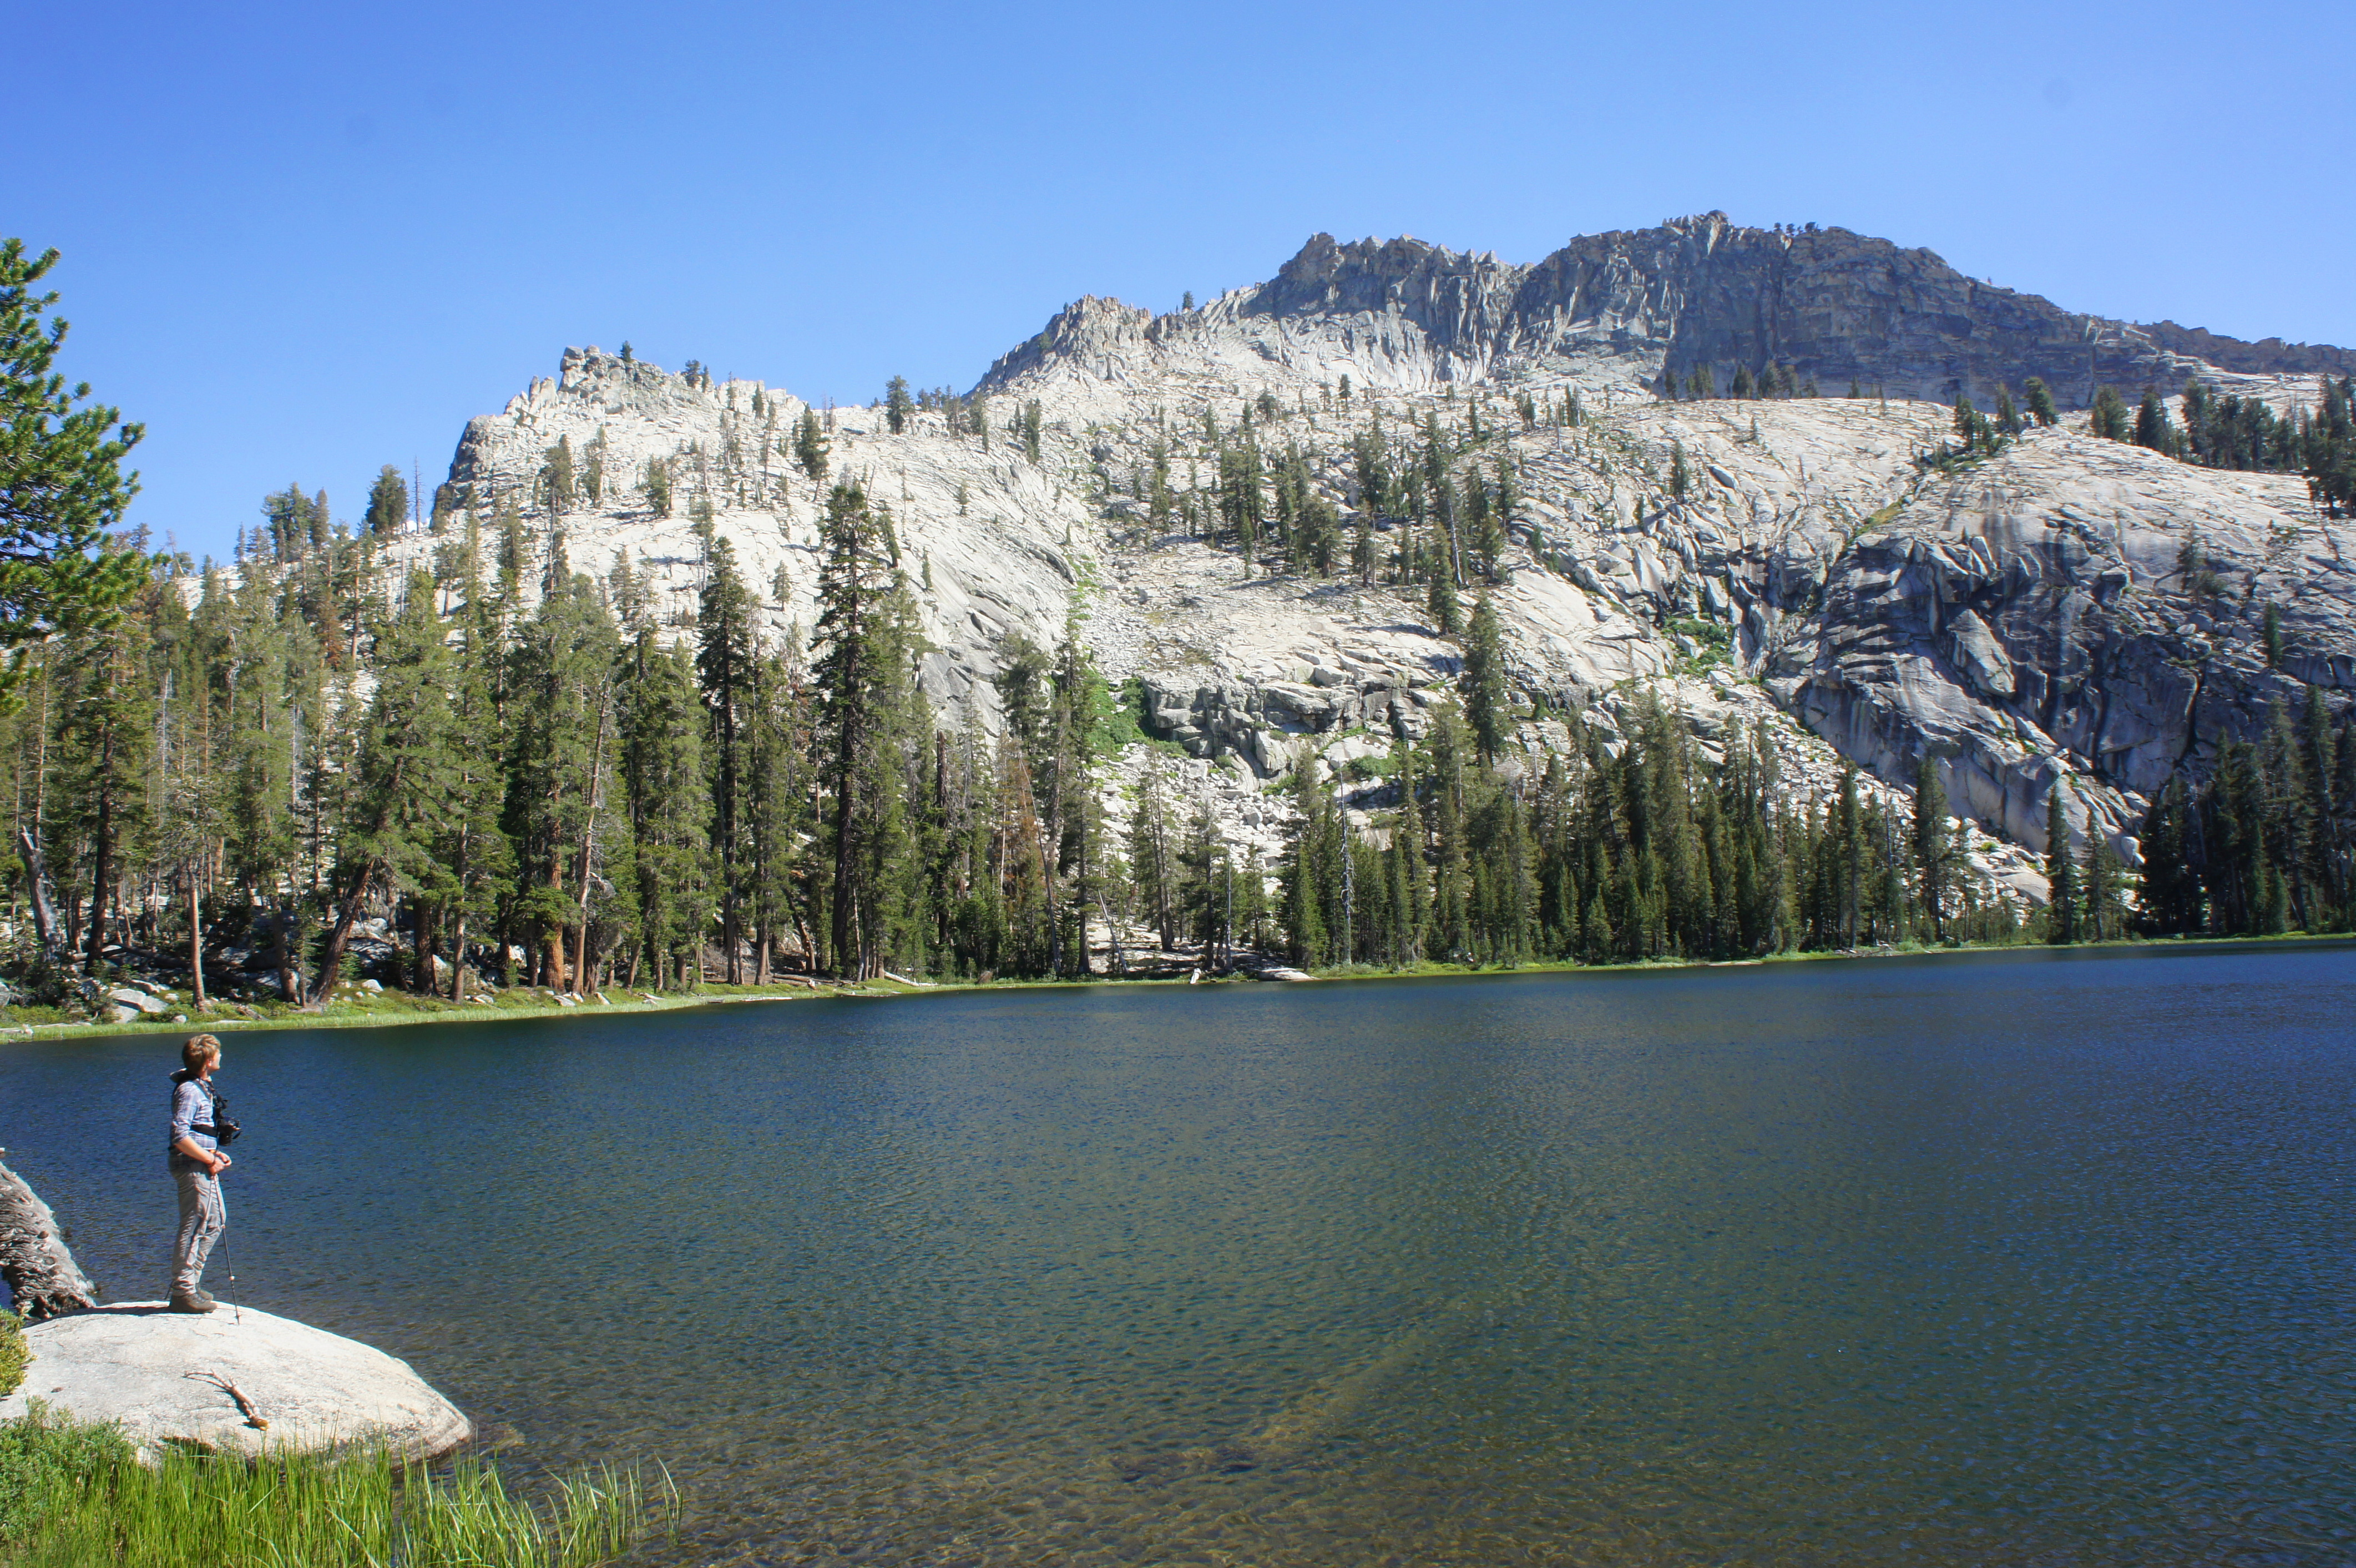
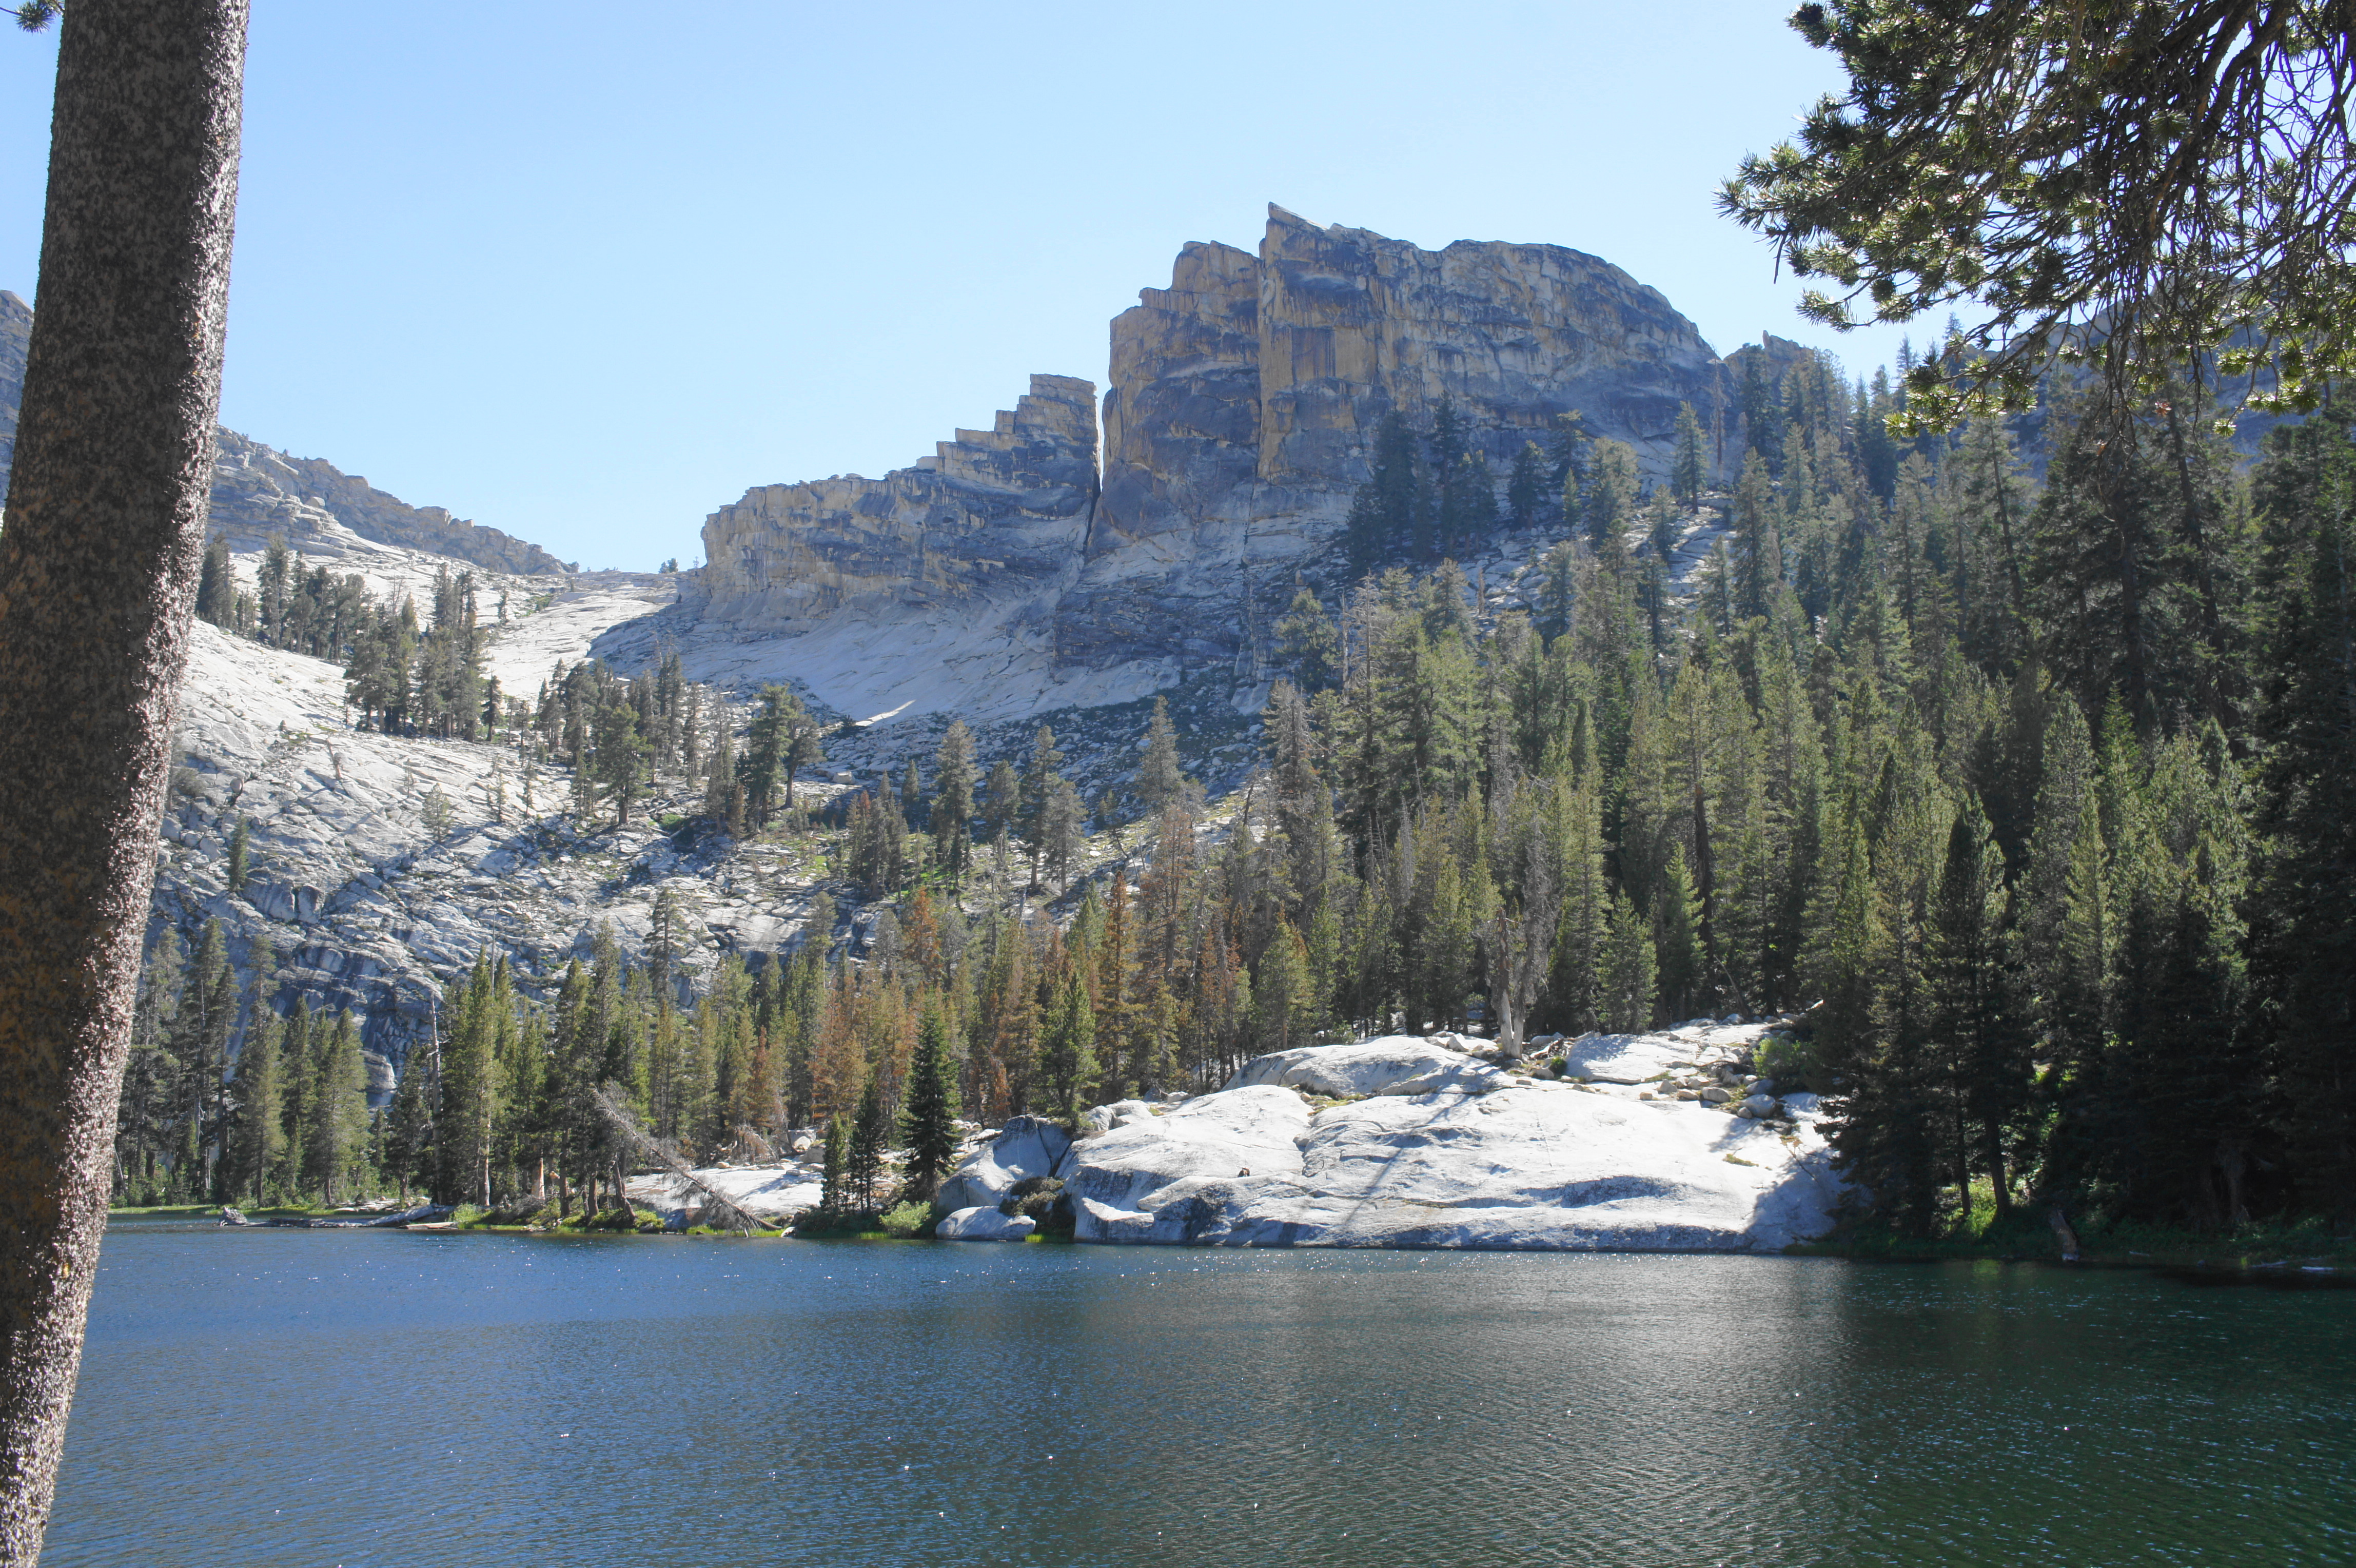
Here lies the two Twin Lakes, each with their distinct differences. Big Twin Lake, off to the right, is by far the largest of the two and is fronted by a granite slide to the east, interrupting the marshy banks. Little Twin Lake, though smaller, is arguably prettier due to its location below the imposing Twin Peaks, another granitic feature rising more than 1,000 feet above the subalpine lakes.

Sun setting on Big Twin Lake 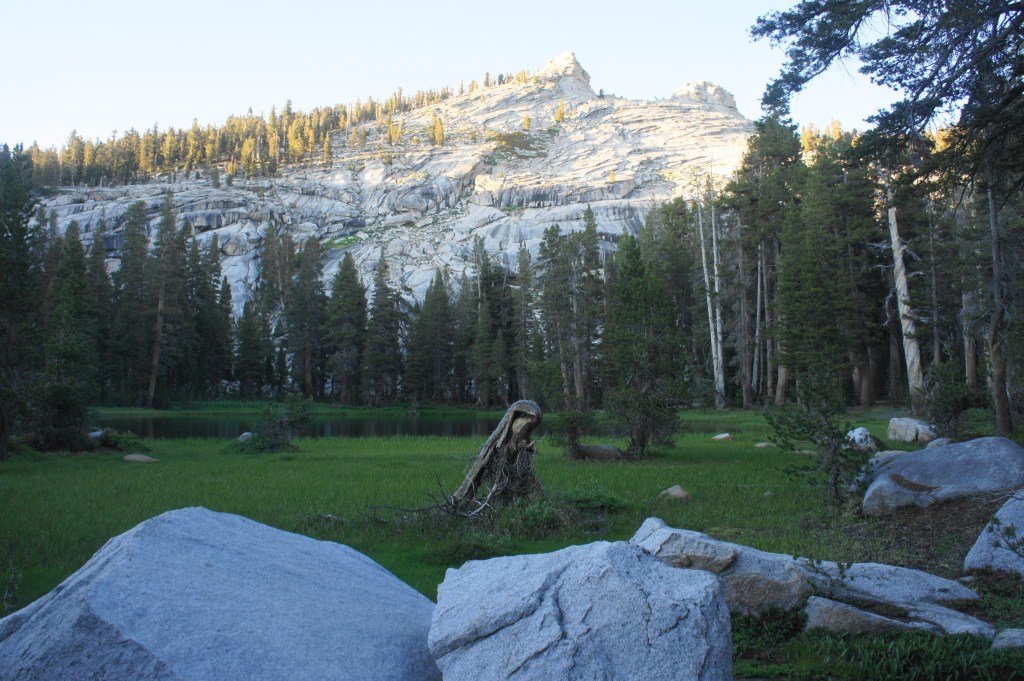
Little Twin Lake and Twin Peaks

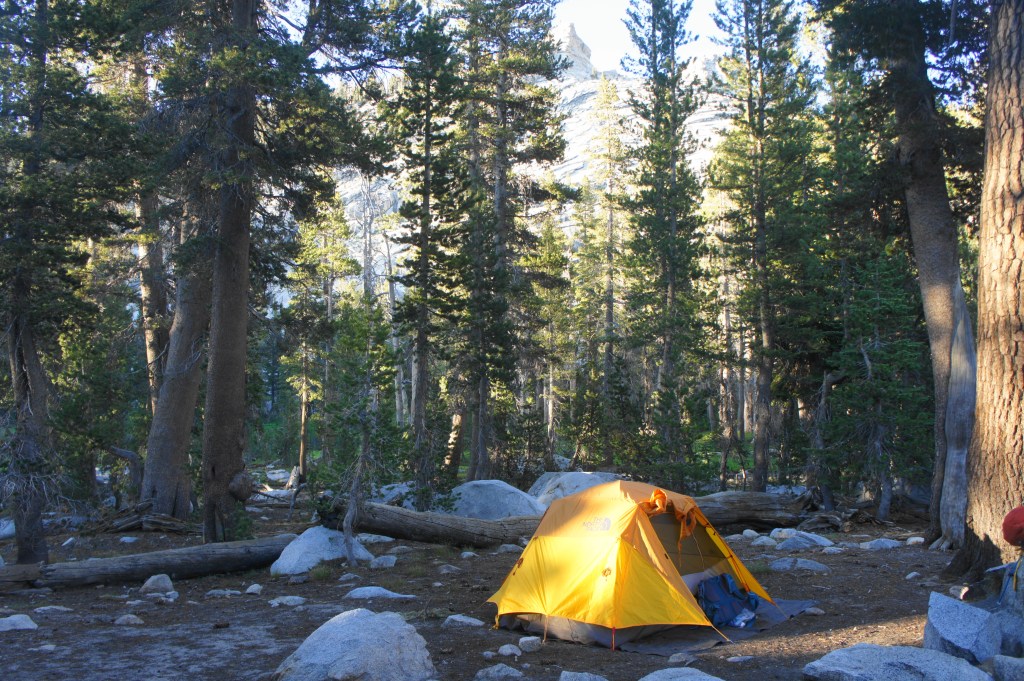
Campsite at Twin Lakes 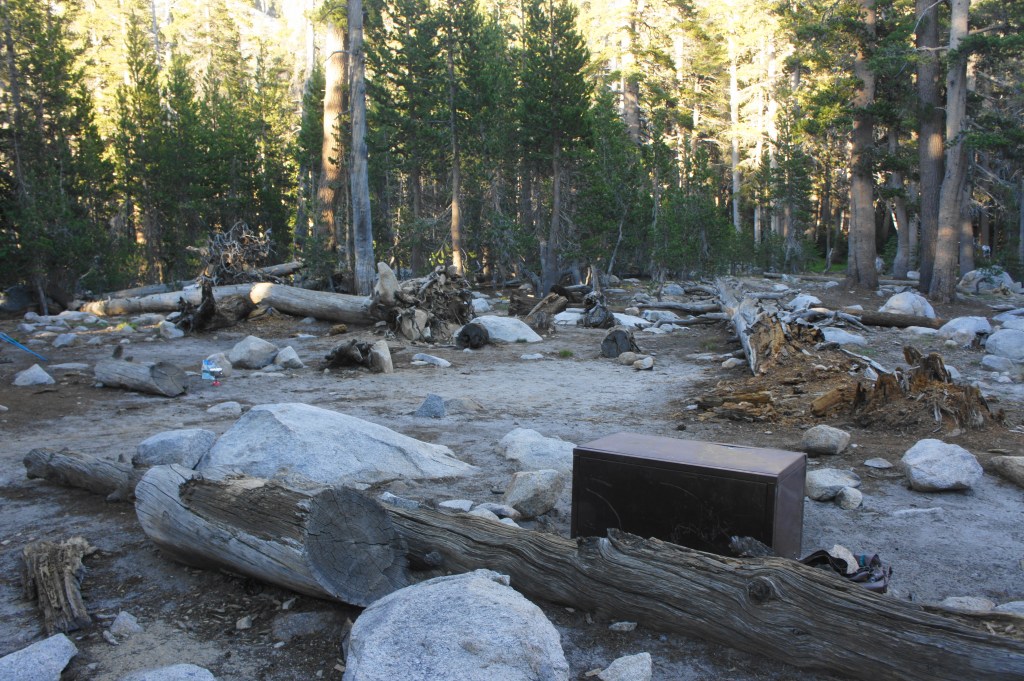
Bear locker at Twin Lakes


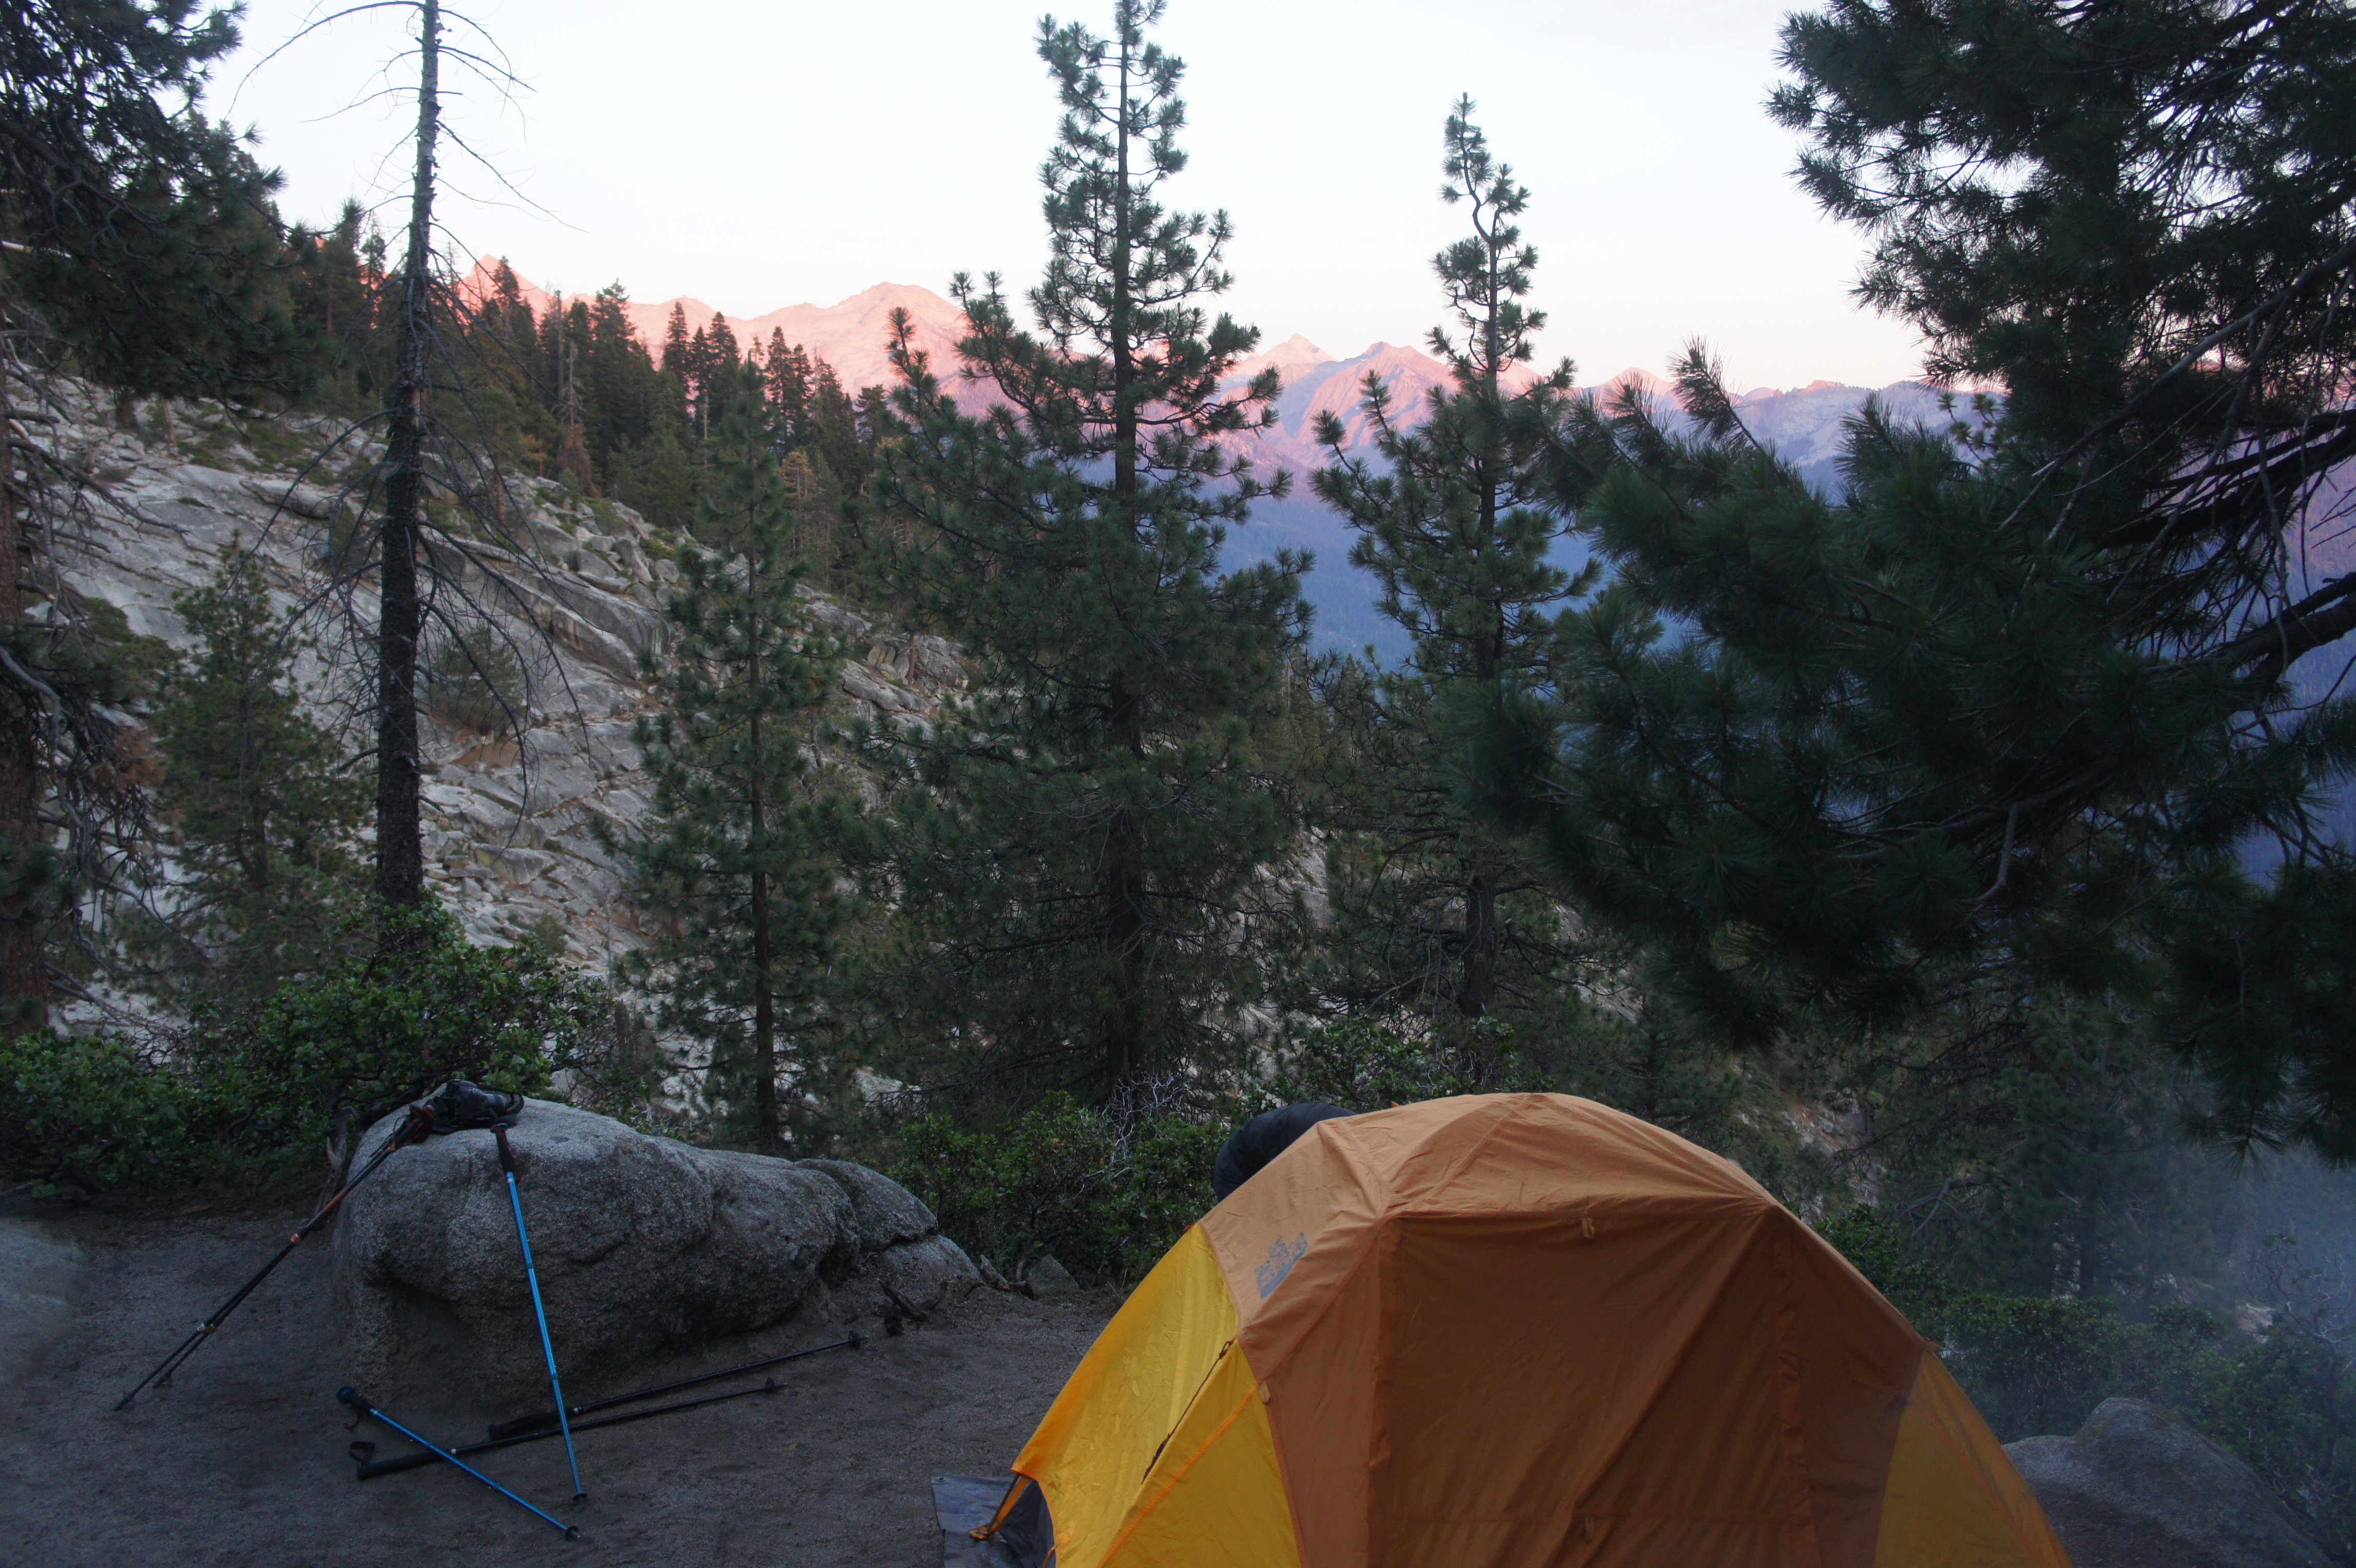
Situated between the two lakes is a large, oft-used camping area with a bear box and several fire rings. More secluded sites are situated off-trail to the right or left, nearer to the lakeshores. A pit toilet (a toilet seat with two walls for at least some privacy) can be found by following a relatively long access trail off to west of Little Twin Lake. Many travelers will end Day 1 here, choosing to camp before tackling the challenging ascent to Silliman Pass on the next morning.
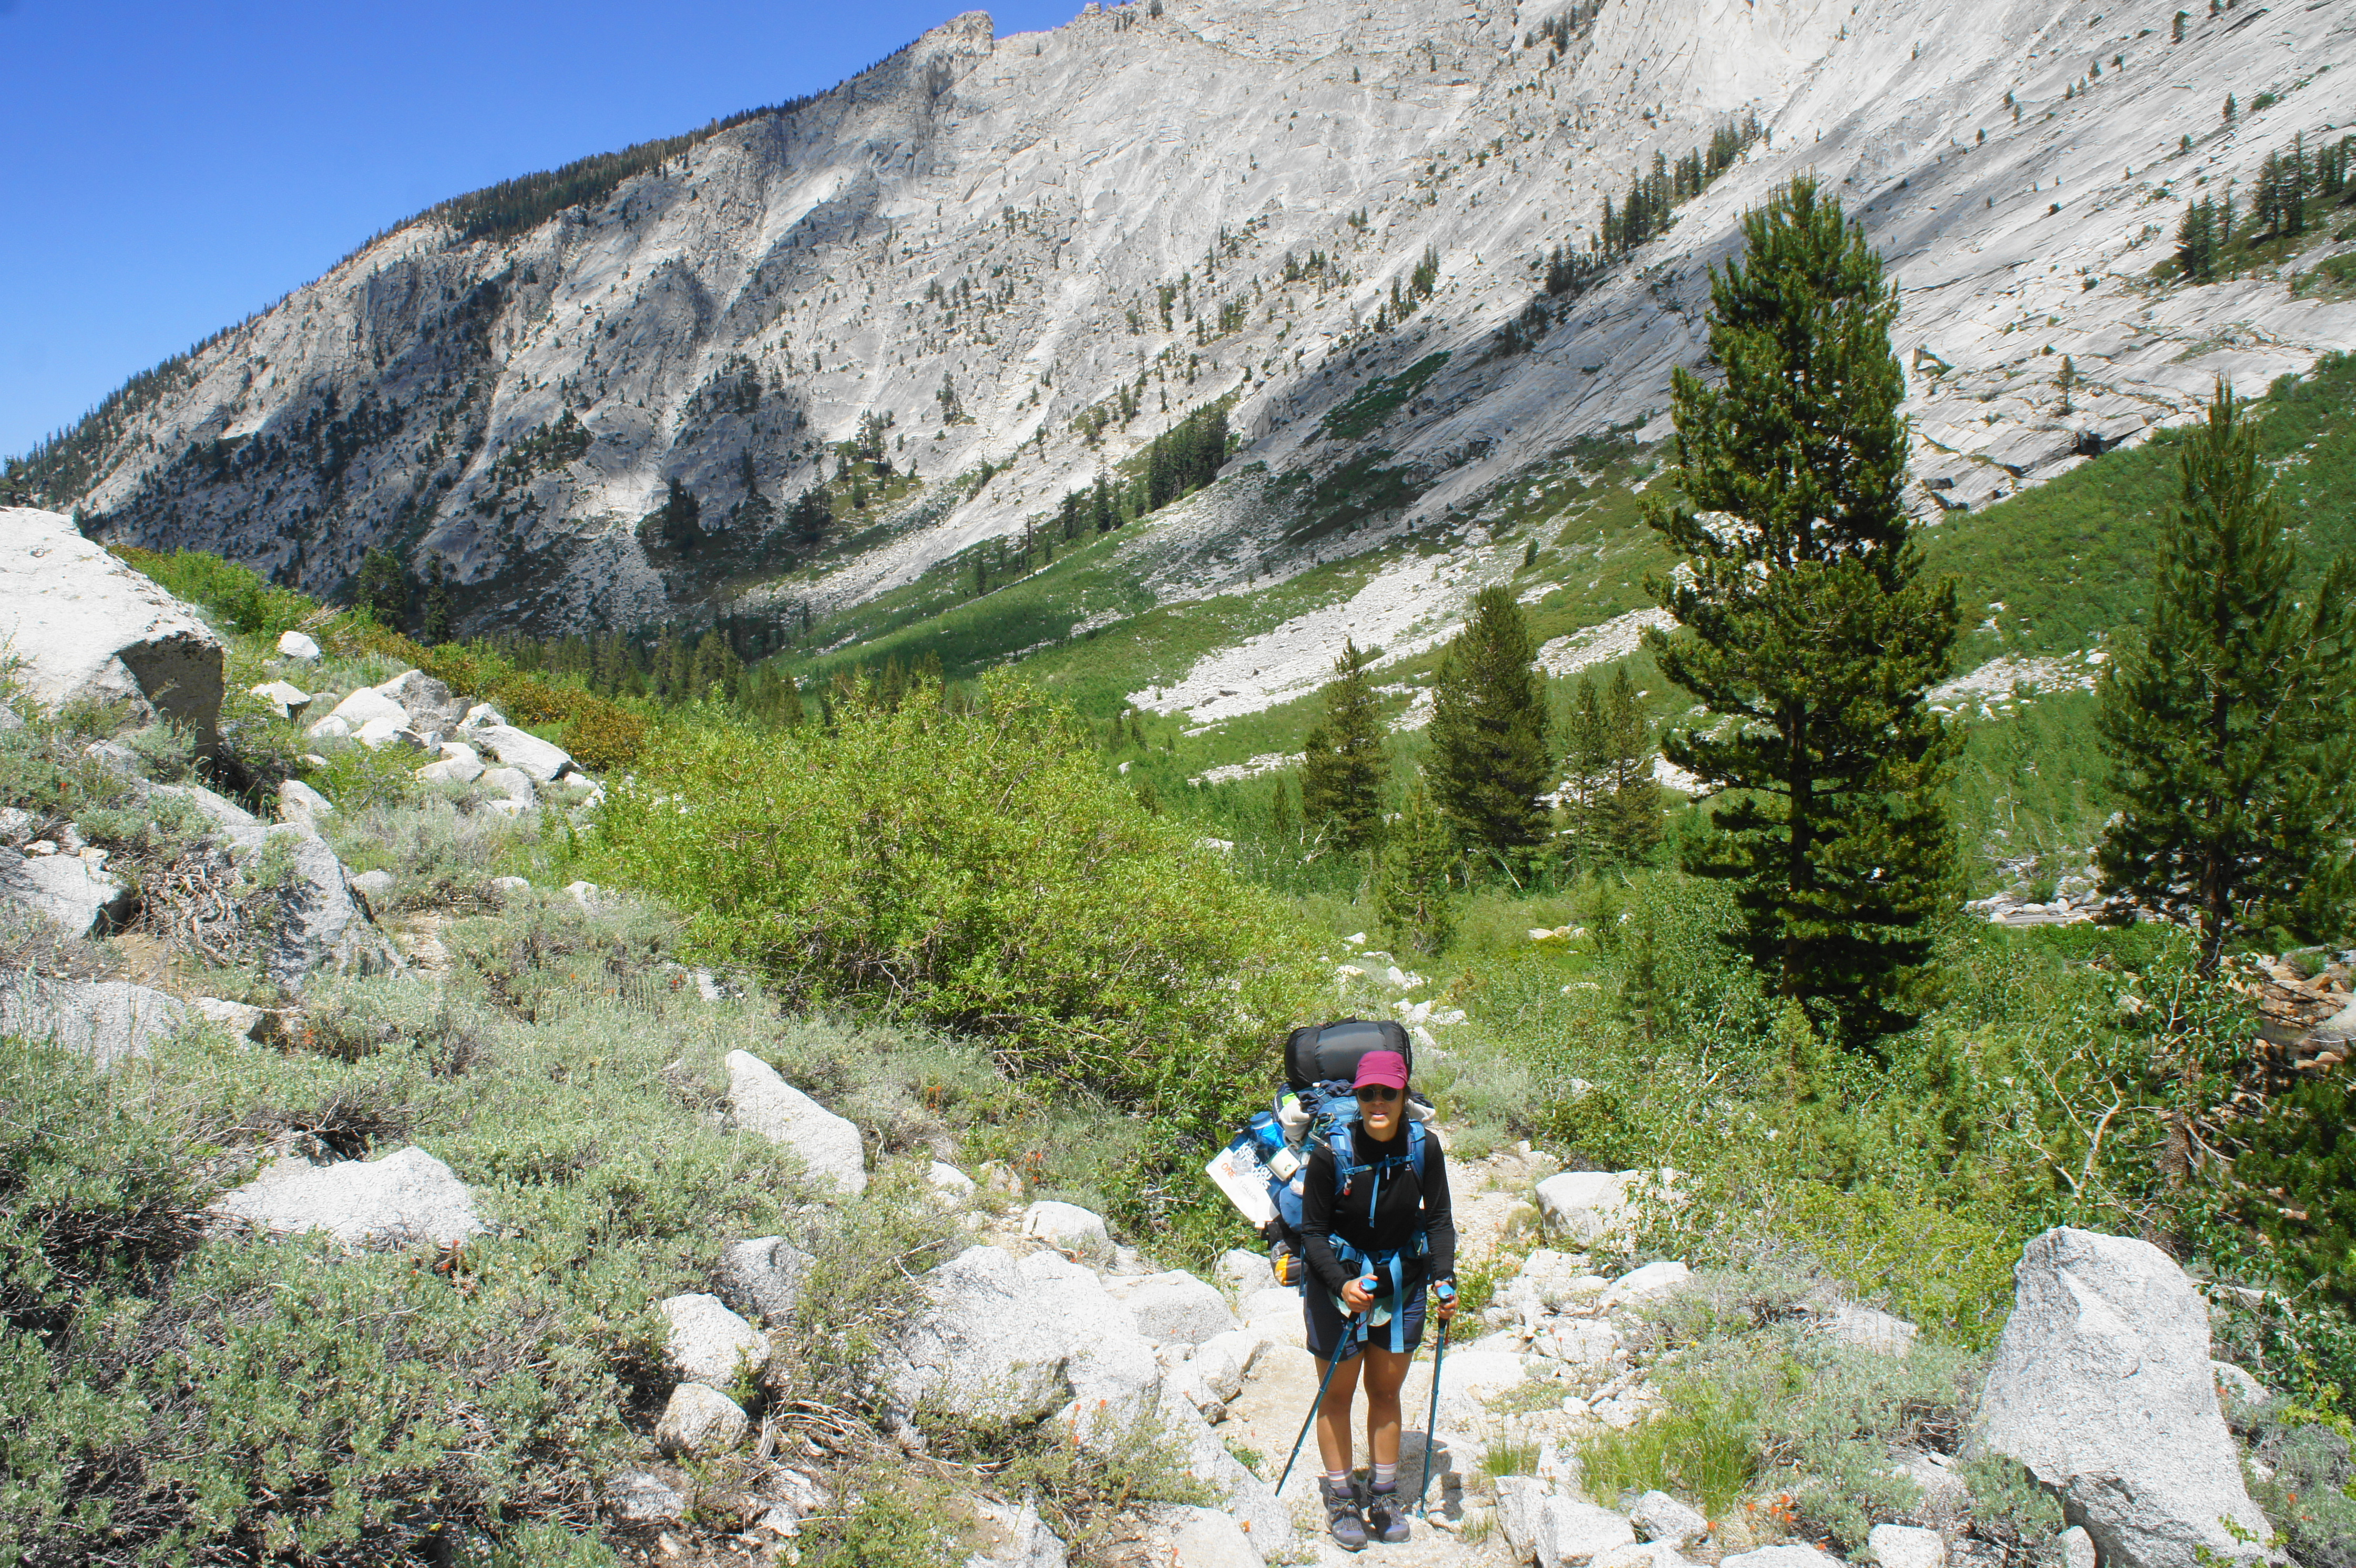
DAY 2: Twin Lakes to Seville Lake (via Silliman Pass, Beville Lake, Ranger Lake, and Lost Lake) (8.5 miles)
The second day of the hike brings one up and over Silliman Pass and into Kings Canyon National Park, encountering four stunning sub-alpine lakes along the way: Beville, Ranger, Lost, and Seville. Waking up at Twin Lakes, hikers should collect and filter water for the ascent to come, then prepare to climb more than 700 feet in the course of the next mile.
View back toward Twin Lakes from the ascent to Silliman Pass 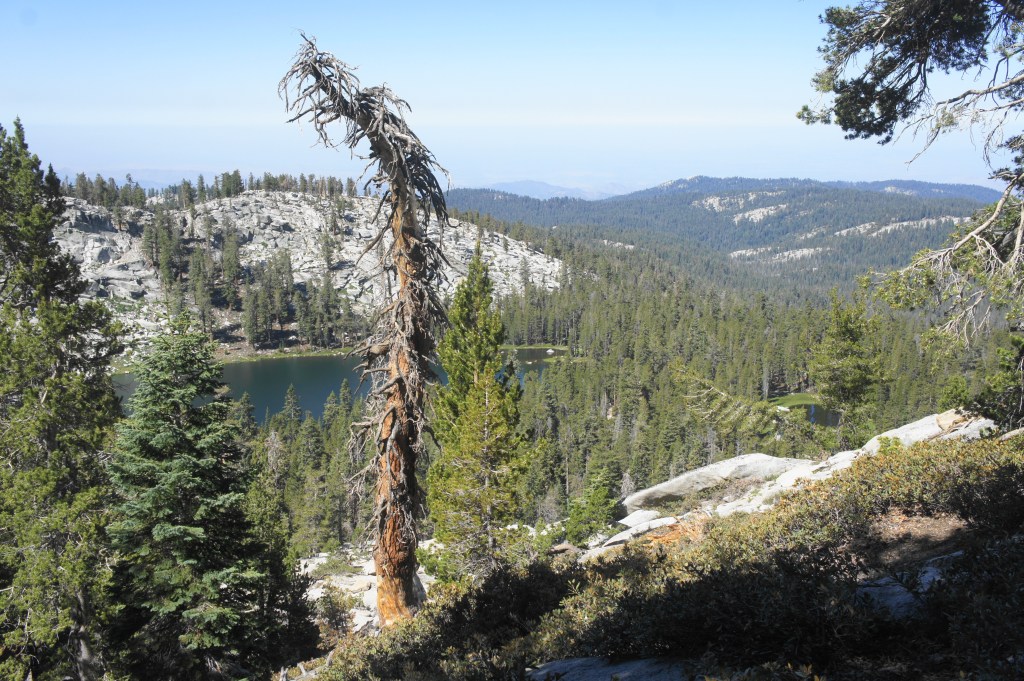
Twin Lakes and the Clover Creek drainage to the west

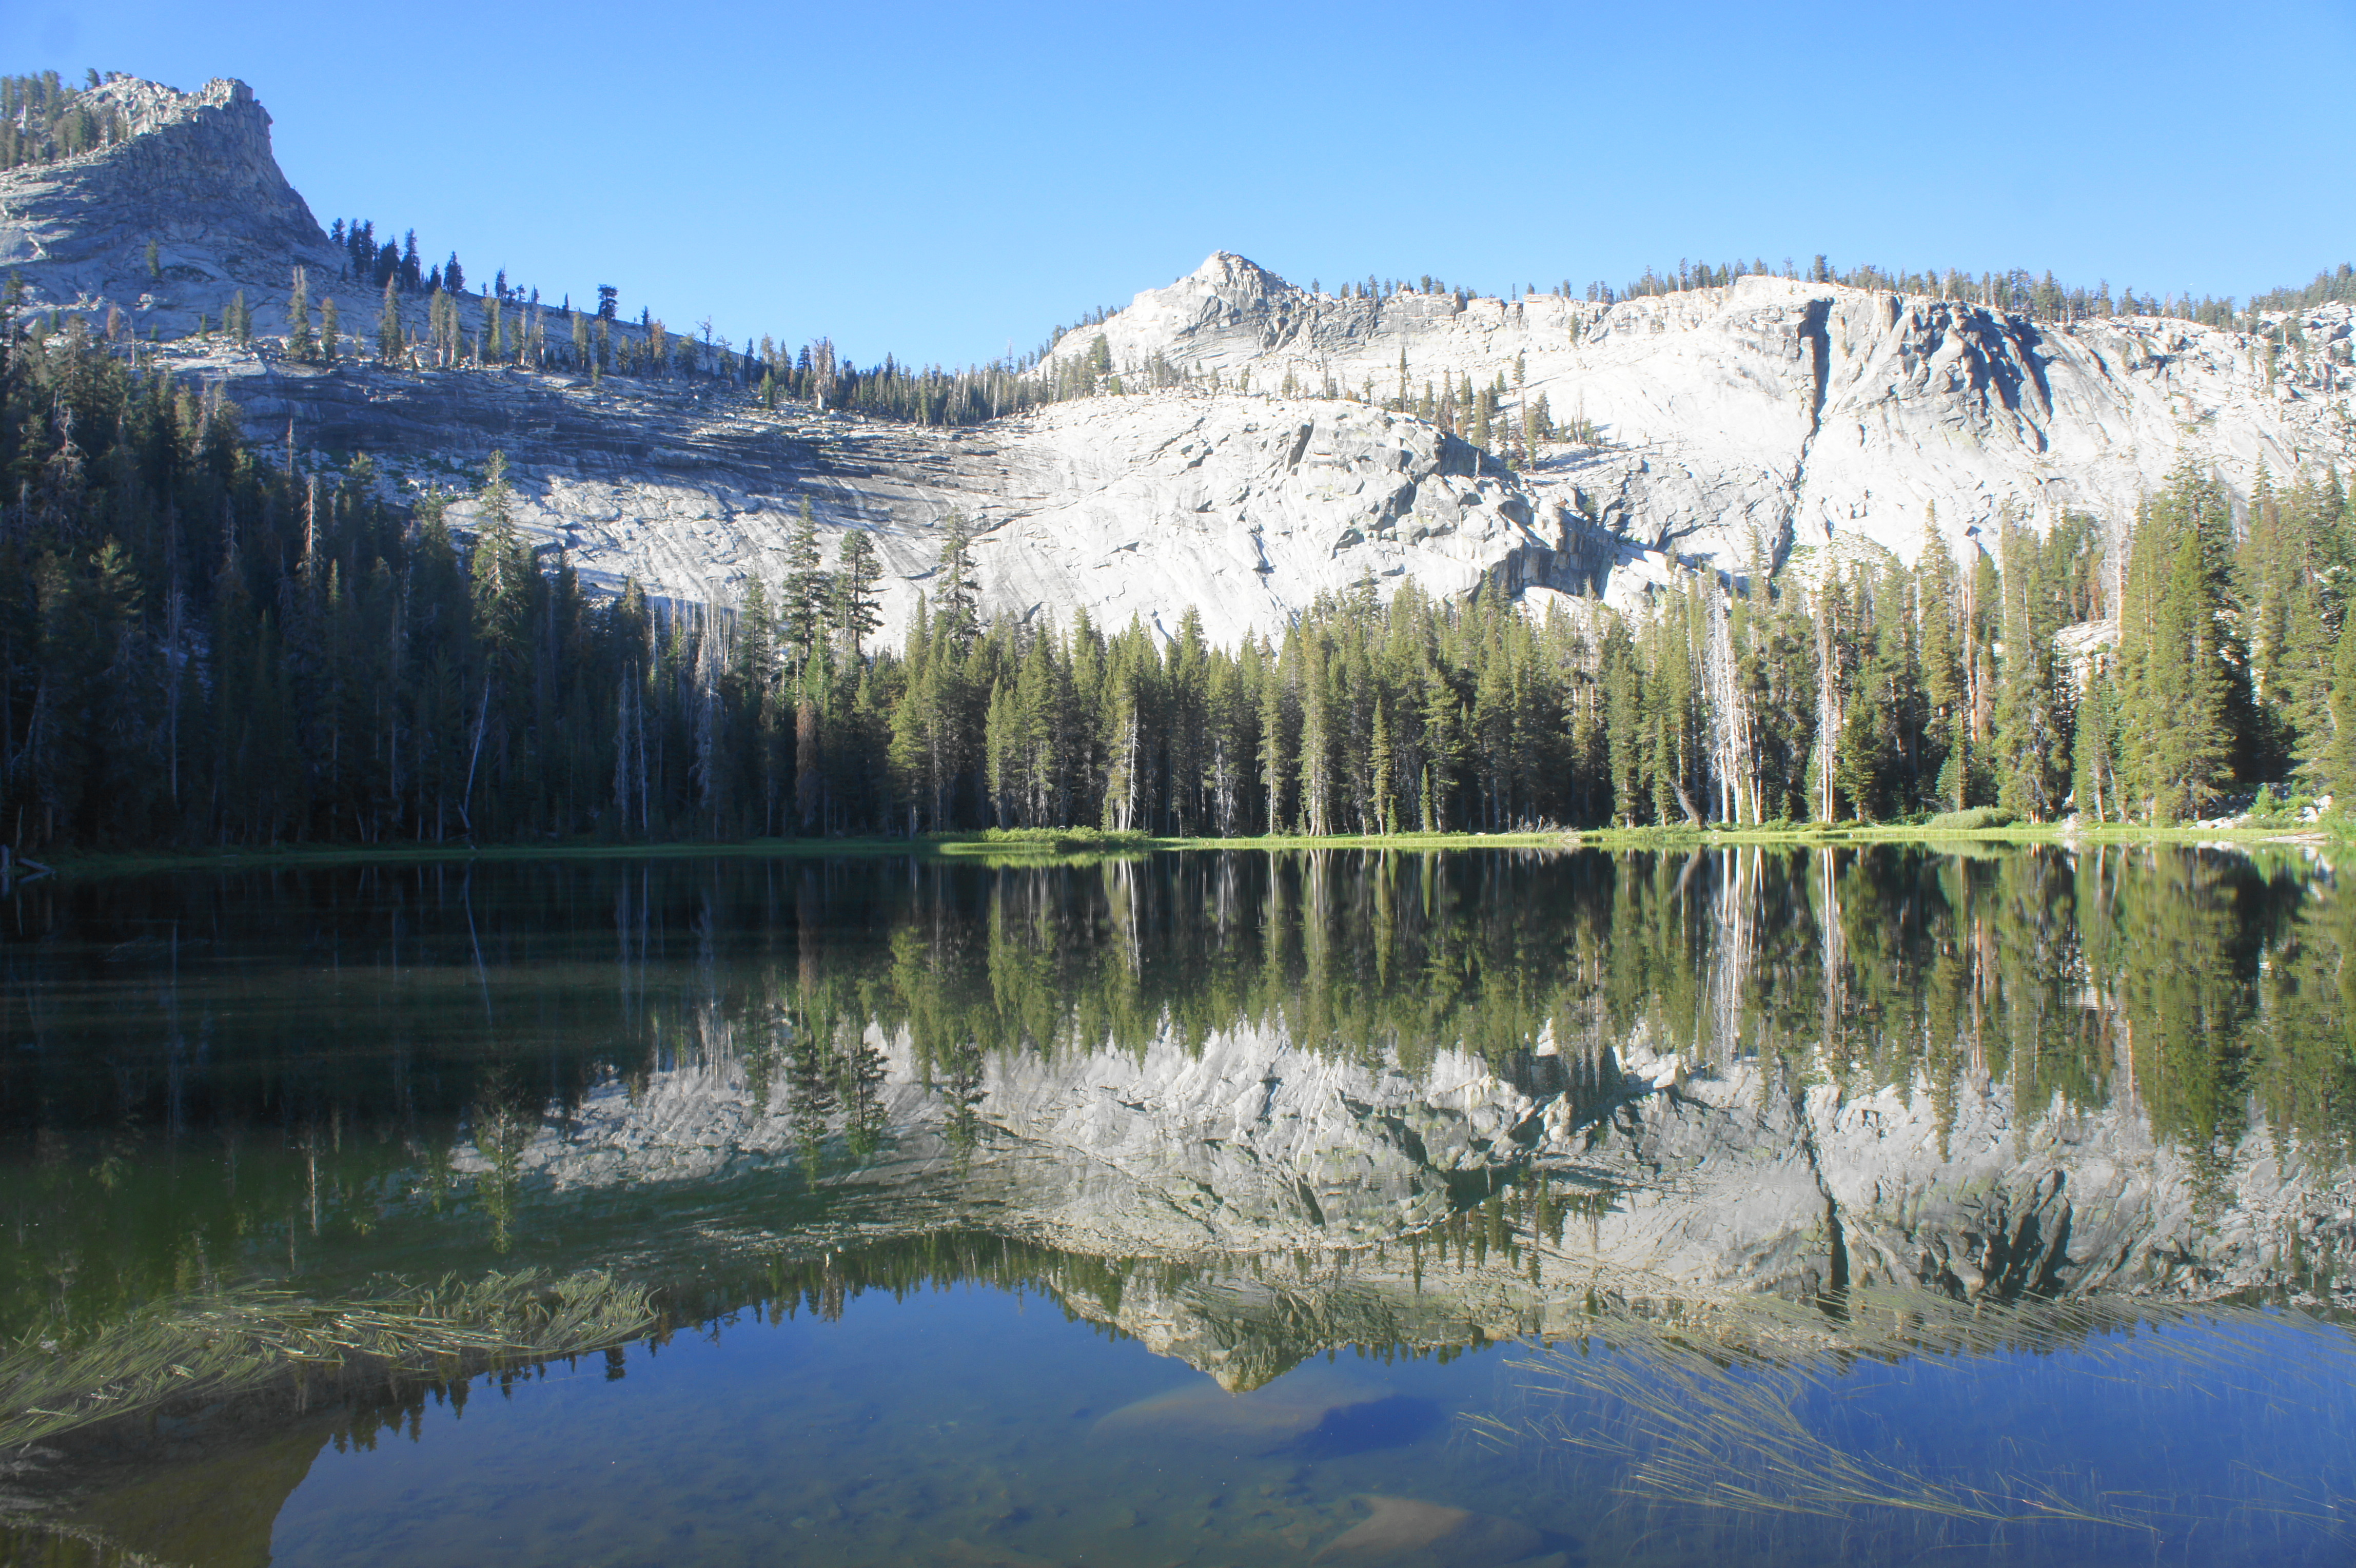
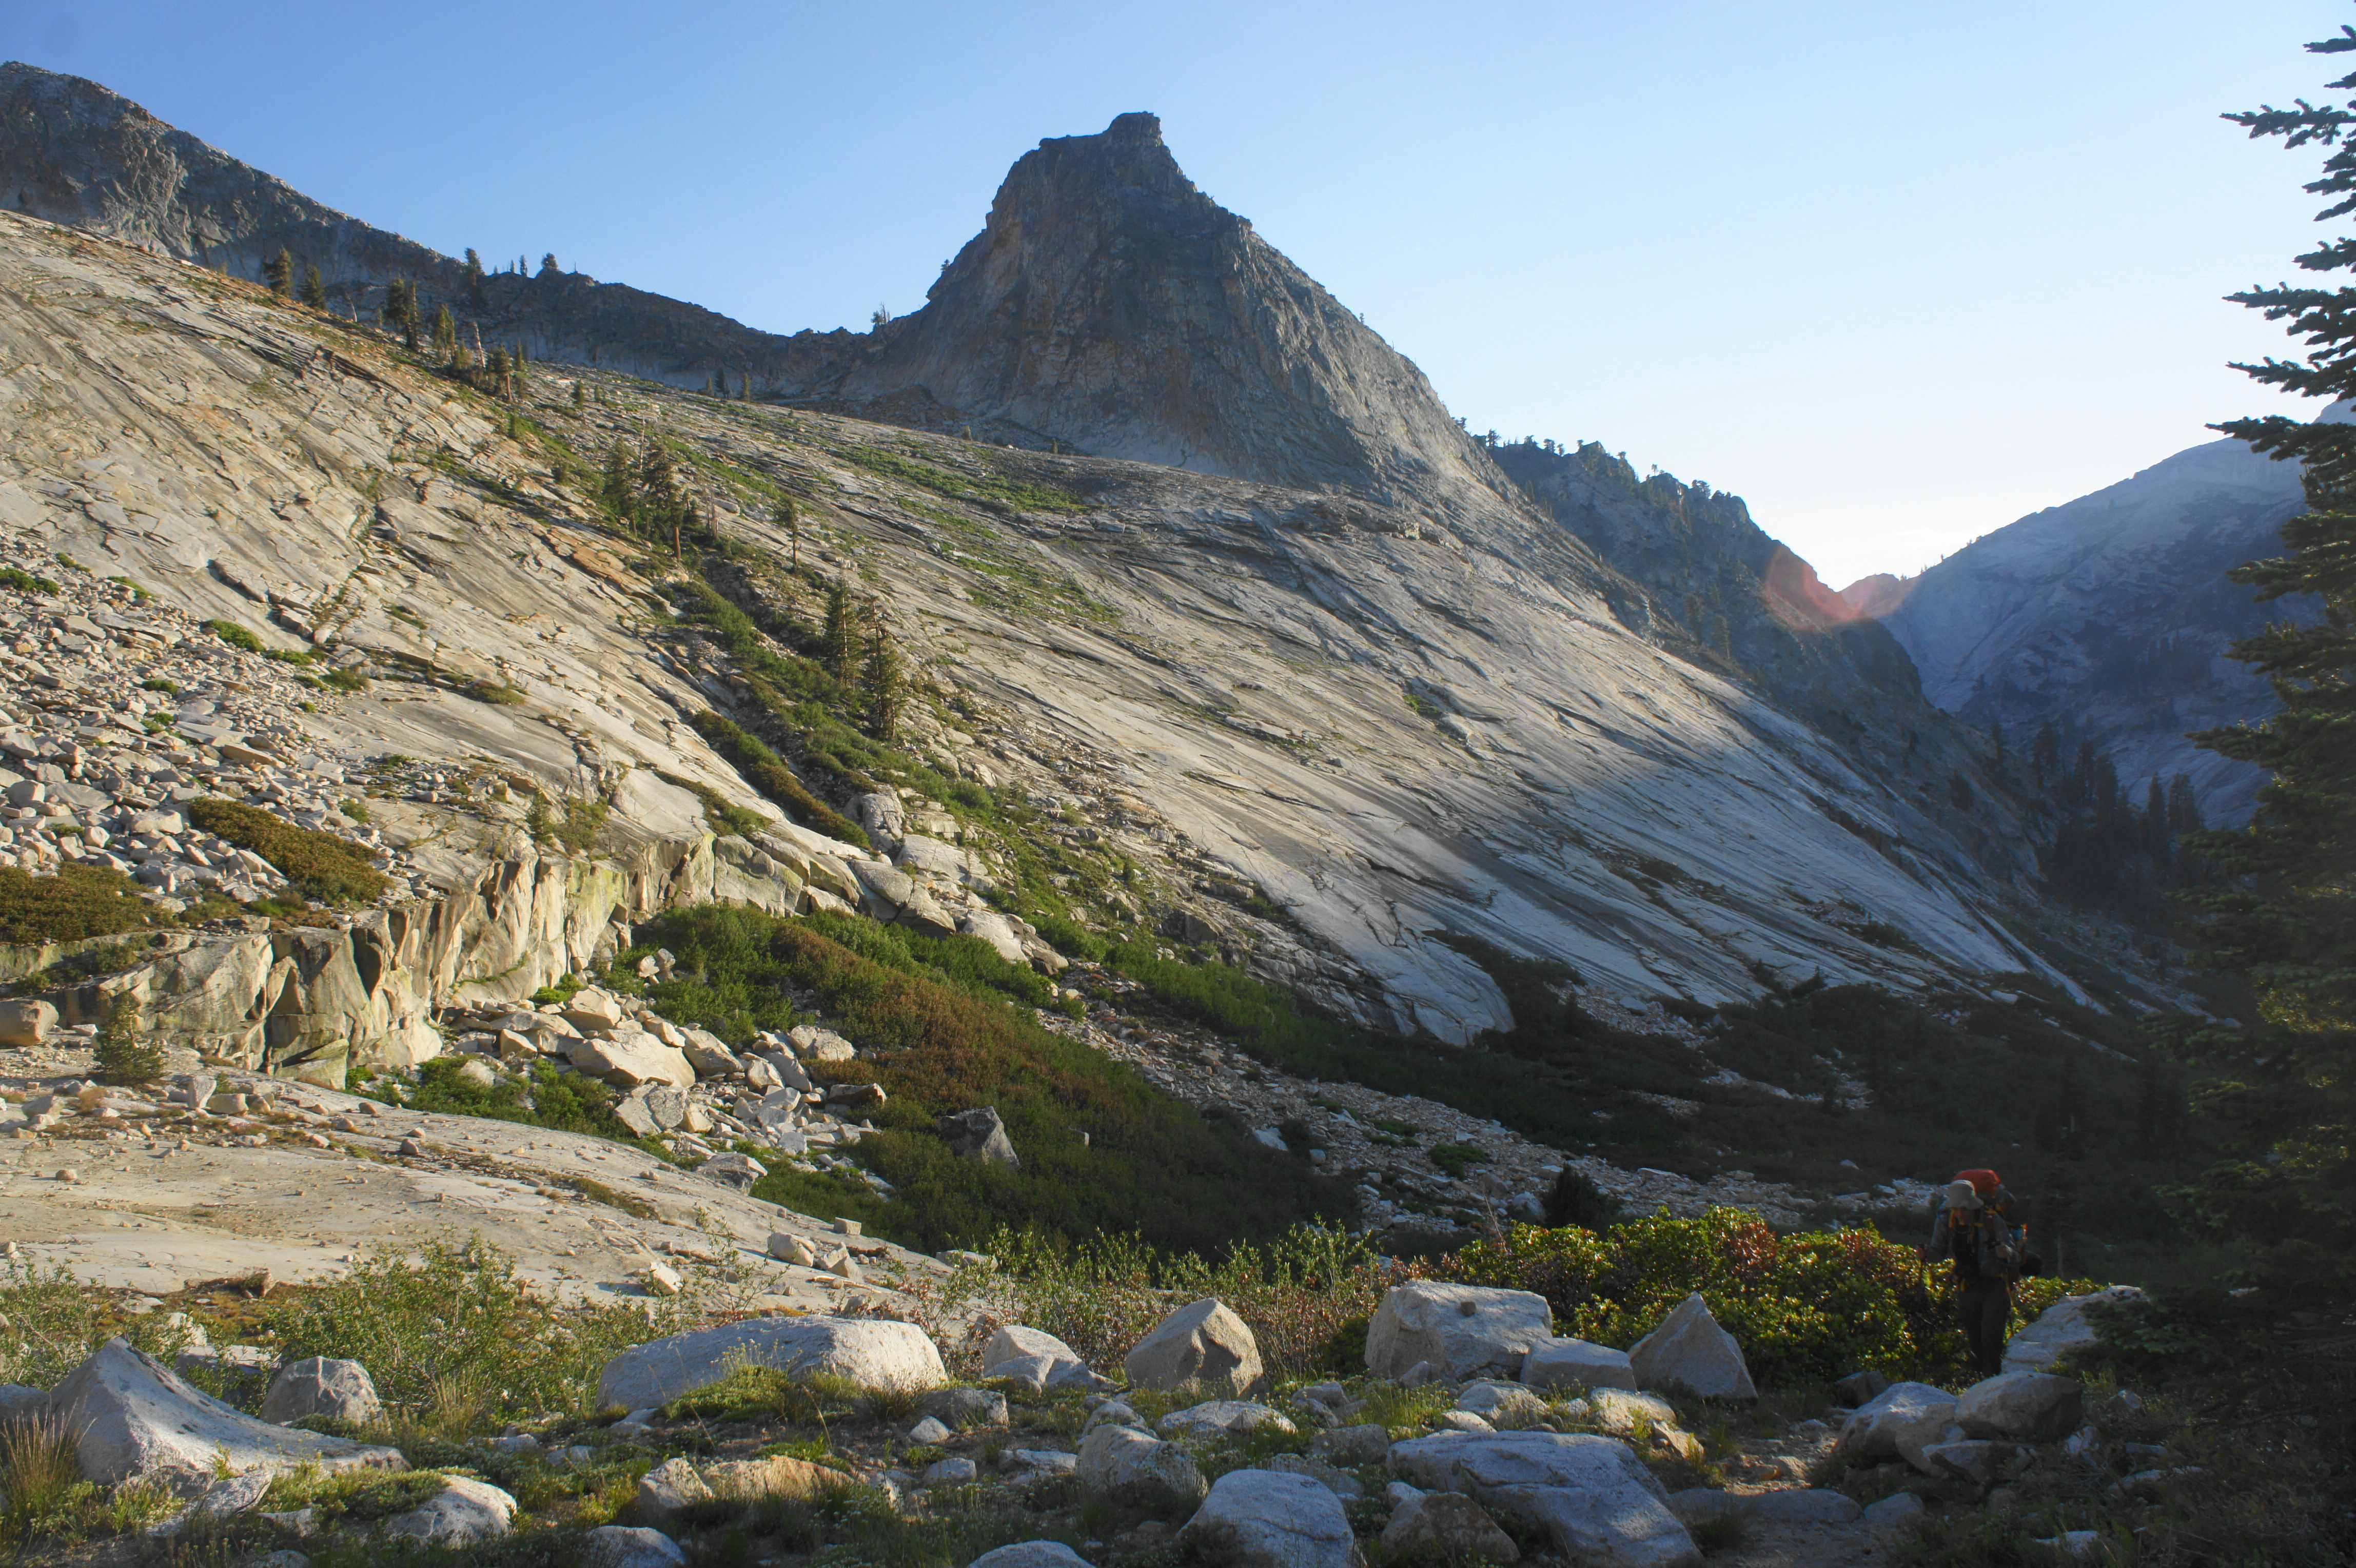
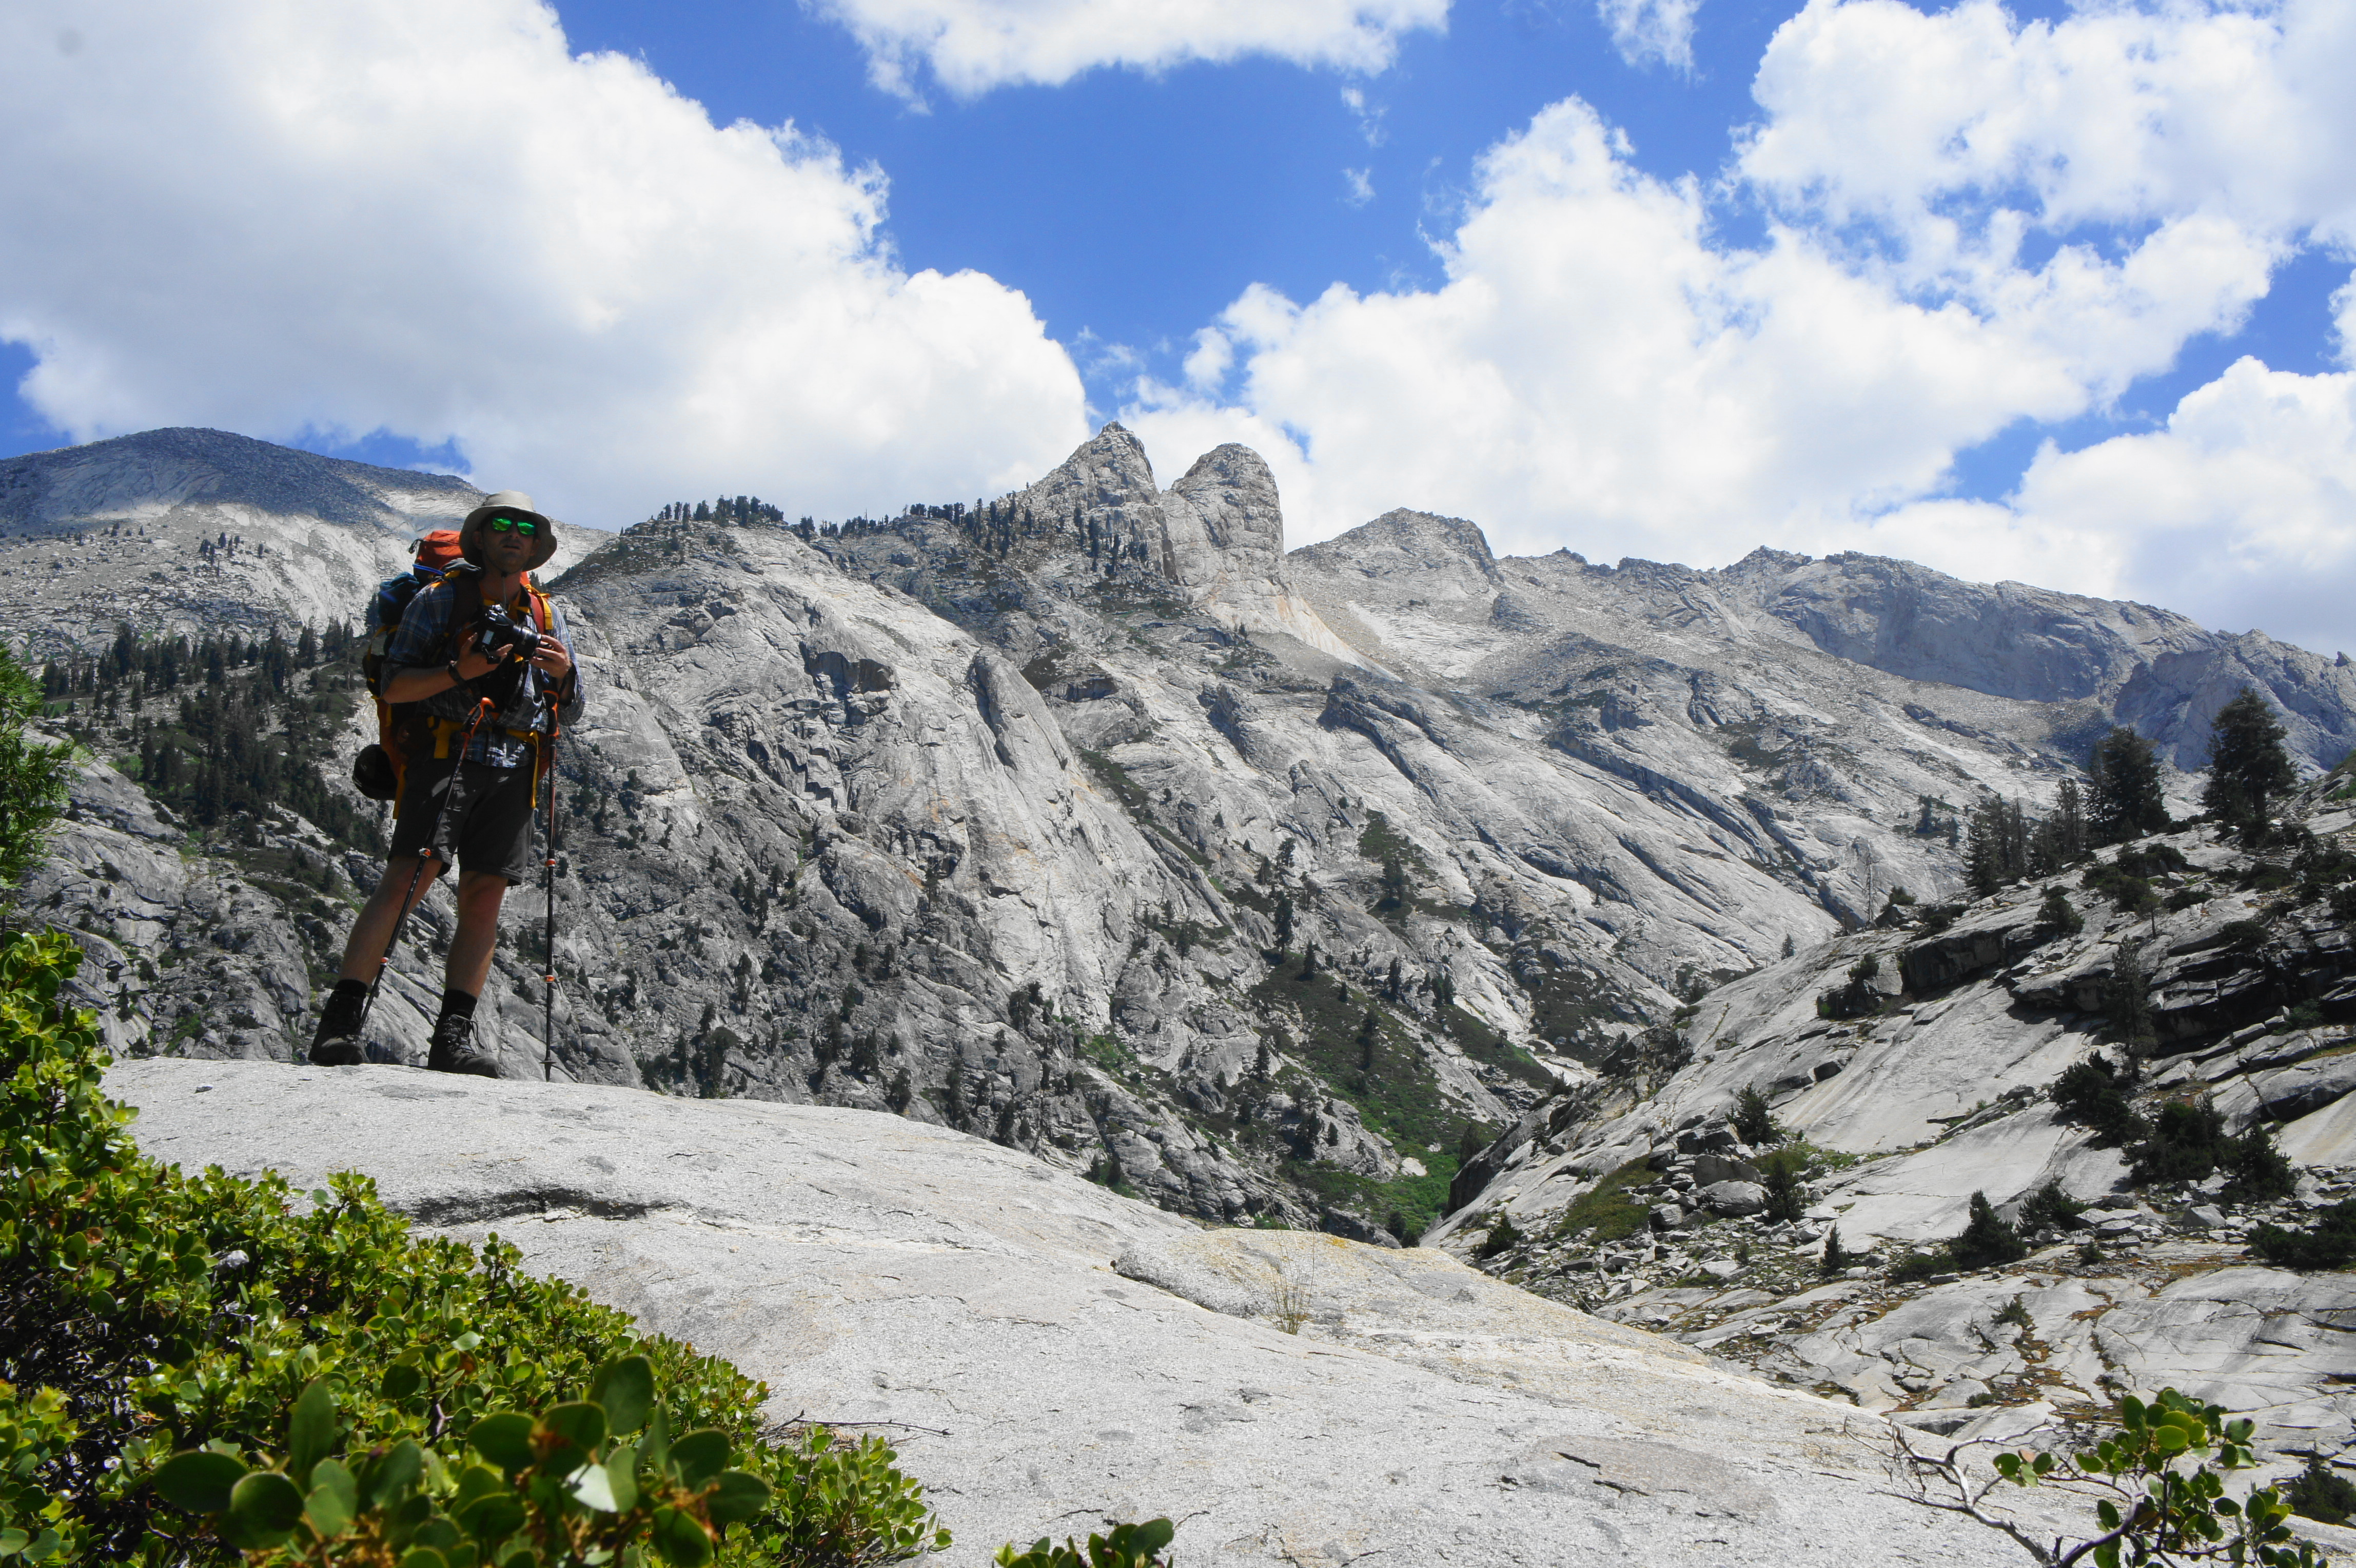
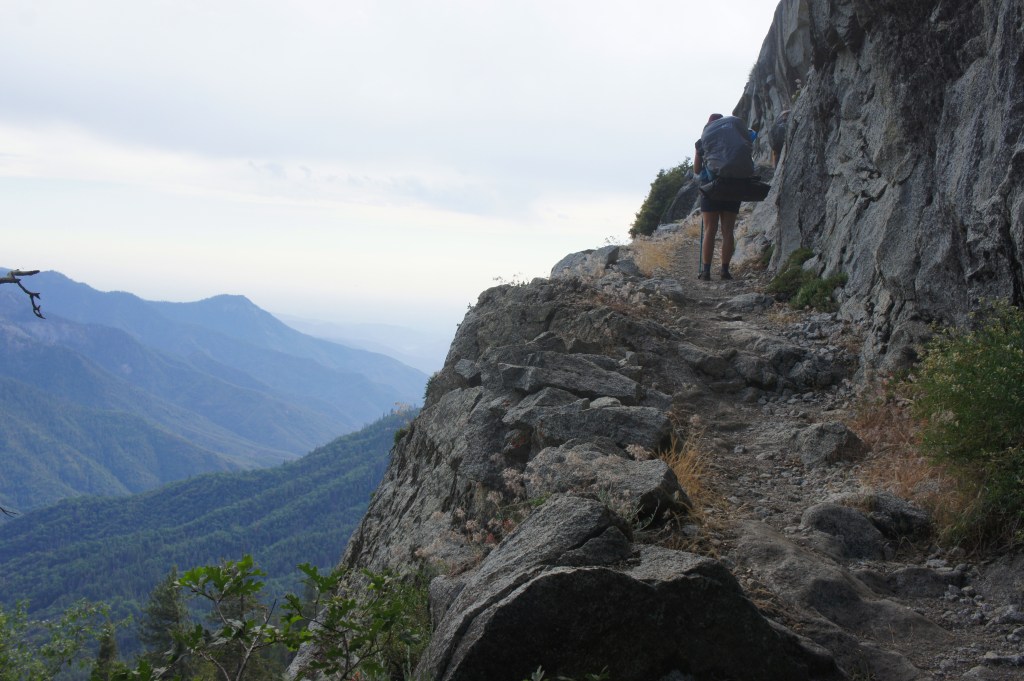
After leaving Twin Lakes behind, the climb begins in earnest, with the switchbacks crisscrossing a spring-fed stream that seemingly flows year-round. The stiff climb affords some limited and sporadic views back down the Clover Creek drainage to Twin Lakes, with the distant Central Valley (usually pretty hazy) eventually emerging into the picture on the horizon. After passing the 10,000-foot mark, the trail passes under the striated outcrops of Twin Peaks, then finally levels off and crests Silliman Pass (10,160’), one of just three trail-serviced gaps offering passage over the Kings-Kaweah Divide.
Northern view to Monarch Divide and Sierra Crest from Silliman Pass 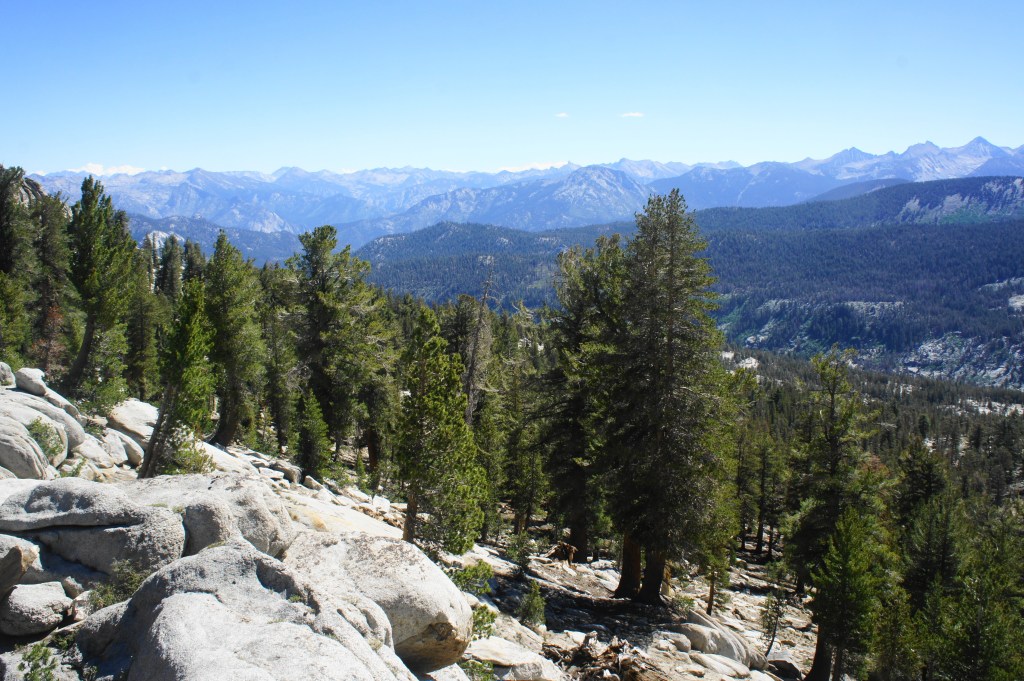
Another wide-ranging view

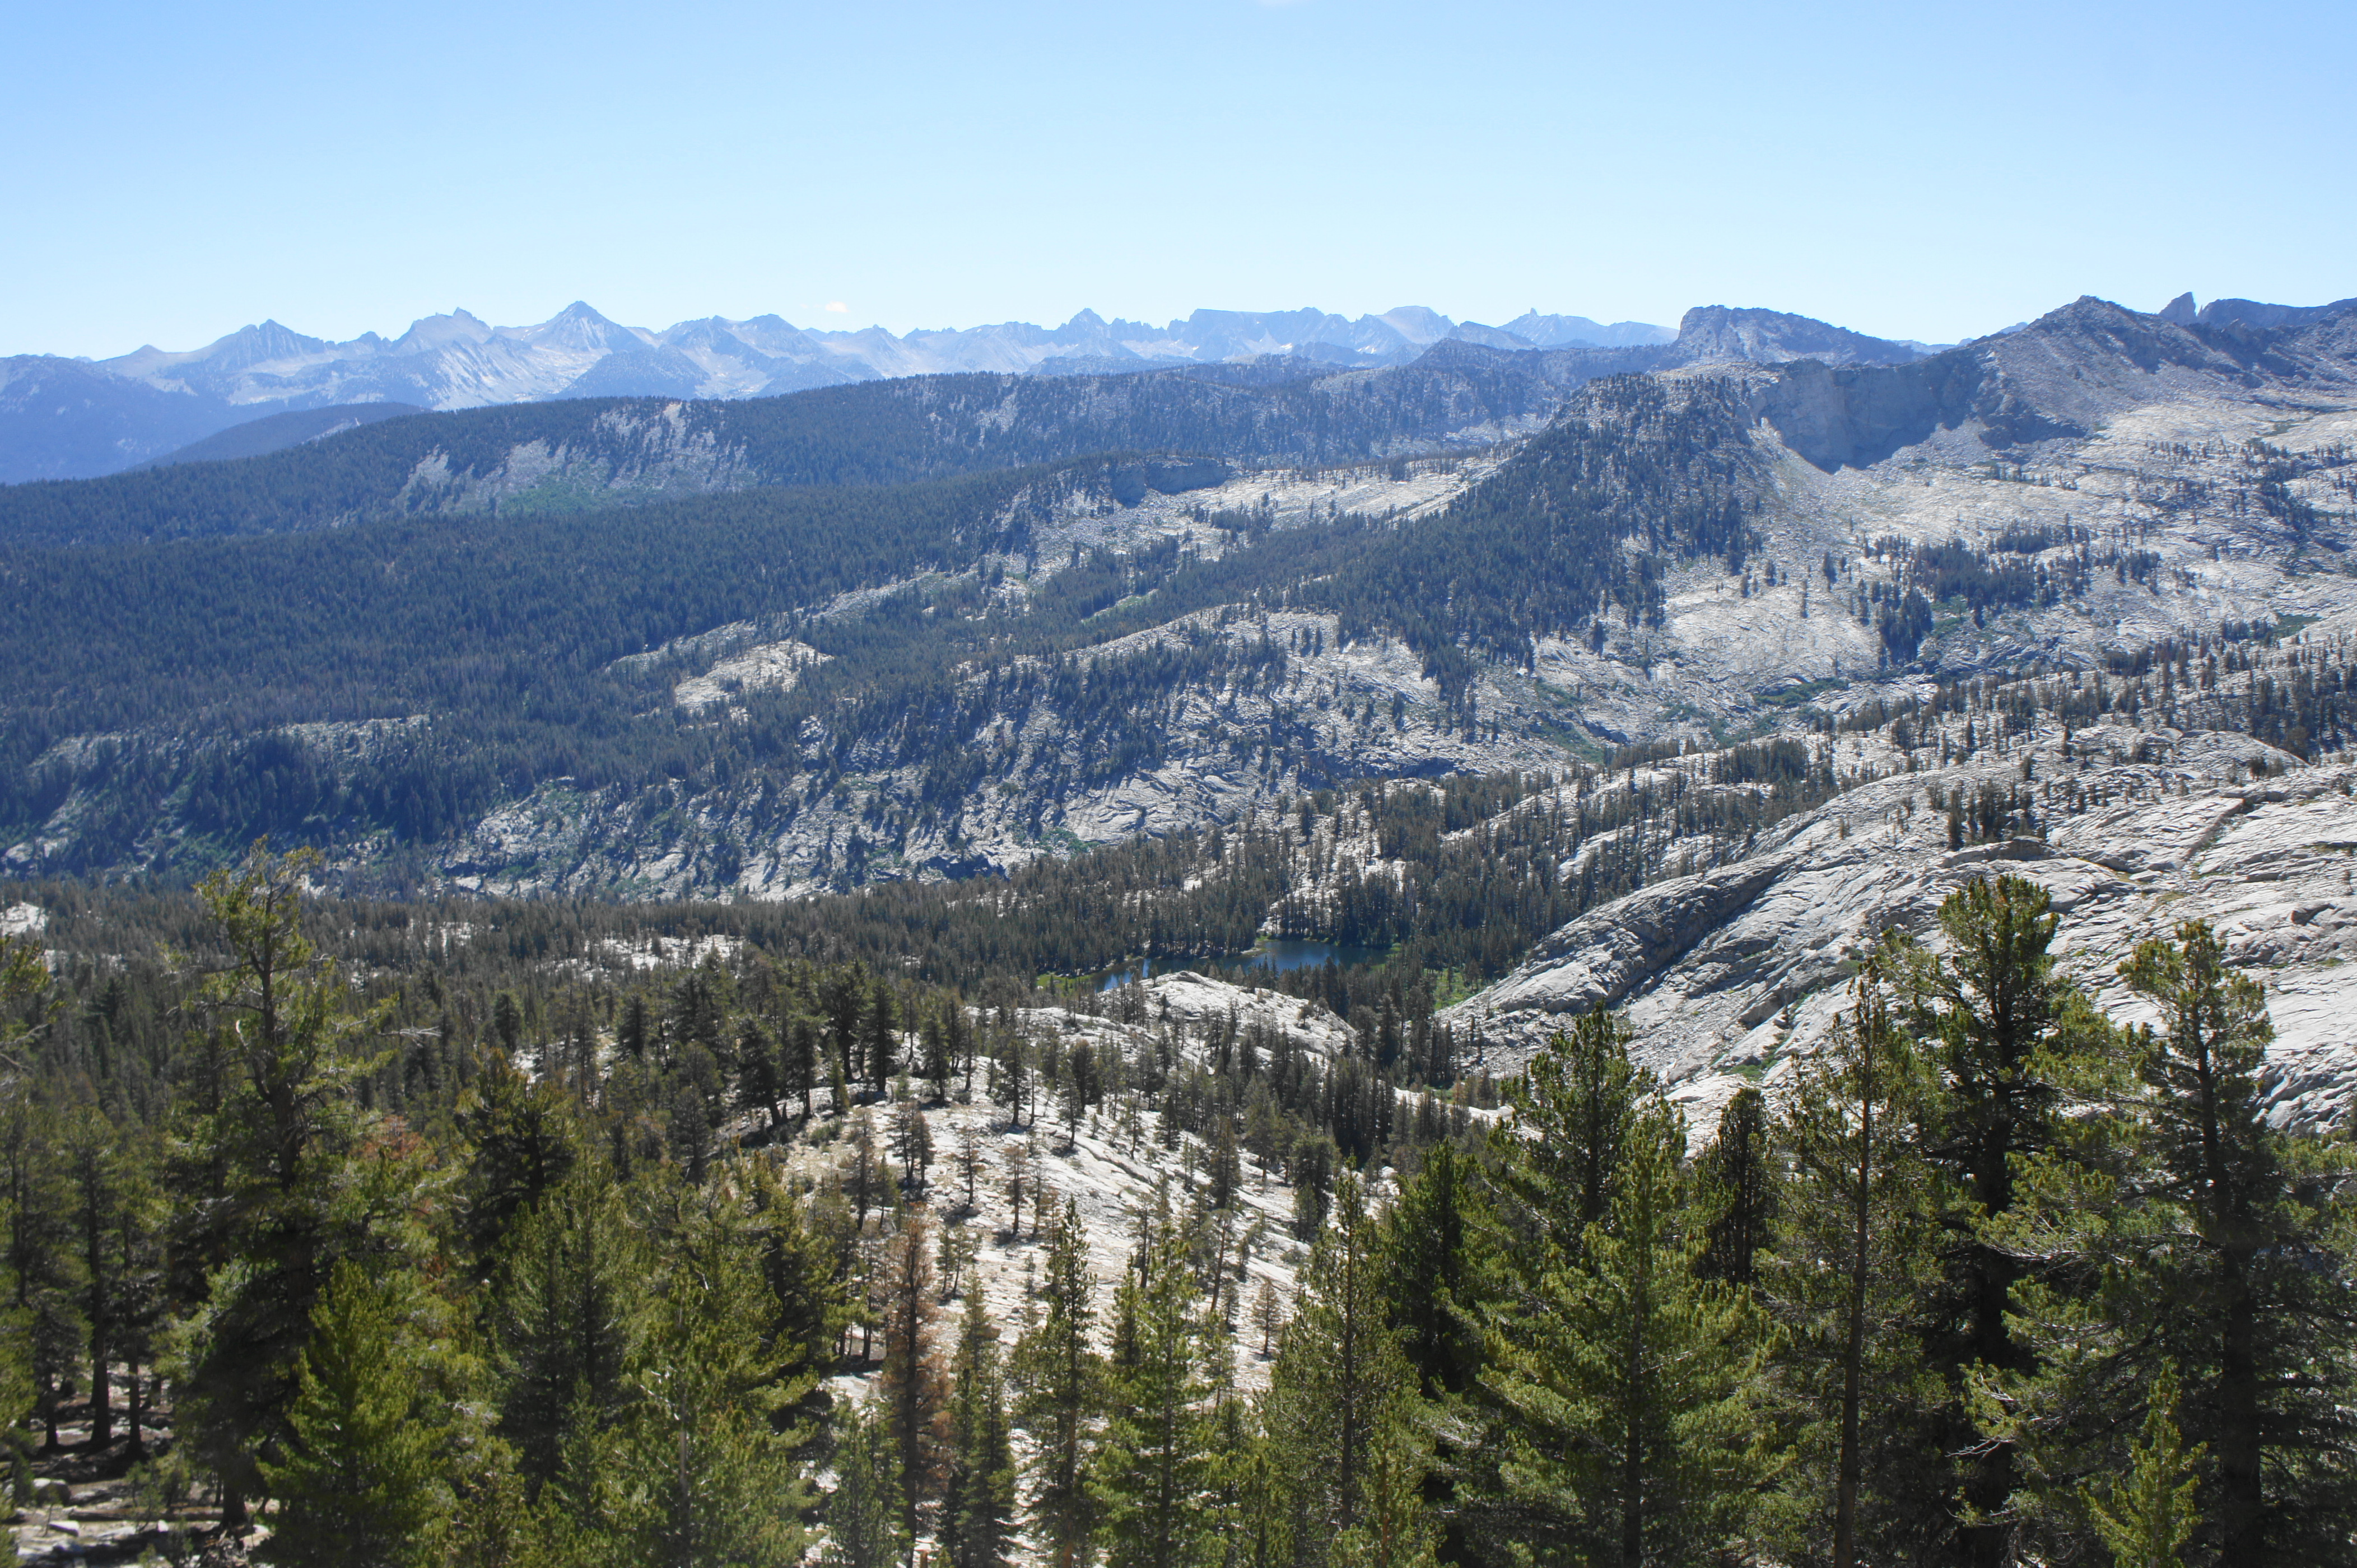
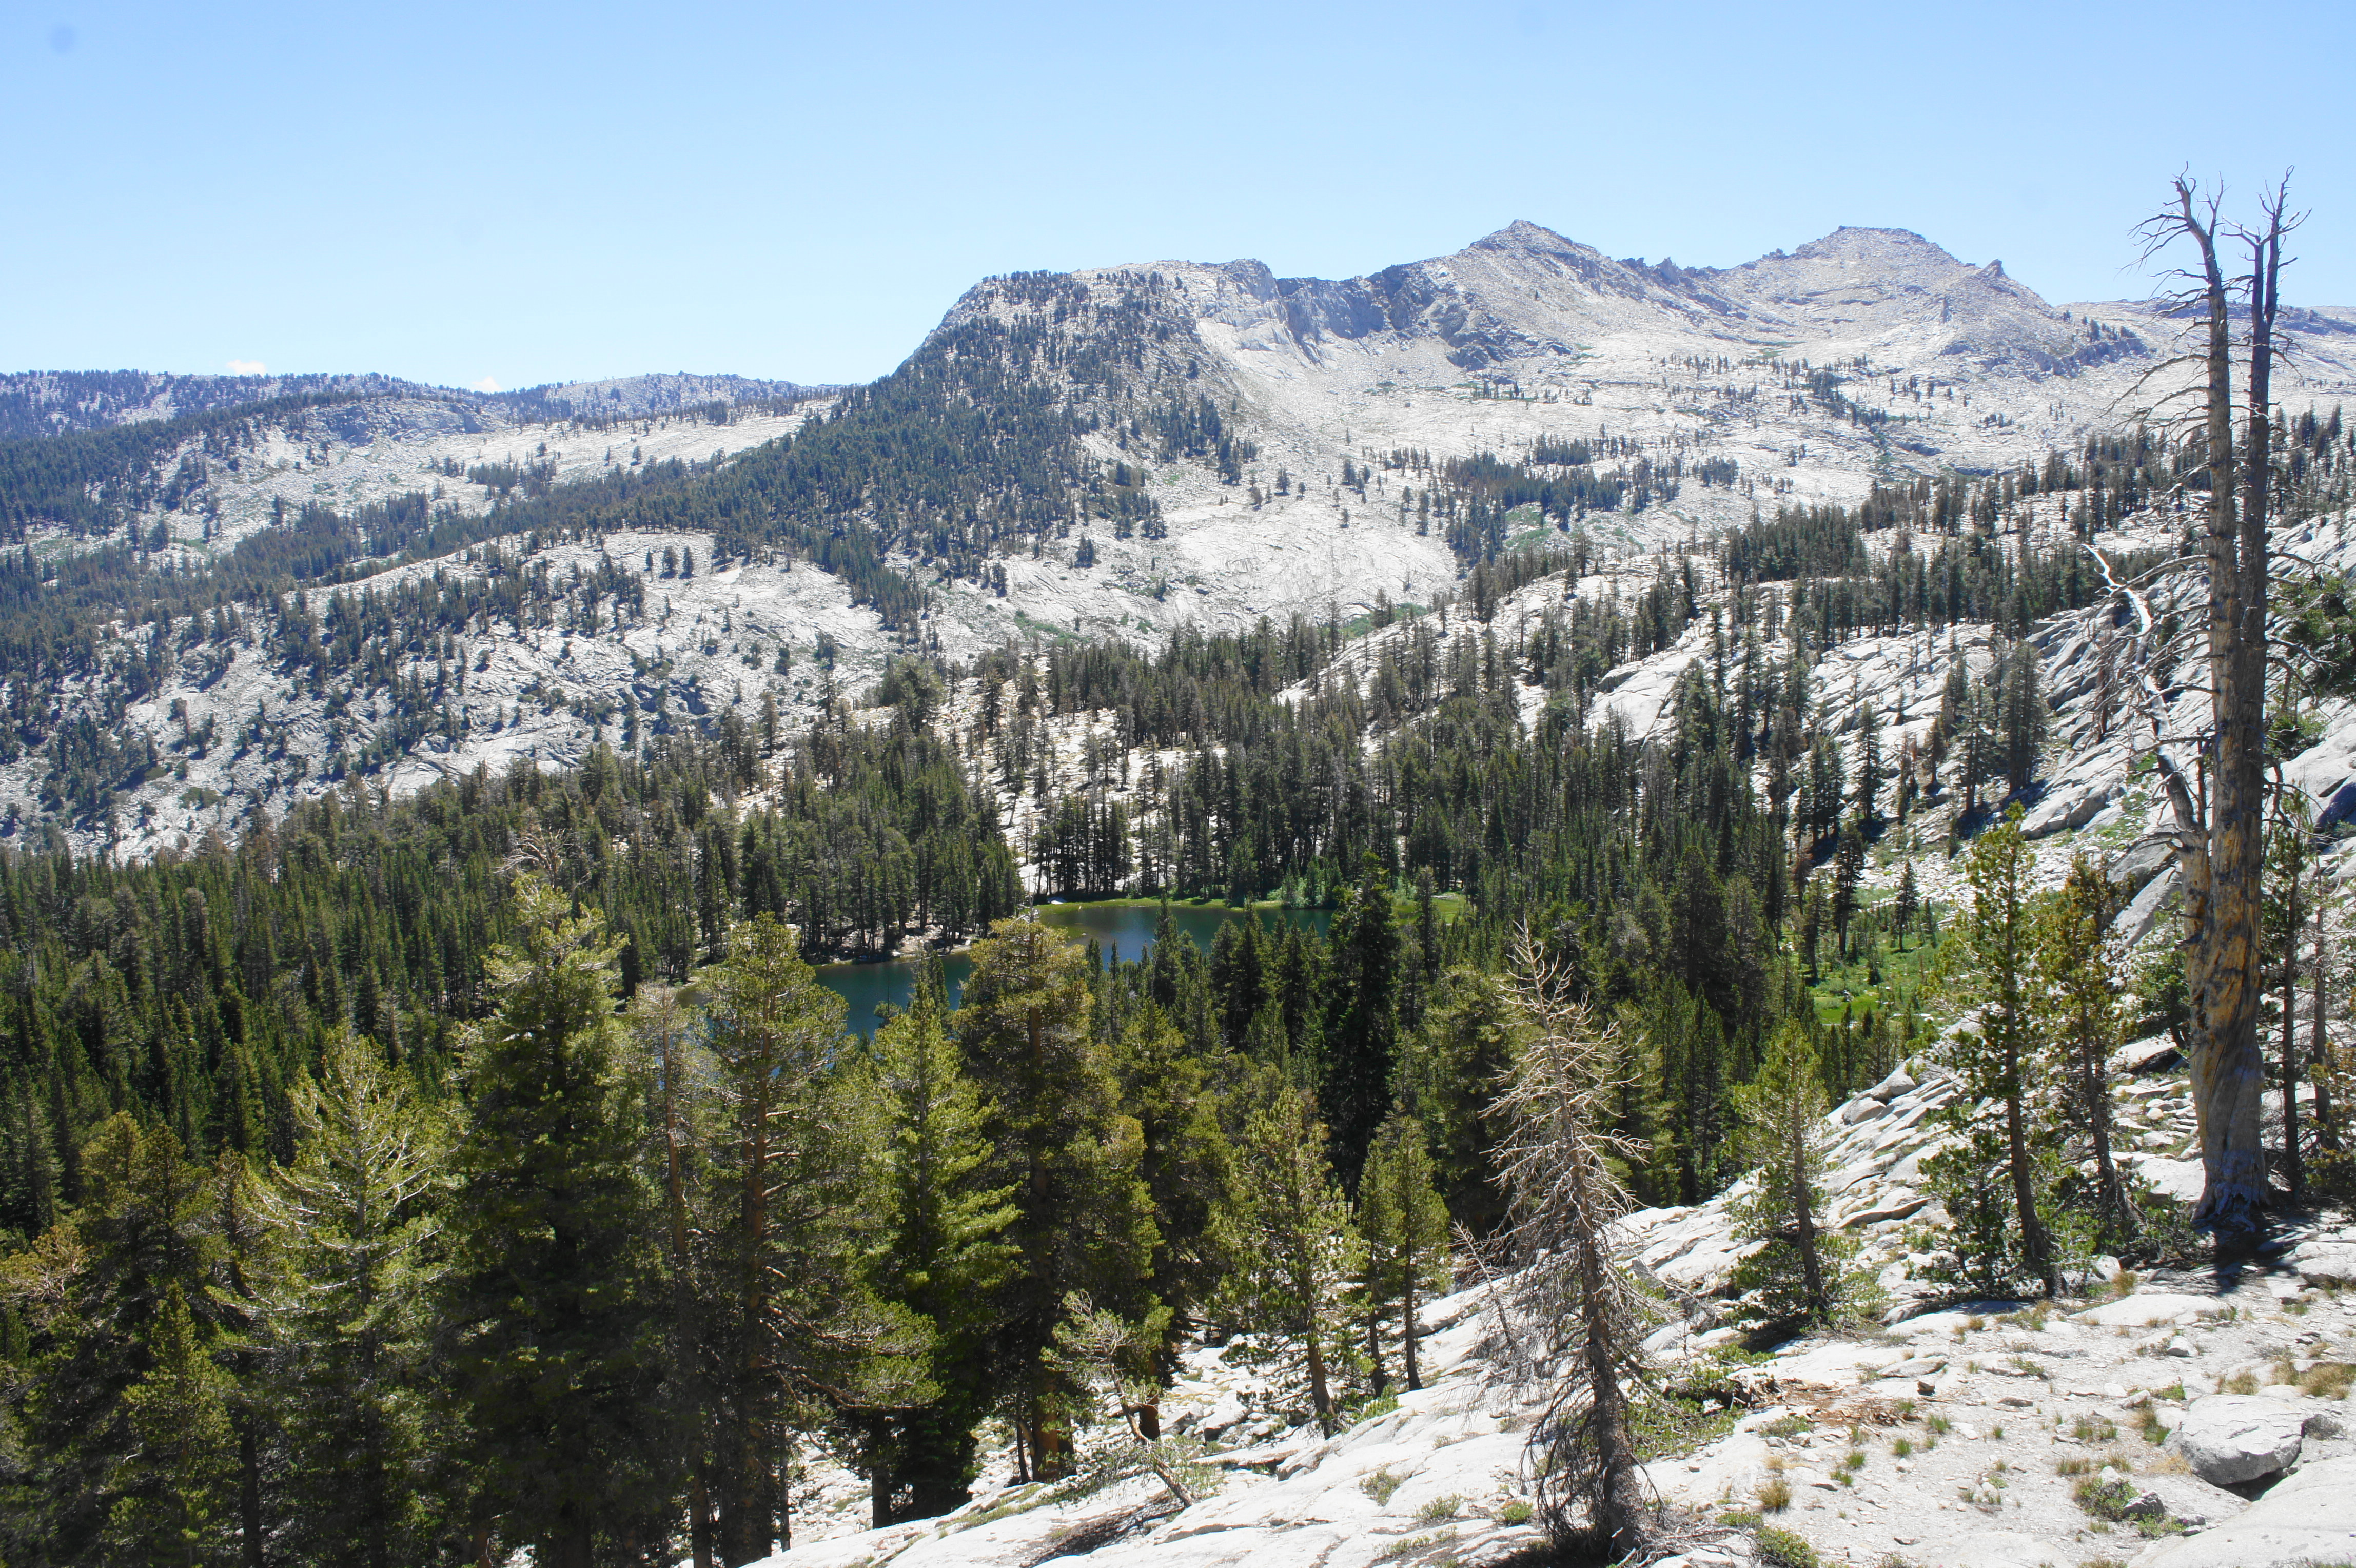
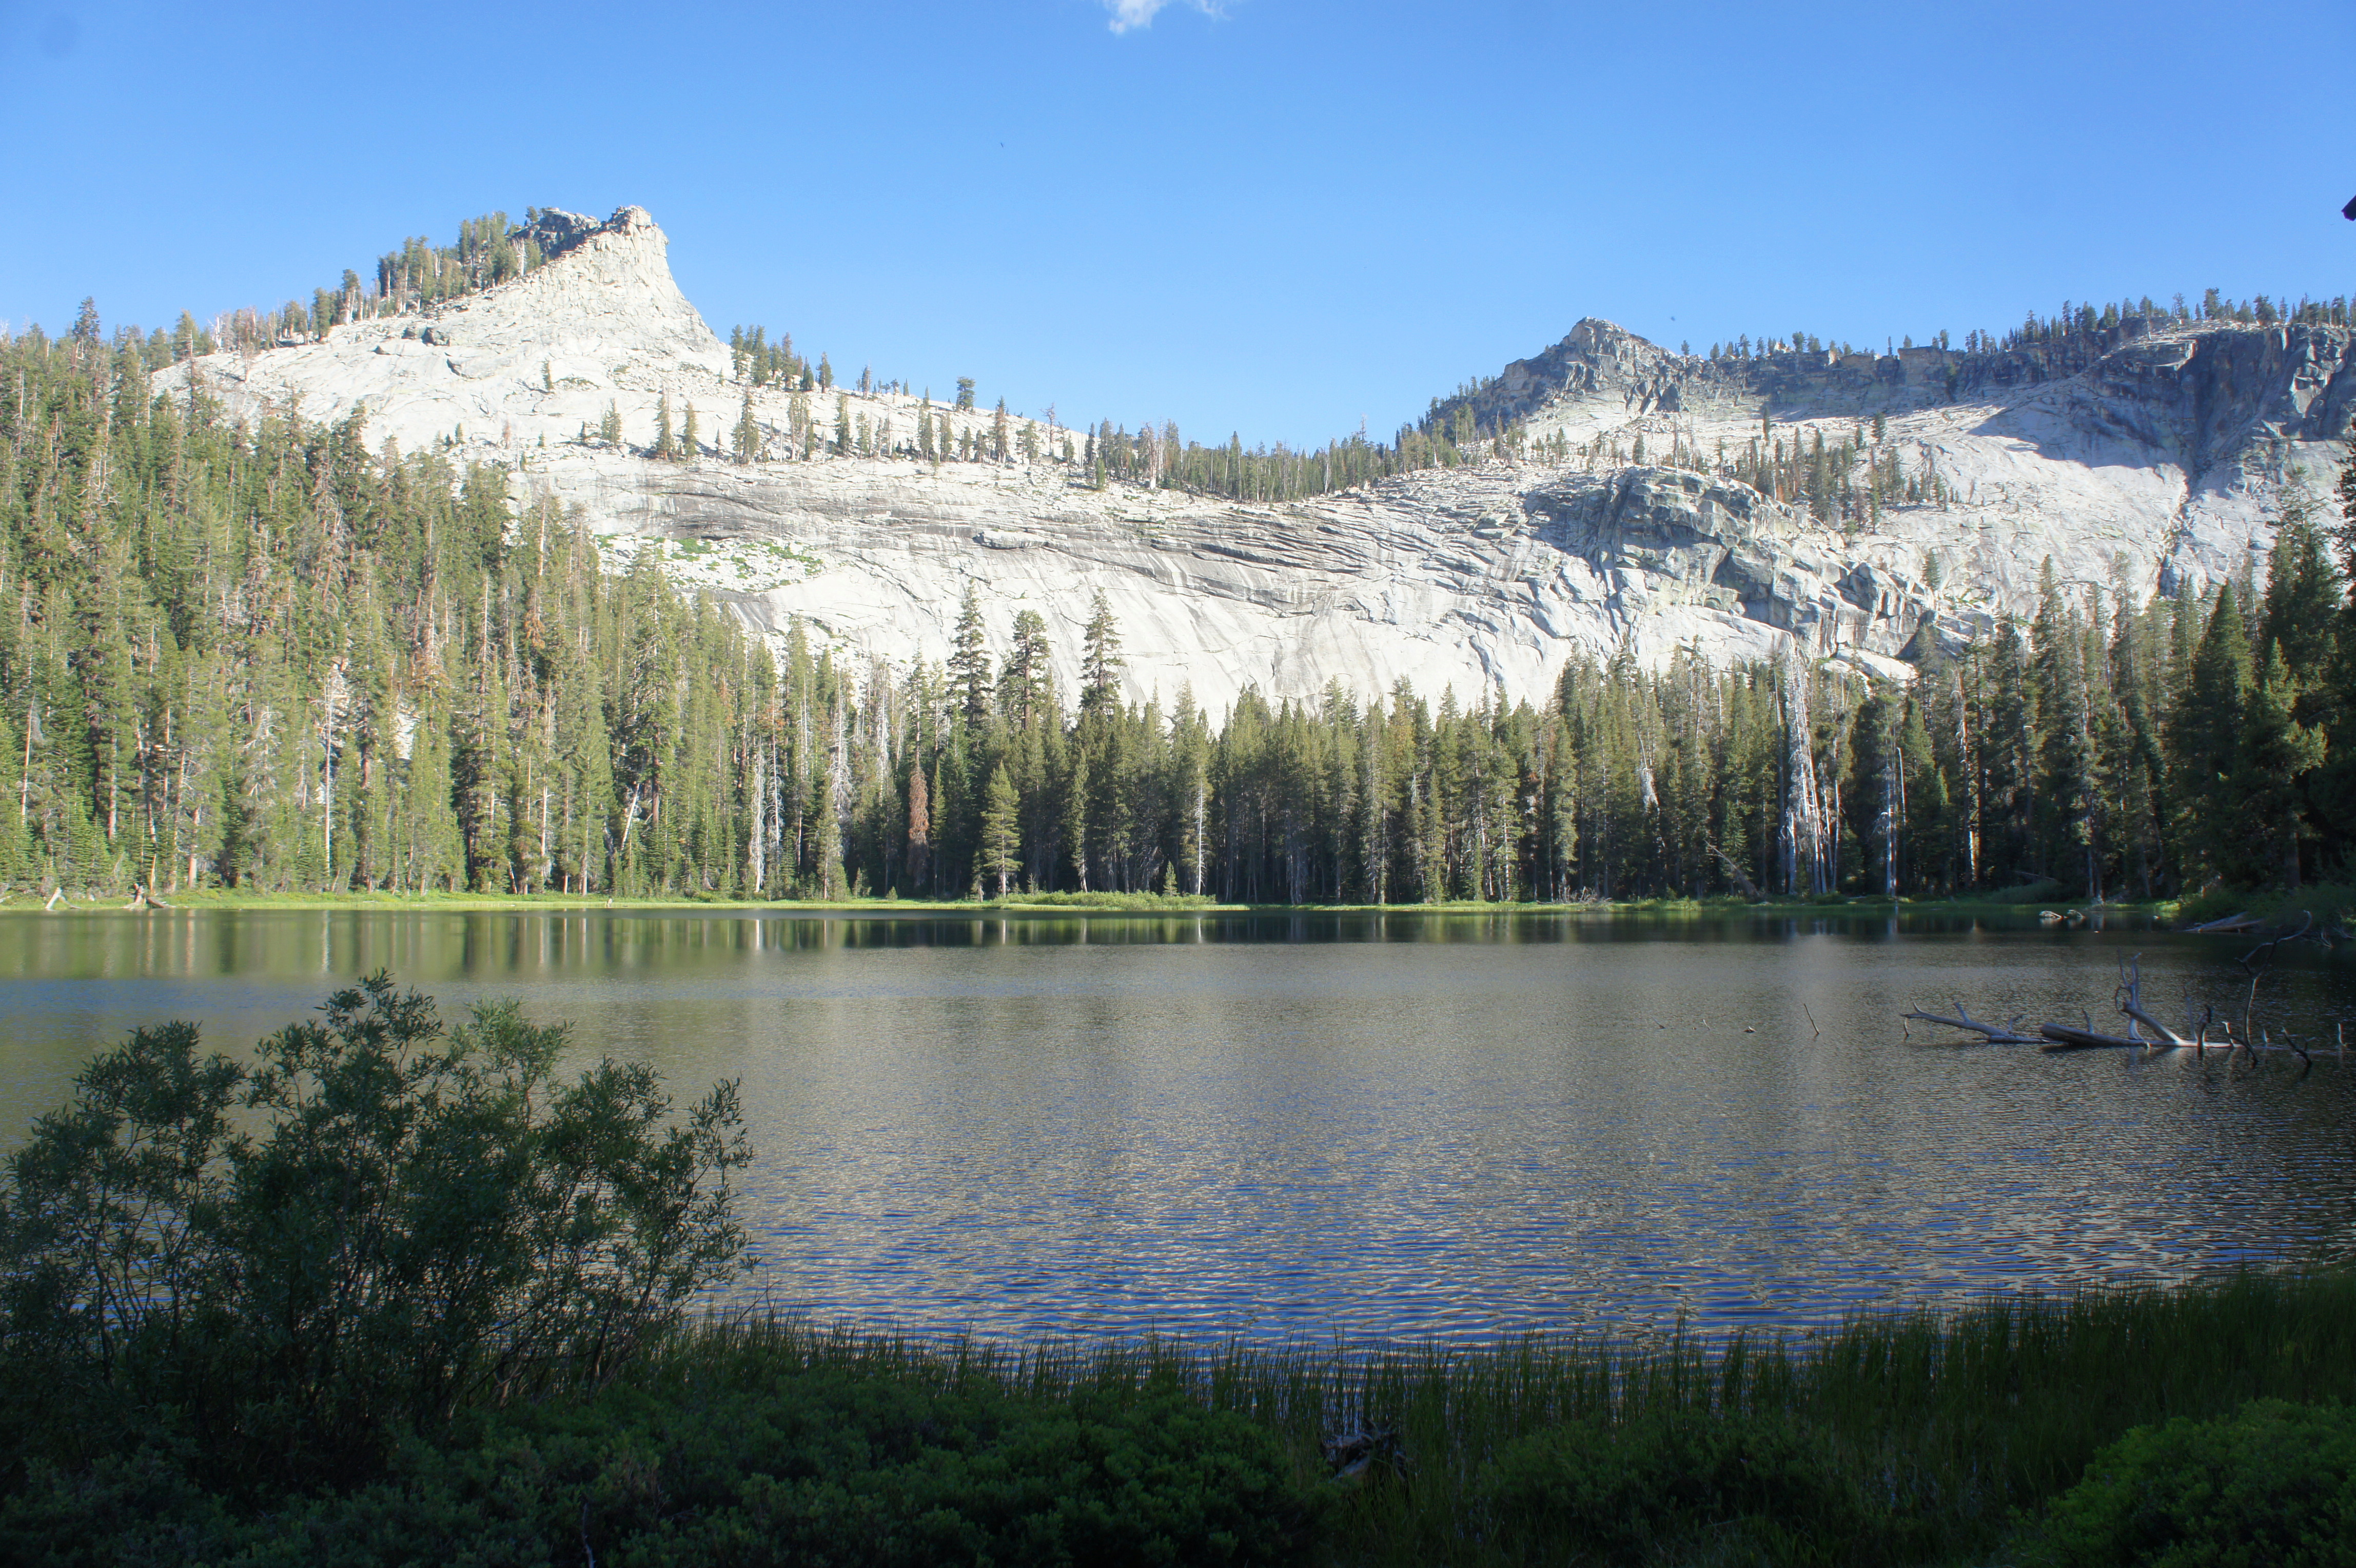
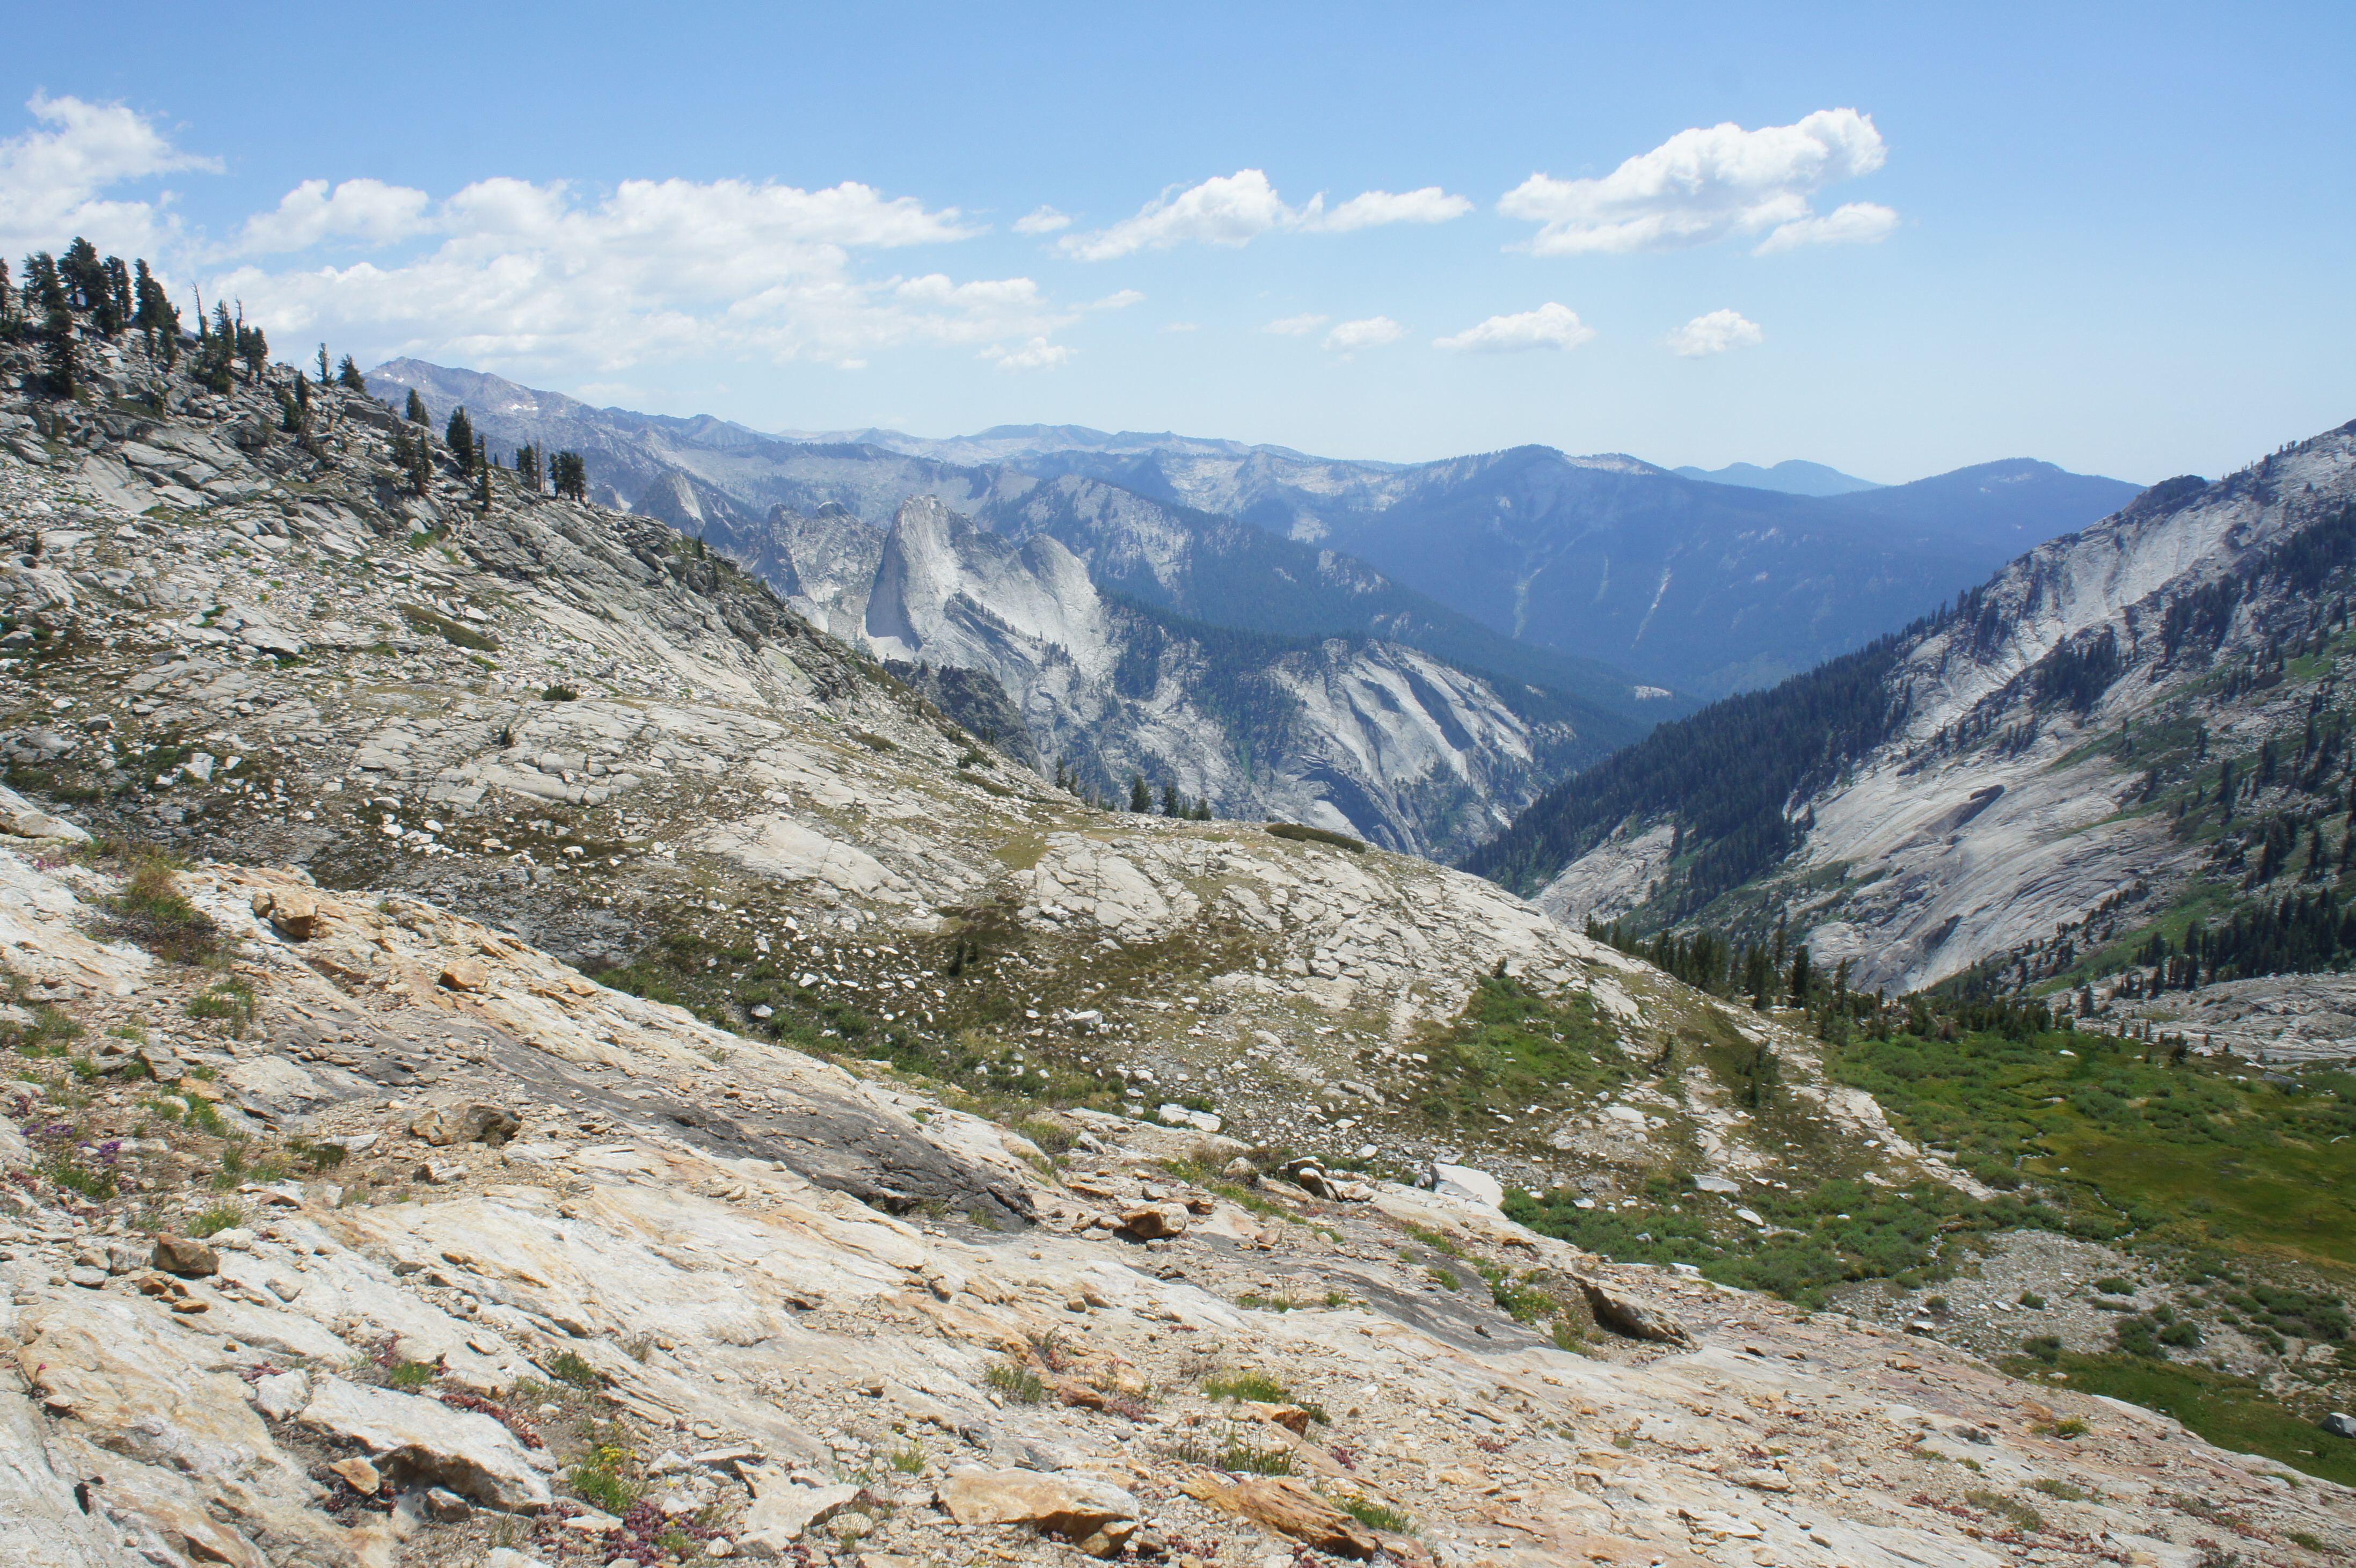
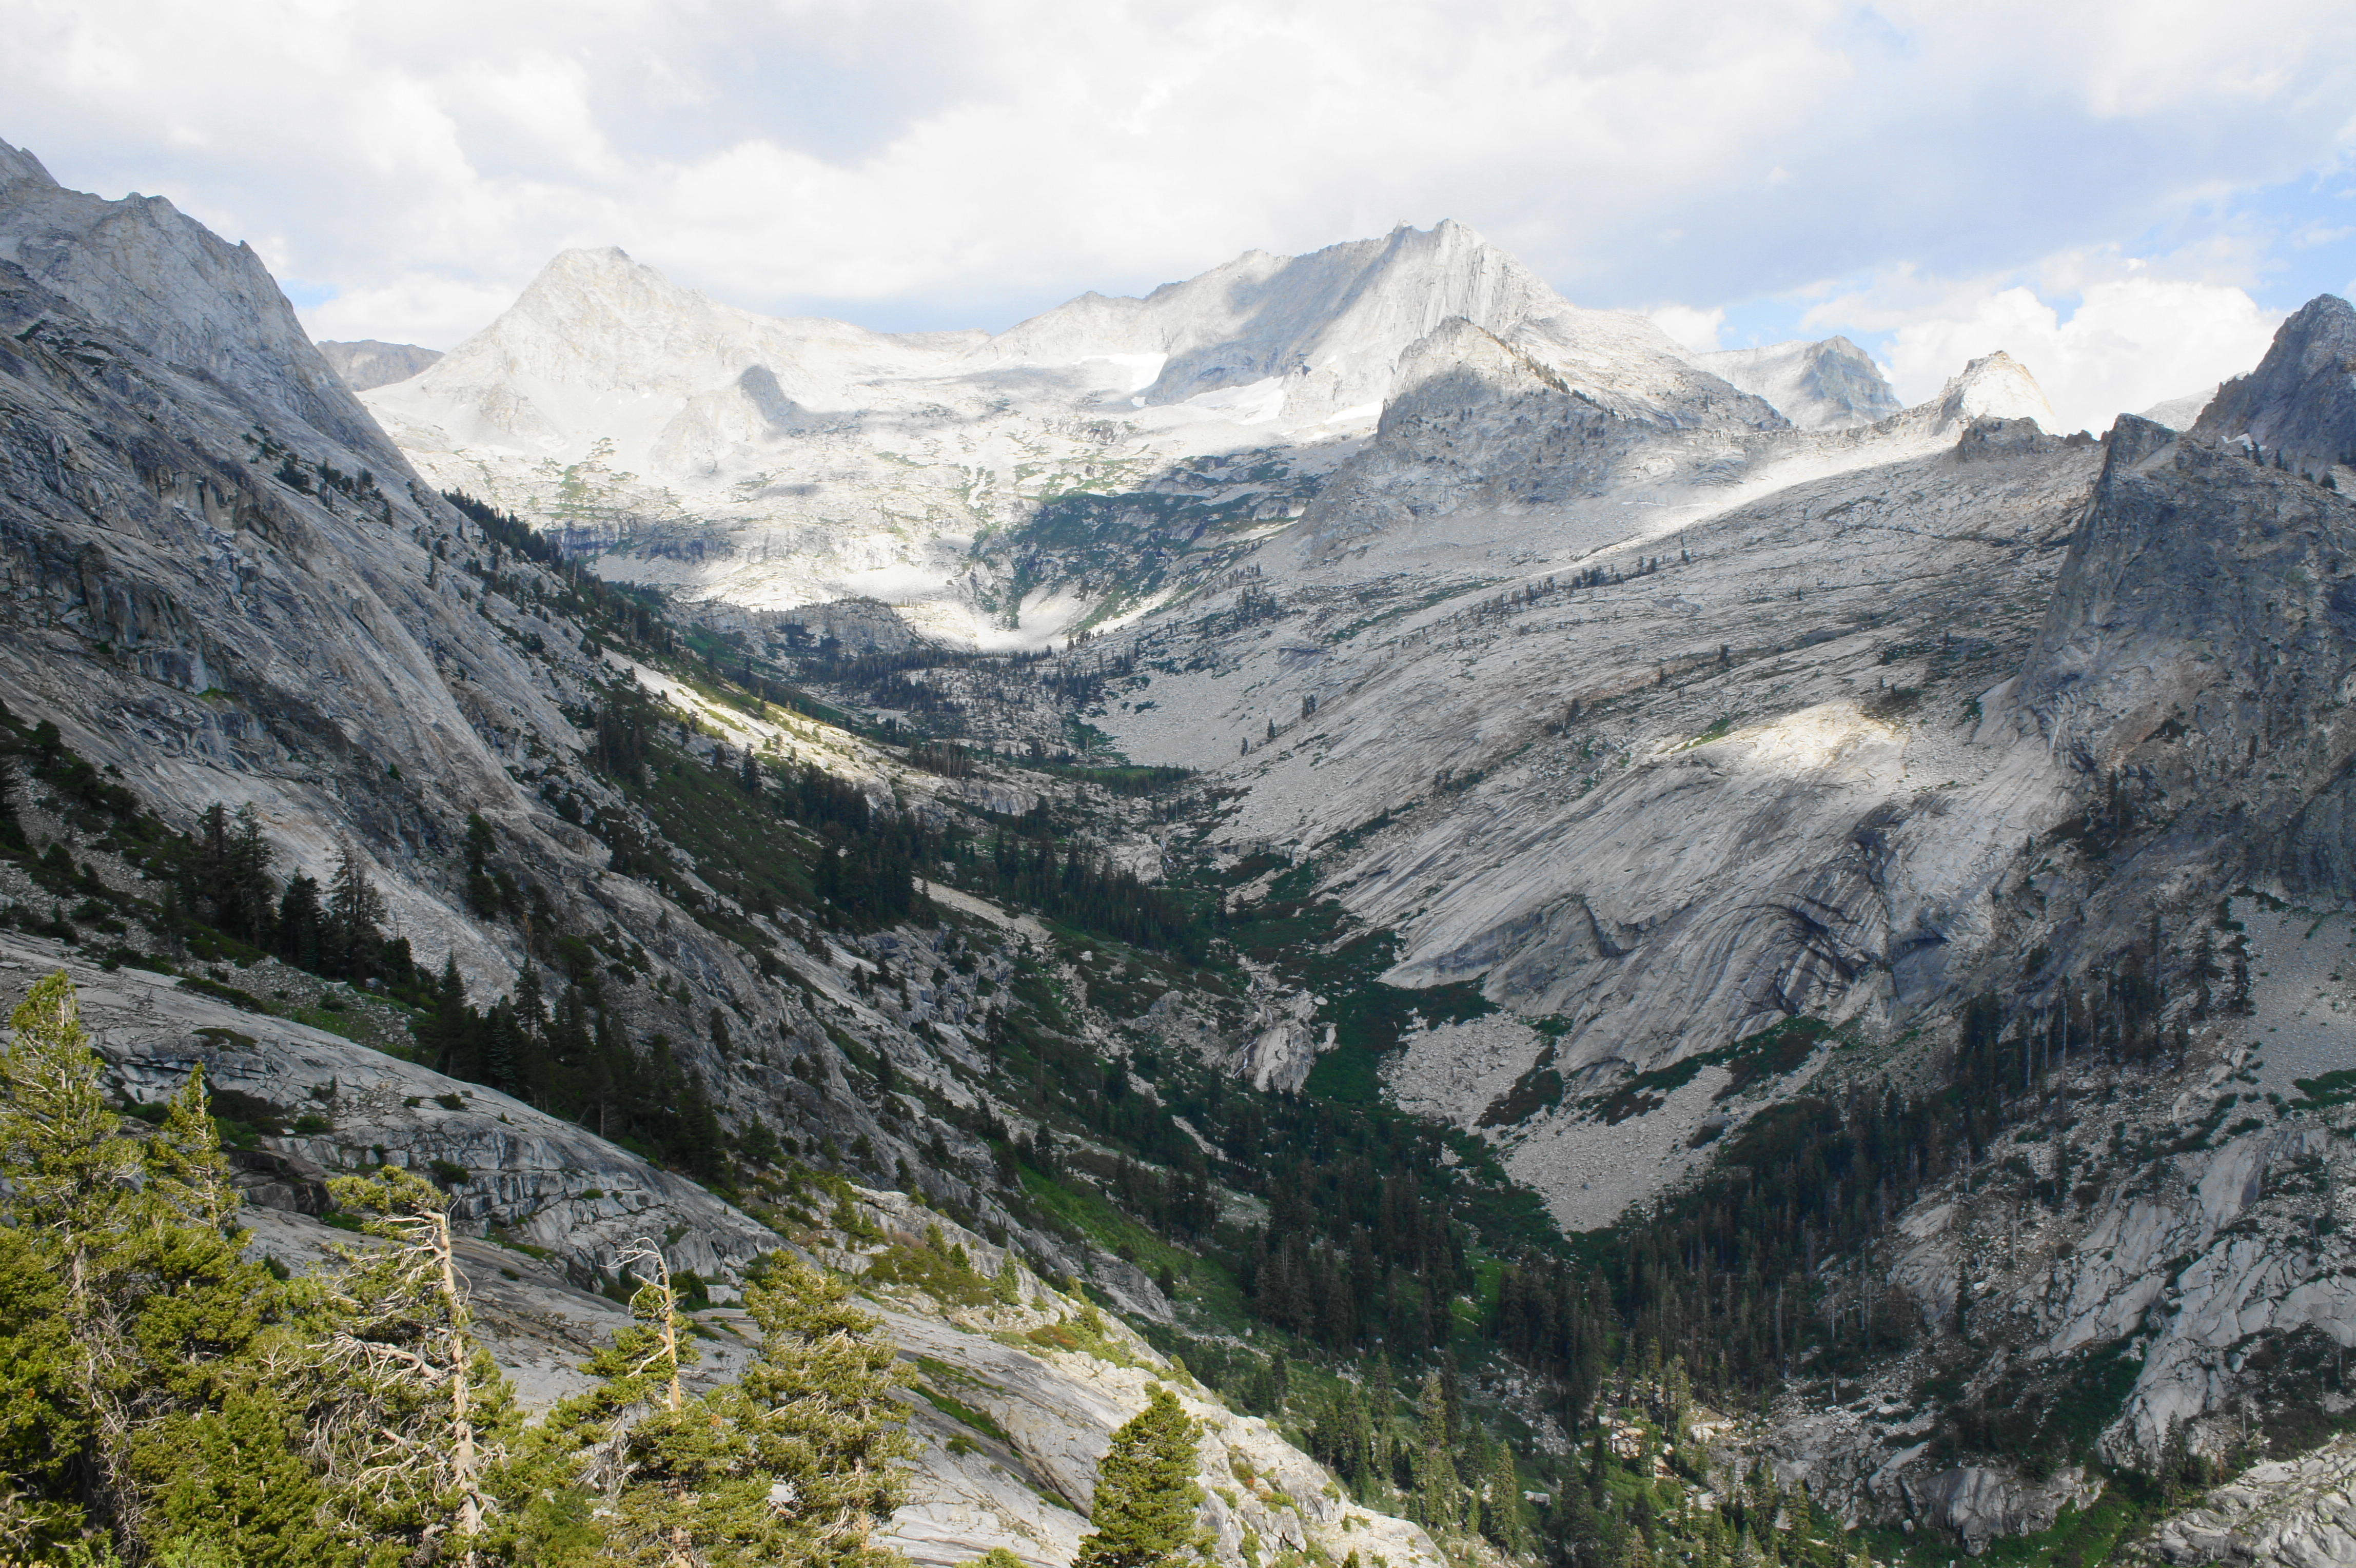
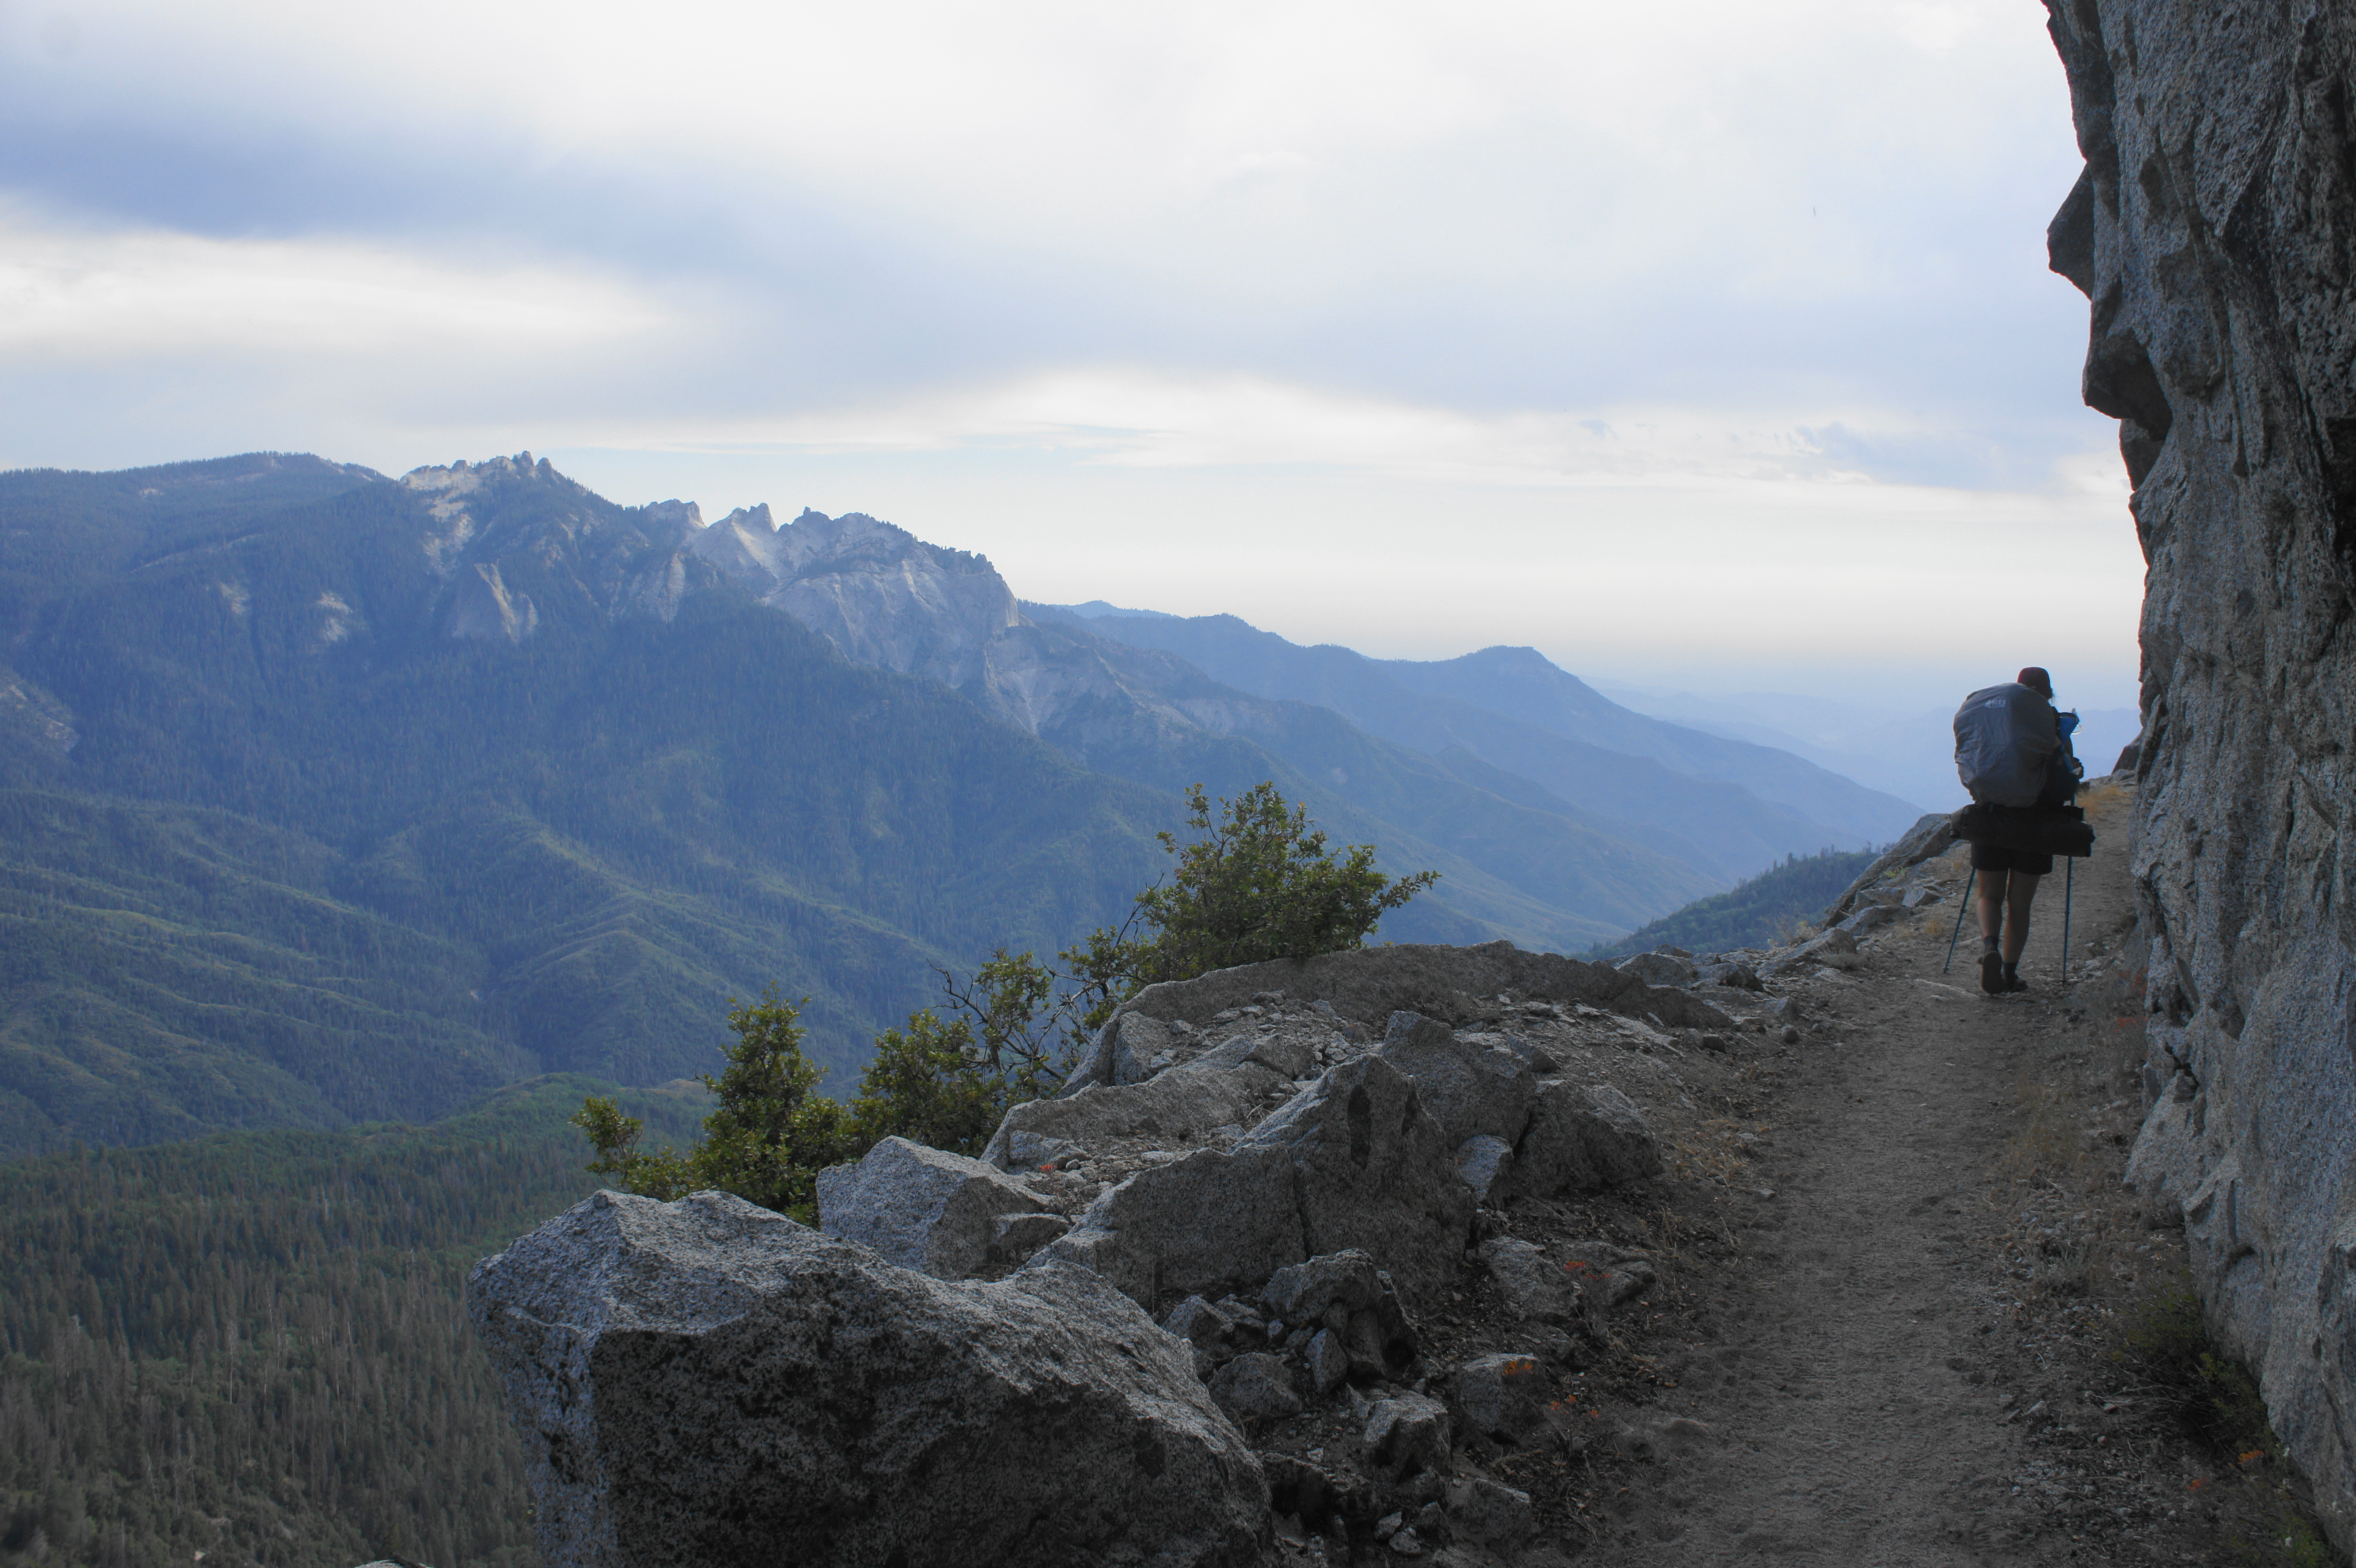
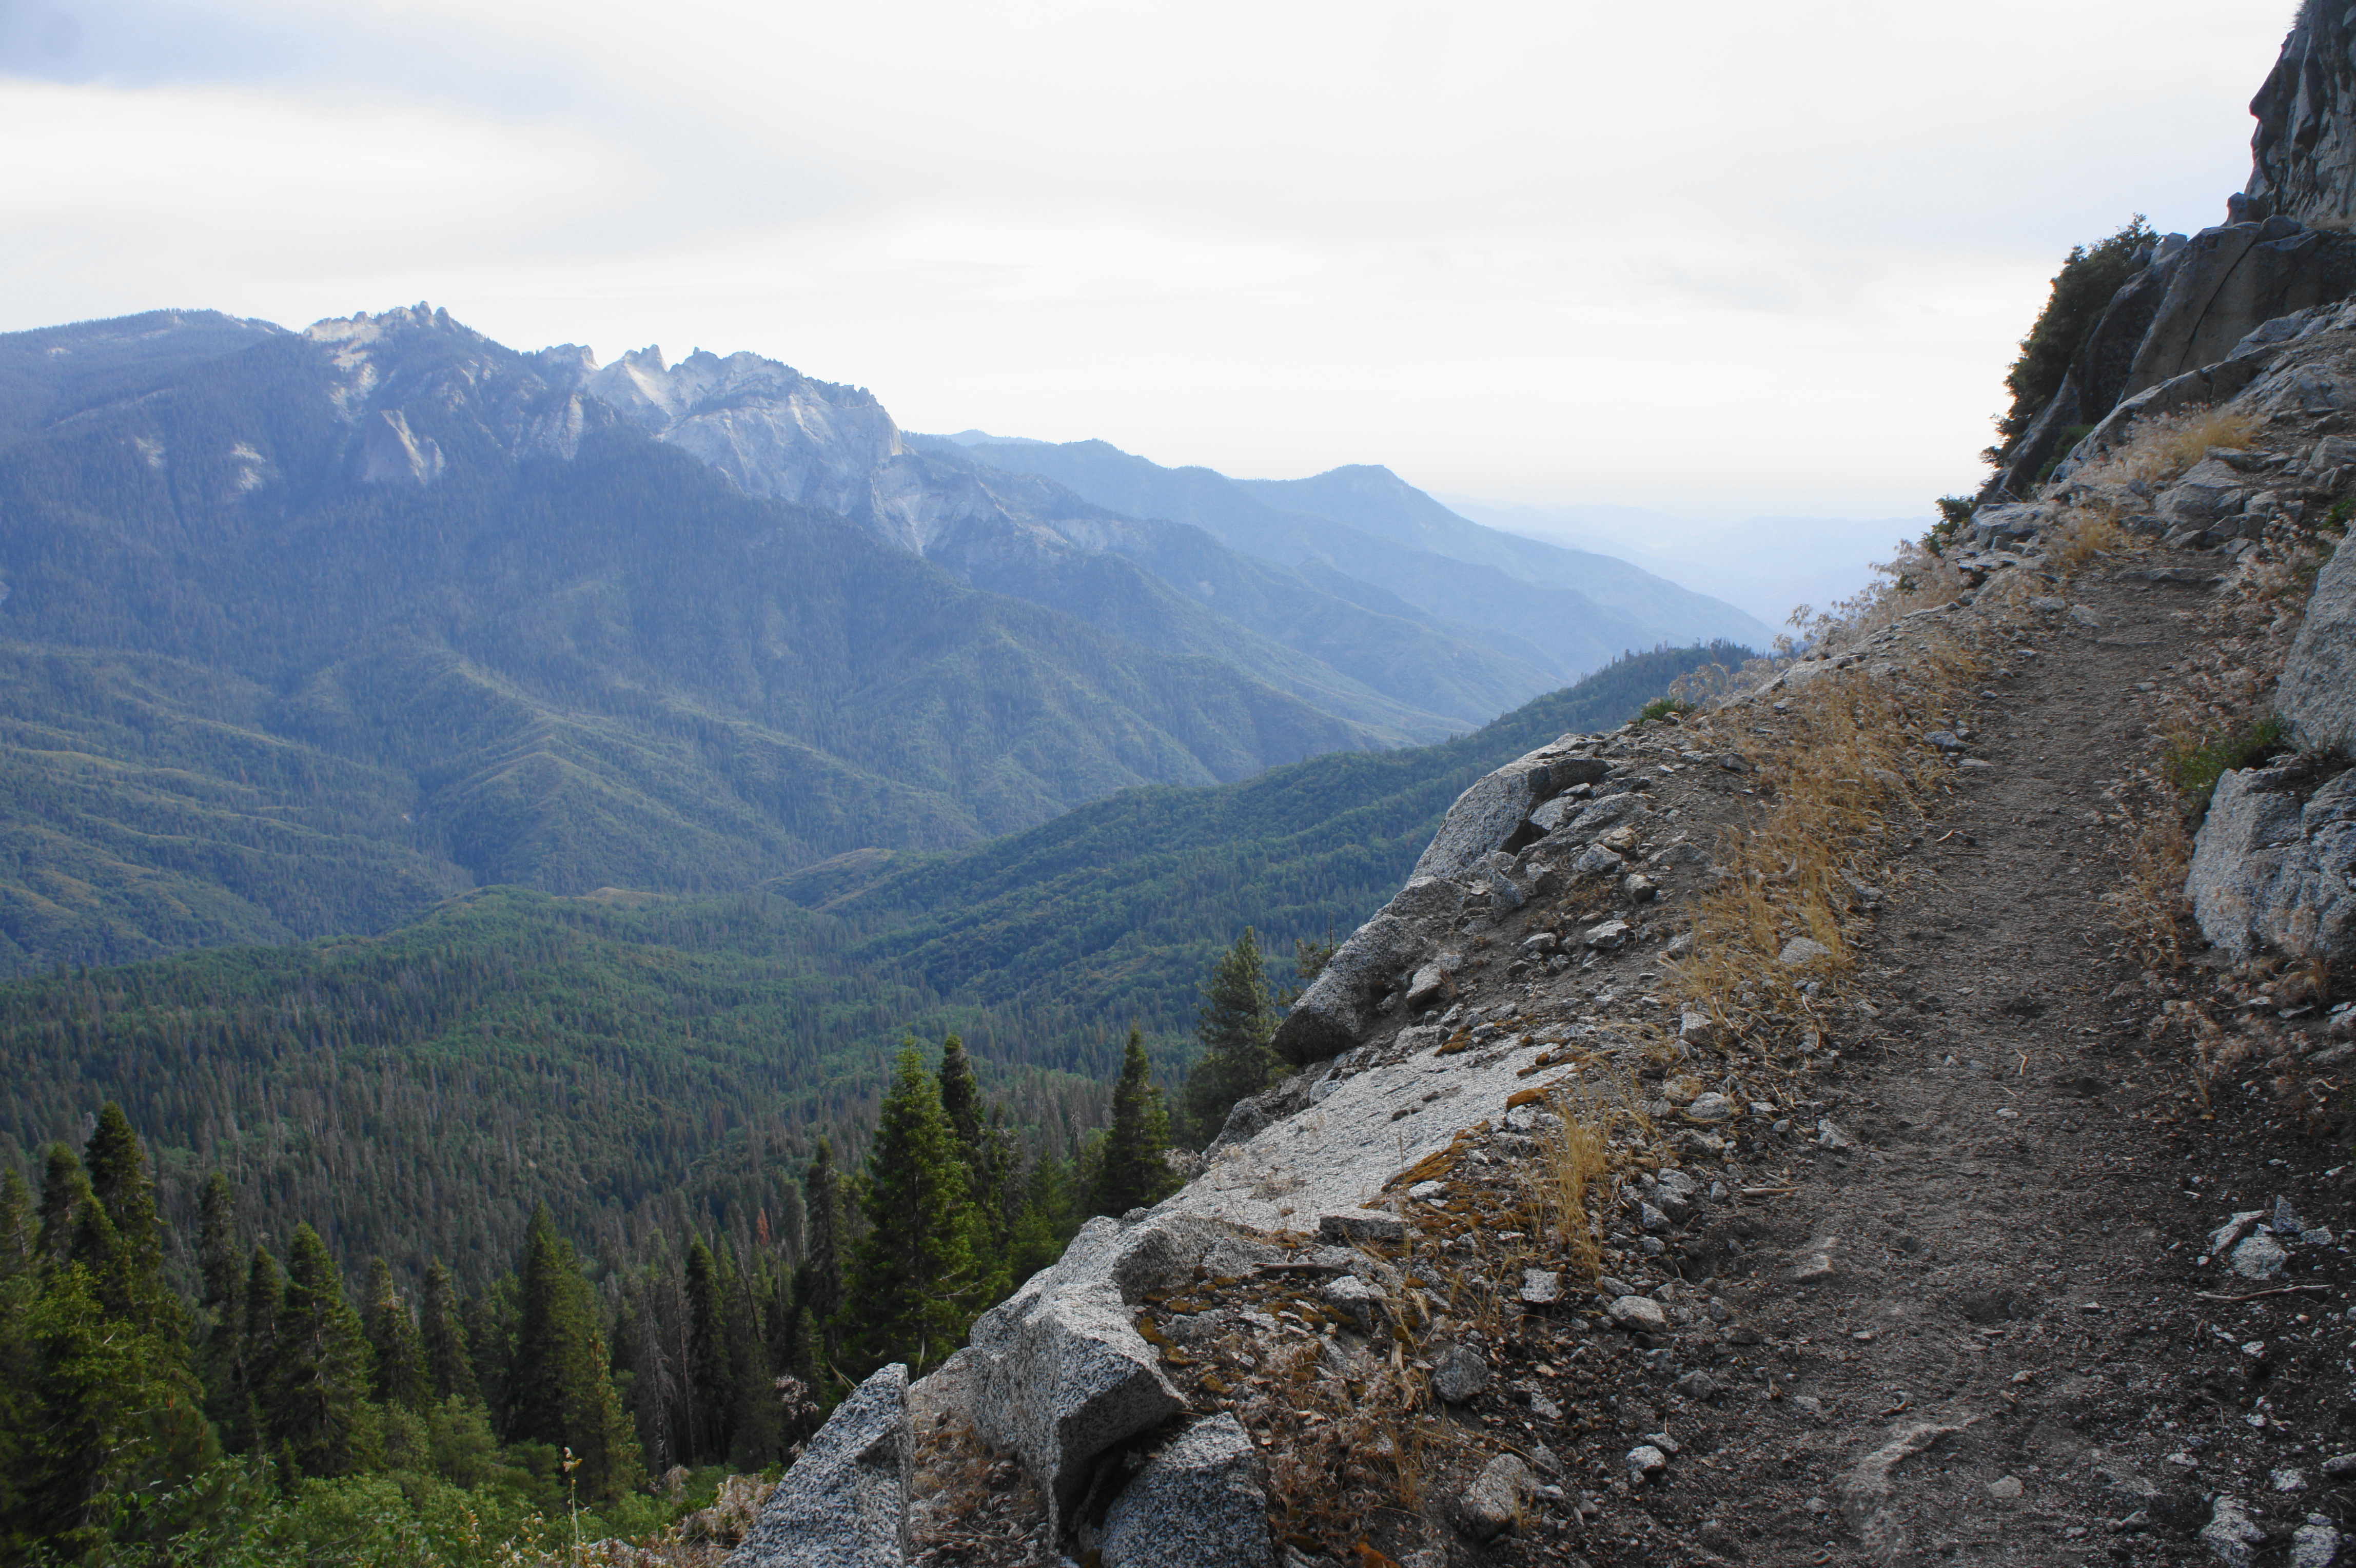
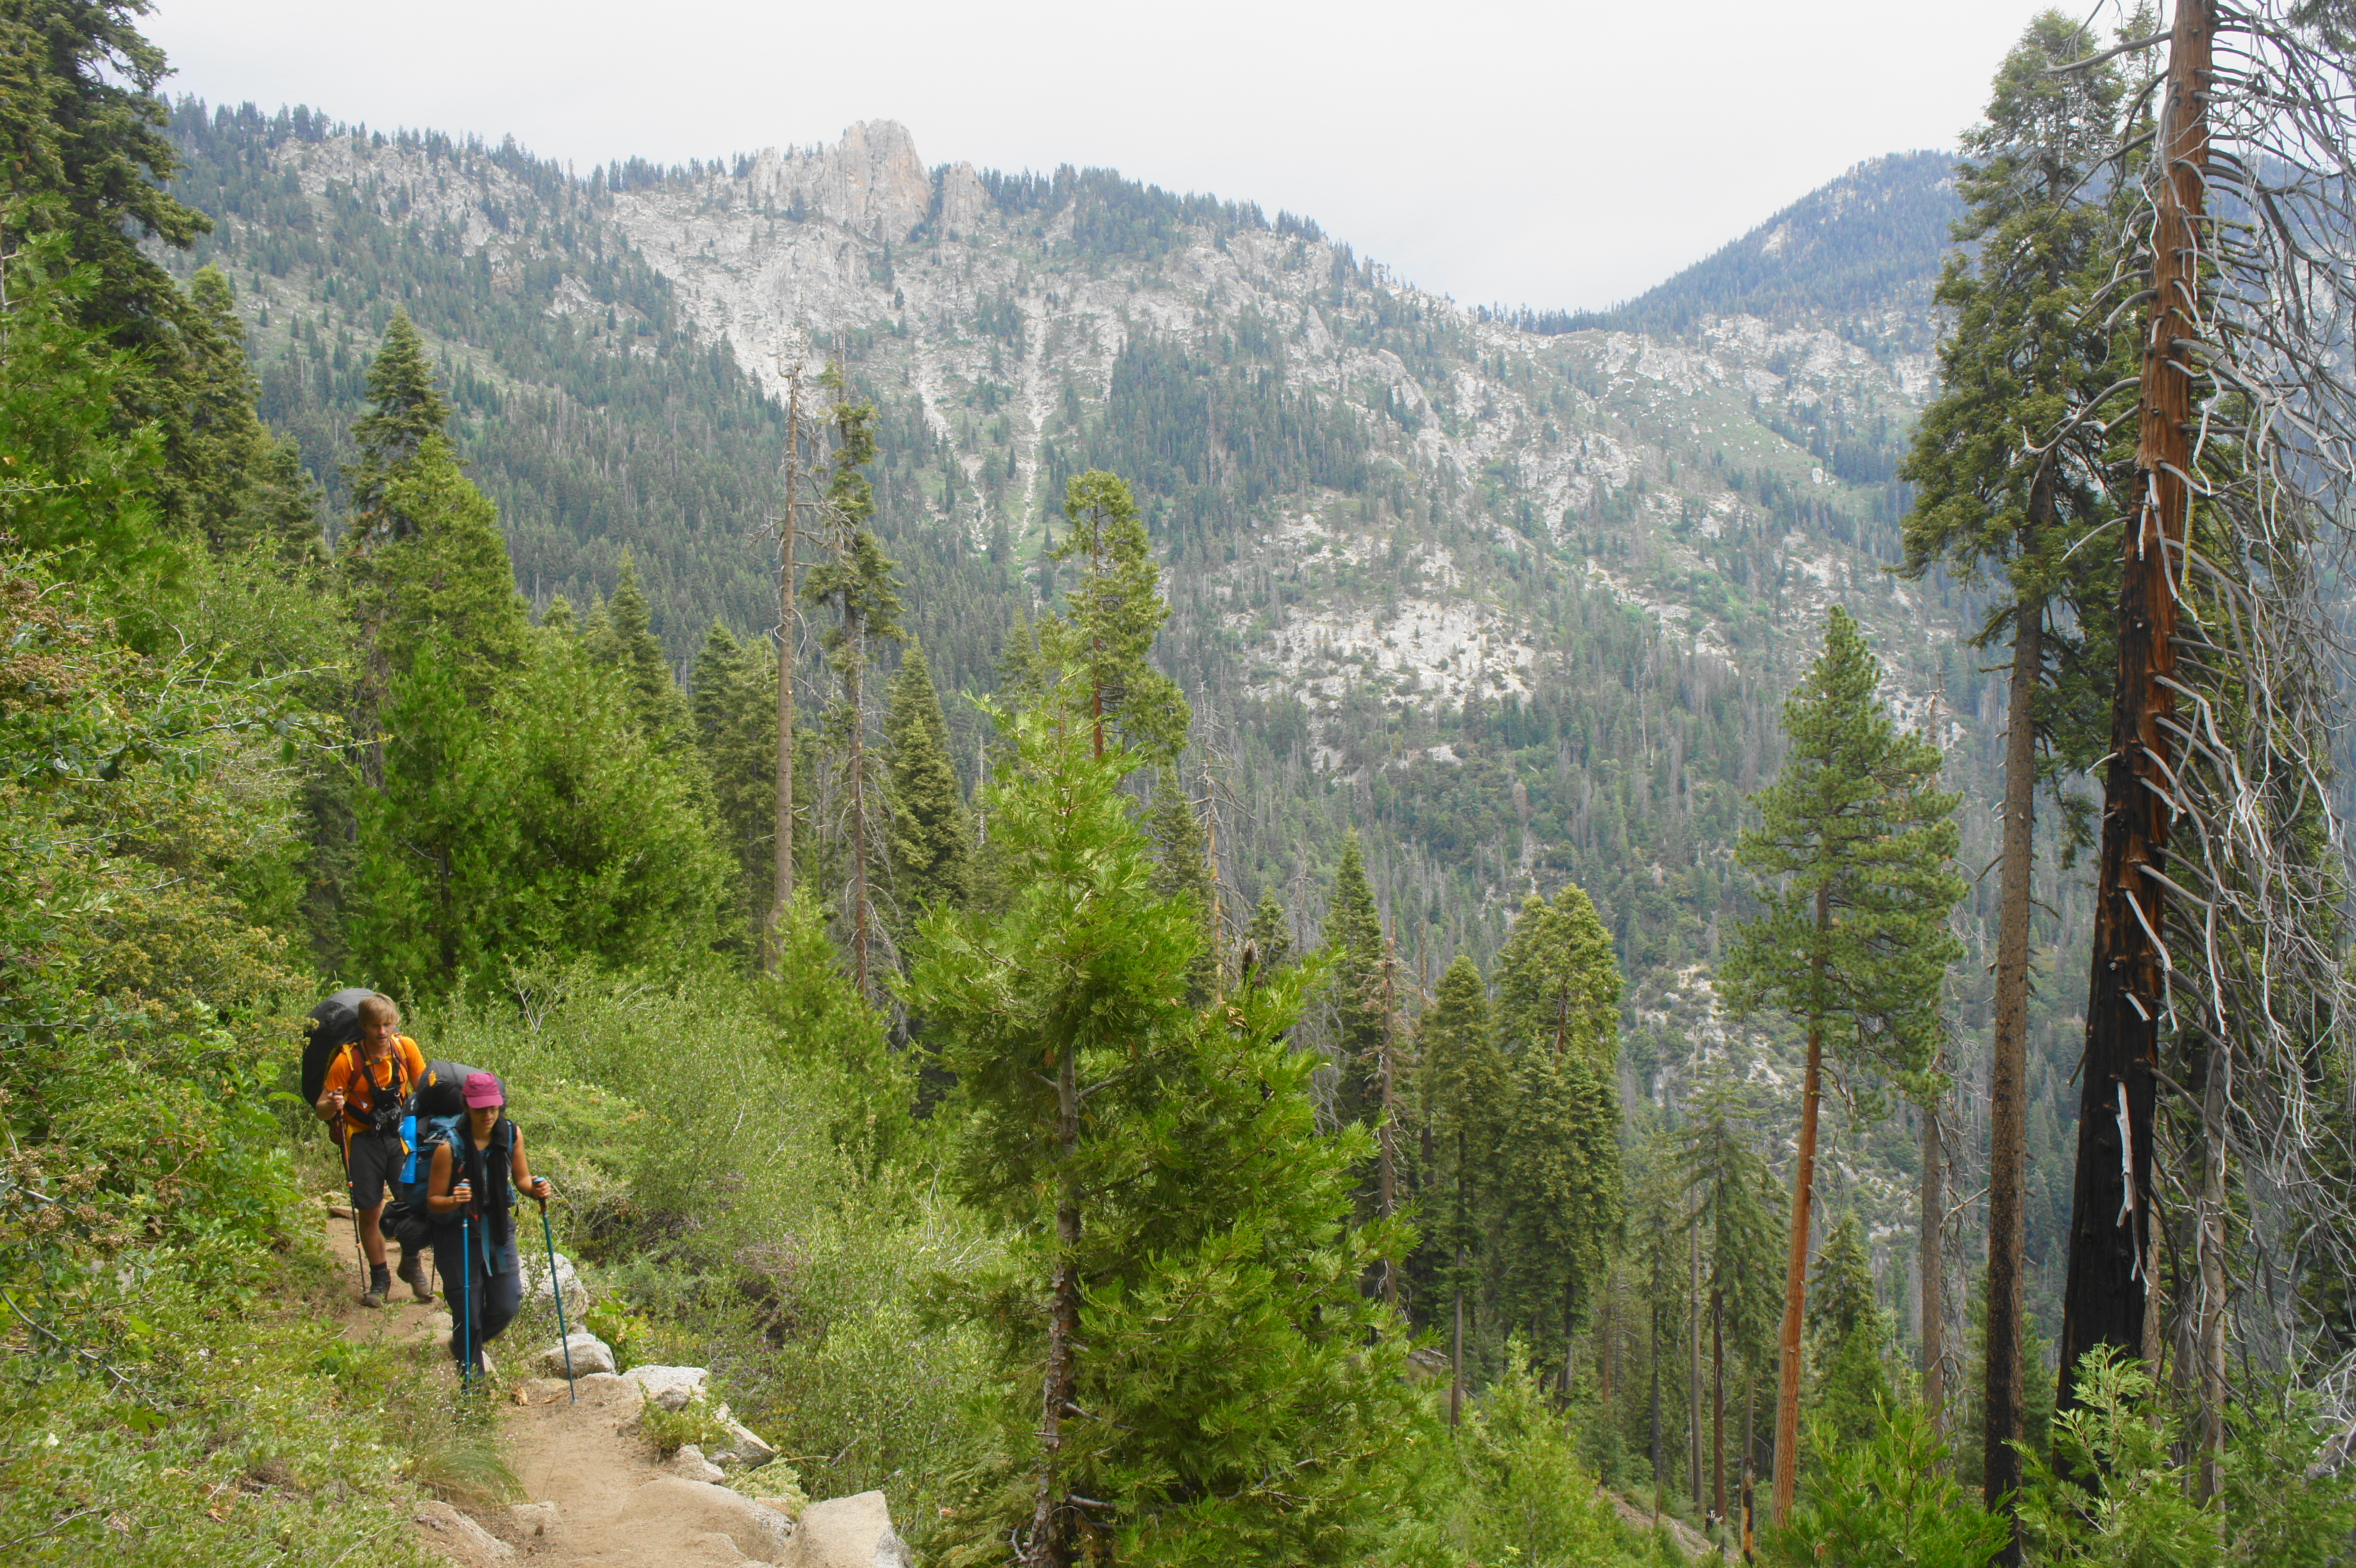
East of the pass, the Kings River watershed unfolds, revealing a breathtaking landscape of undulating granite, deep canyons, and towering peaks. Off to the south is Mount Silliman (11,188’), an imposing summit that is a somewhat popular off-trail destination. Beyond Mount Silliman is a series of granite bowls and canyons, each separated by a sharp divide. More than 1,000 feet down, the diminutive Beville Lake is visible at the base of granite slabs. On the horizon to the east is the Great Western Divide, concealing views of the even higher Sierra Crest (including Mount Whitney) beyond.
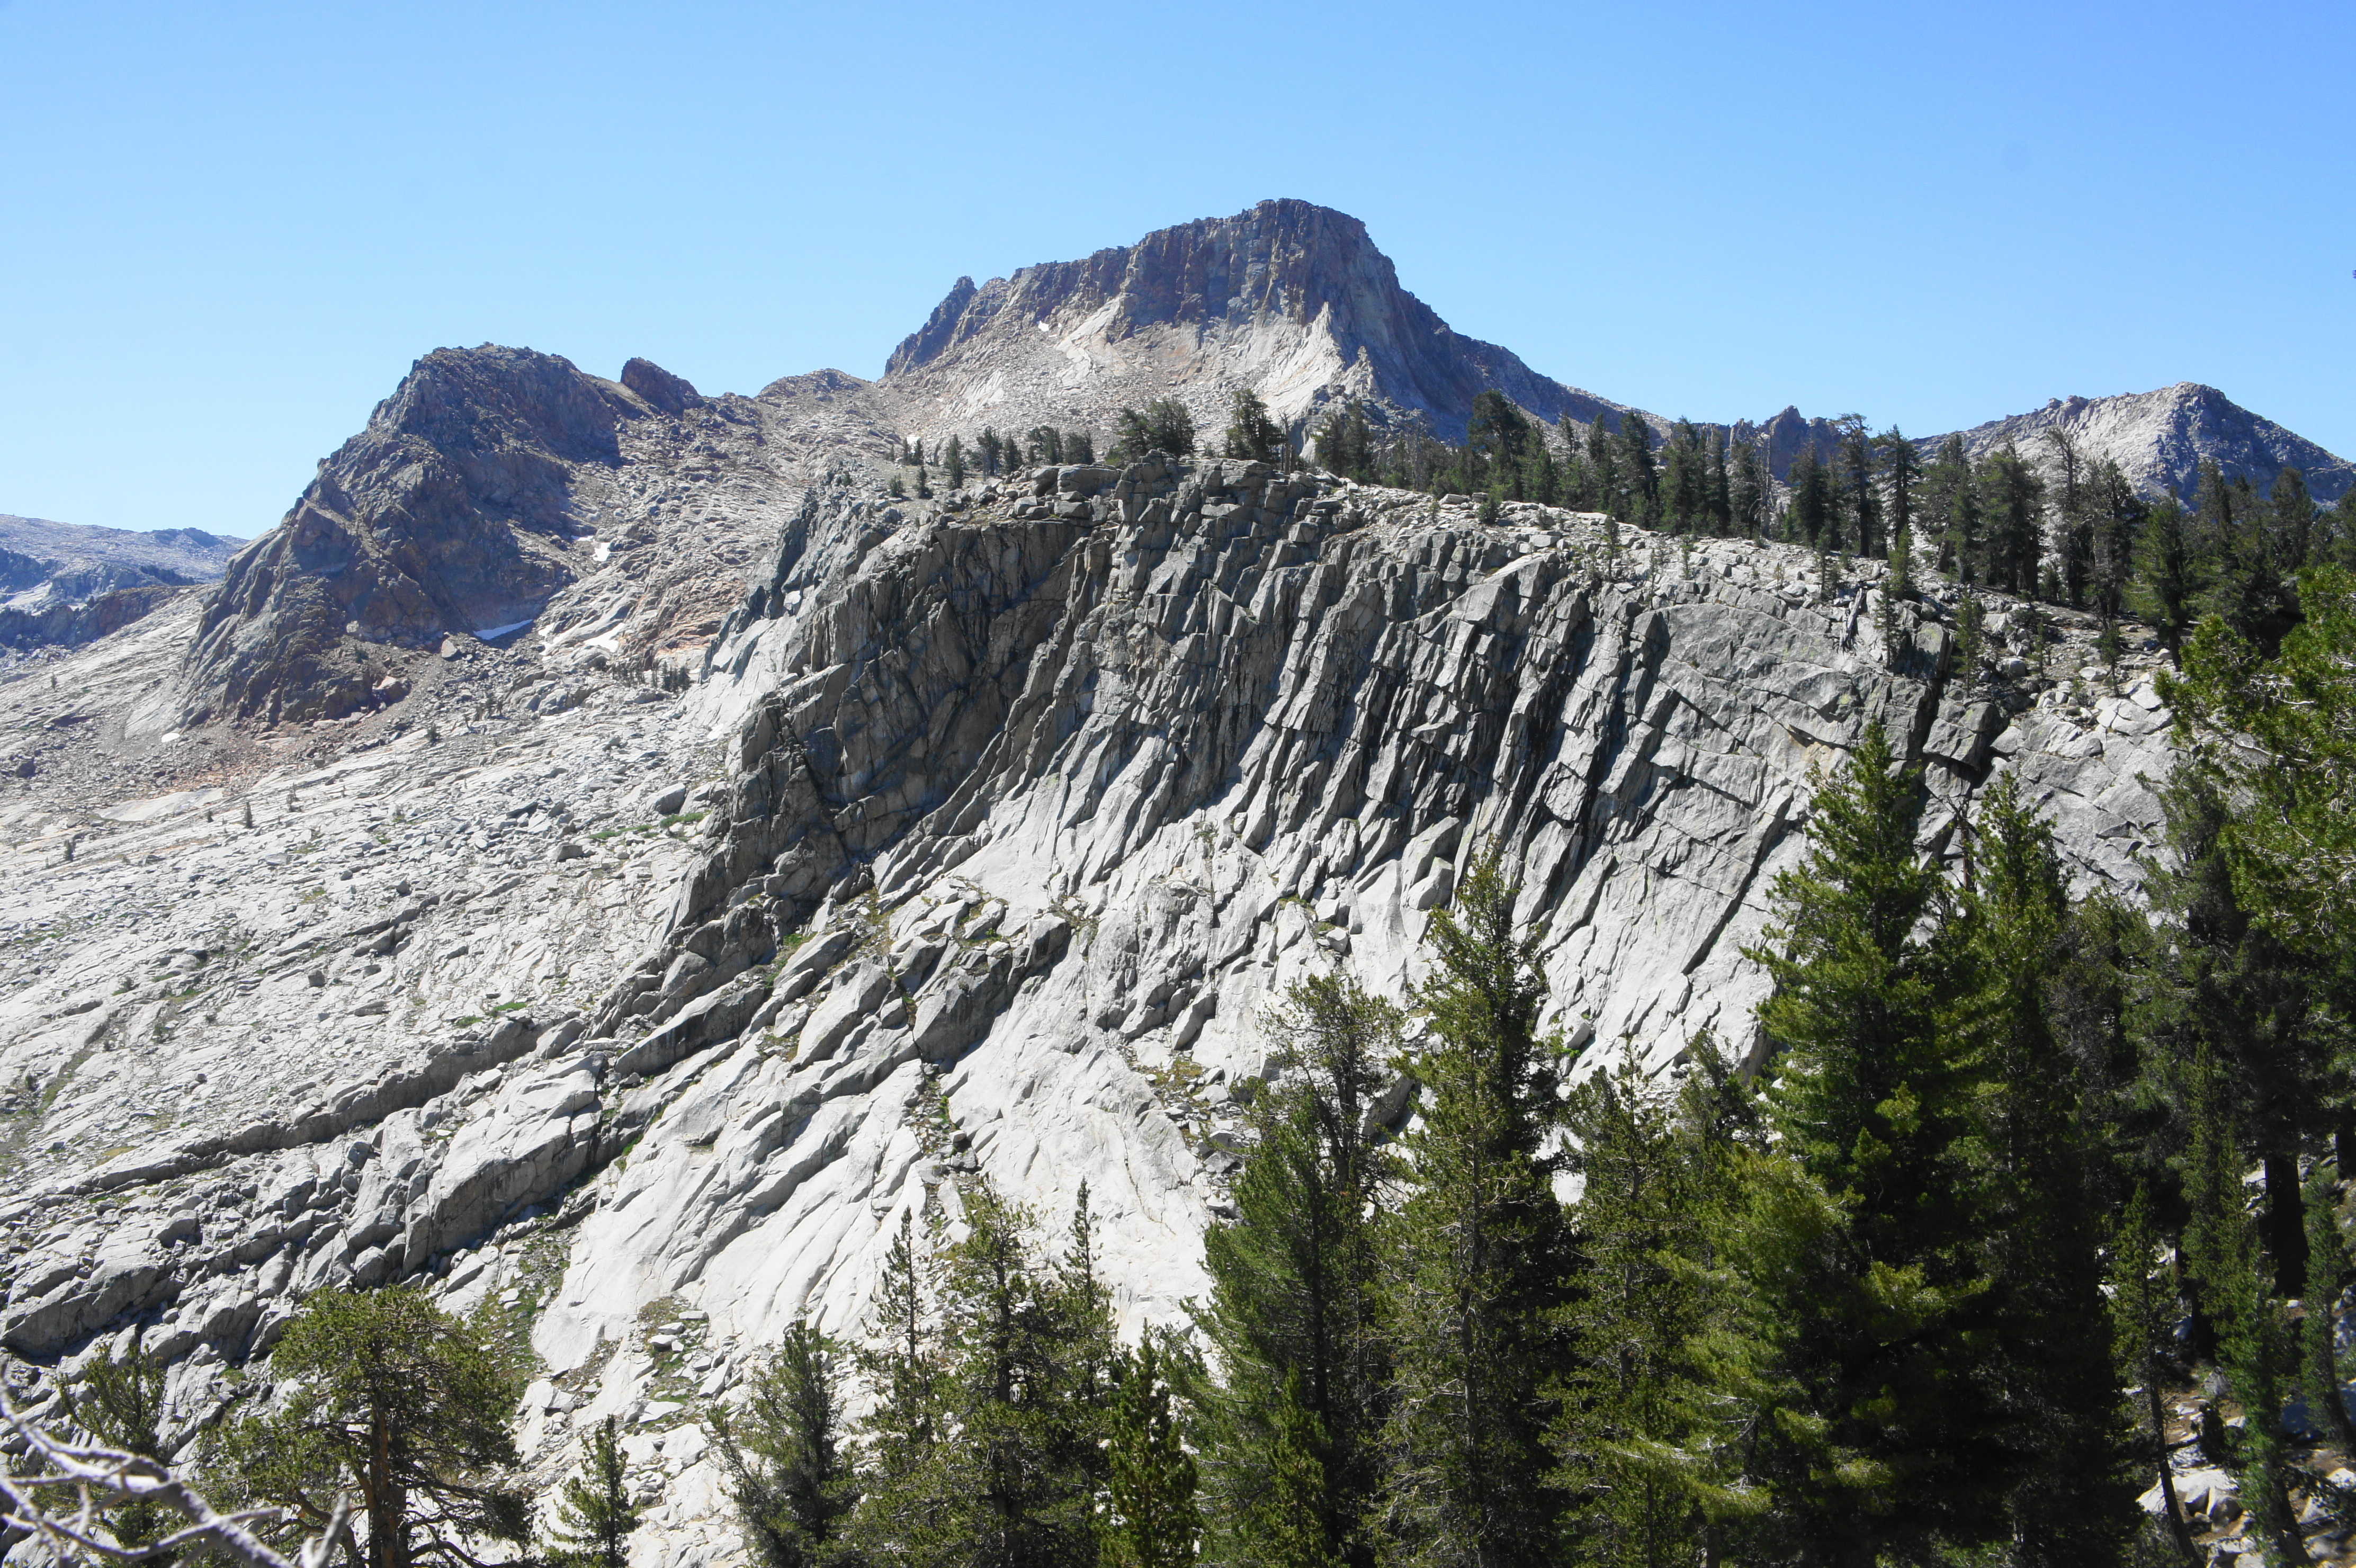
Off to the northeast, Sugarloaf Valley gives way to Kings Canyon proper, a deep incision at the heart of the park, with more imposing ranges beyond, including the Monarch Divide, Cirque Crest, and Sphinx Crest. This is the most wide-ranging view of the entire hike and previews much of the terrain to come: although tucked just out of view, the upper reaches of Deadman Canyon and Elizabeth Pass are just over the ruffles of granite to the southeast. (Note: The best, unobstructed views from Silliman Pass are situated a couple minutes’ walk off-trail to the south.)
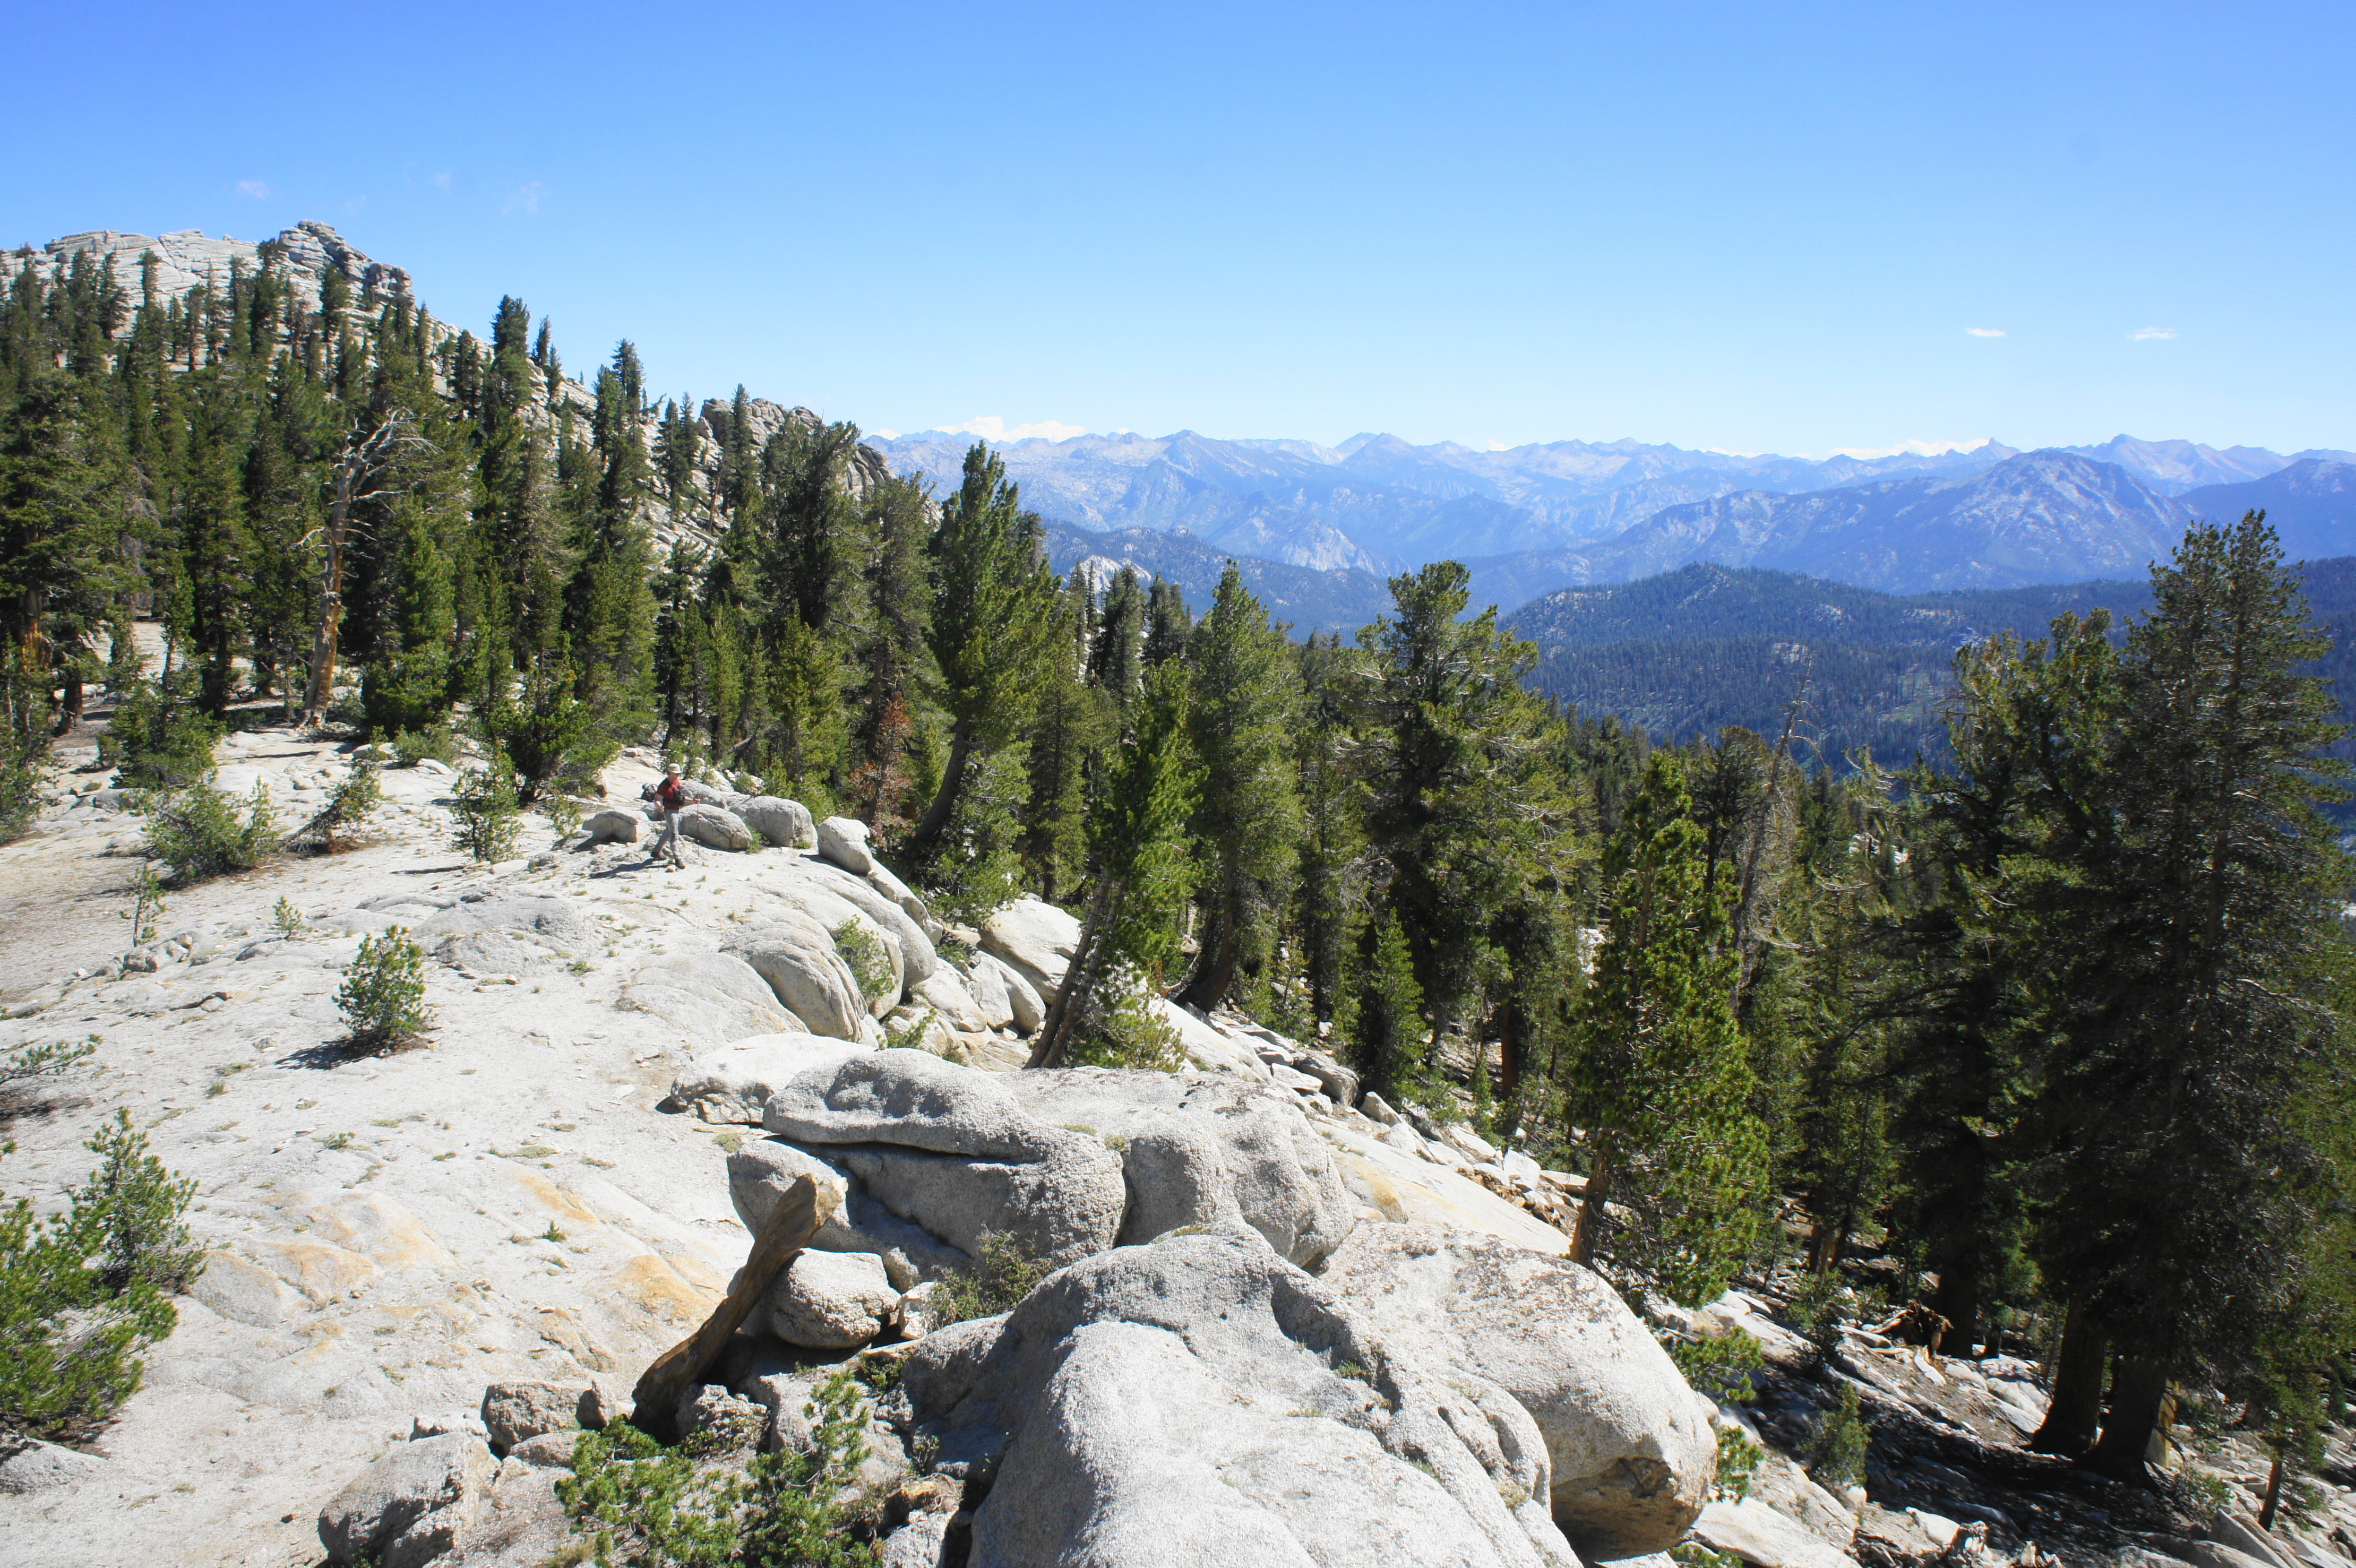
From the pass, the onward route follows a downhill course that sheds more than 1,000 feet in about 1.5 miles. At first, the slope is partly wooded, with sporadic views of the unfolding granite landscape of Upper Crowley Canyon. Pay close attention to the trail in this section, as it grows relatively faint at some points, although never entirely indiscernible.
About ¾ mile from the pass, the trail winds around a right-hand bend, skirting a granite slope with expansive views, including of the protruding knob known as Ball Dome (9,435’) to the north and, more prominently, the turquoise-tinged Ranger Lake directly below to the east.

View north toward Ball Dome (9,435′), Belle Canyon, and Mitchell Peak (10,365′) 
Descending toward Beville Lake
After coursing back to the south, returning briefly to the trees, hikers are faced with a steep descent, switchbacking down staircases carved into the granite en route to the moraine below. At last, after about 1.4 miles (2.4 miles from Twin Lakes), the path bottoms out and reenters the dense thicket of pines and brush. Within minutes, a small sign indicates the first of several worthy detours: a short spur to the shores of Beville Lake.
This first tarn is surrounded by marsh, making access to the lakeshore difficult, but nearby rocks offer a nice vantage point of the beautiful body of water with Mount Silliman towering above. (Note: There is no bear box available at Beville Lake, and campsites are a little harder to find than at other nearby lakes.)

Beville Lake looking southeast 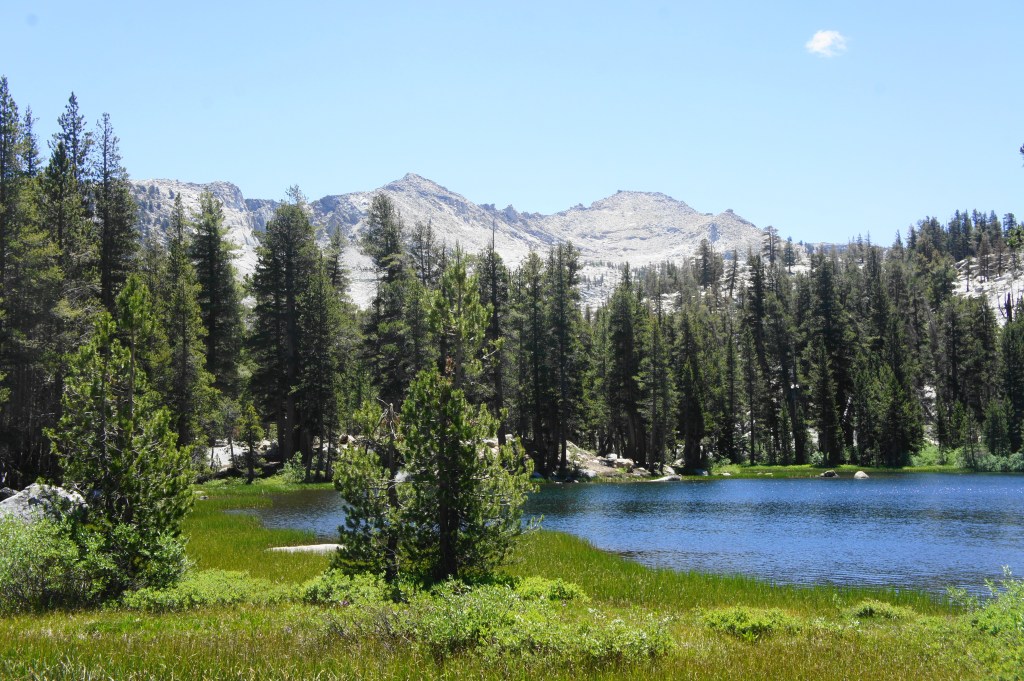
Beville Lake looking west
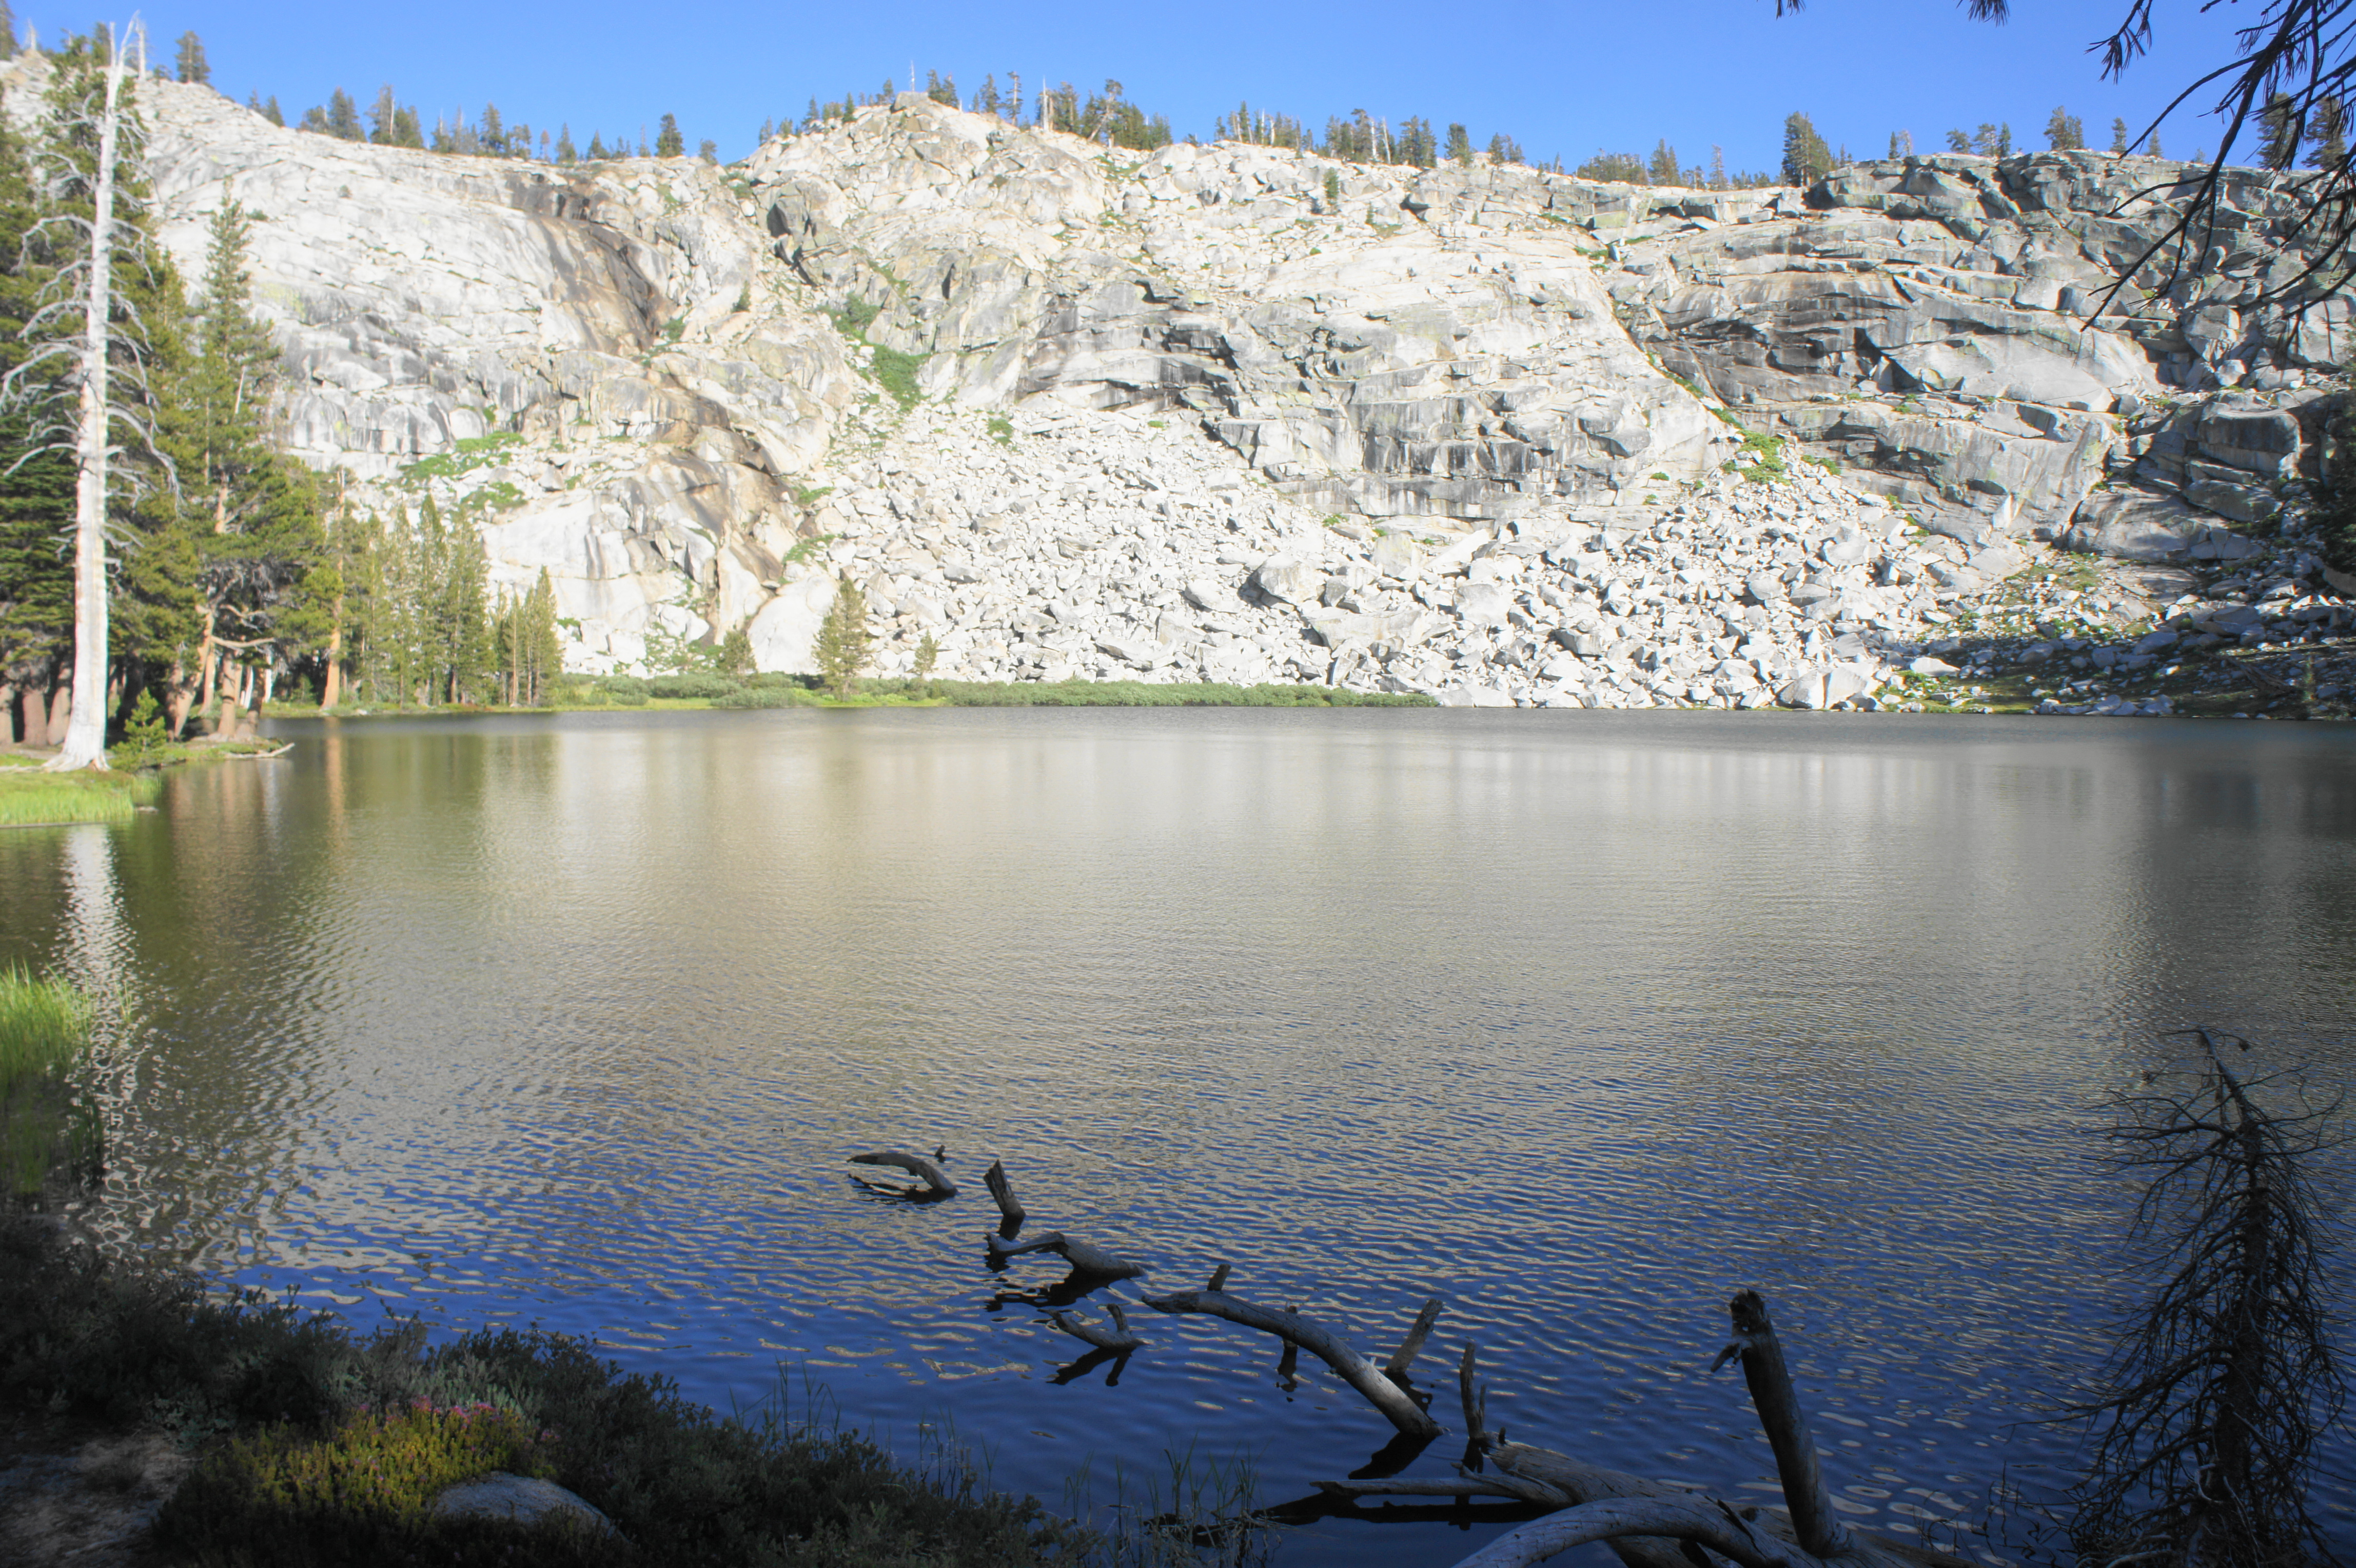
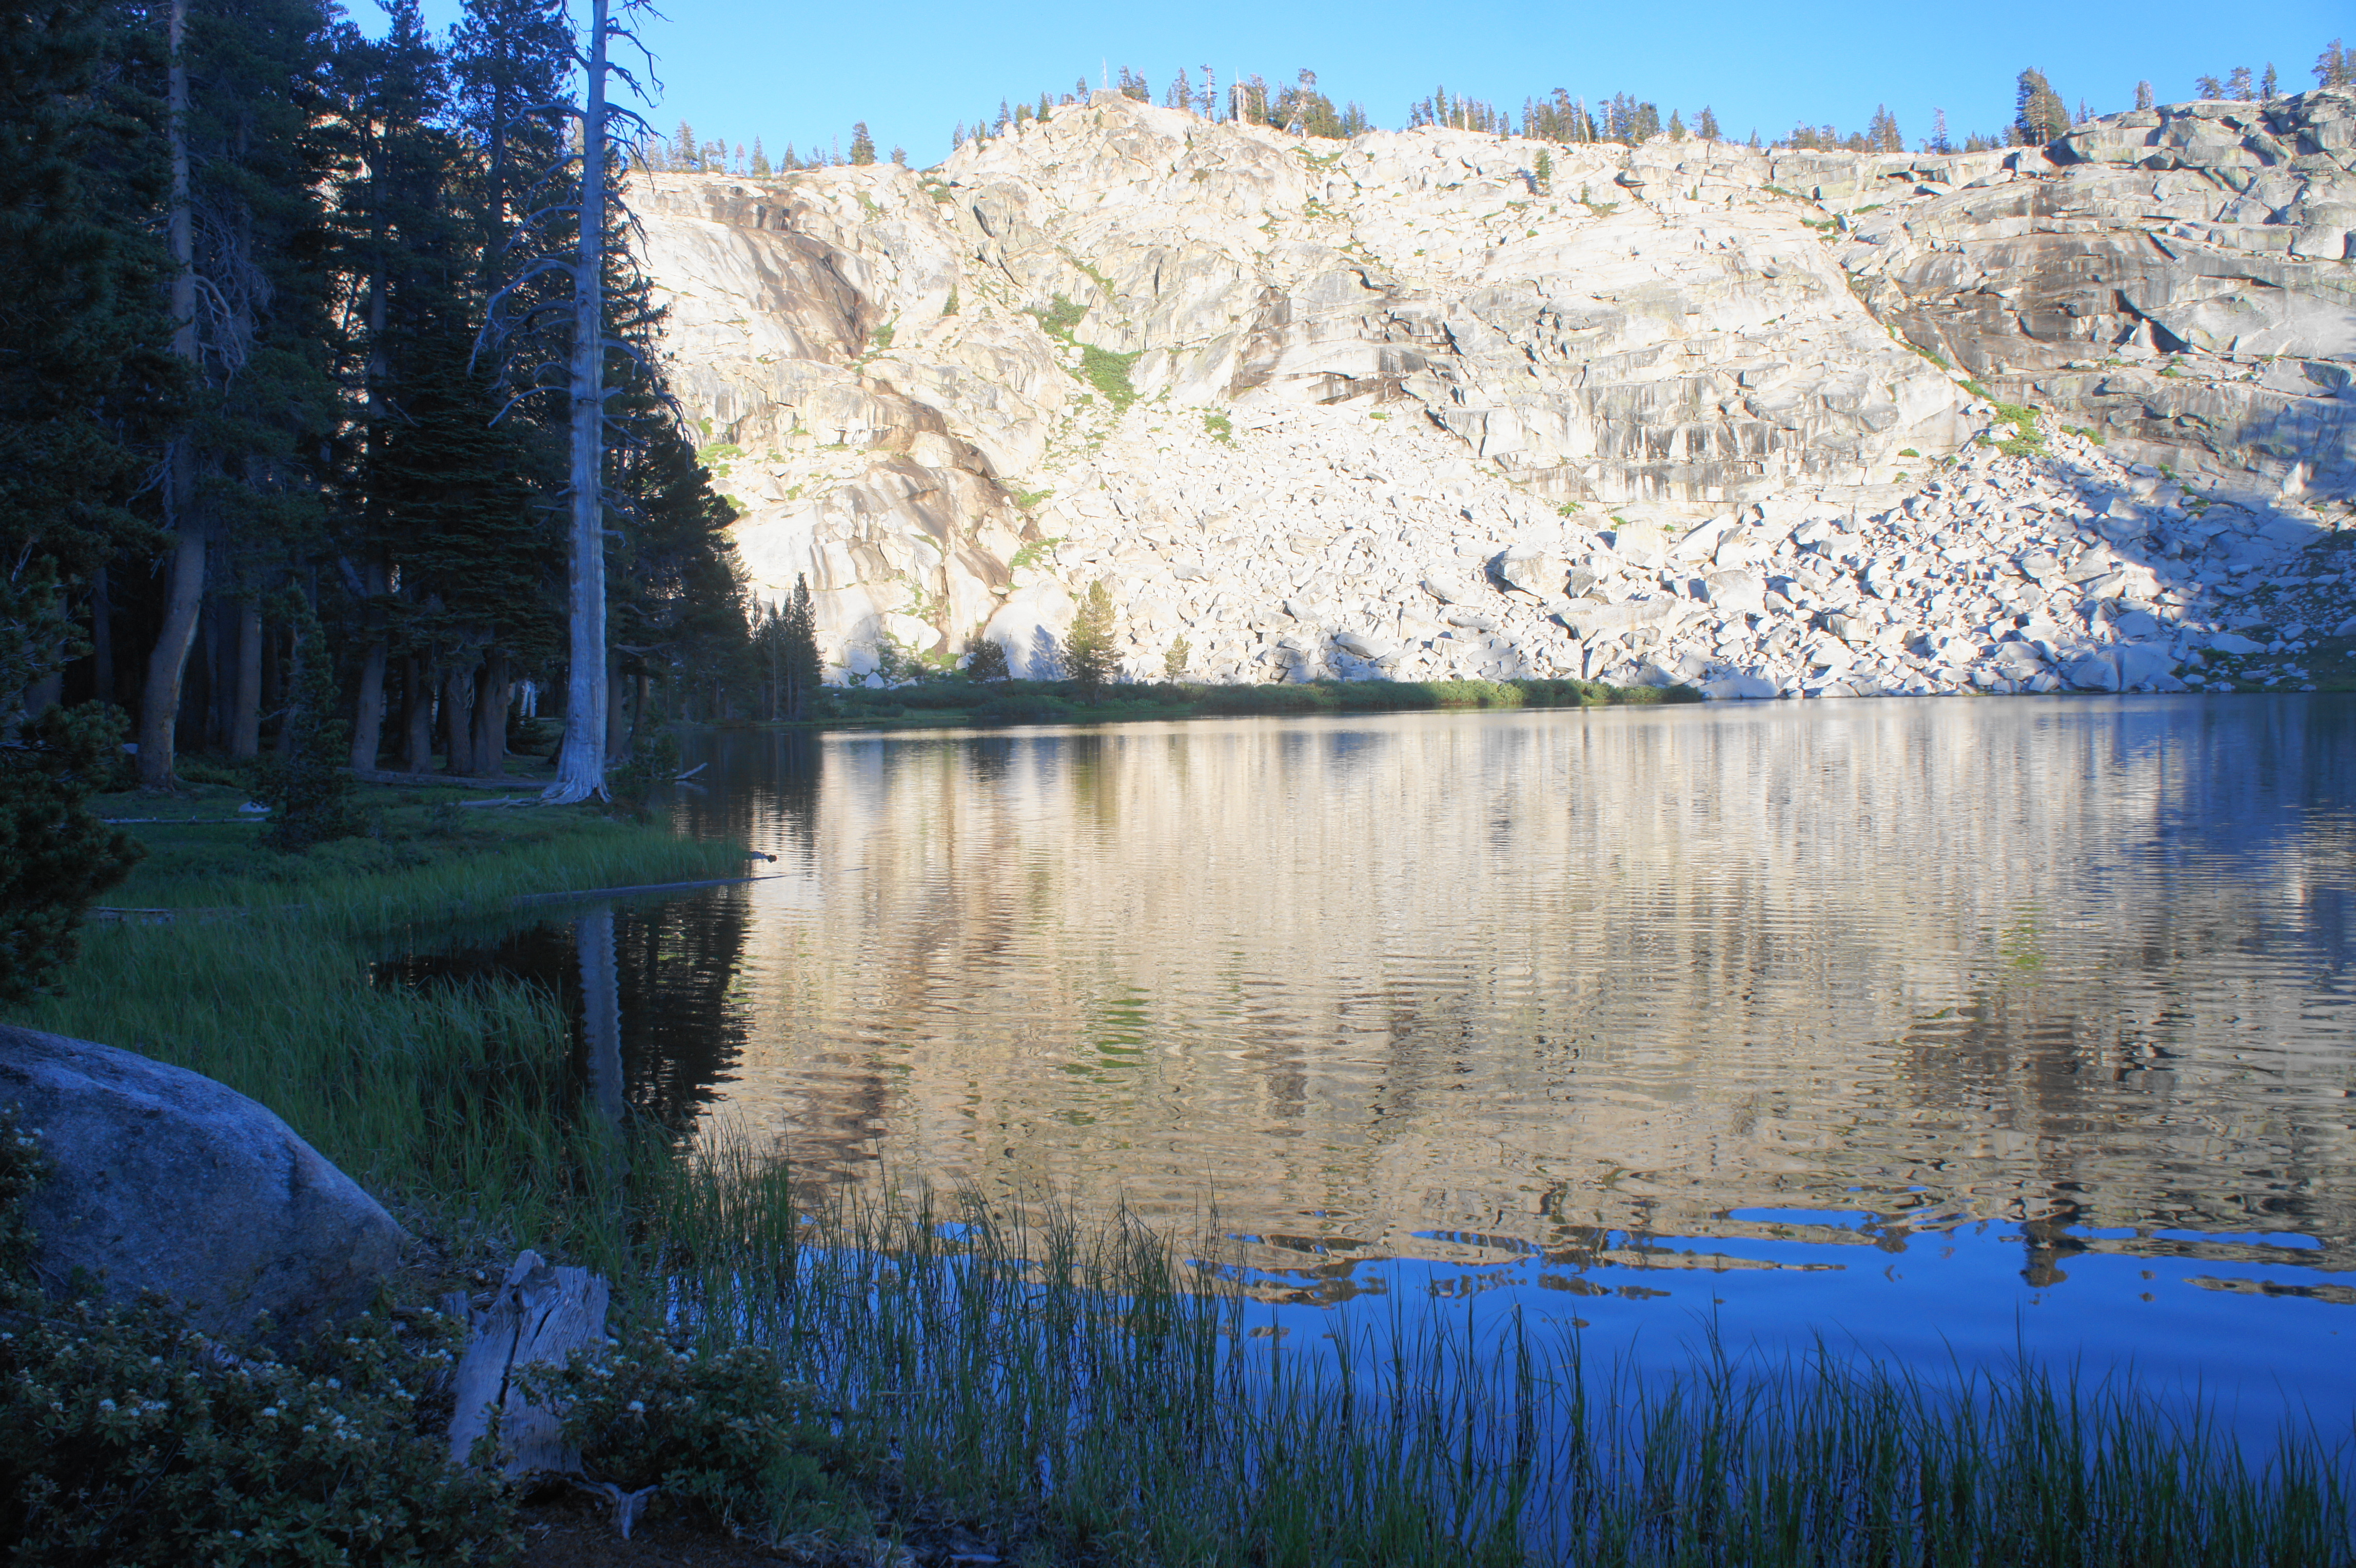
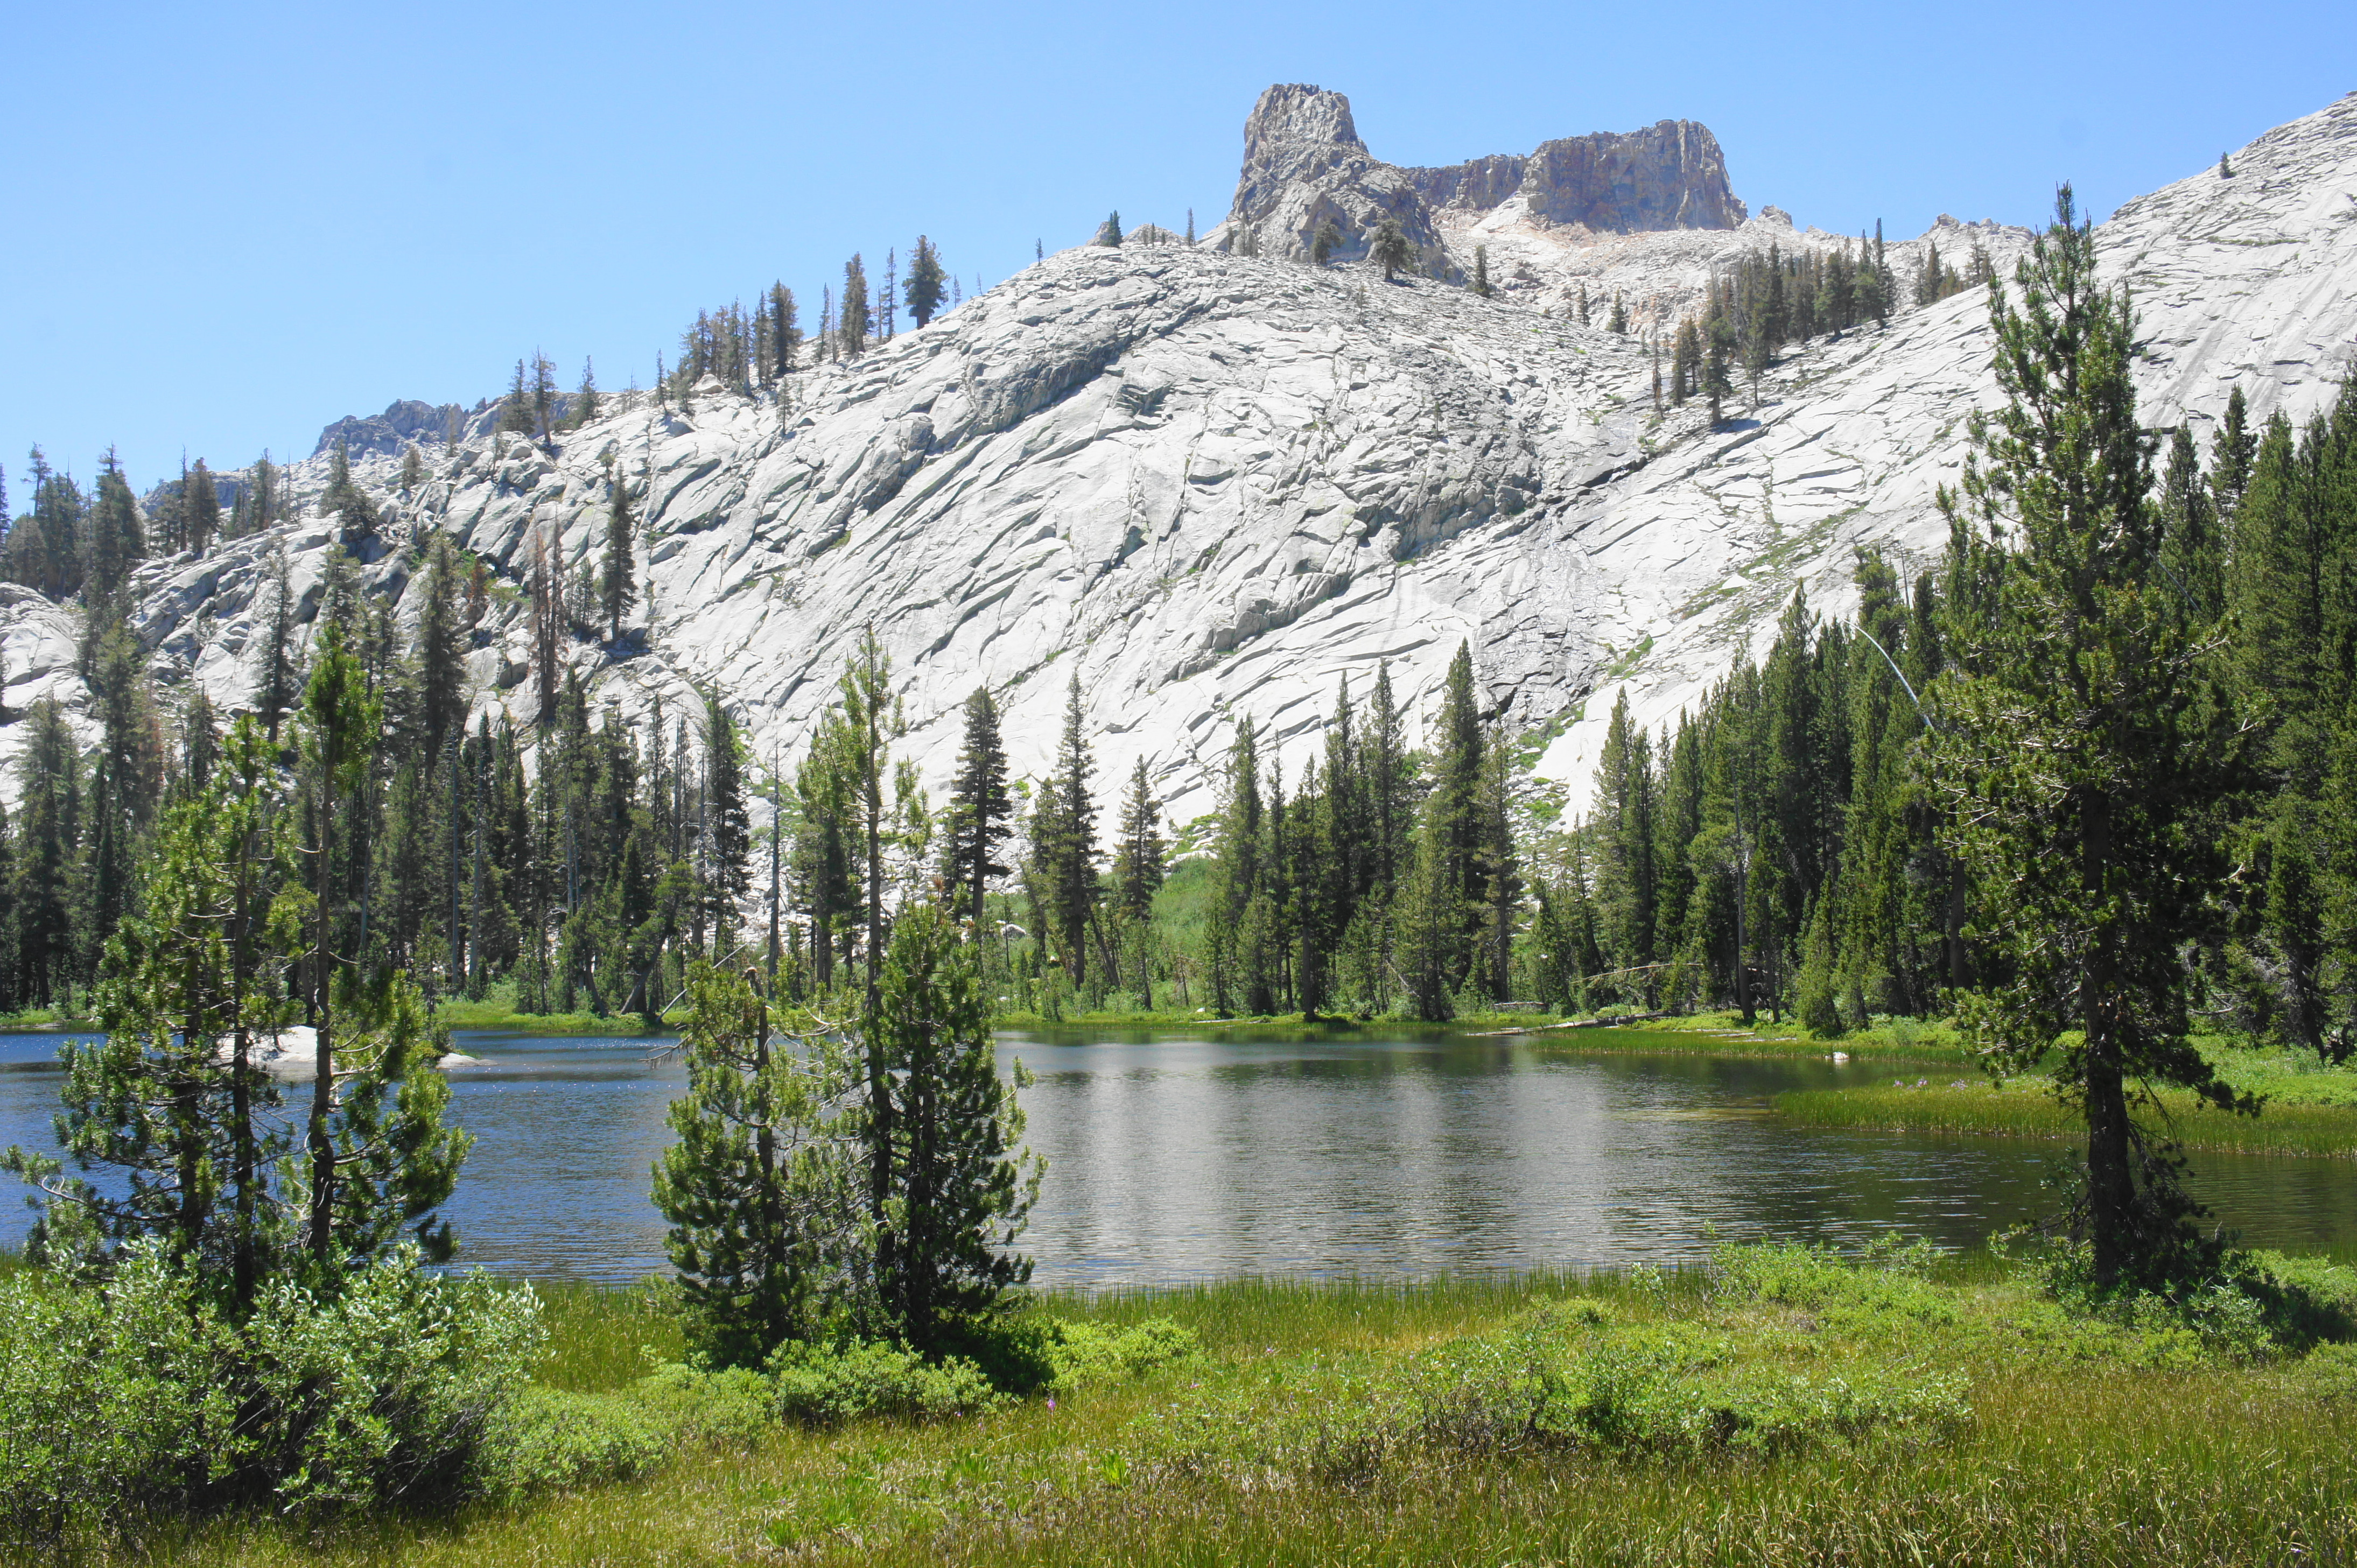
Beville Lake is often overshadowed by its nearby cousin, Ranger Lake, which is reached by returning to the main trail, walking about 1/10 mile further north, then bearing left on the spur trail leading to the lake’s eastern shore. The spur trail parallels the lake before ending at a campsite with a bear box. Aside from the deep mud along the banks, swimming is a lovely activity at this large lake, which features a handful of reachable islands.
Ranger Lake is also more distant than Beville from Mount Silliman, but the surrounding granite scenery is no less scintillating. A granite slide directly west leads steadily down from Twin Peaks to the western shore. By now, hikers may want to stop for lunch, or at least a break, before moving on to the additional destinations in the late morning/early afternoon.
Ranger Lake 
The author at Ranger Lake

Returning to the main trail, bear left and follow the path as it descends gradually and passes a few nice platforms with open views to the east. Beyond, the trail dips down into the conifer forest, dropping to clear a drainage at about the day’s four-mile mark (including the Beville and Ranger Lakes spurs). The trail then rises another 150 feet to clear a wooded ridgeline and descends again, reaching a junction with the spur trail to Lost Lake at 4.5 miles.
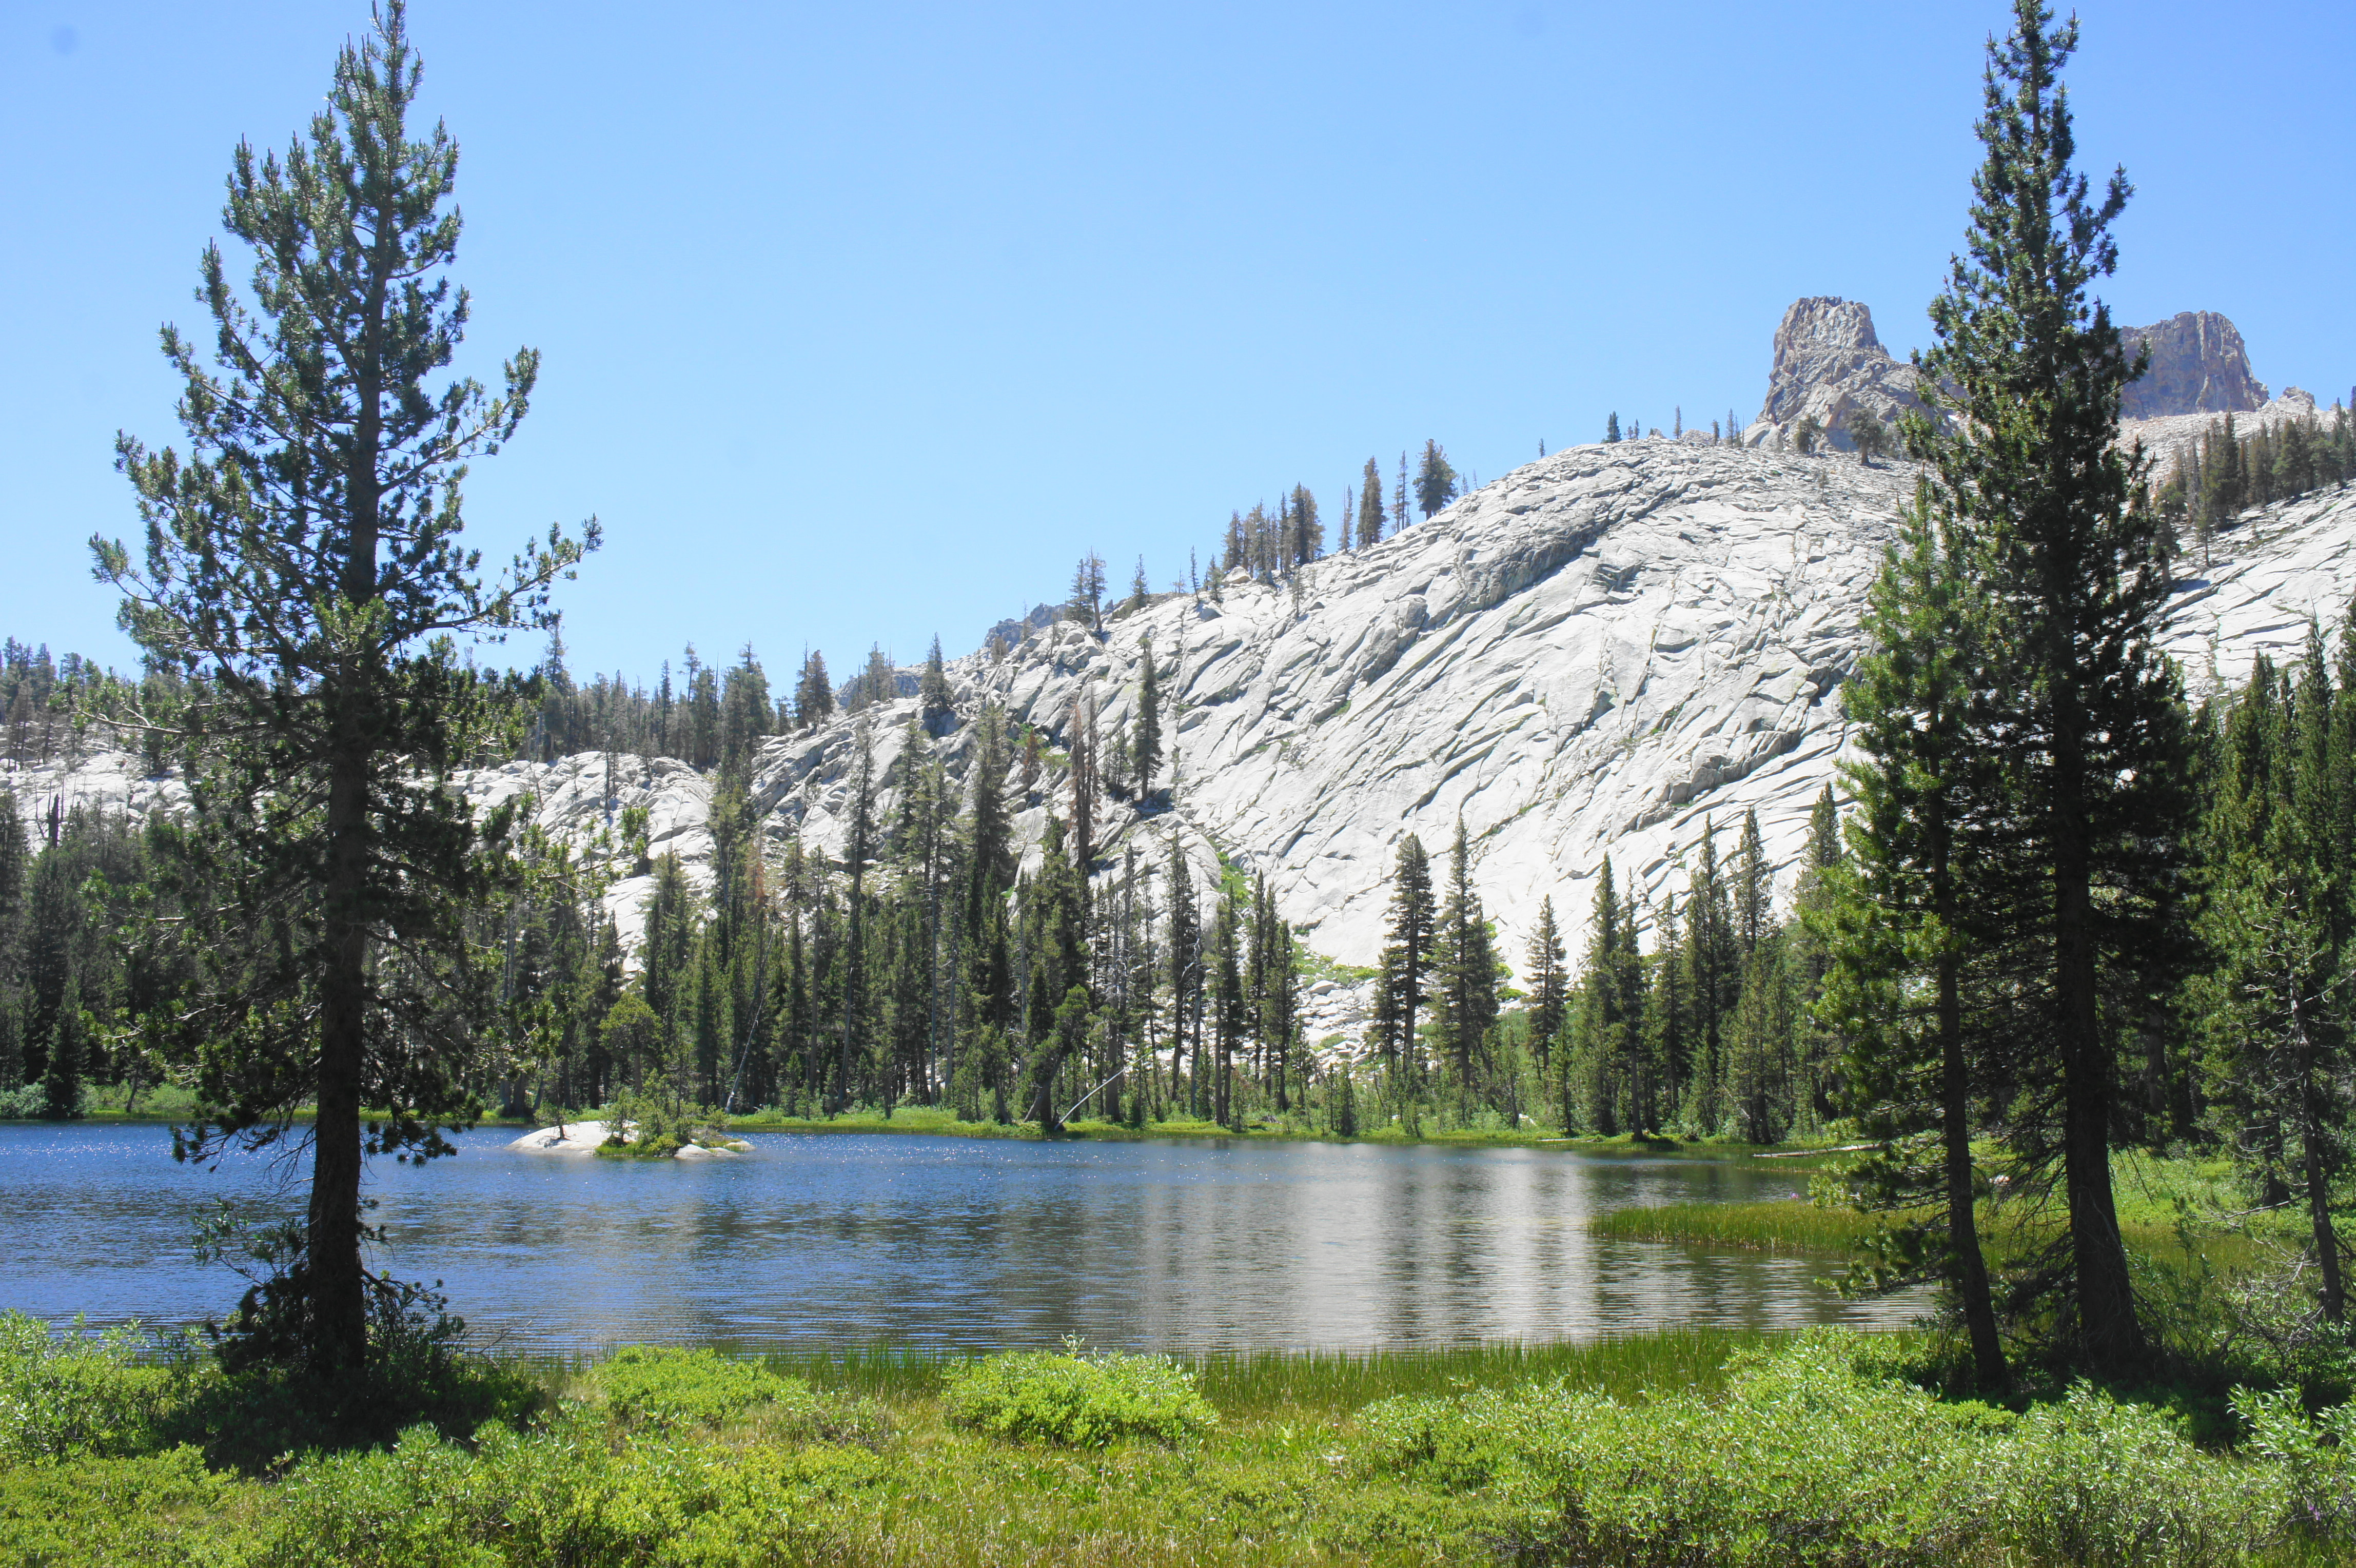
By now, hikers may be tired and put off by the 250-foot climb to Lost Lake. Resist the temptation to skip this turn. The spur to Lost Lake is one of the highlights of the entire loop and well worth the detour (1/2 mile each way). The route to Lost Lake is a steady ascent, loosely following a drainage on the left, culminating at a nice camping area and the shores of the lake, easily the most spectacular of the cluster found around the Silliman Crest.
In addition to viewing the backside of Twin Peaks, a jagged, sawtooth ridge rises high above the lake, giving the water a memorable backdrop. Social trails lead around parts of the lake, but a large stony outcrop blocks passage at one point.

Looking out over Lost Lake 
Granite peaks above Lost Lake
It’s hard to steal yourself away from Lost Lake, but when ready, make your way back down the ½-mile spur trail and rejoin the main thoroughfare, turning left to continue northward. The subsequent two miles involve a mild ascent, with a couple of brief steep sections, to clear a ridge below Ball Dome (not visible from the trail here), followed by a steady descent into mostly wooded Belle Canyon.
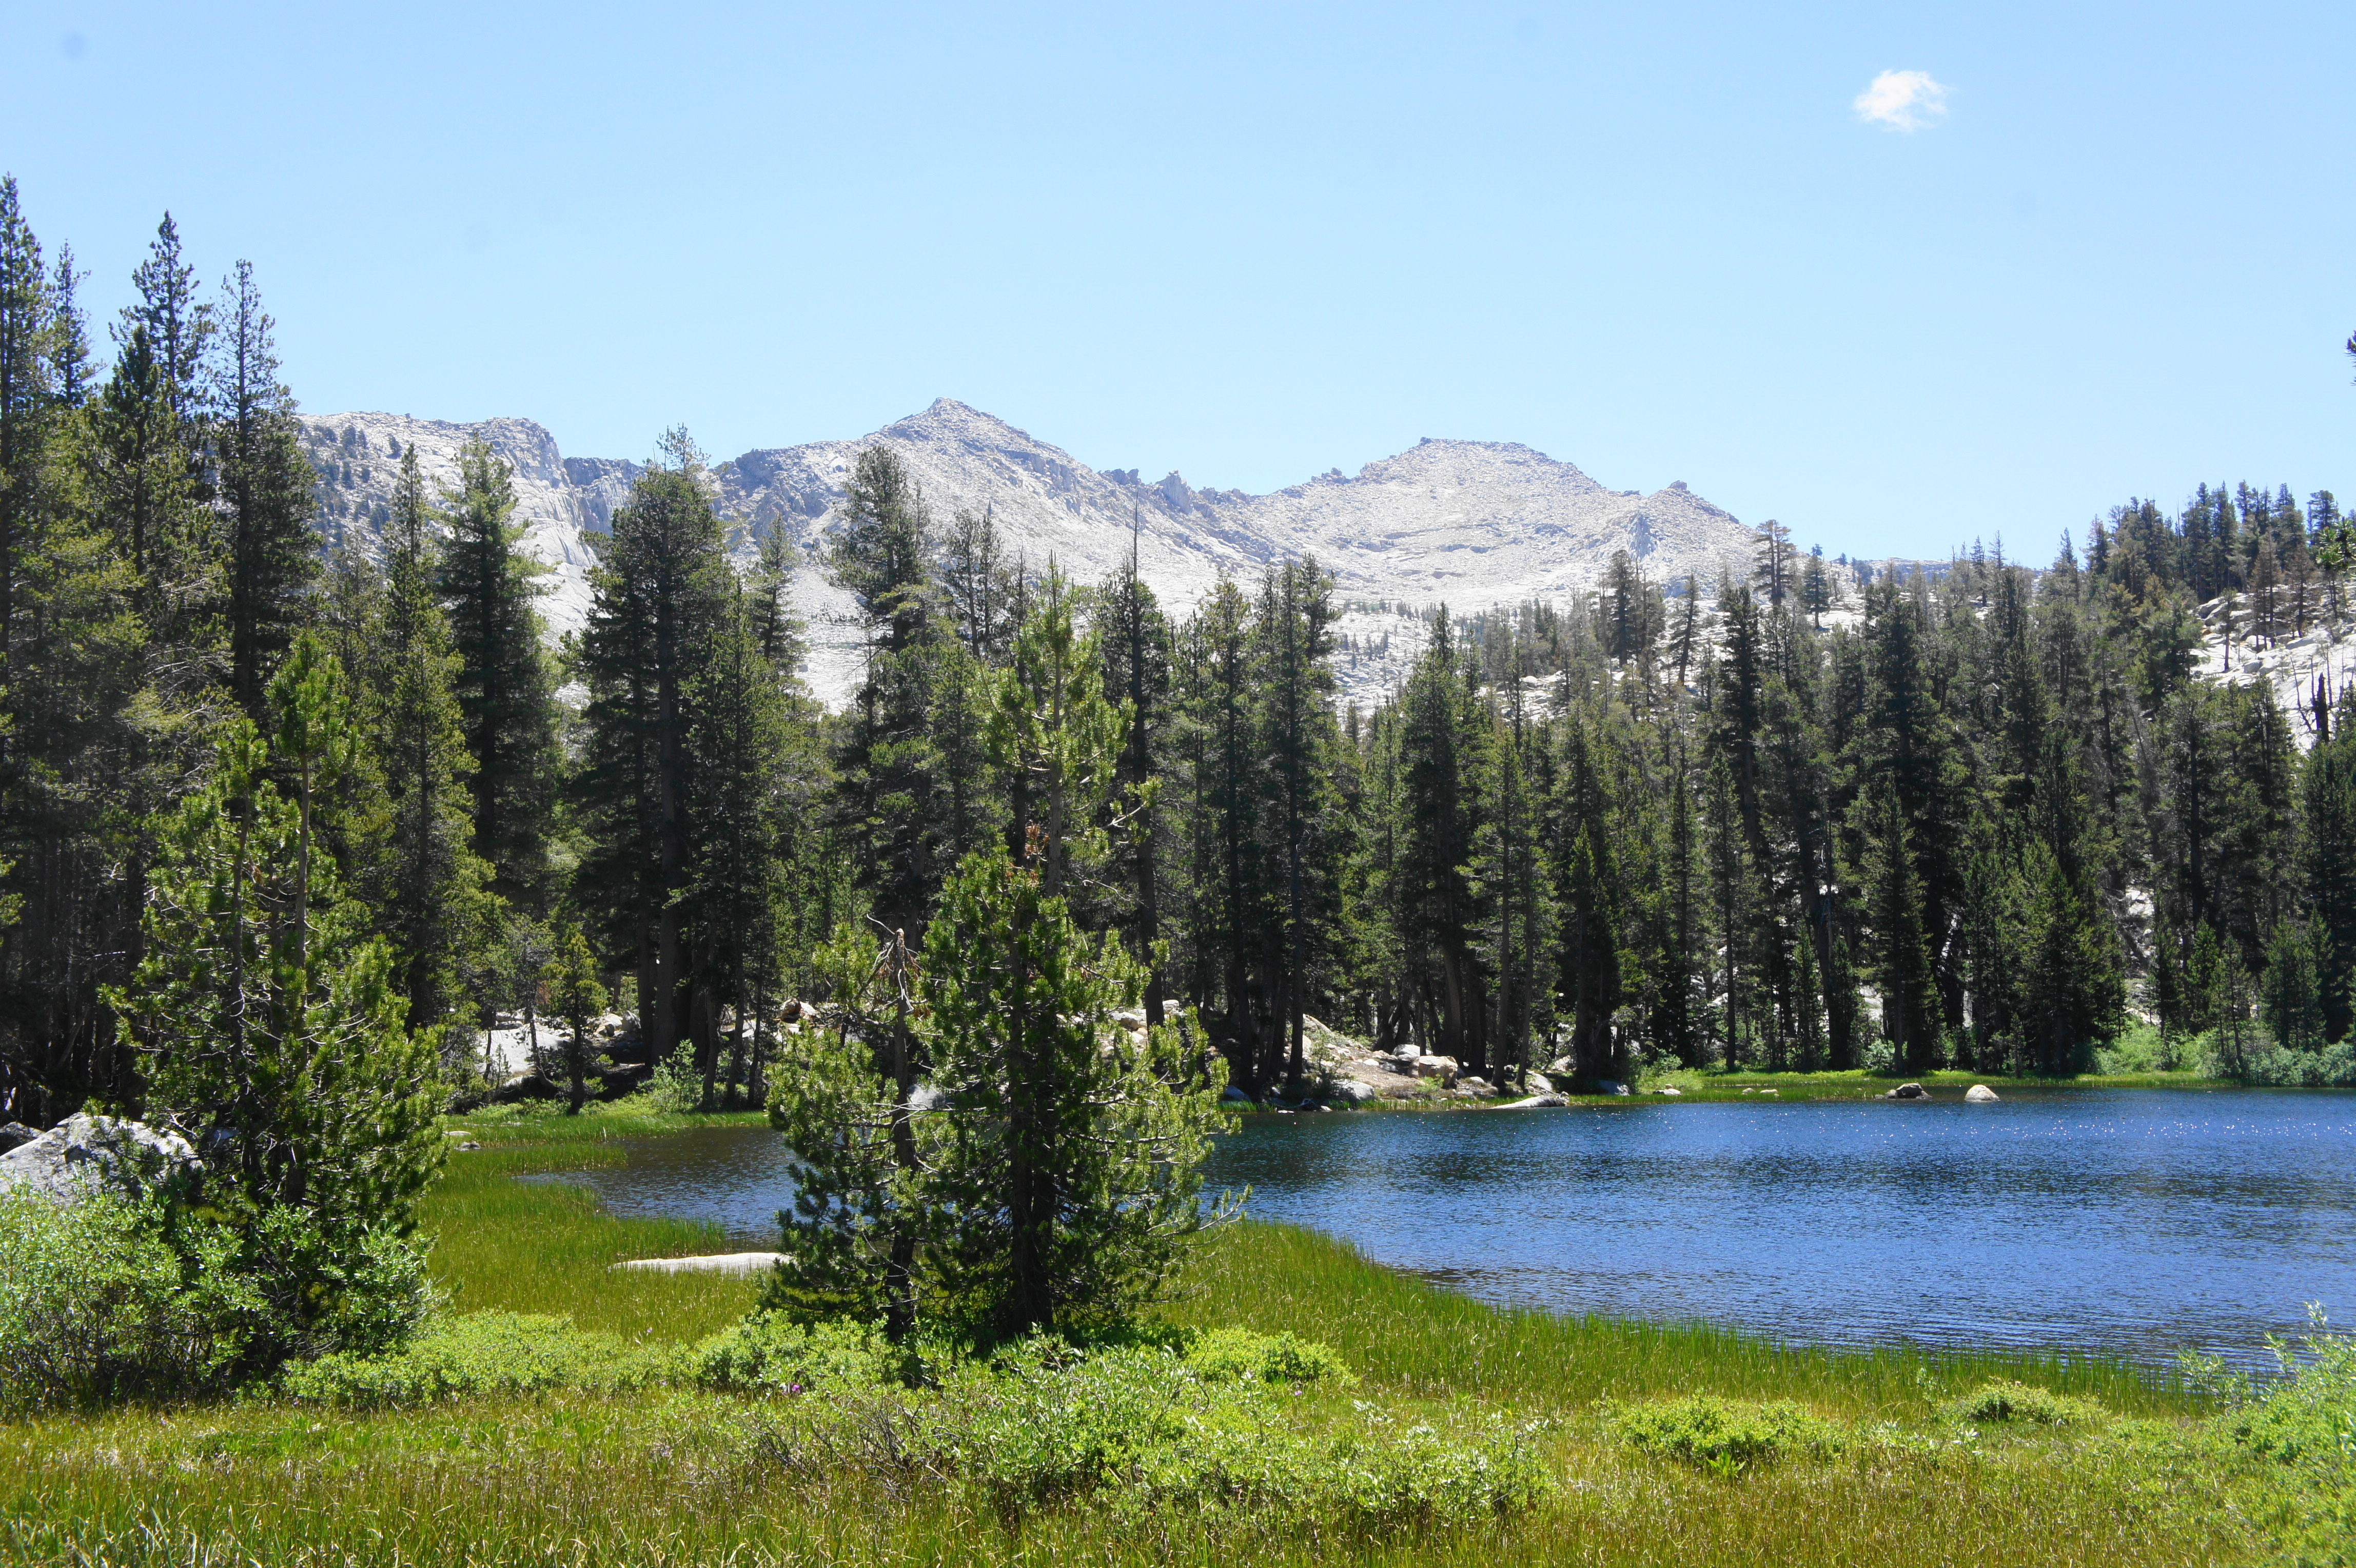
At about 7.3 miles on the day, the trail crosses the main drainage through the canyon—Sugarloaf Creek—and then quickly reaches another junction. Bear left to continue on the spur to Seville Lake, the longest detour of the four lakes. A minute later, cross a side drainage and then bear left at another fork (heading right leads up toward Rowell Meadow in Jennie Lakes Wilderness). Then cross the drainage again and ascend a short staircase before settling in for a mild jaunt through dense forest for about 1.2 miles, ending at Seville Lake.
After seeing several other beautiful lakes earlier in the day, it’s possible that Seville Lake—lacking Beville’s views of Mount Silliman, Ranger’s pretty islands, or Lost Lake’s stunning granite crags—will disappoint. But the quiet moraine lake is still quite pretty, set in a bowl-shaped valley bounded by granite walls.
There are two main camping areas at Seville Lake that make most sense. The first, just to the left of the trail (across the trail from the bear box), there is a wooded area with a nice fire pit and lots of space for tents. The second, further on, requires following a well-trodden trail around the west side of the lake, reaching another spacious site that is closer to the water, about 1/10 mile from the first site. In either case, boulders or fallen trees hanging out over the water offer perches for watching the sun set over the lake, capping a roughly 8.5-mile day.
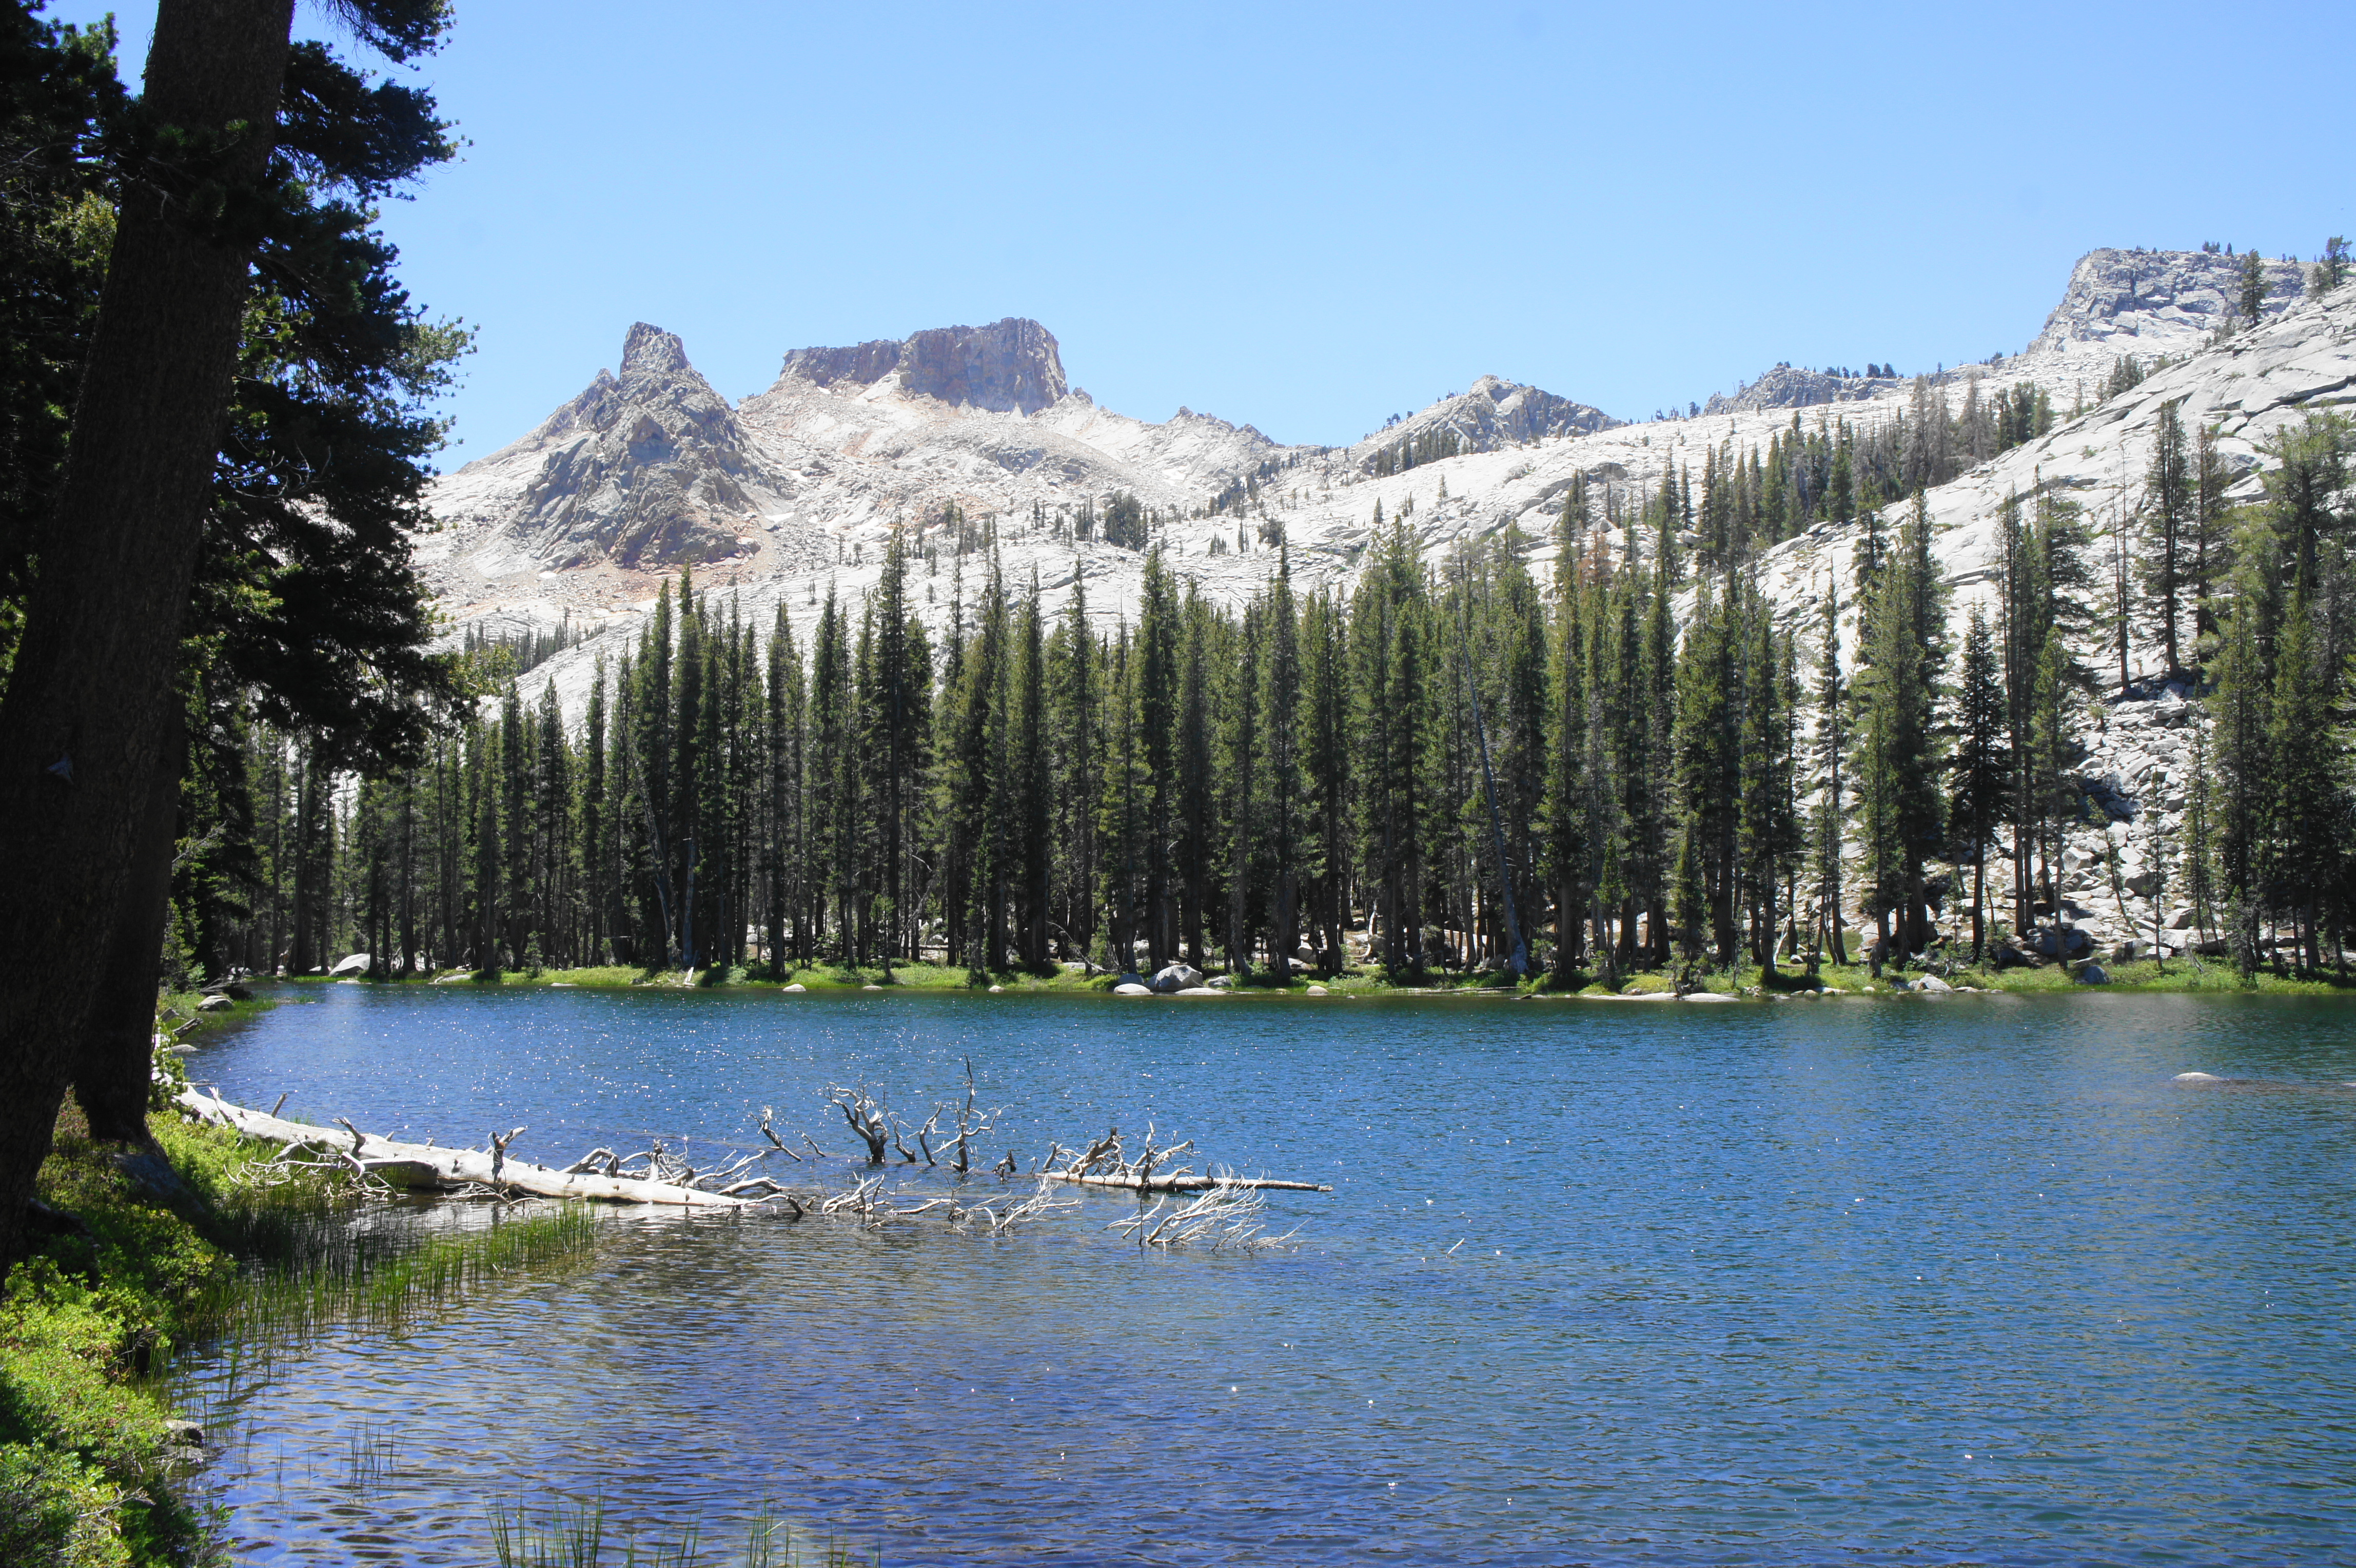
DAY 3: Seville Lake to Roaring River (10.1 miles)
The third day of the hike, which traverses less dramatic terrain, connects the Silliman Crest area with the entry to Deadman Canyon and is perhaps the mildest day in terms of elevation loss and gain. Starting from Seville Lake, make your way back down the spur trail, crossing a drainage at around 1.1 miles and then passing the turn for the route to Rowell Meadow on the left. Bear right and cross the wash again, just before a second junction. This time head left, in the direction of Sugarloaf and Roaring River.
Much of this day involves walking through heavily-vegetated pine forest, and the understory becomes increasingly crowded as the Sugarloaf Trail continues northeast through lower Belle Canyon. About a mile from the junction, the path comes within close range of Sugarloaf Creek on the right before moving away from the stream again and traversing a woody ridgeline. Around 2.75 miles into the day’s walk, hikers encounter another junction, with trails leading left toward Jennie Lakes Wilderness.
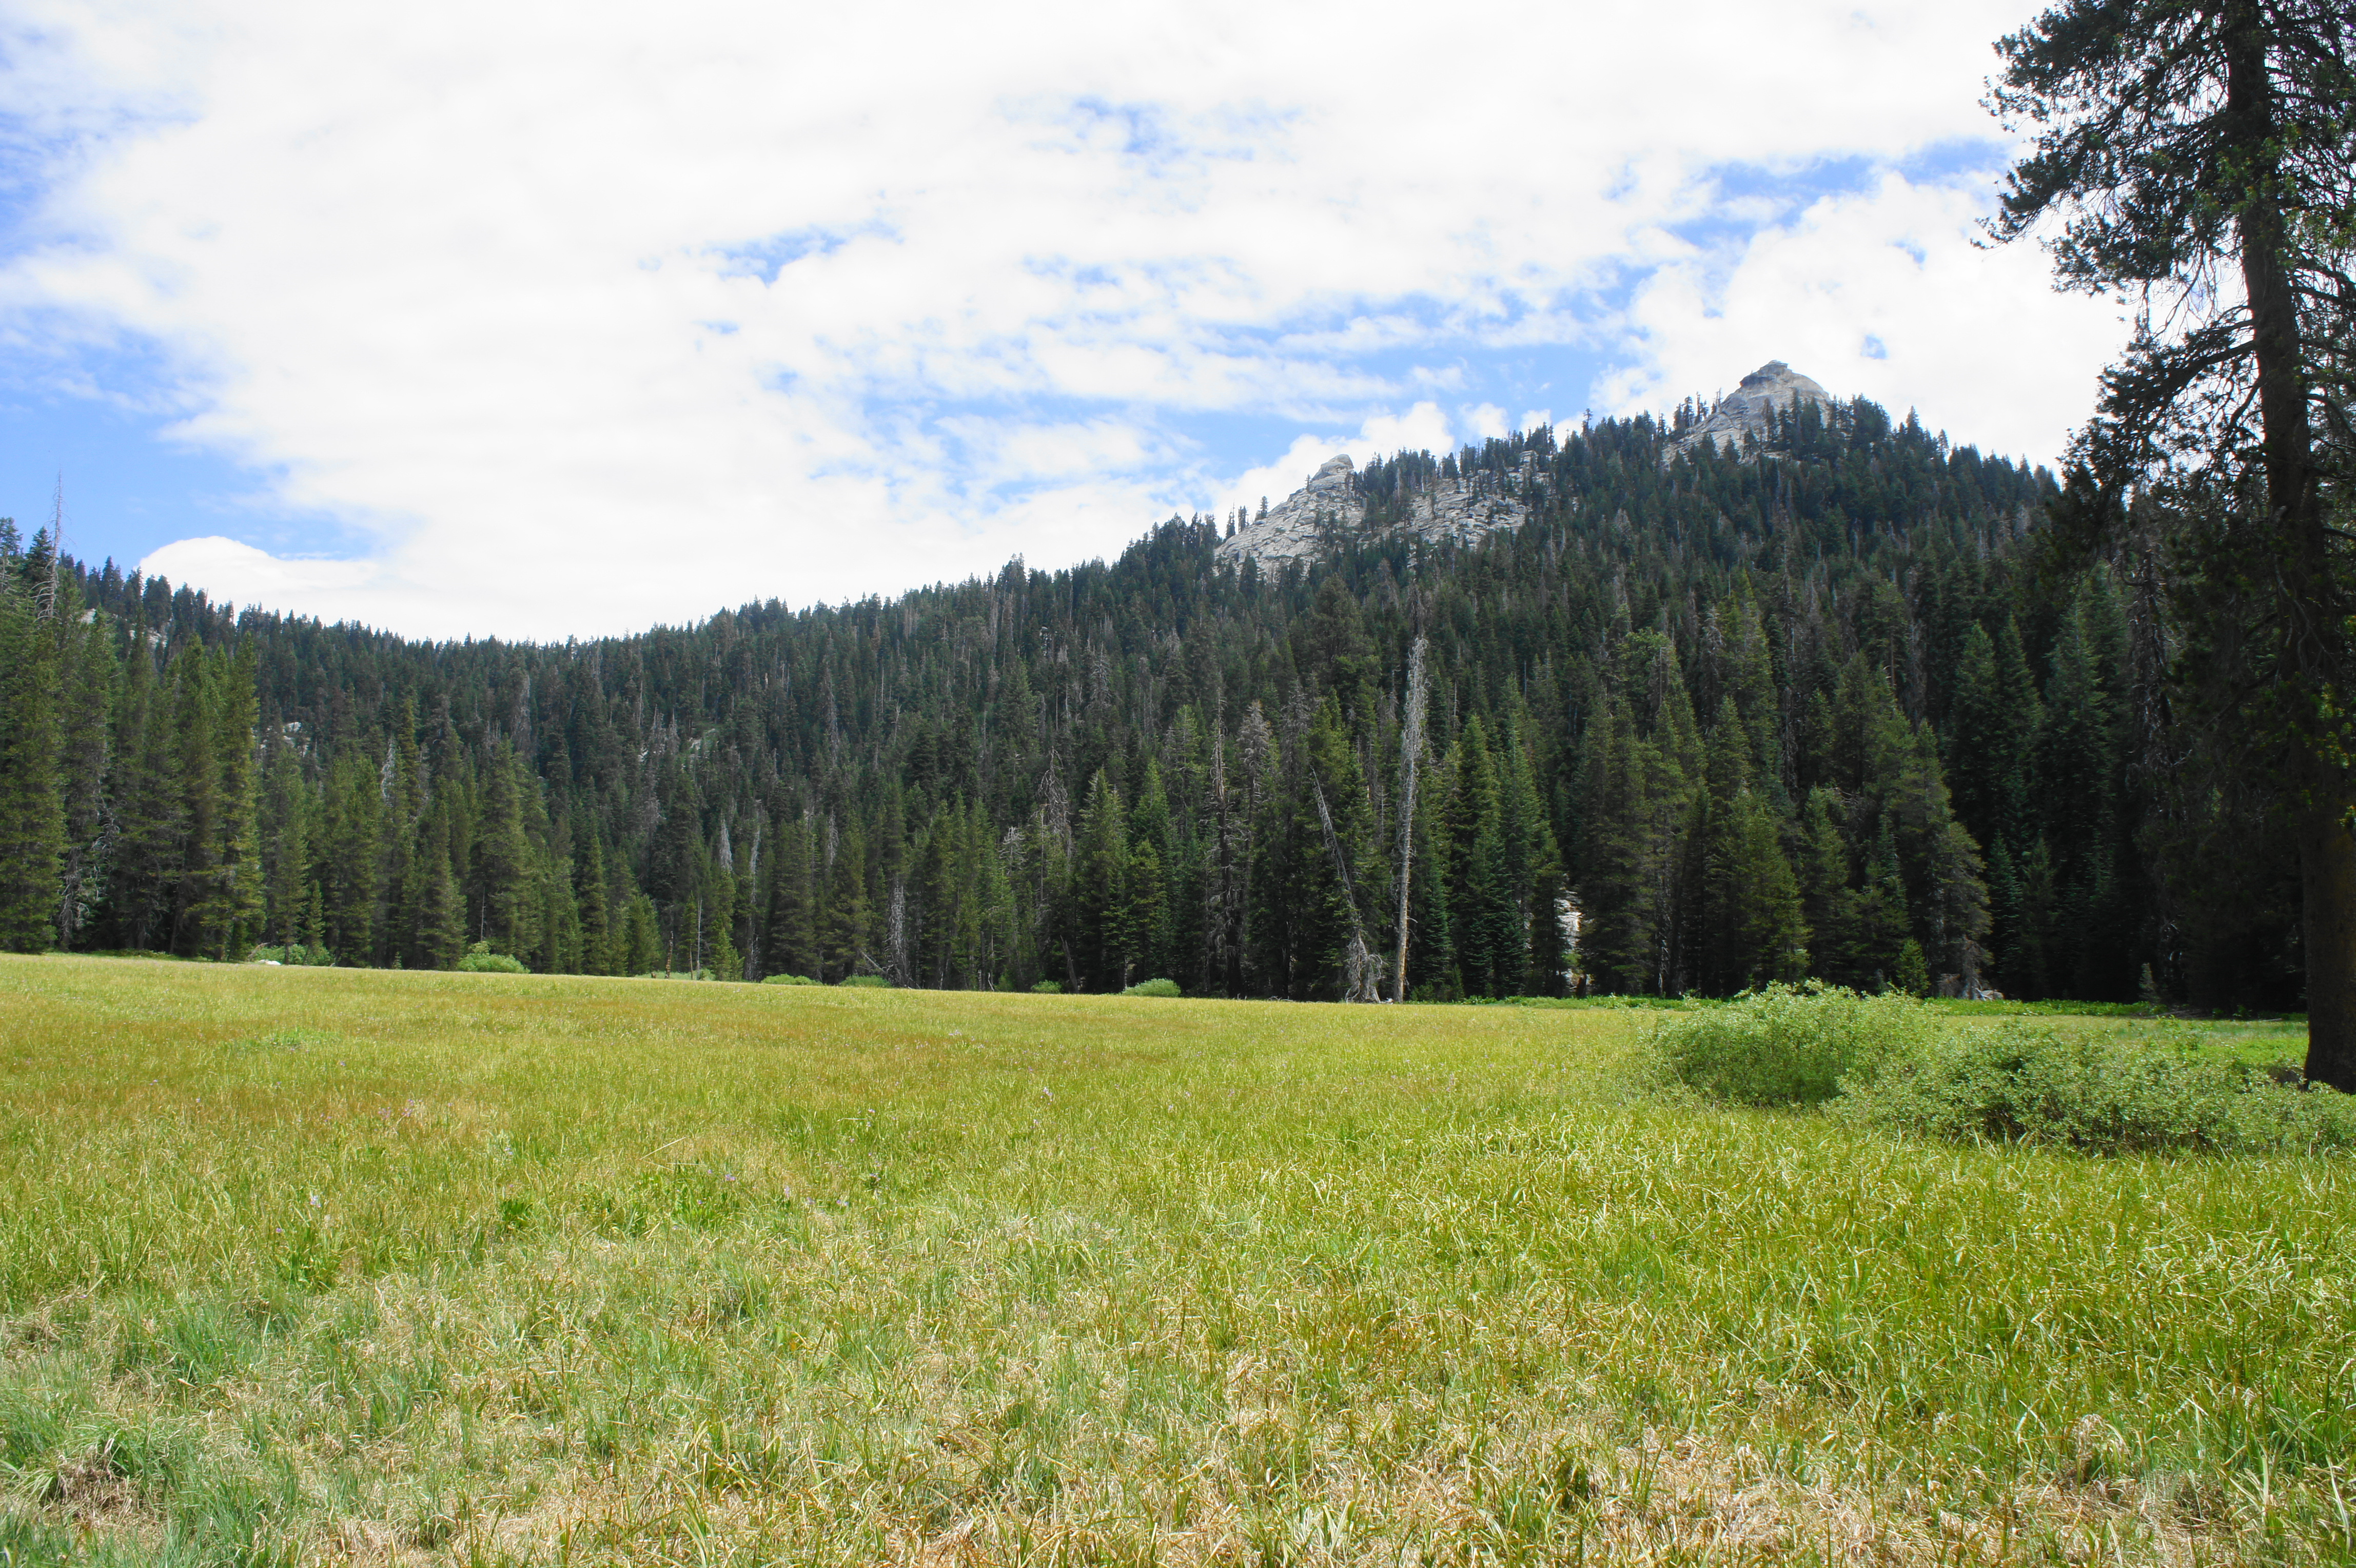
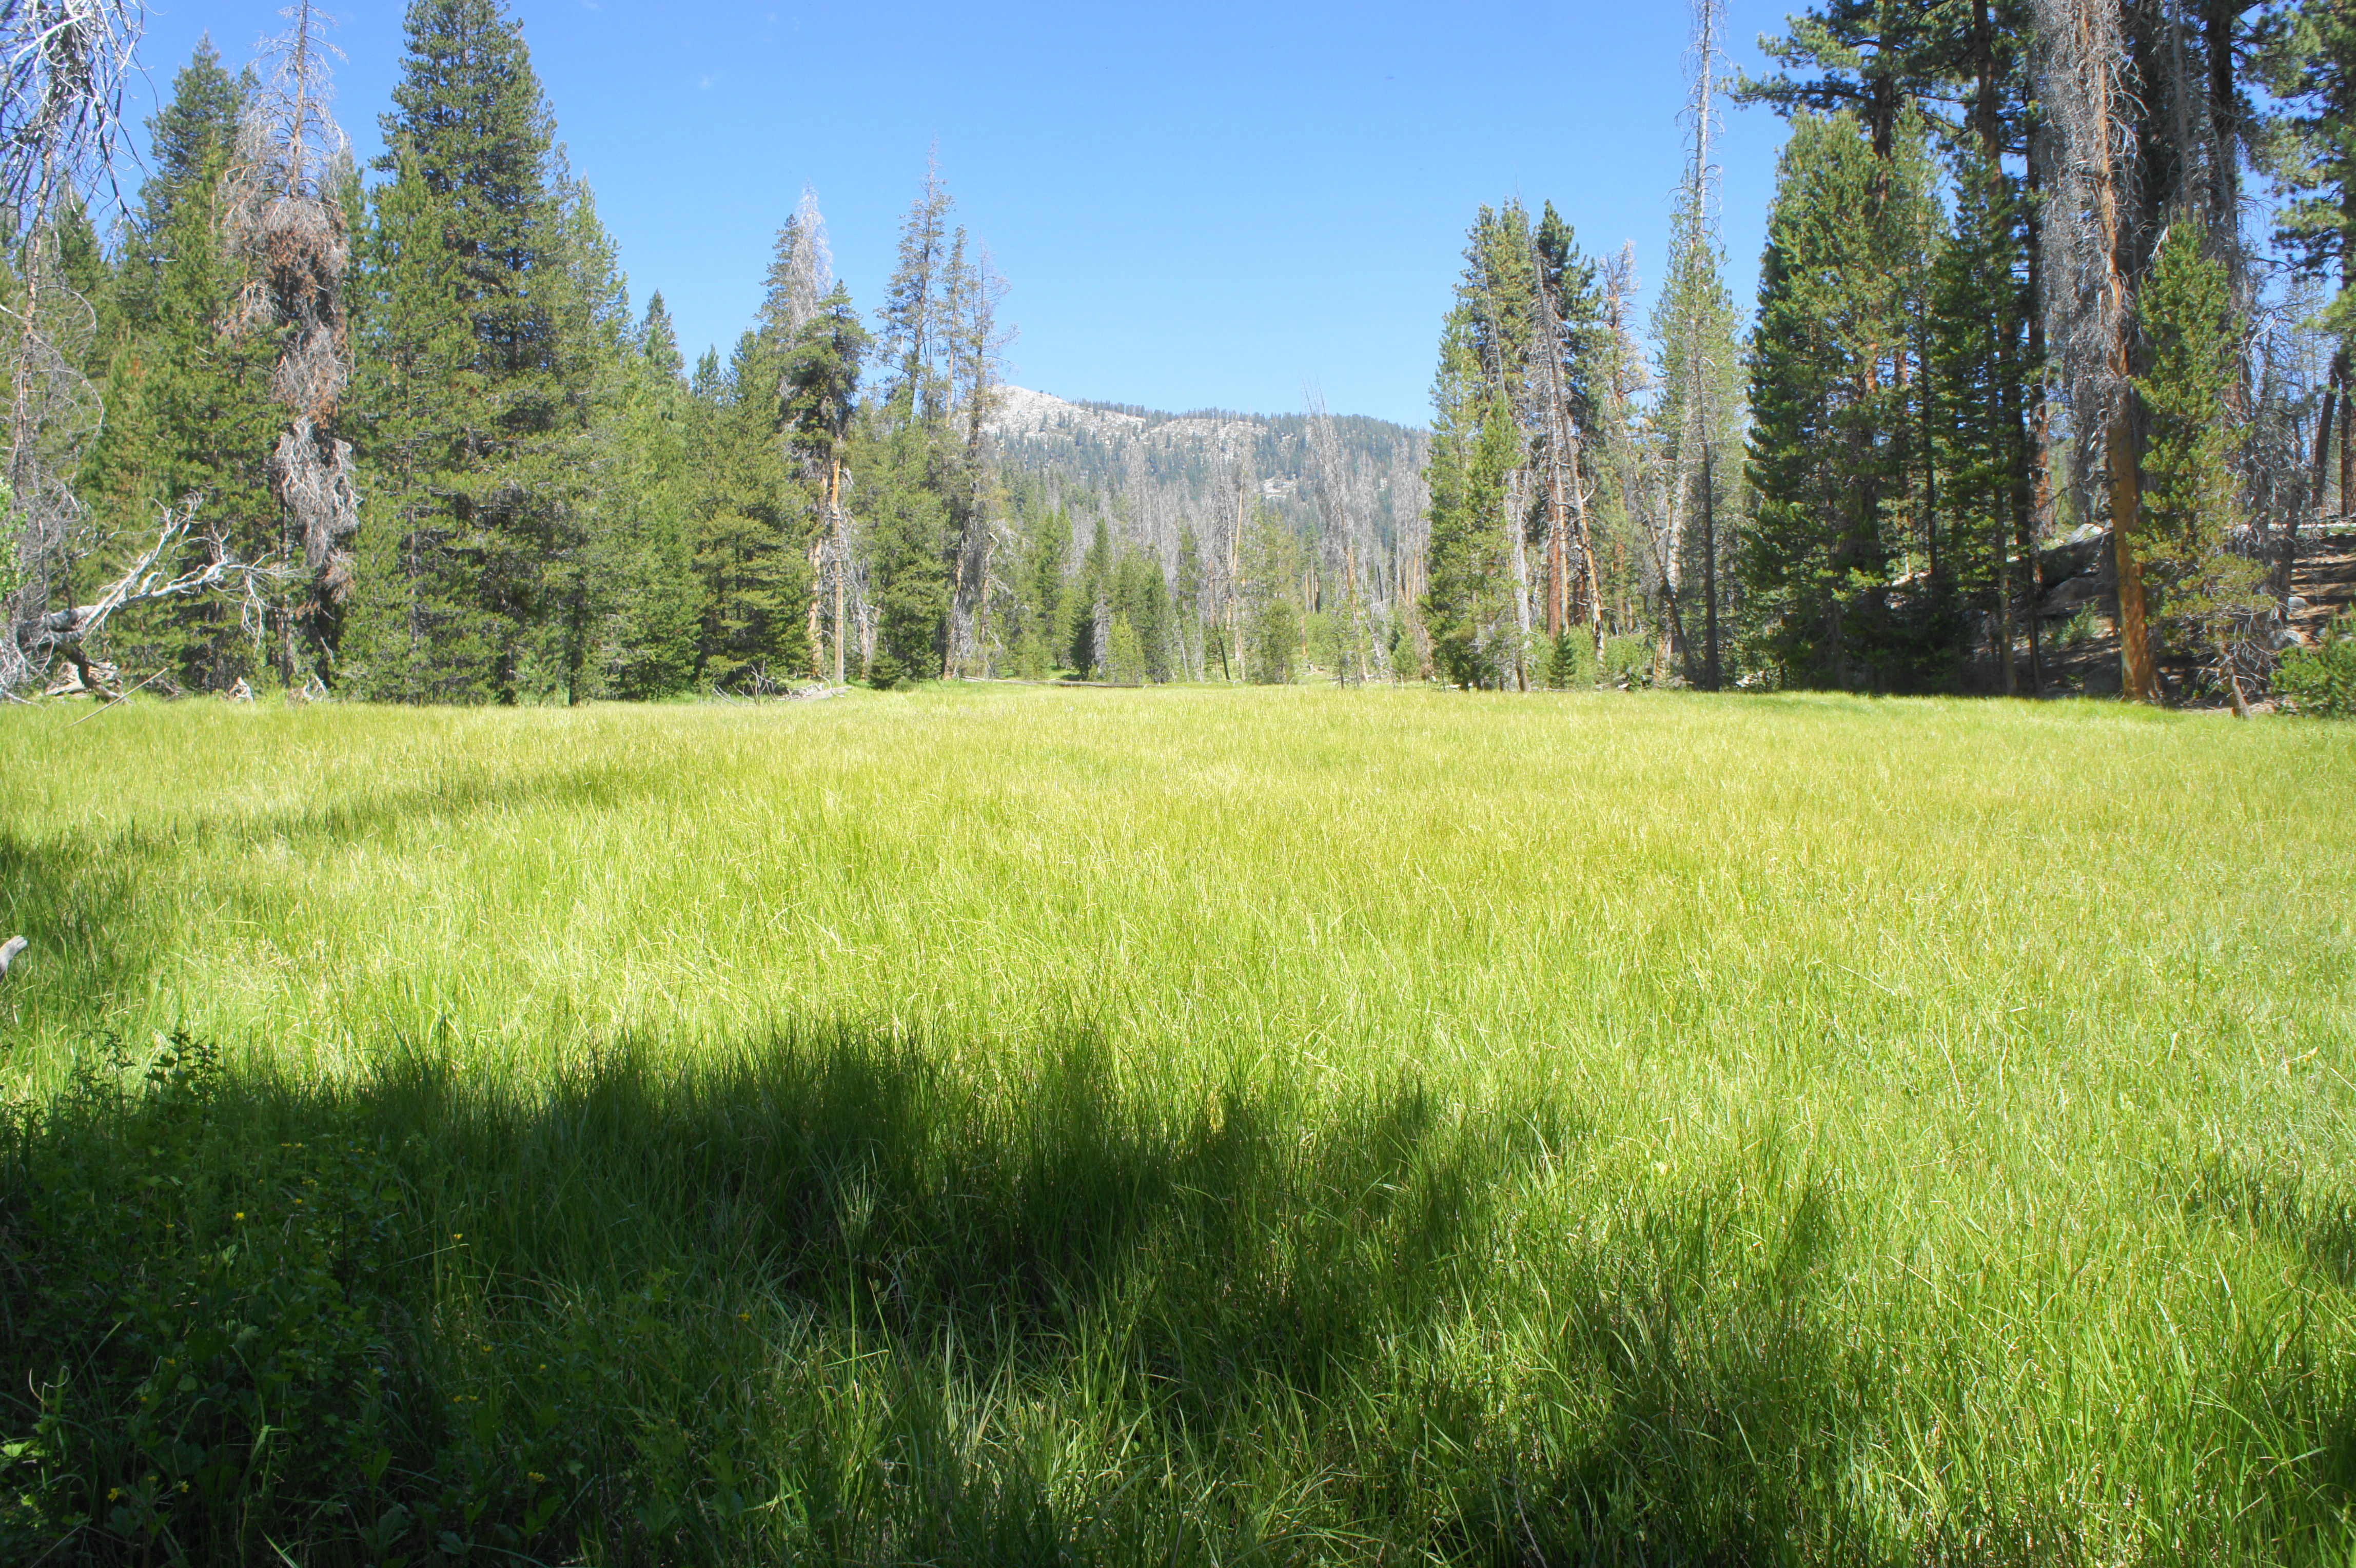
Bear right, coming quickly to Comanche Meadow on the left within about ¼ mile. This narrow inlet of verdant fields is surrounded by conifers and quaking aspens, with distant views of Mitchell Peak (10,365’) off to the northwest. From here the trail drops to cross a tributary stream, followed by a spur to a campsite with a bear box on the right. This is followed by a bigger stream crossing, leading to a pleasant stand of healthy ponderosa pines.
More than 1/3 mile past Comanche Meadow, the trail begins an abrupt and steep descent, switchbacking briefly to descend one level as the Sugarloaf Creek drainage carves a deeper cut in the bedrock. Off to the right, hikers get fleeting views up Crowley Canyon toward the Mount Silliman area, but the trail continues left, dropping some 250 feet before reaching a wire gate. Pass through the gate, noticing the change in topography as scrubby manzanitas begin to dot the landscape.
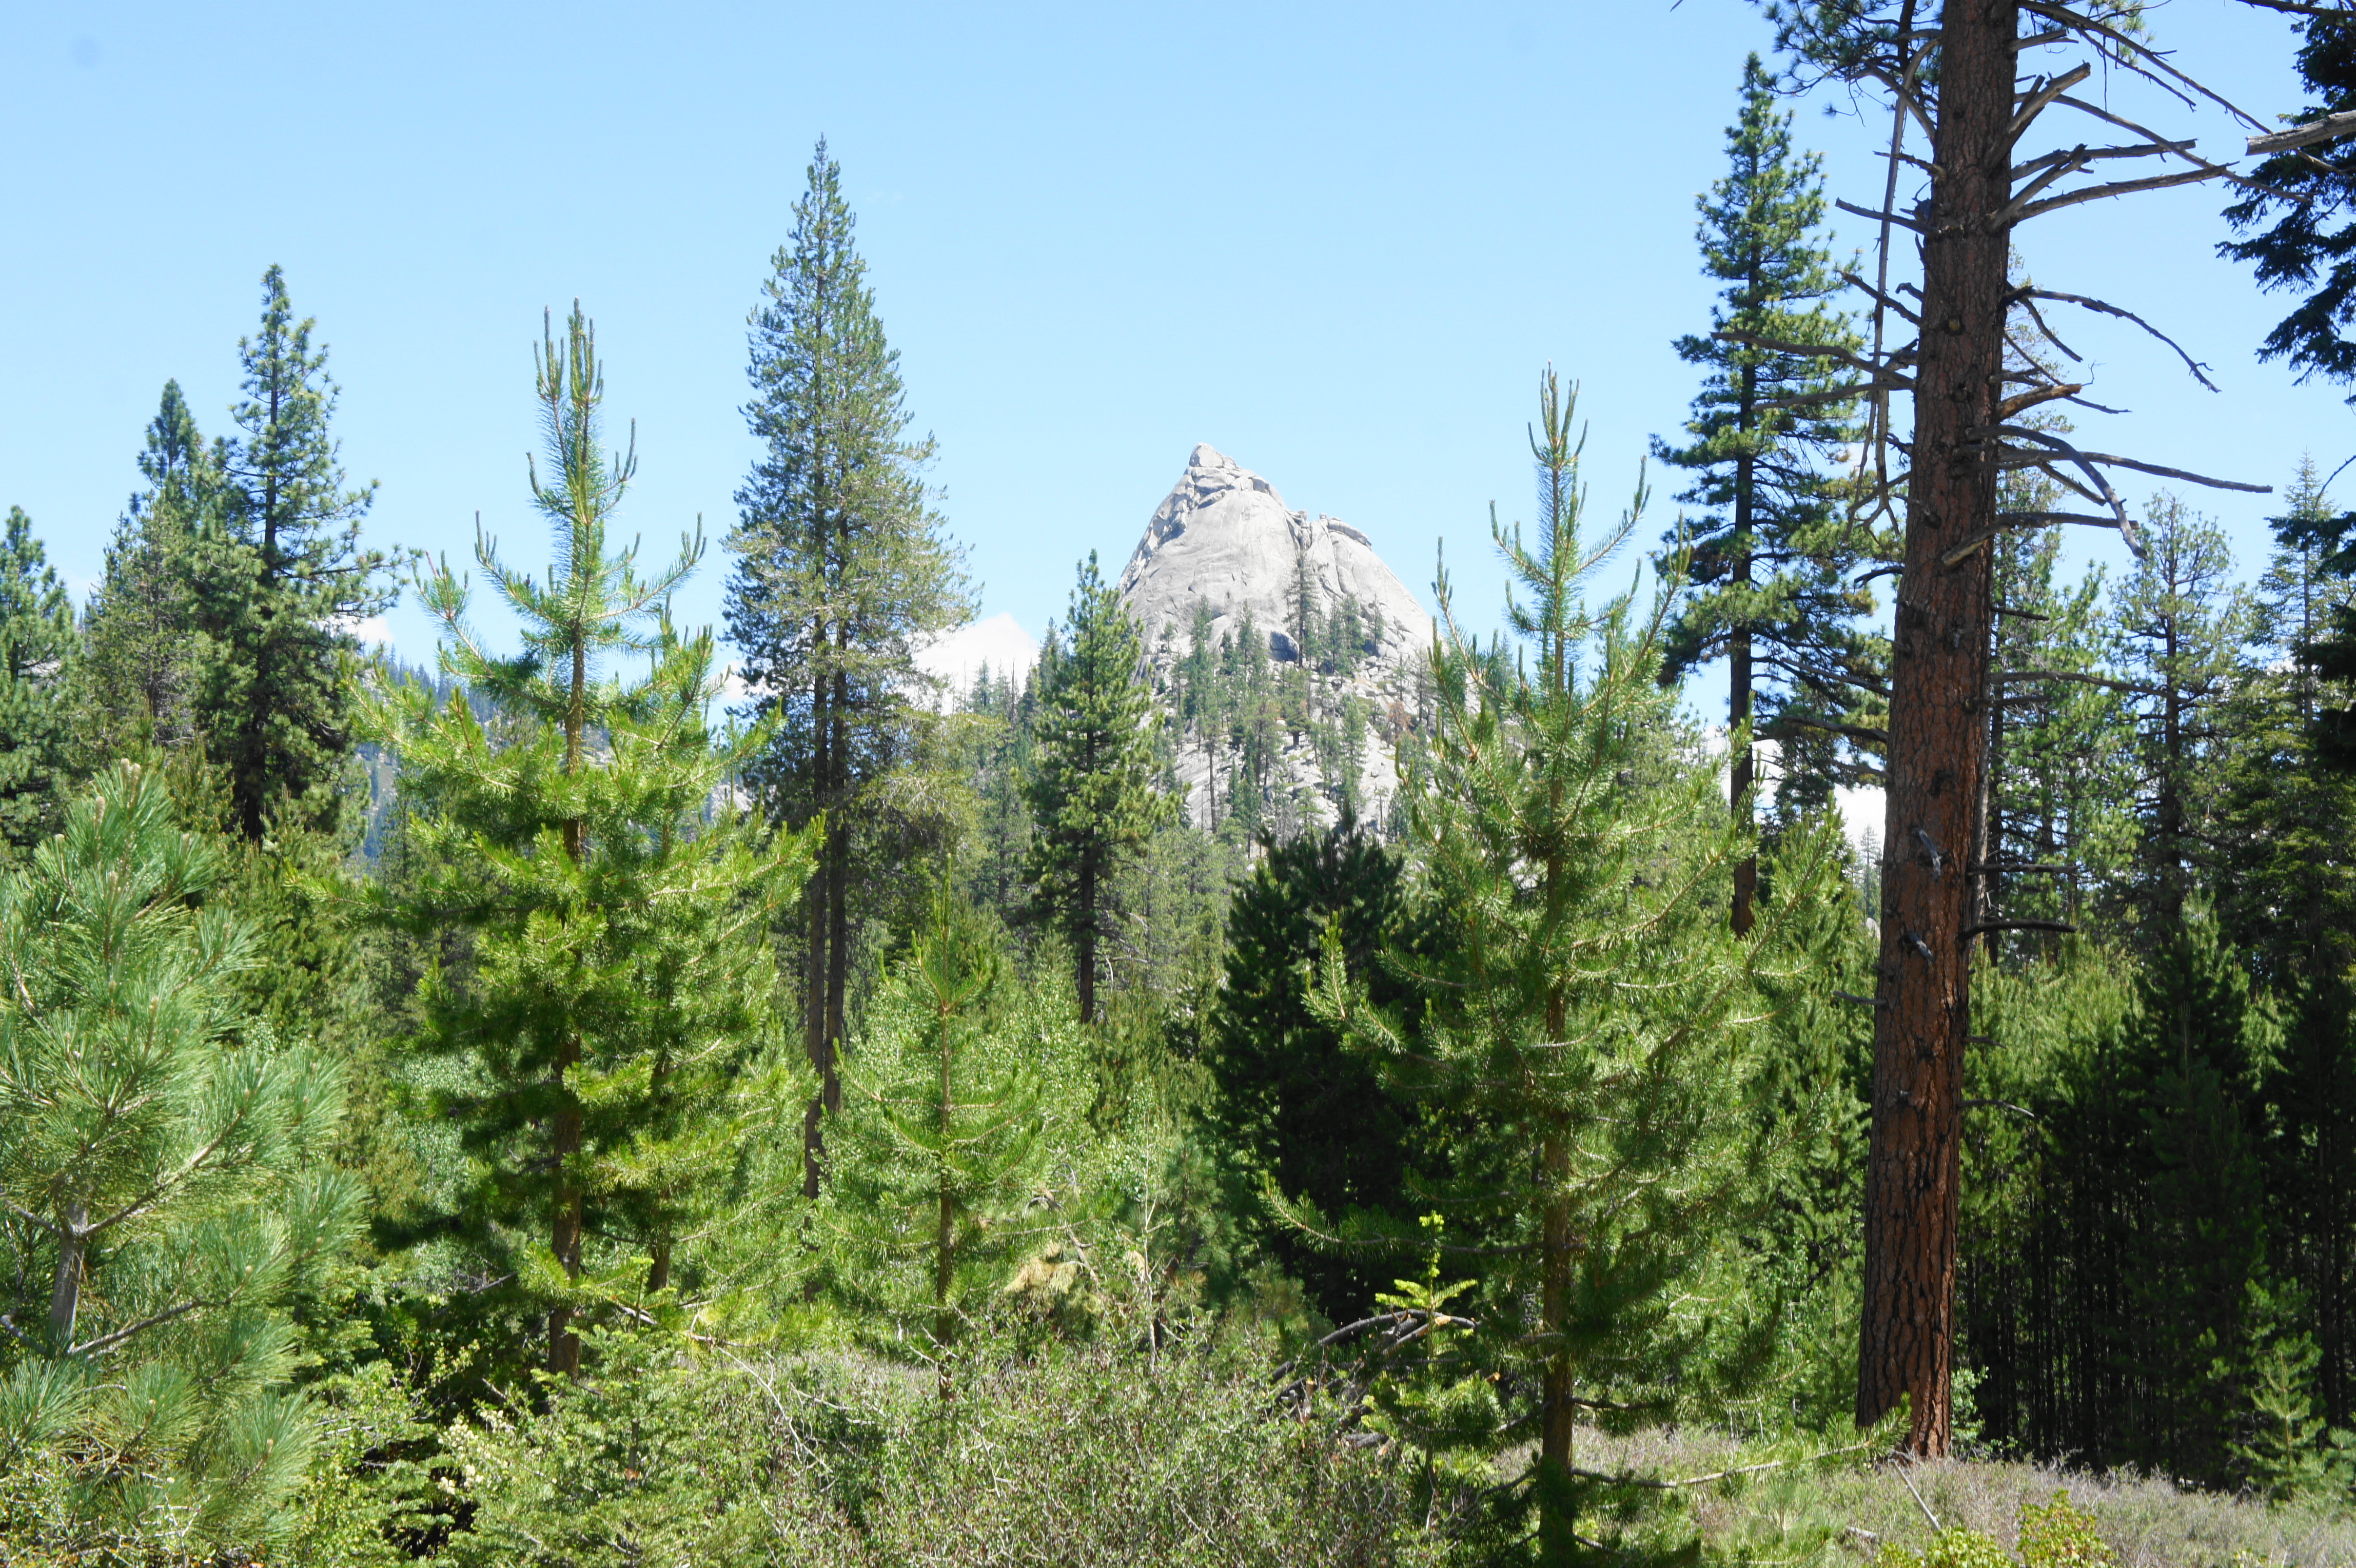
After settling into a level floodplain again, hikers approach Sugarloaf Meadow on the left, indicated by the presence of another campsite with a bear box. (Note: The meadow is not easily visible from the trail but can be seen by following the spur path left past the campsite.) Ahead, the prominent granite dome towering above is Sugarloaf (7,995’), one of the more interesting features of the day’s hike.

Sugarloaf from the trail 
Crossing Sugarloaf Creek
Continuing to roughly parallel Sugarloaf Creek on the right, the trail dips to cross the wide stream at just short of the six-mile mark for the day. This is a nice place to take a rest and get your feet wet, and there are a couple nice campsites along the south bank.
Beyond, the trail leaves Sugarloaf Creek behind and does the first sustained climbing of the day, ascending partway up the forested slope, with Sugarloaf Valley unfolding off to the left. After passing another small tributary, the trail reaches lovely Ferguson Creek at 7.3 miles, where there is also a nice set of campsites.
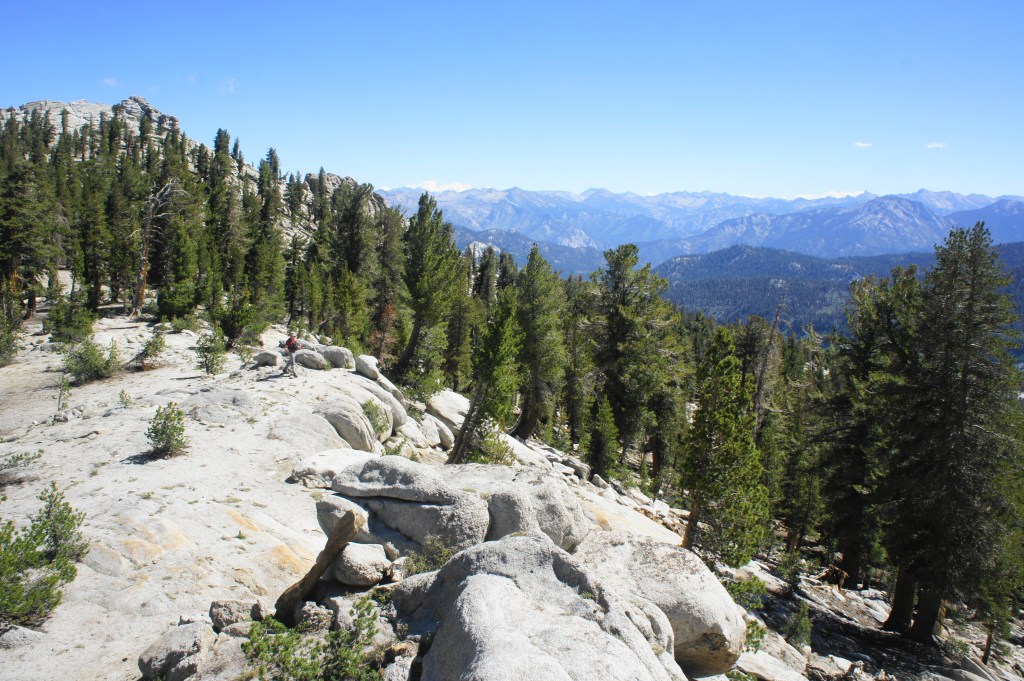
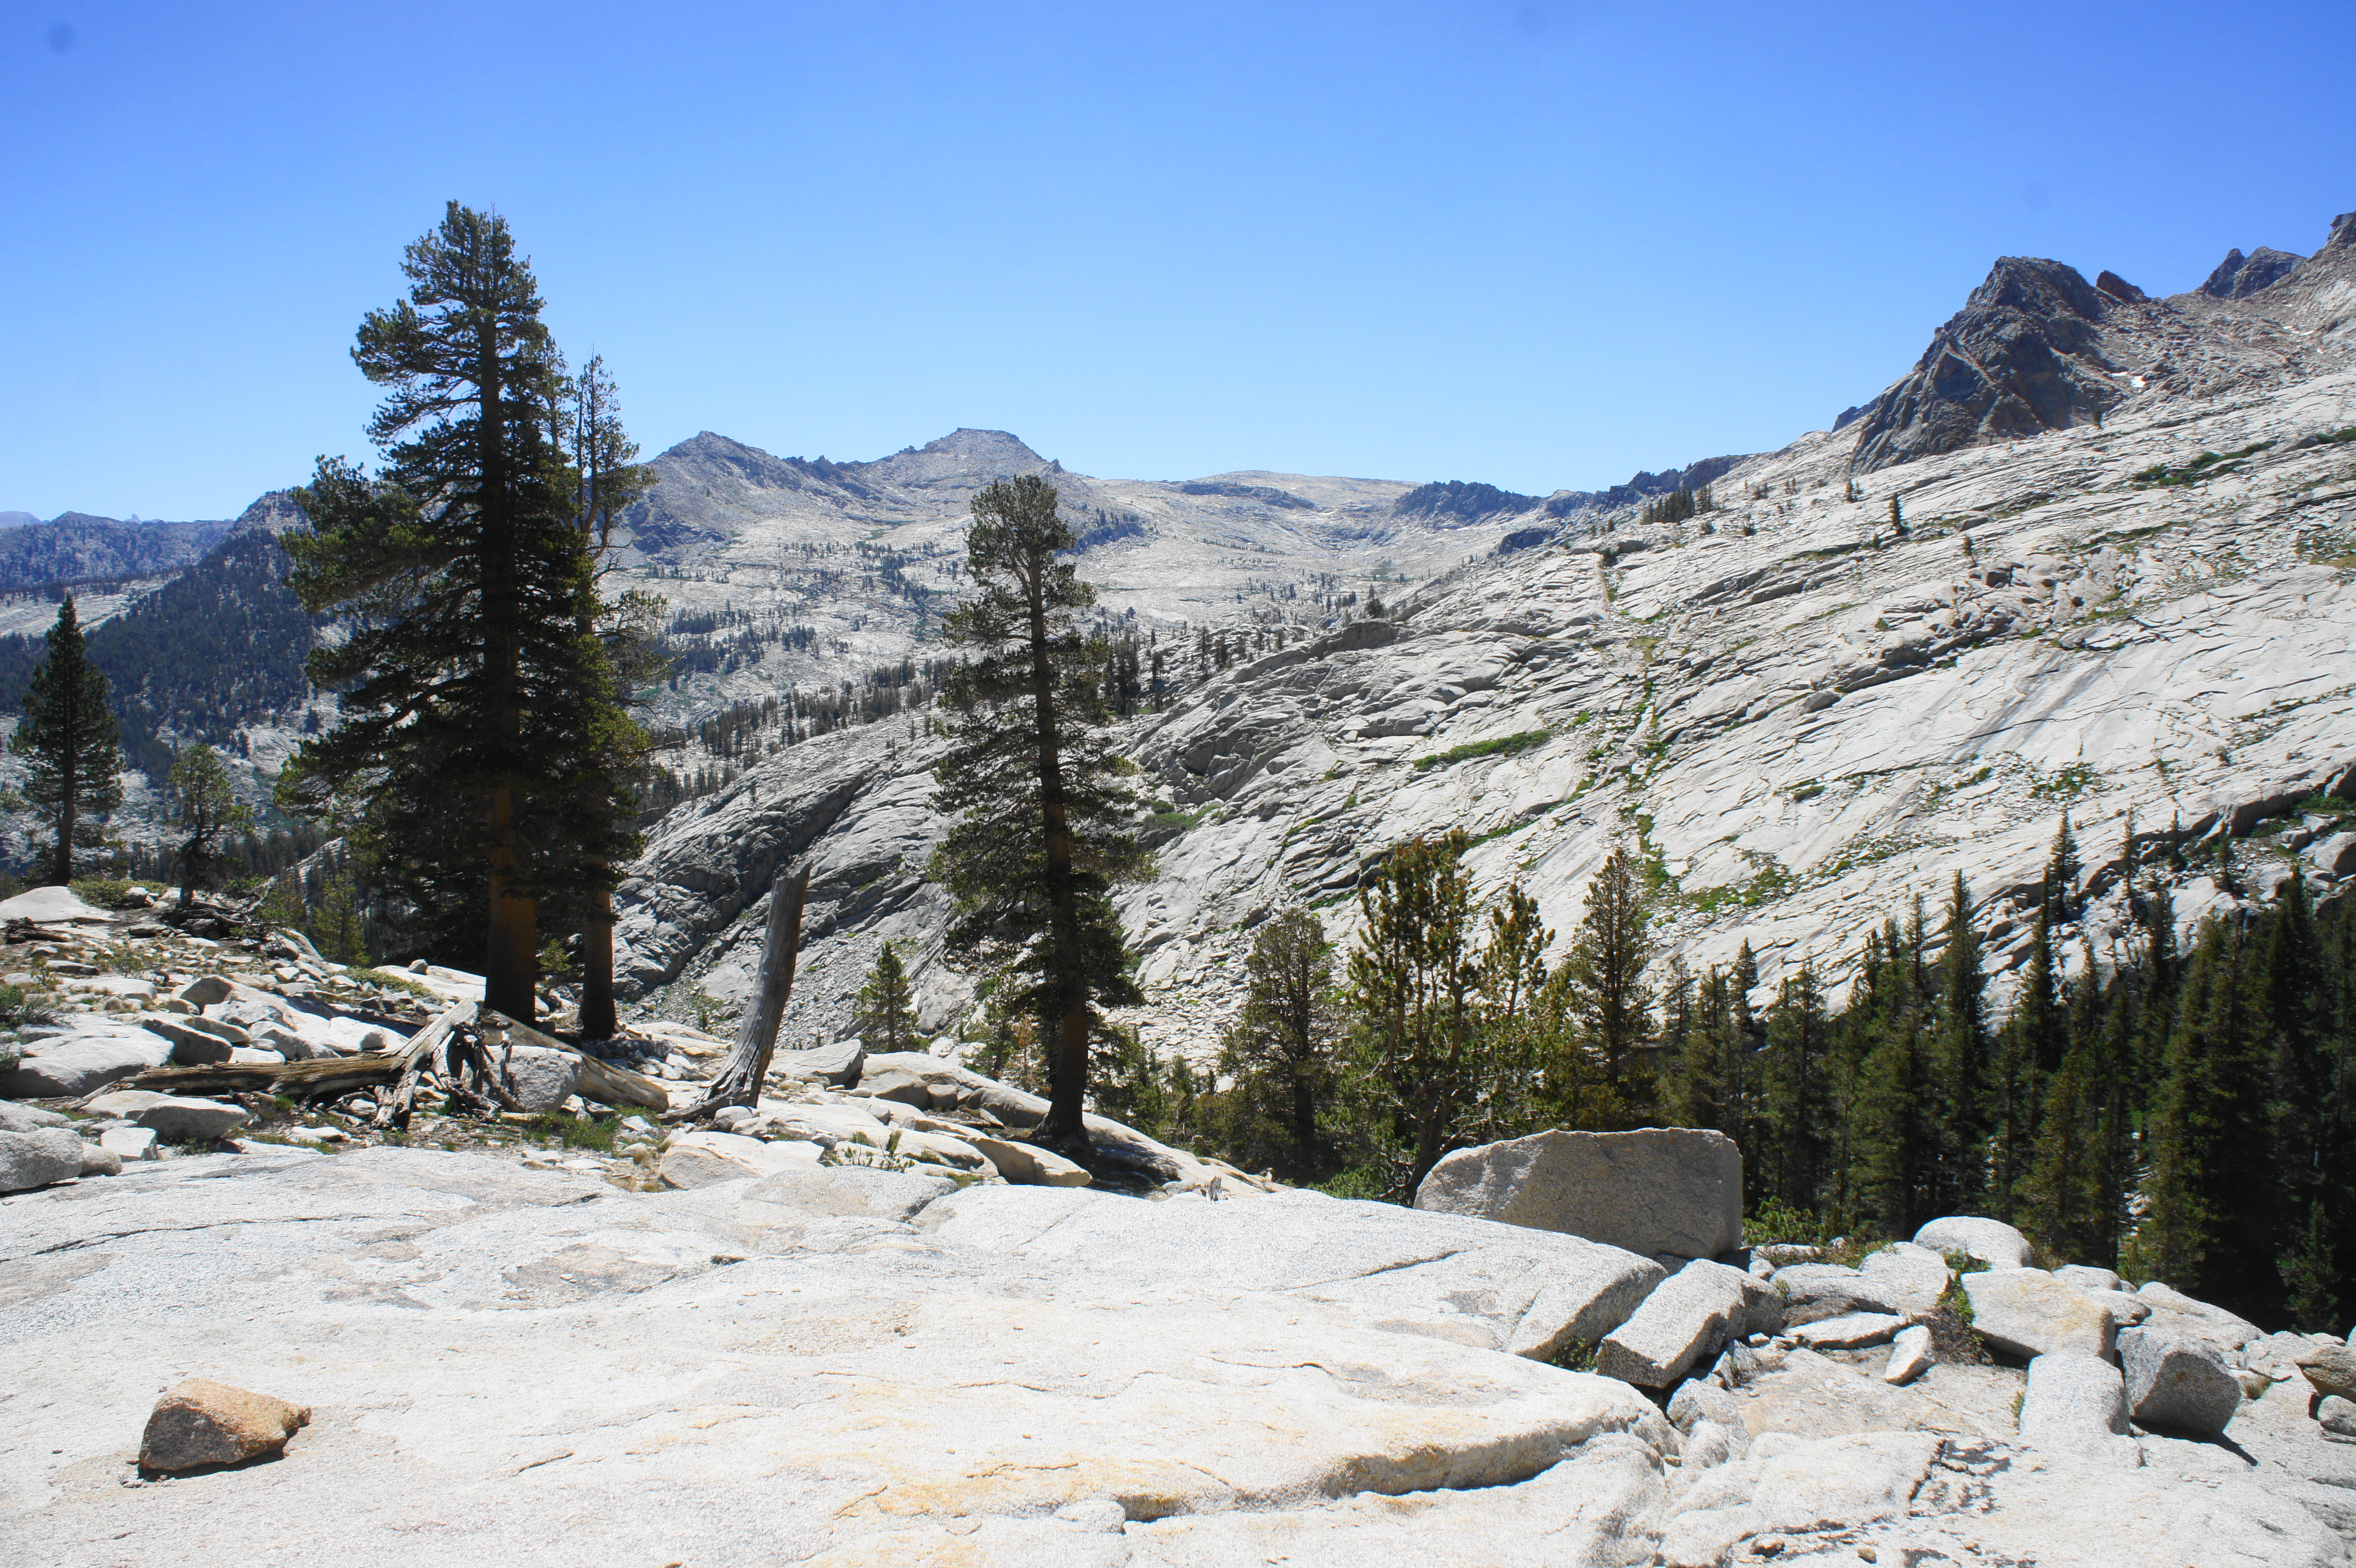
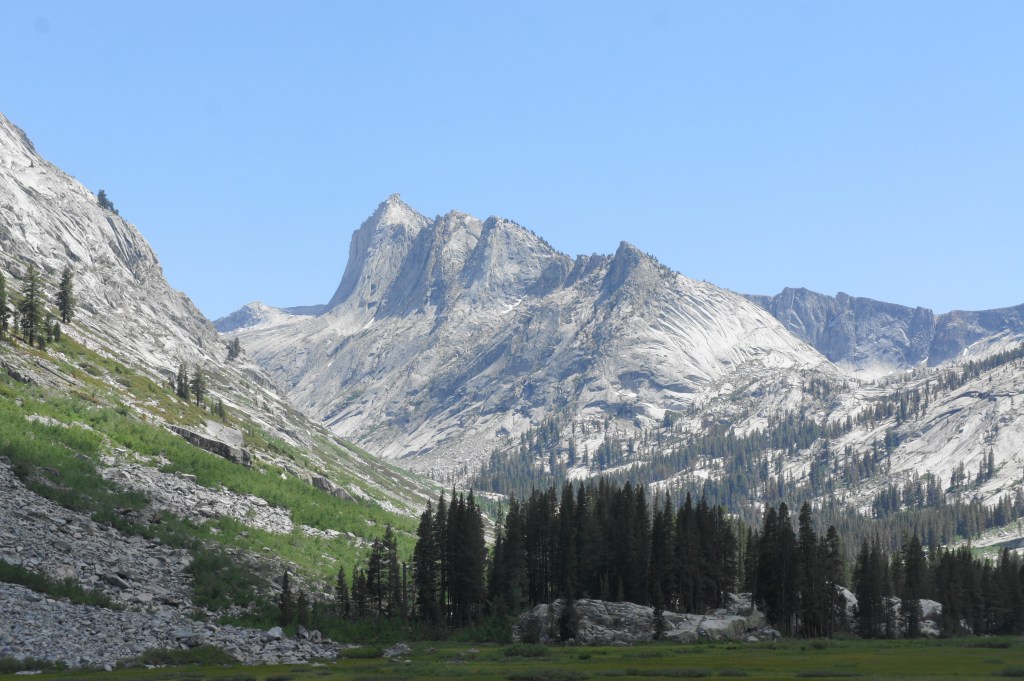
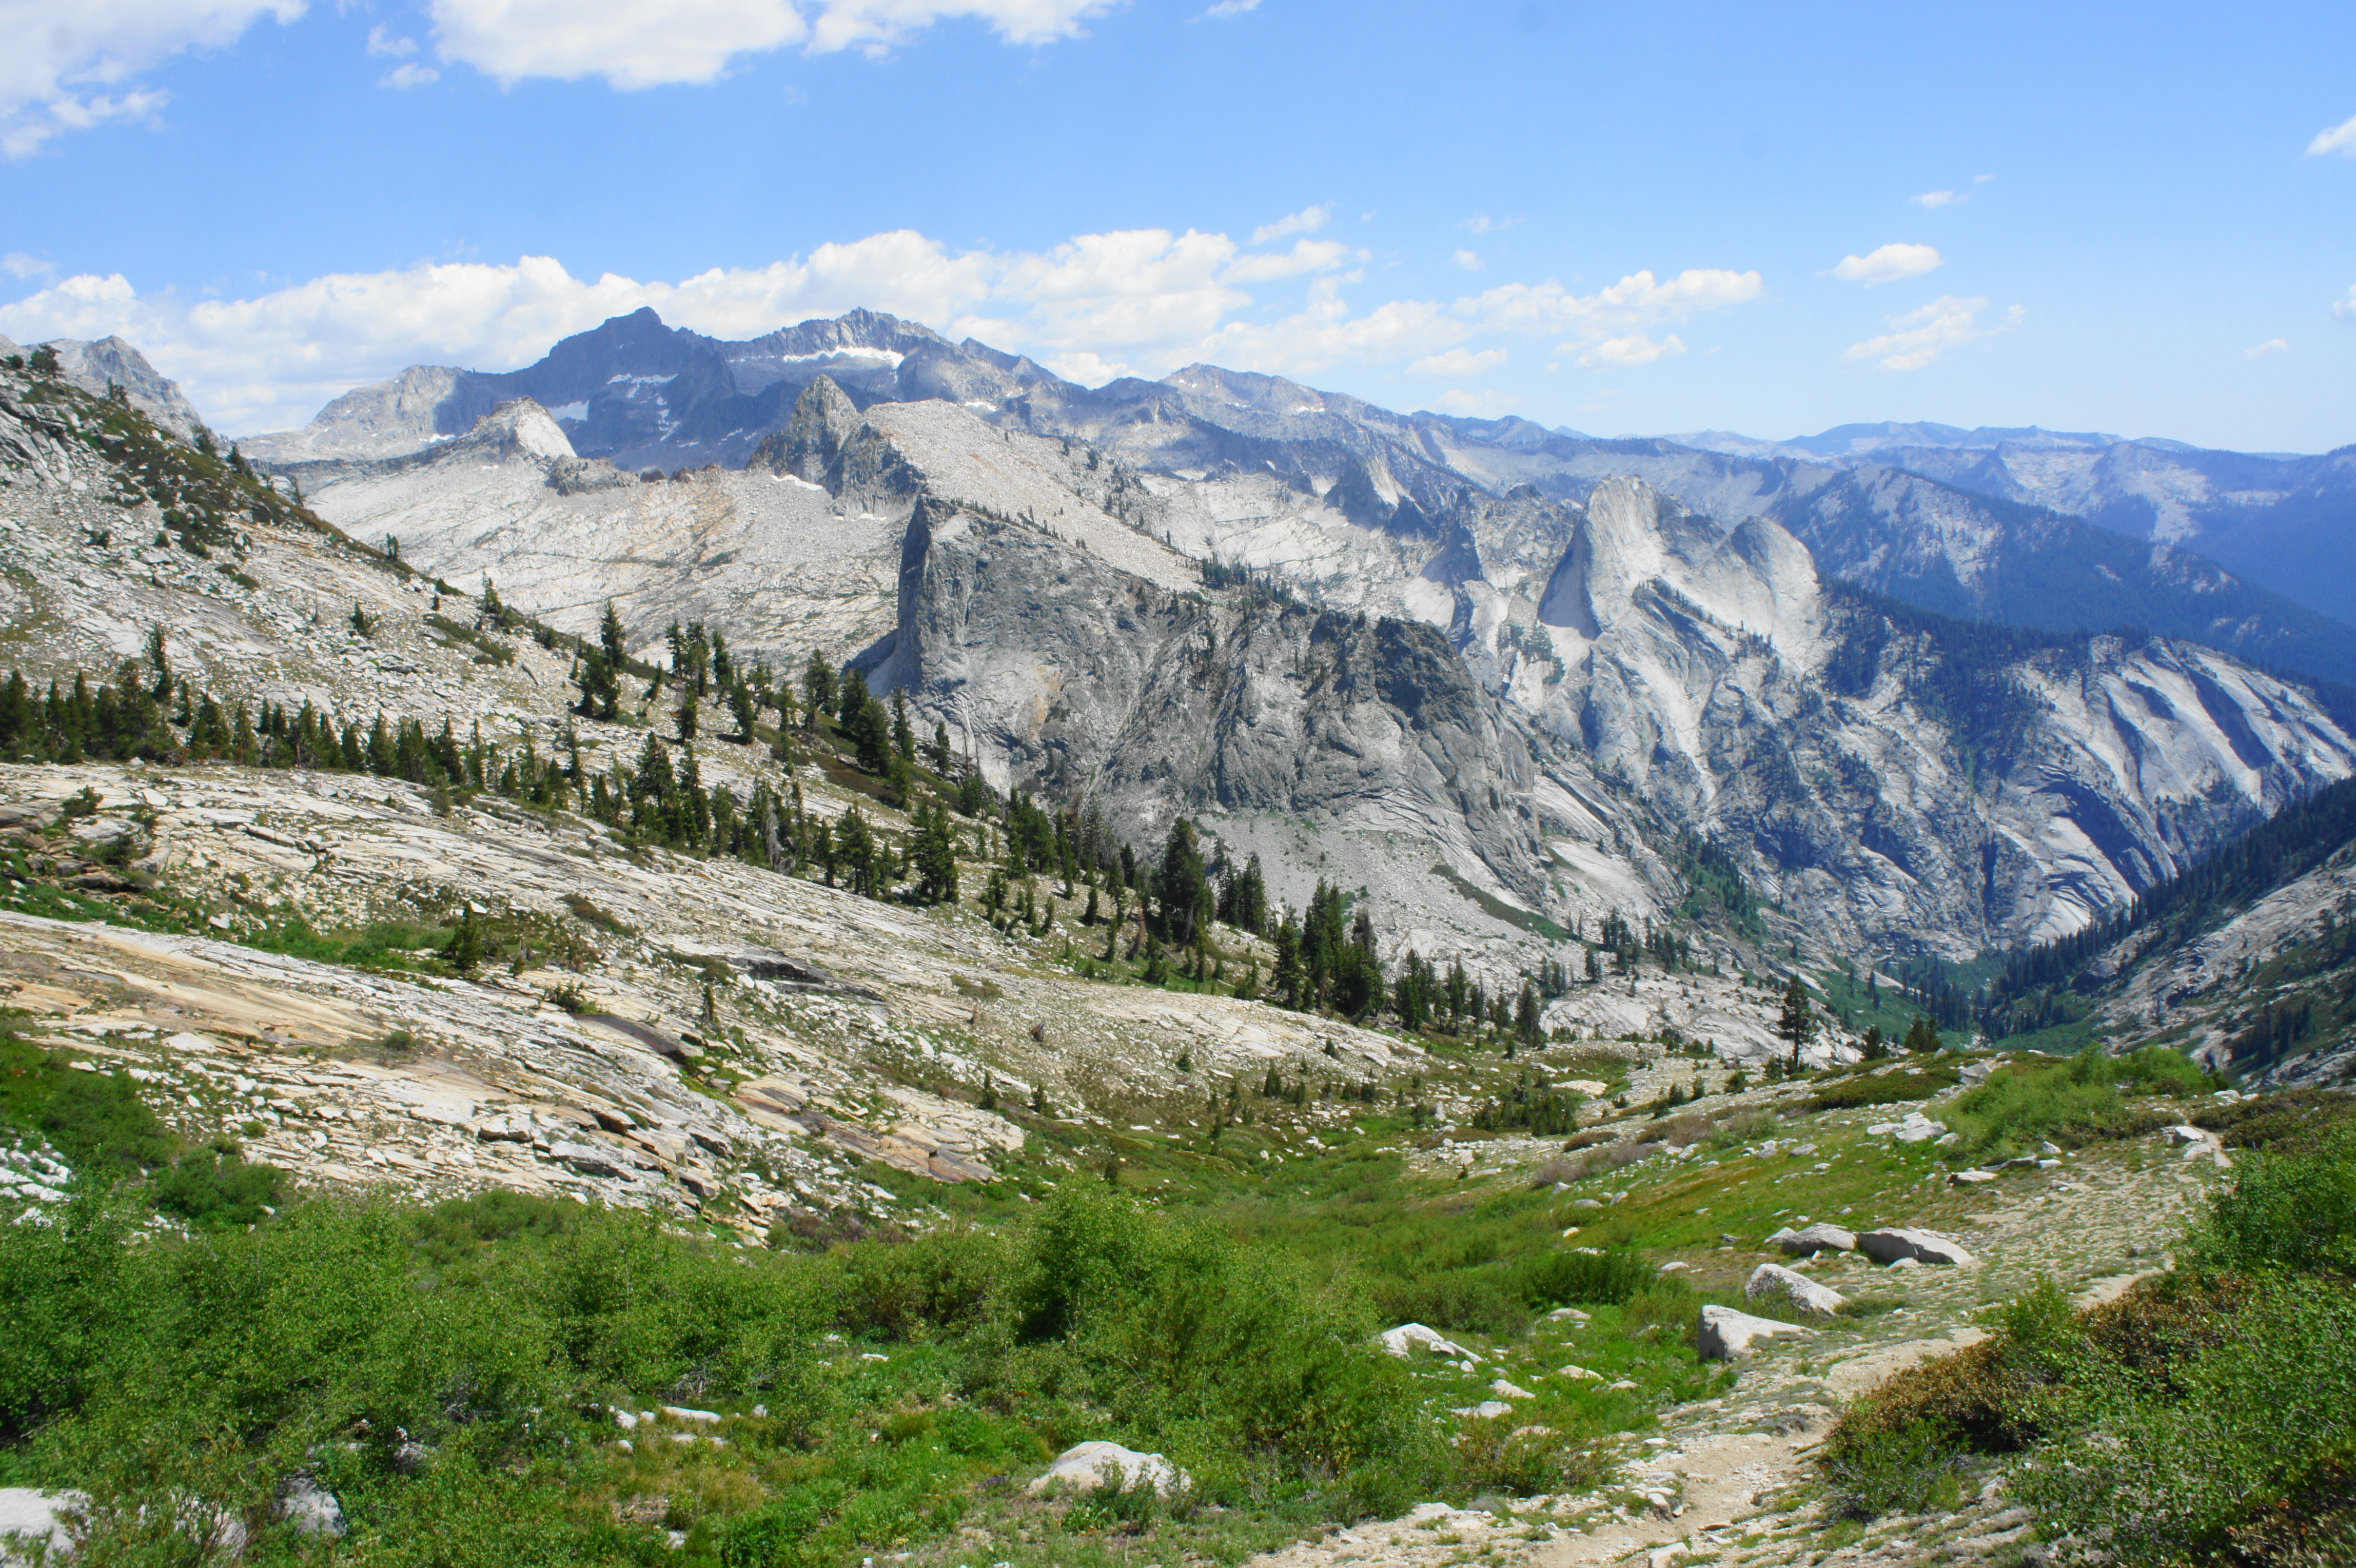
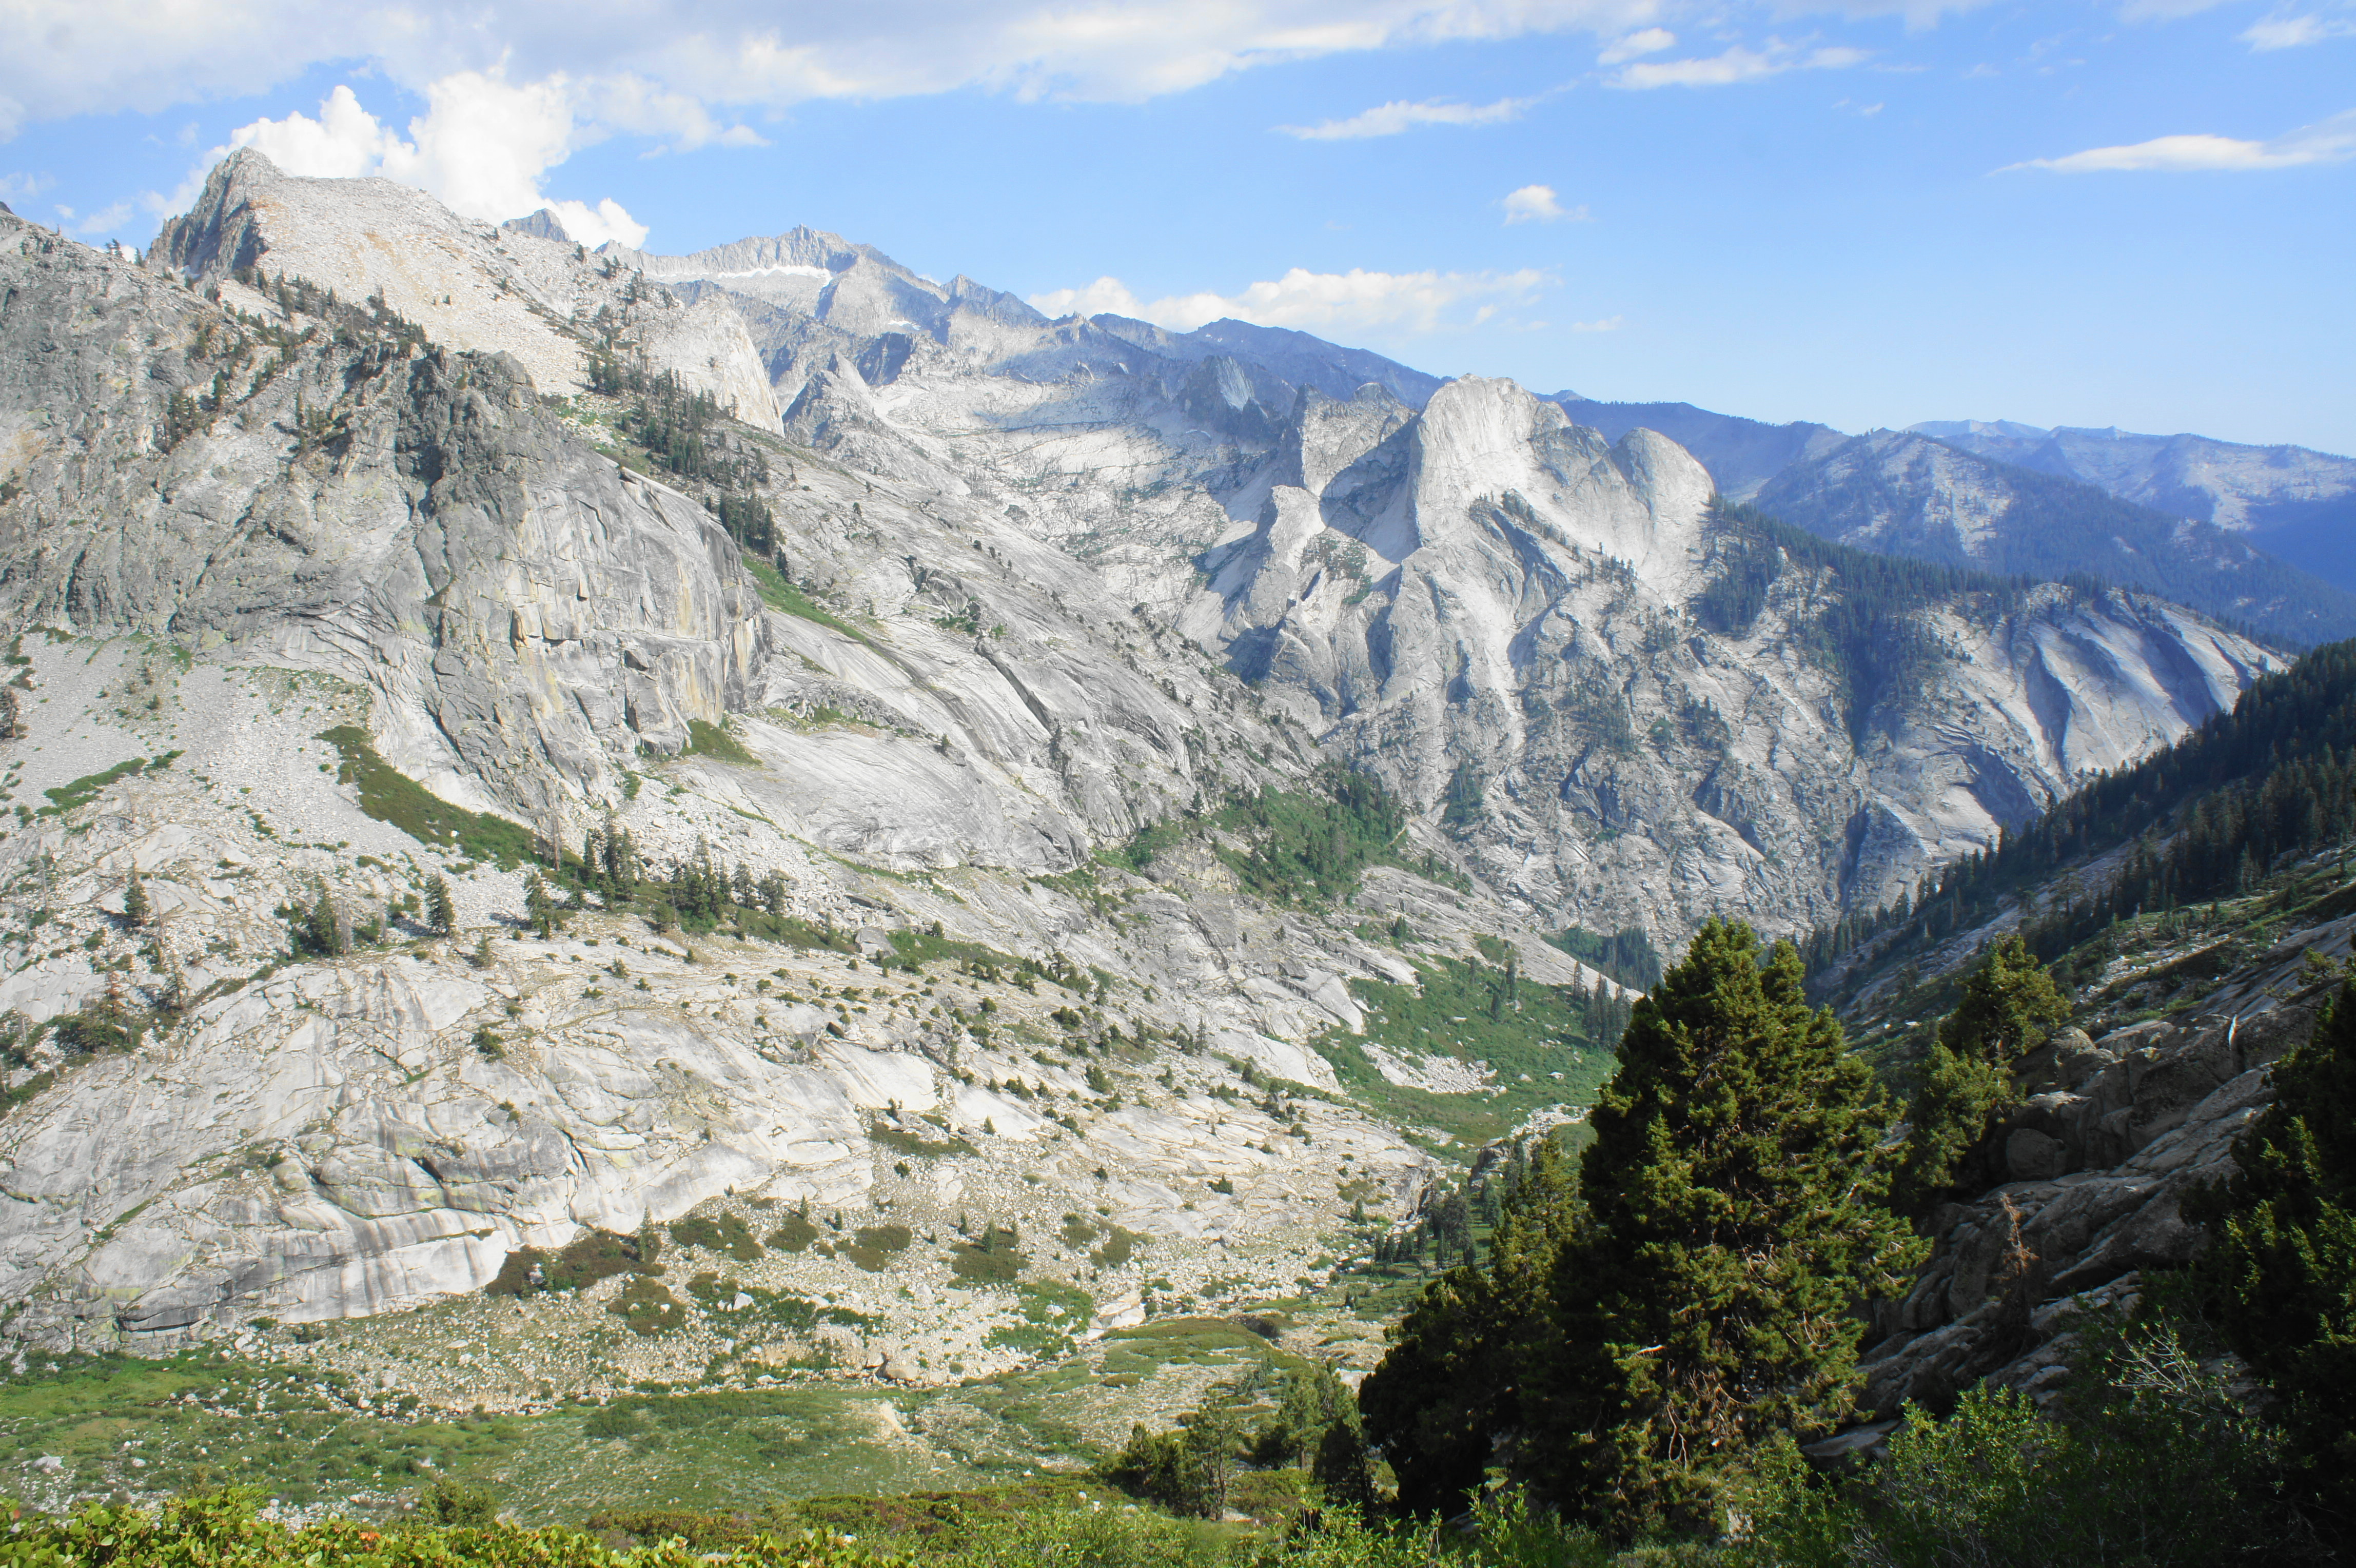
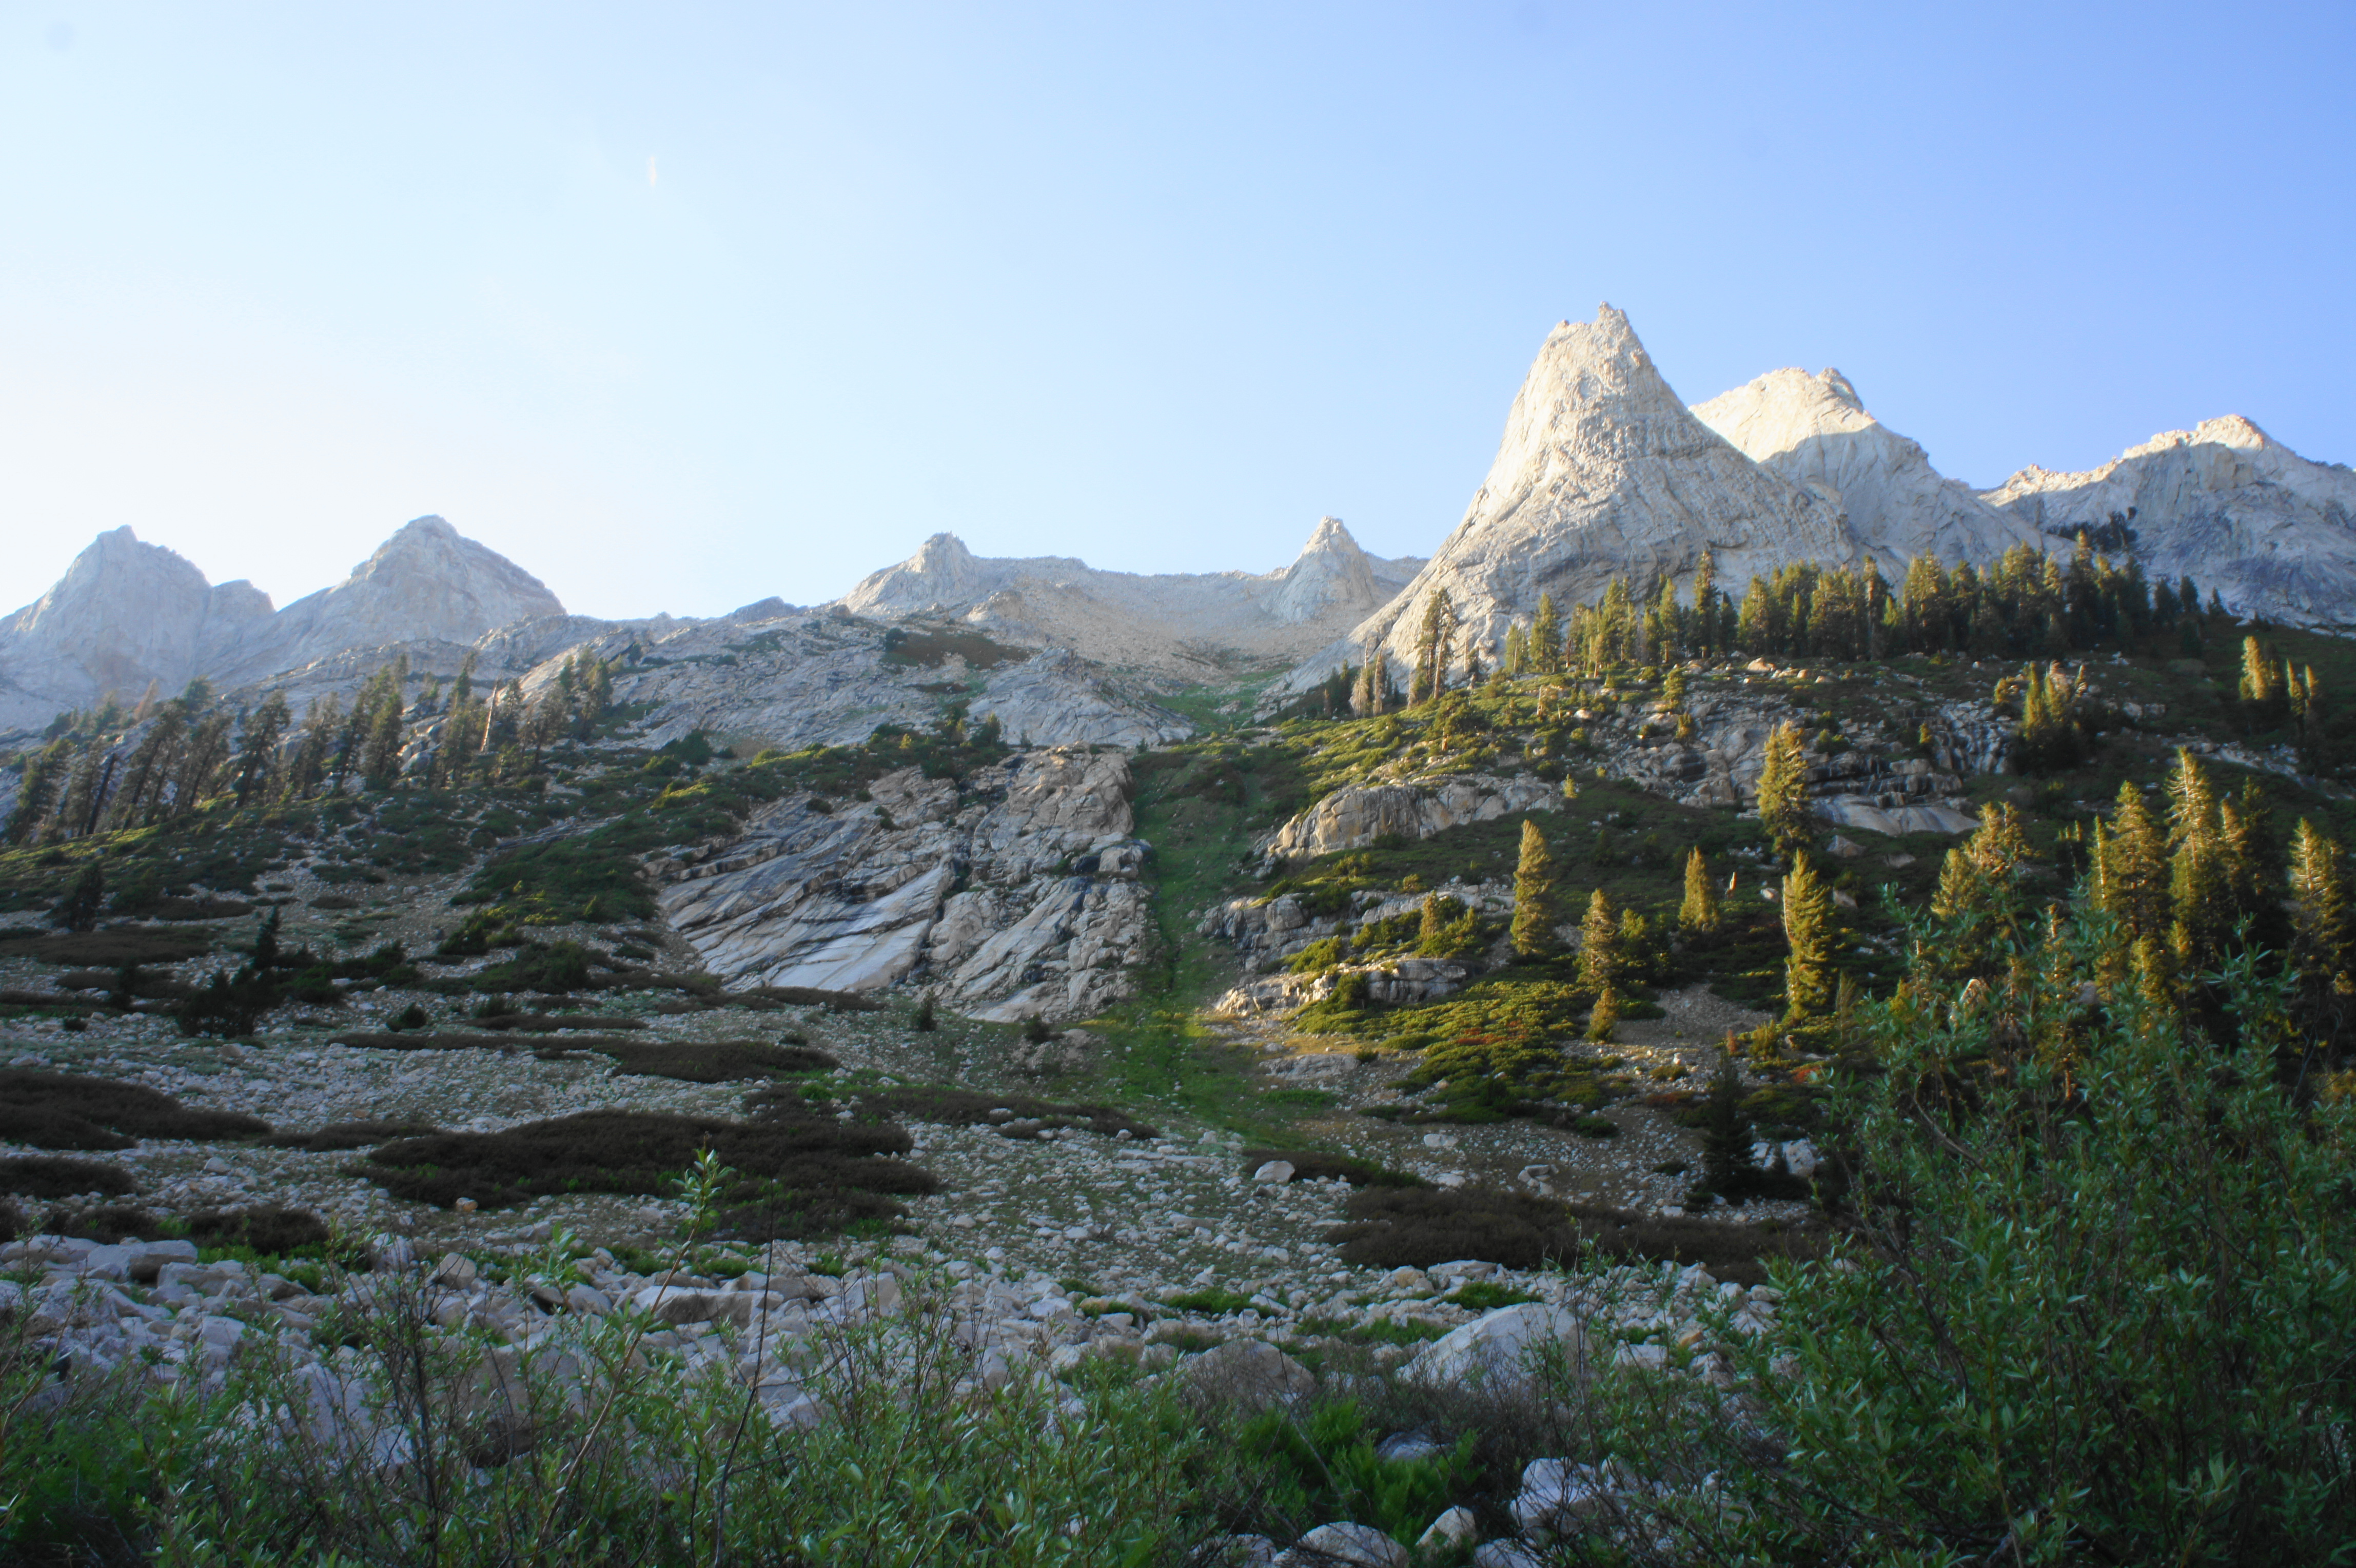
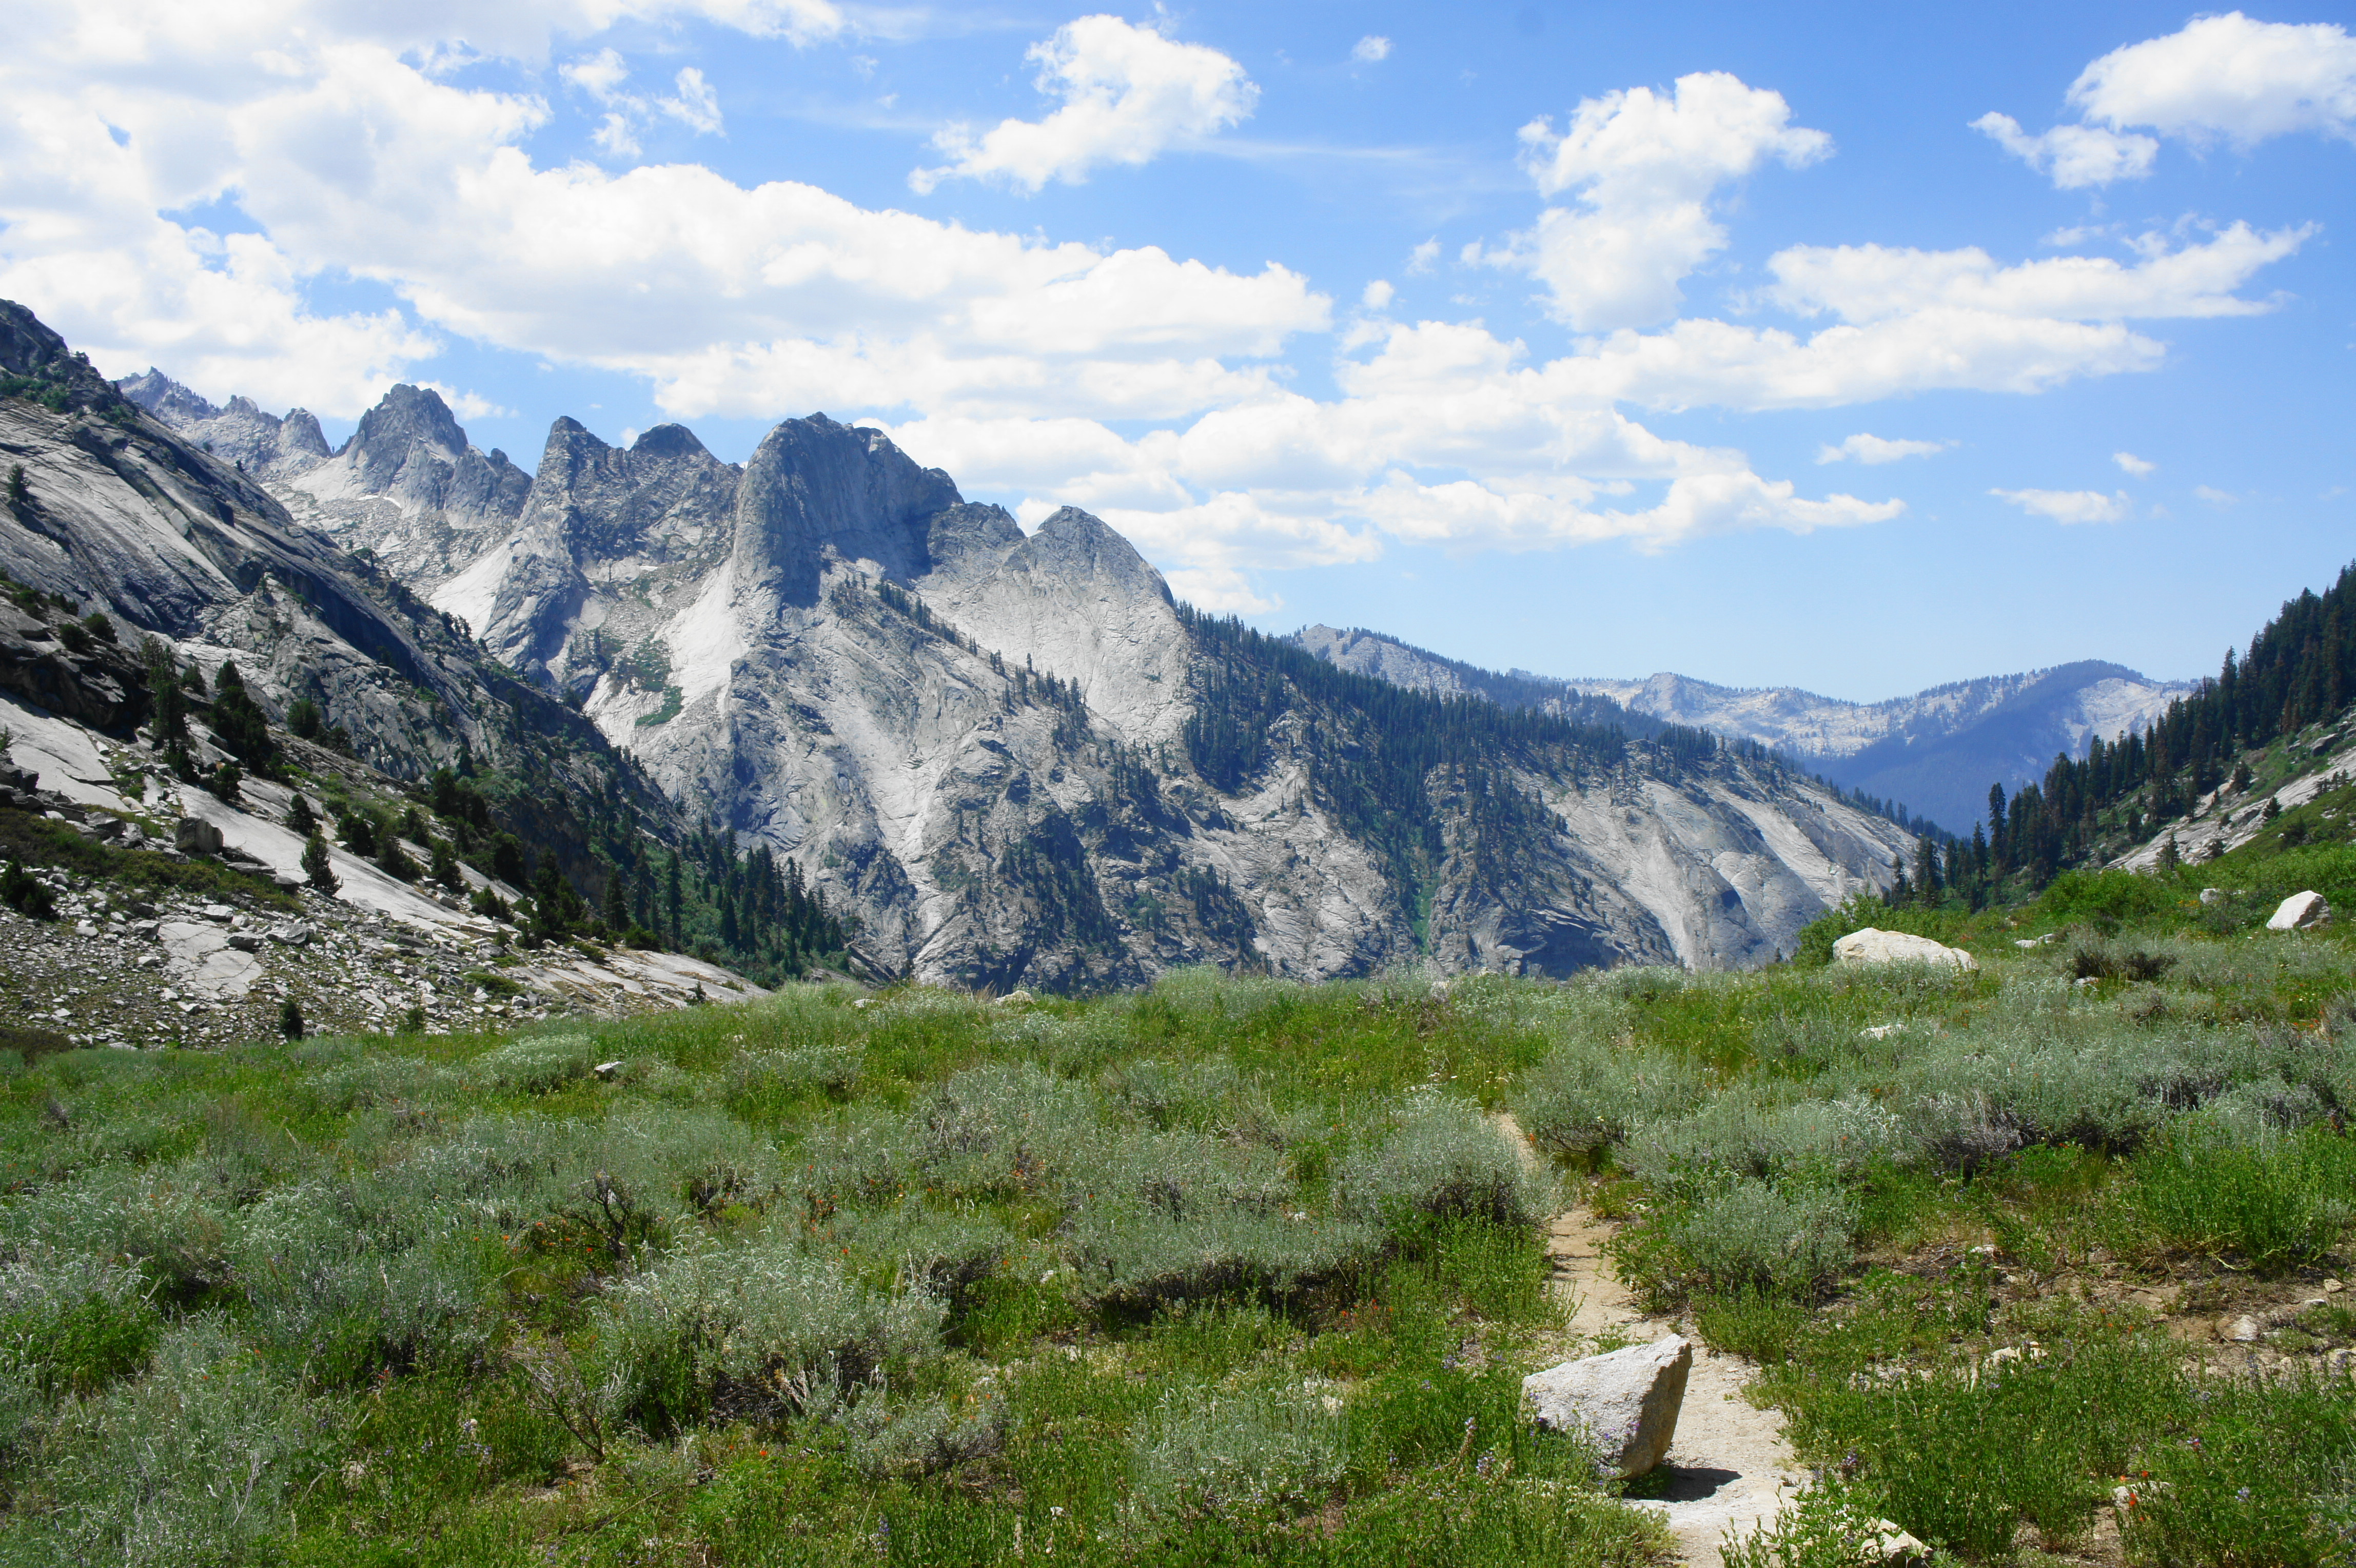
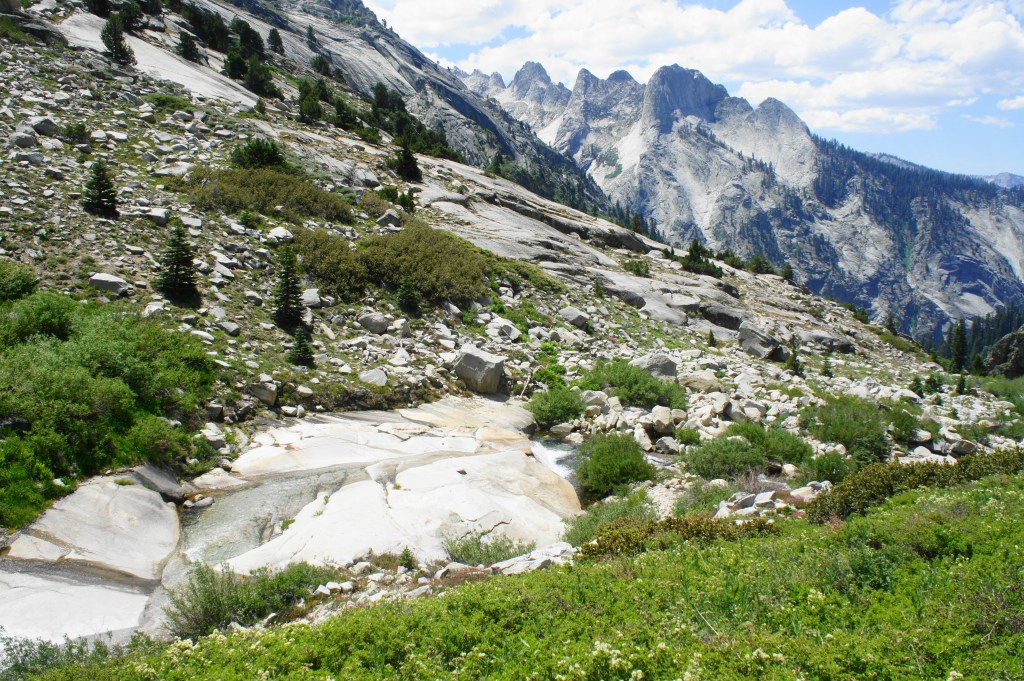
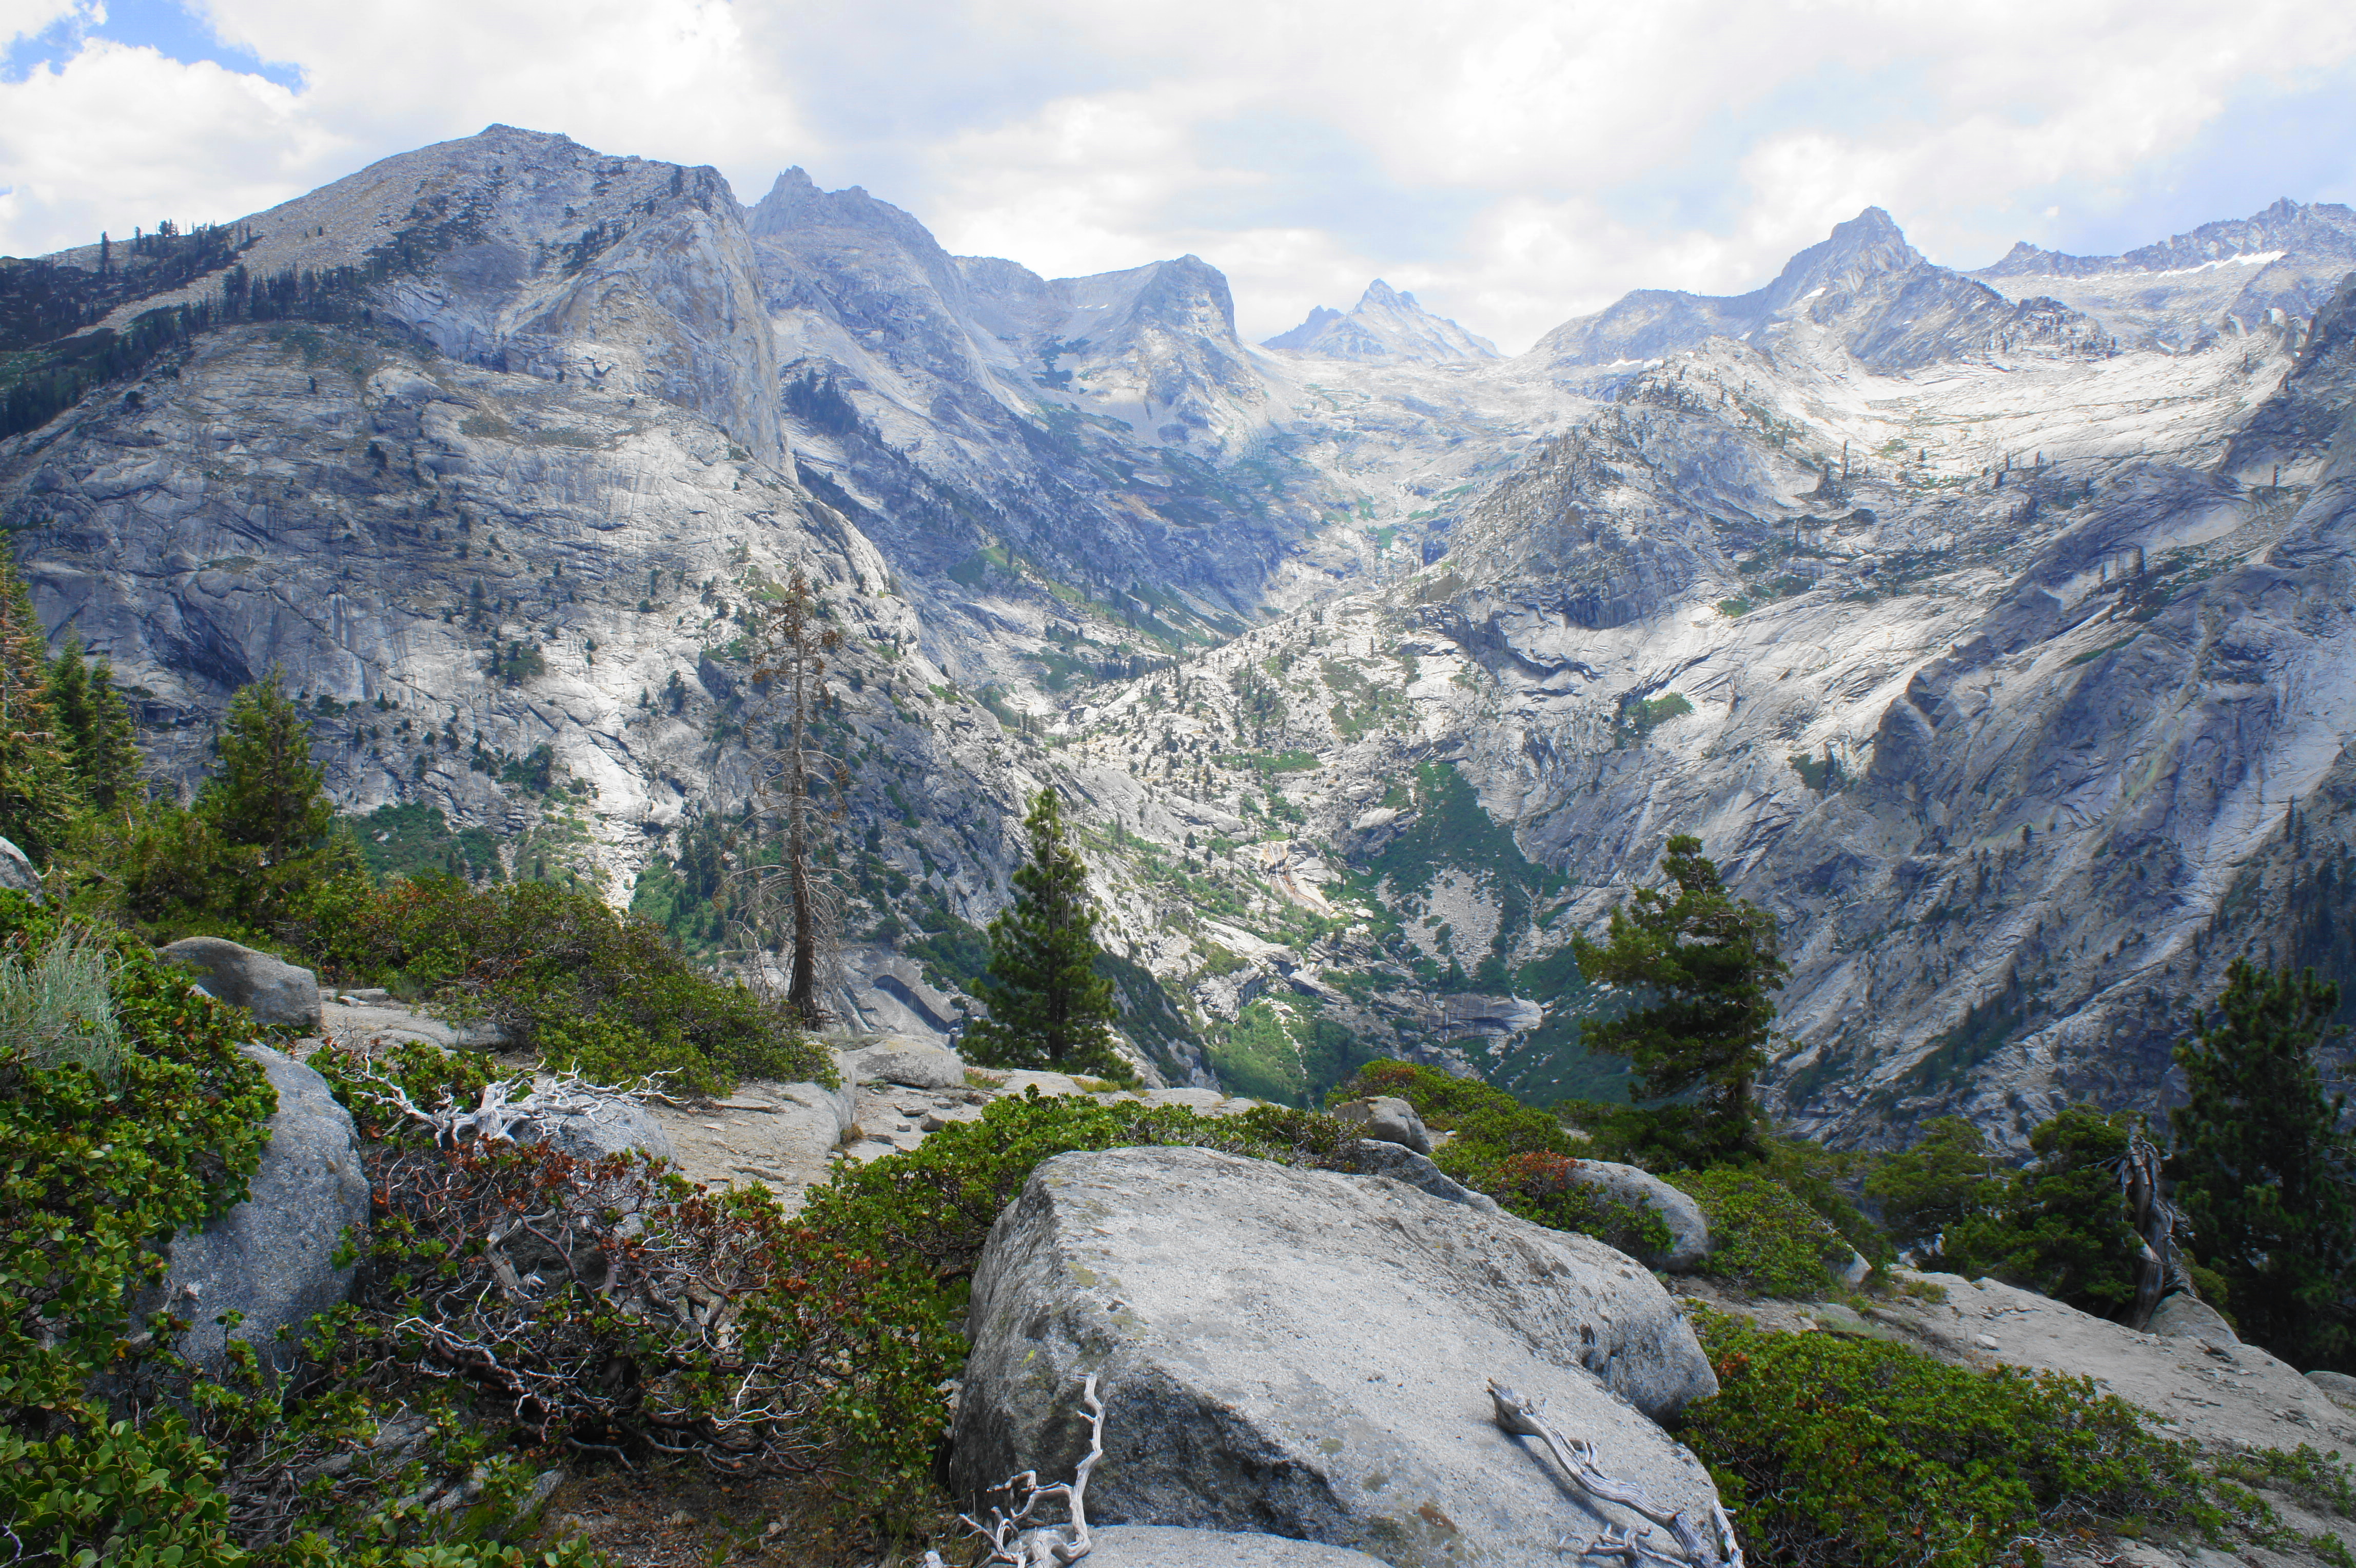
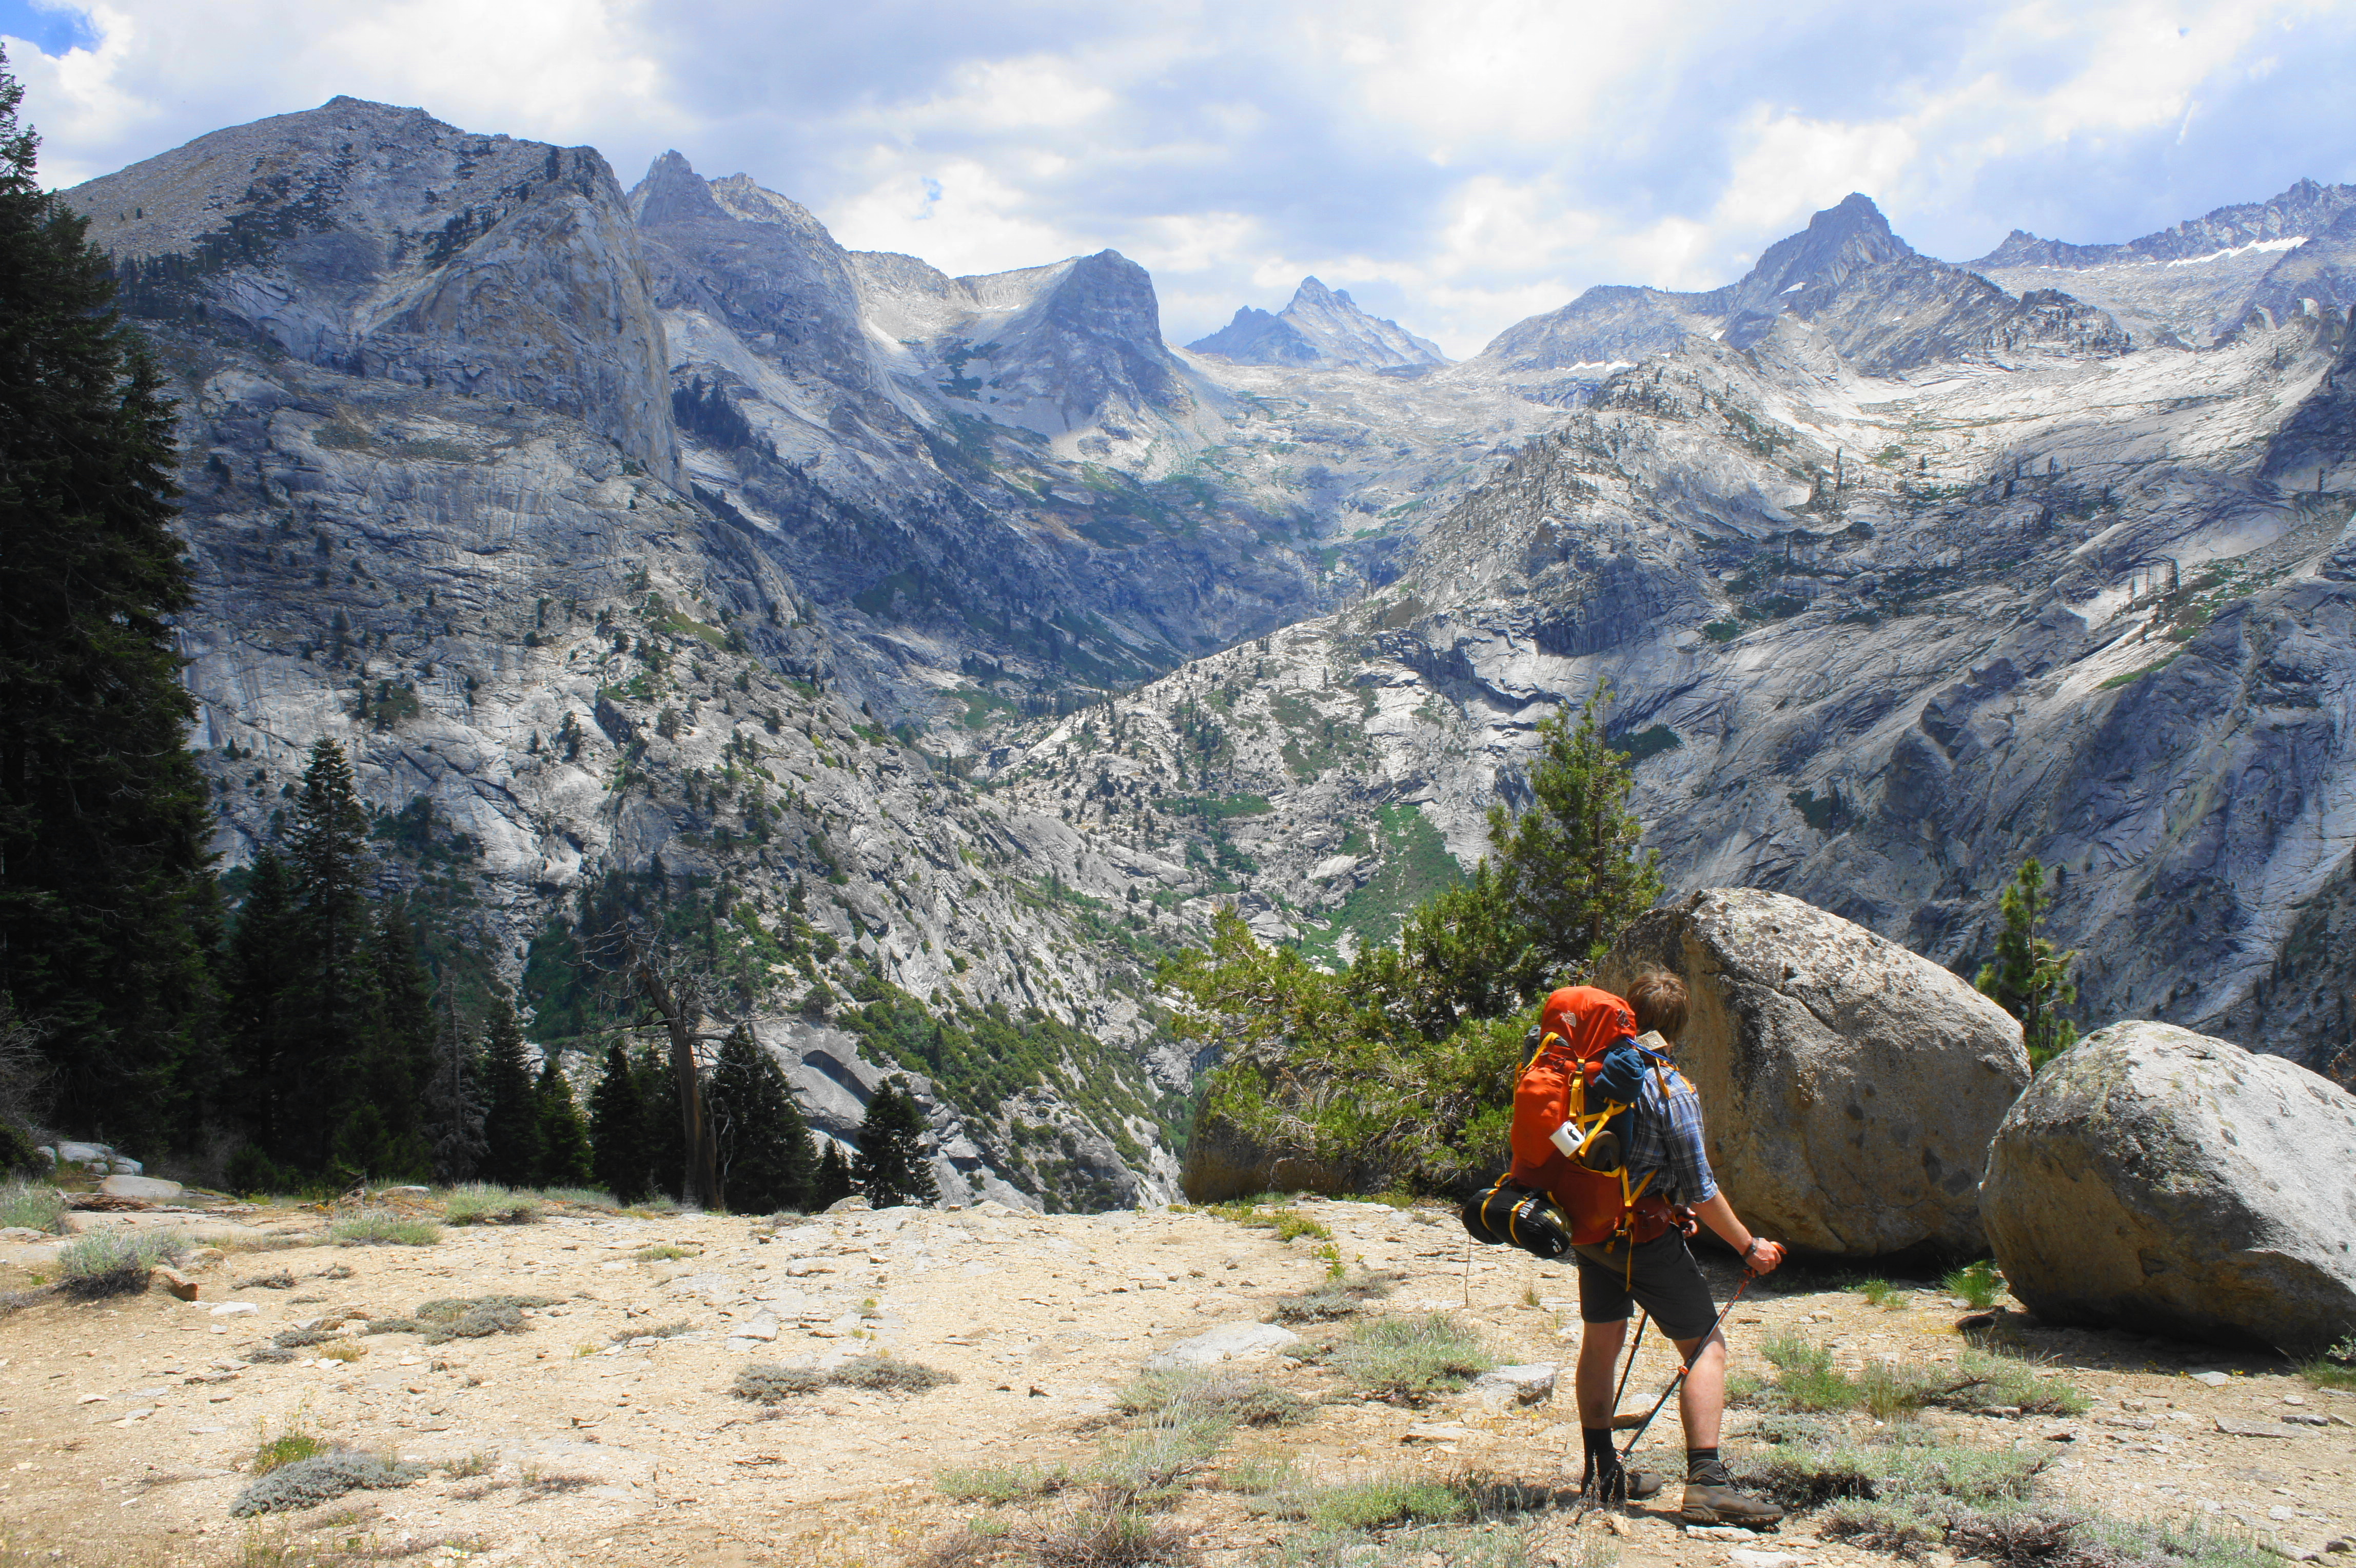
Traversing Ferguson Creek ushers in another steady climb, this one gaining nearly 400 feet in about 7/10 mile. As the sounds of the creek gradually fade away, hikers are greeted upon cresting the moraine with great views of the Roaring River drainage, with the peaks of the Great Western Divide beyond. Among them is Palmer Mountain (11,254’) (the closest tall peak), which gives way to the granitic Sphinx Crest, Mount Brewer (13,570’) and Thunder Mountain (13,588’). Cloud Canyon—and Deadman Canyon—are situated off to the right, mostly concealed by the sharp, forested slopes.
Looking toward the Roaring River area 
Peaks of the Great Western Divide


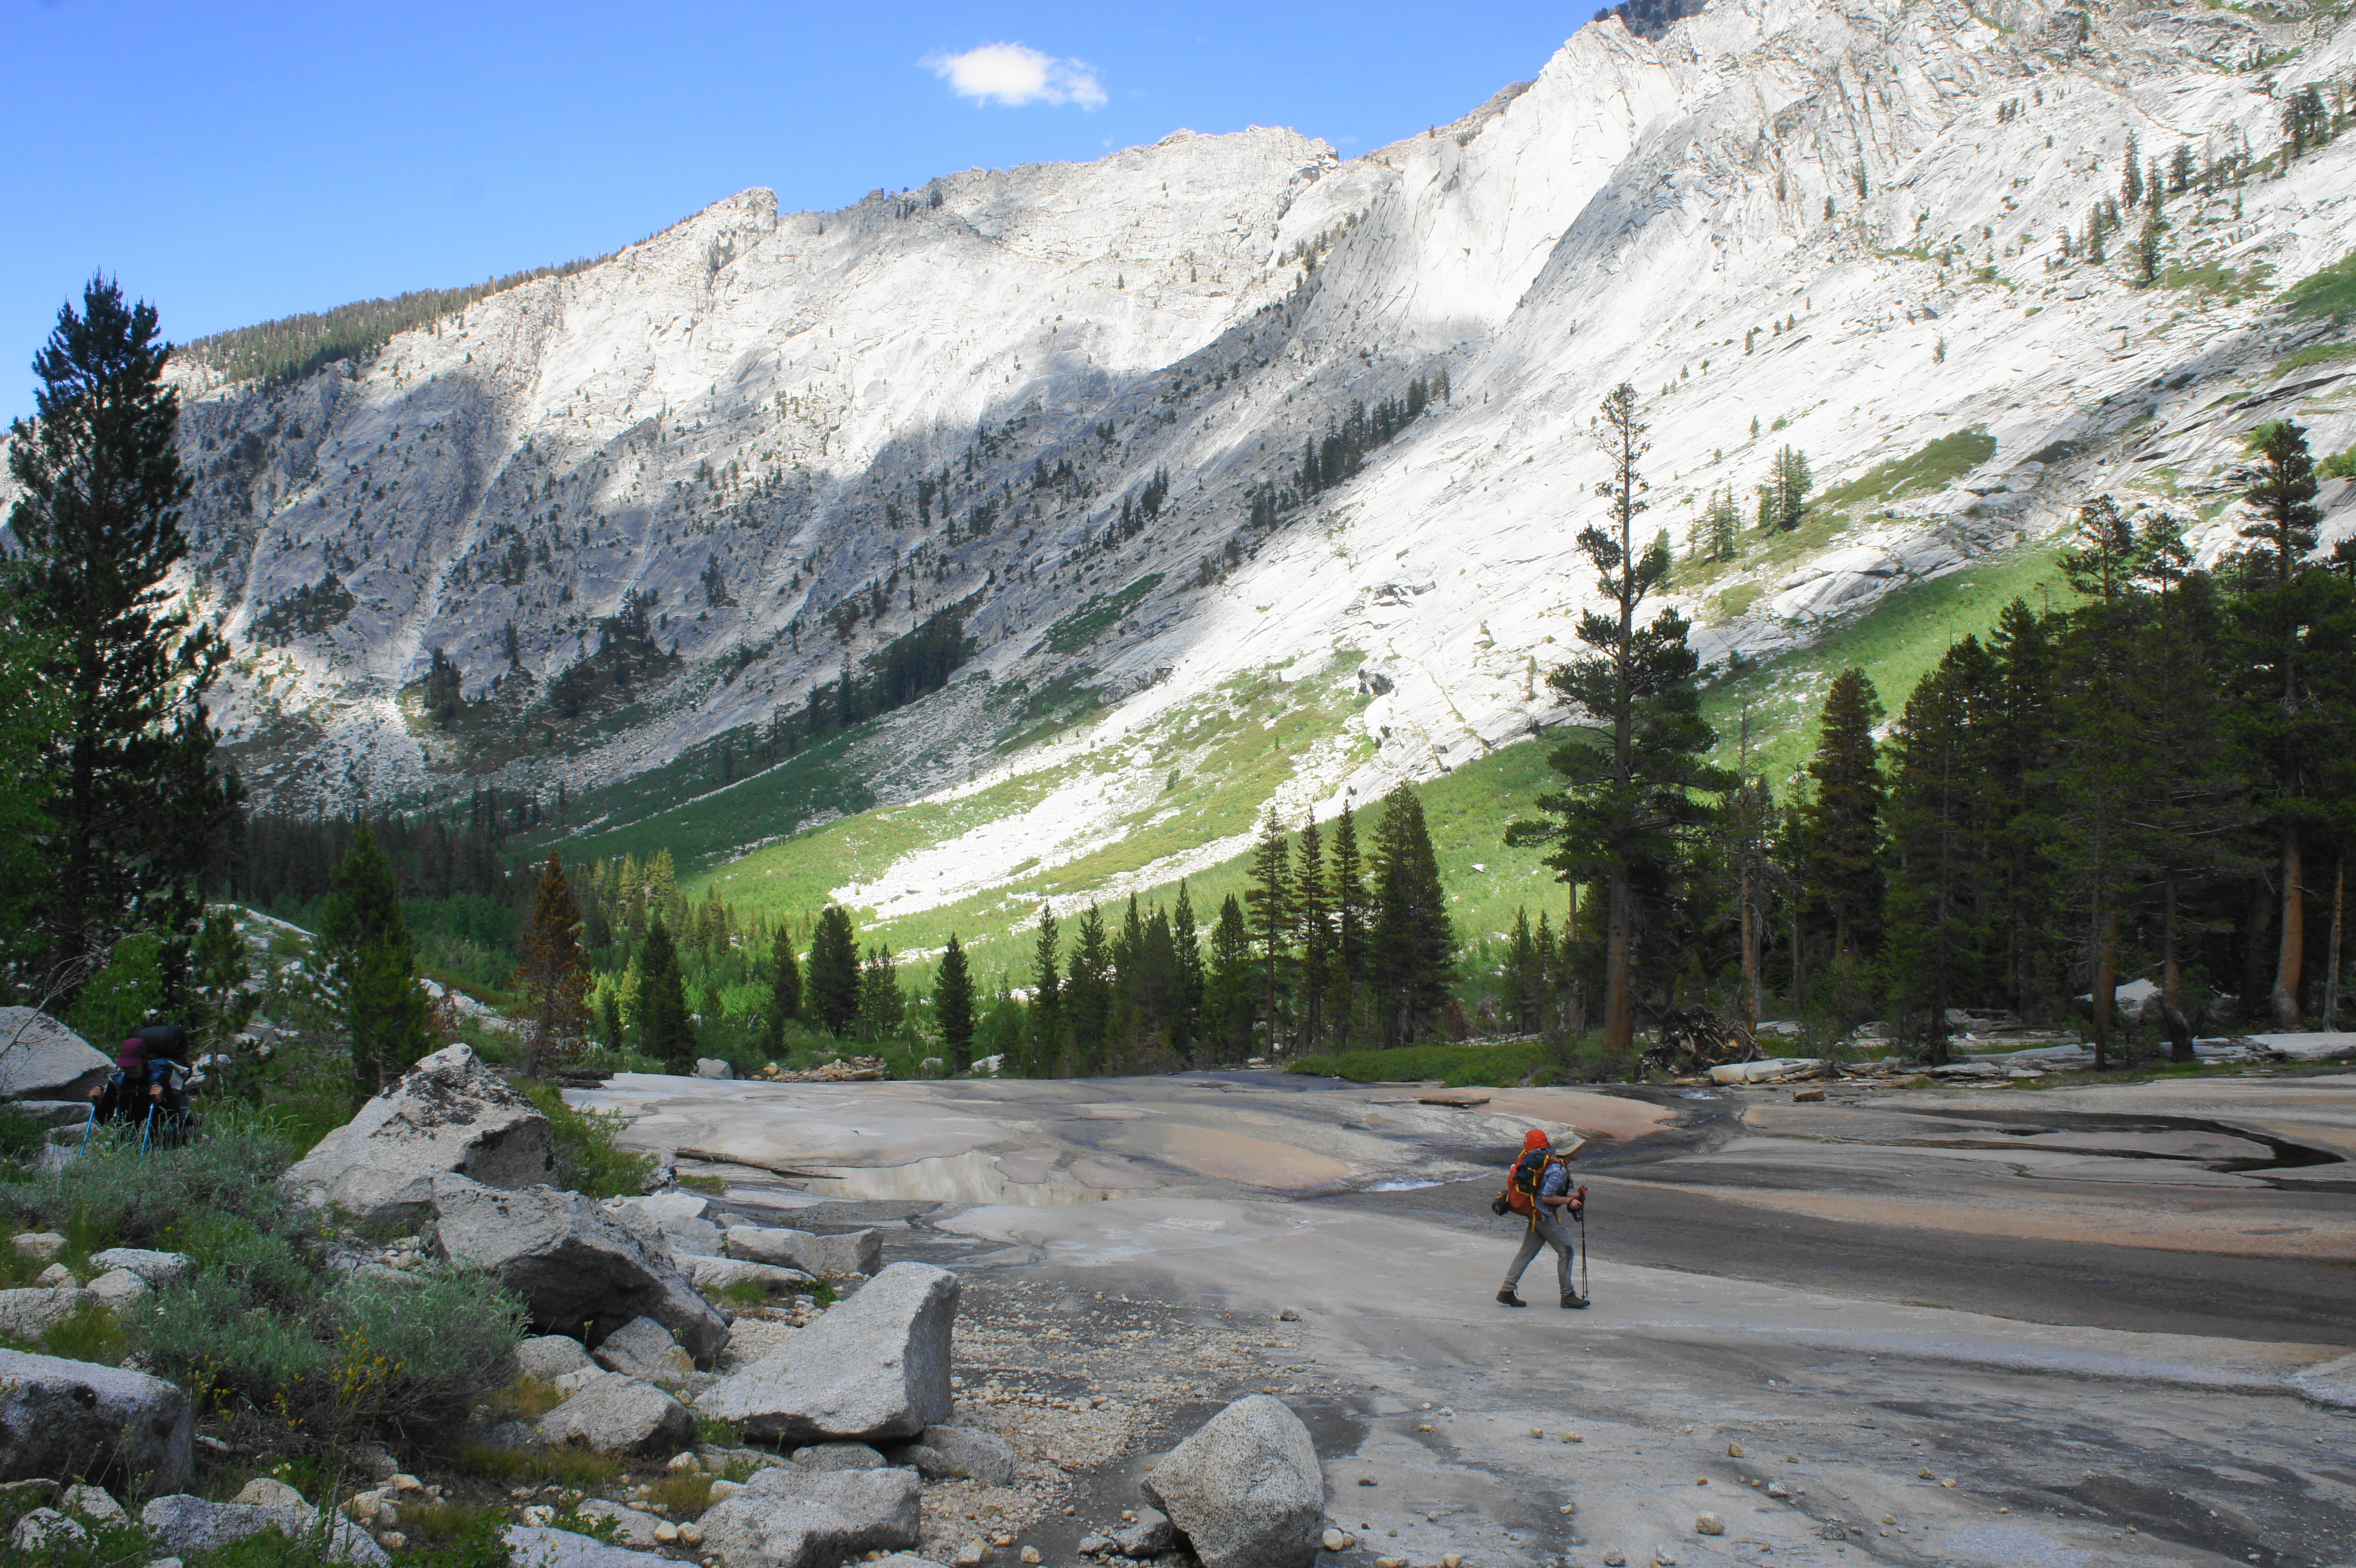
Enthused by the new scenery, hikers should glide down the trail as it gradually approaches Roaring River, a thundering watercourse encountered first at around 9.5 miles. Amid a set of rock clusters above the river, the trail passes through another gate and then descends to the river’s bank as the water squeezes through a narrow gap. After a steep hill, the trail skirts a wire fence and, set slightly back from the water, passes a series of granite outcrops on the right. After another climb, the path levels off and approaches the JR Pasture, which is fenced off. From here it is a minute’s walk to the Roaring River Ranger Station, where hikers will find another trail fork and trail register.

Cabin at Lackey Pasture, near Roaring River 
Crude map of the Roaring River area
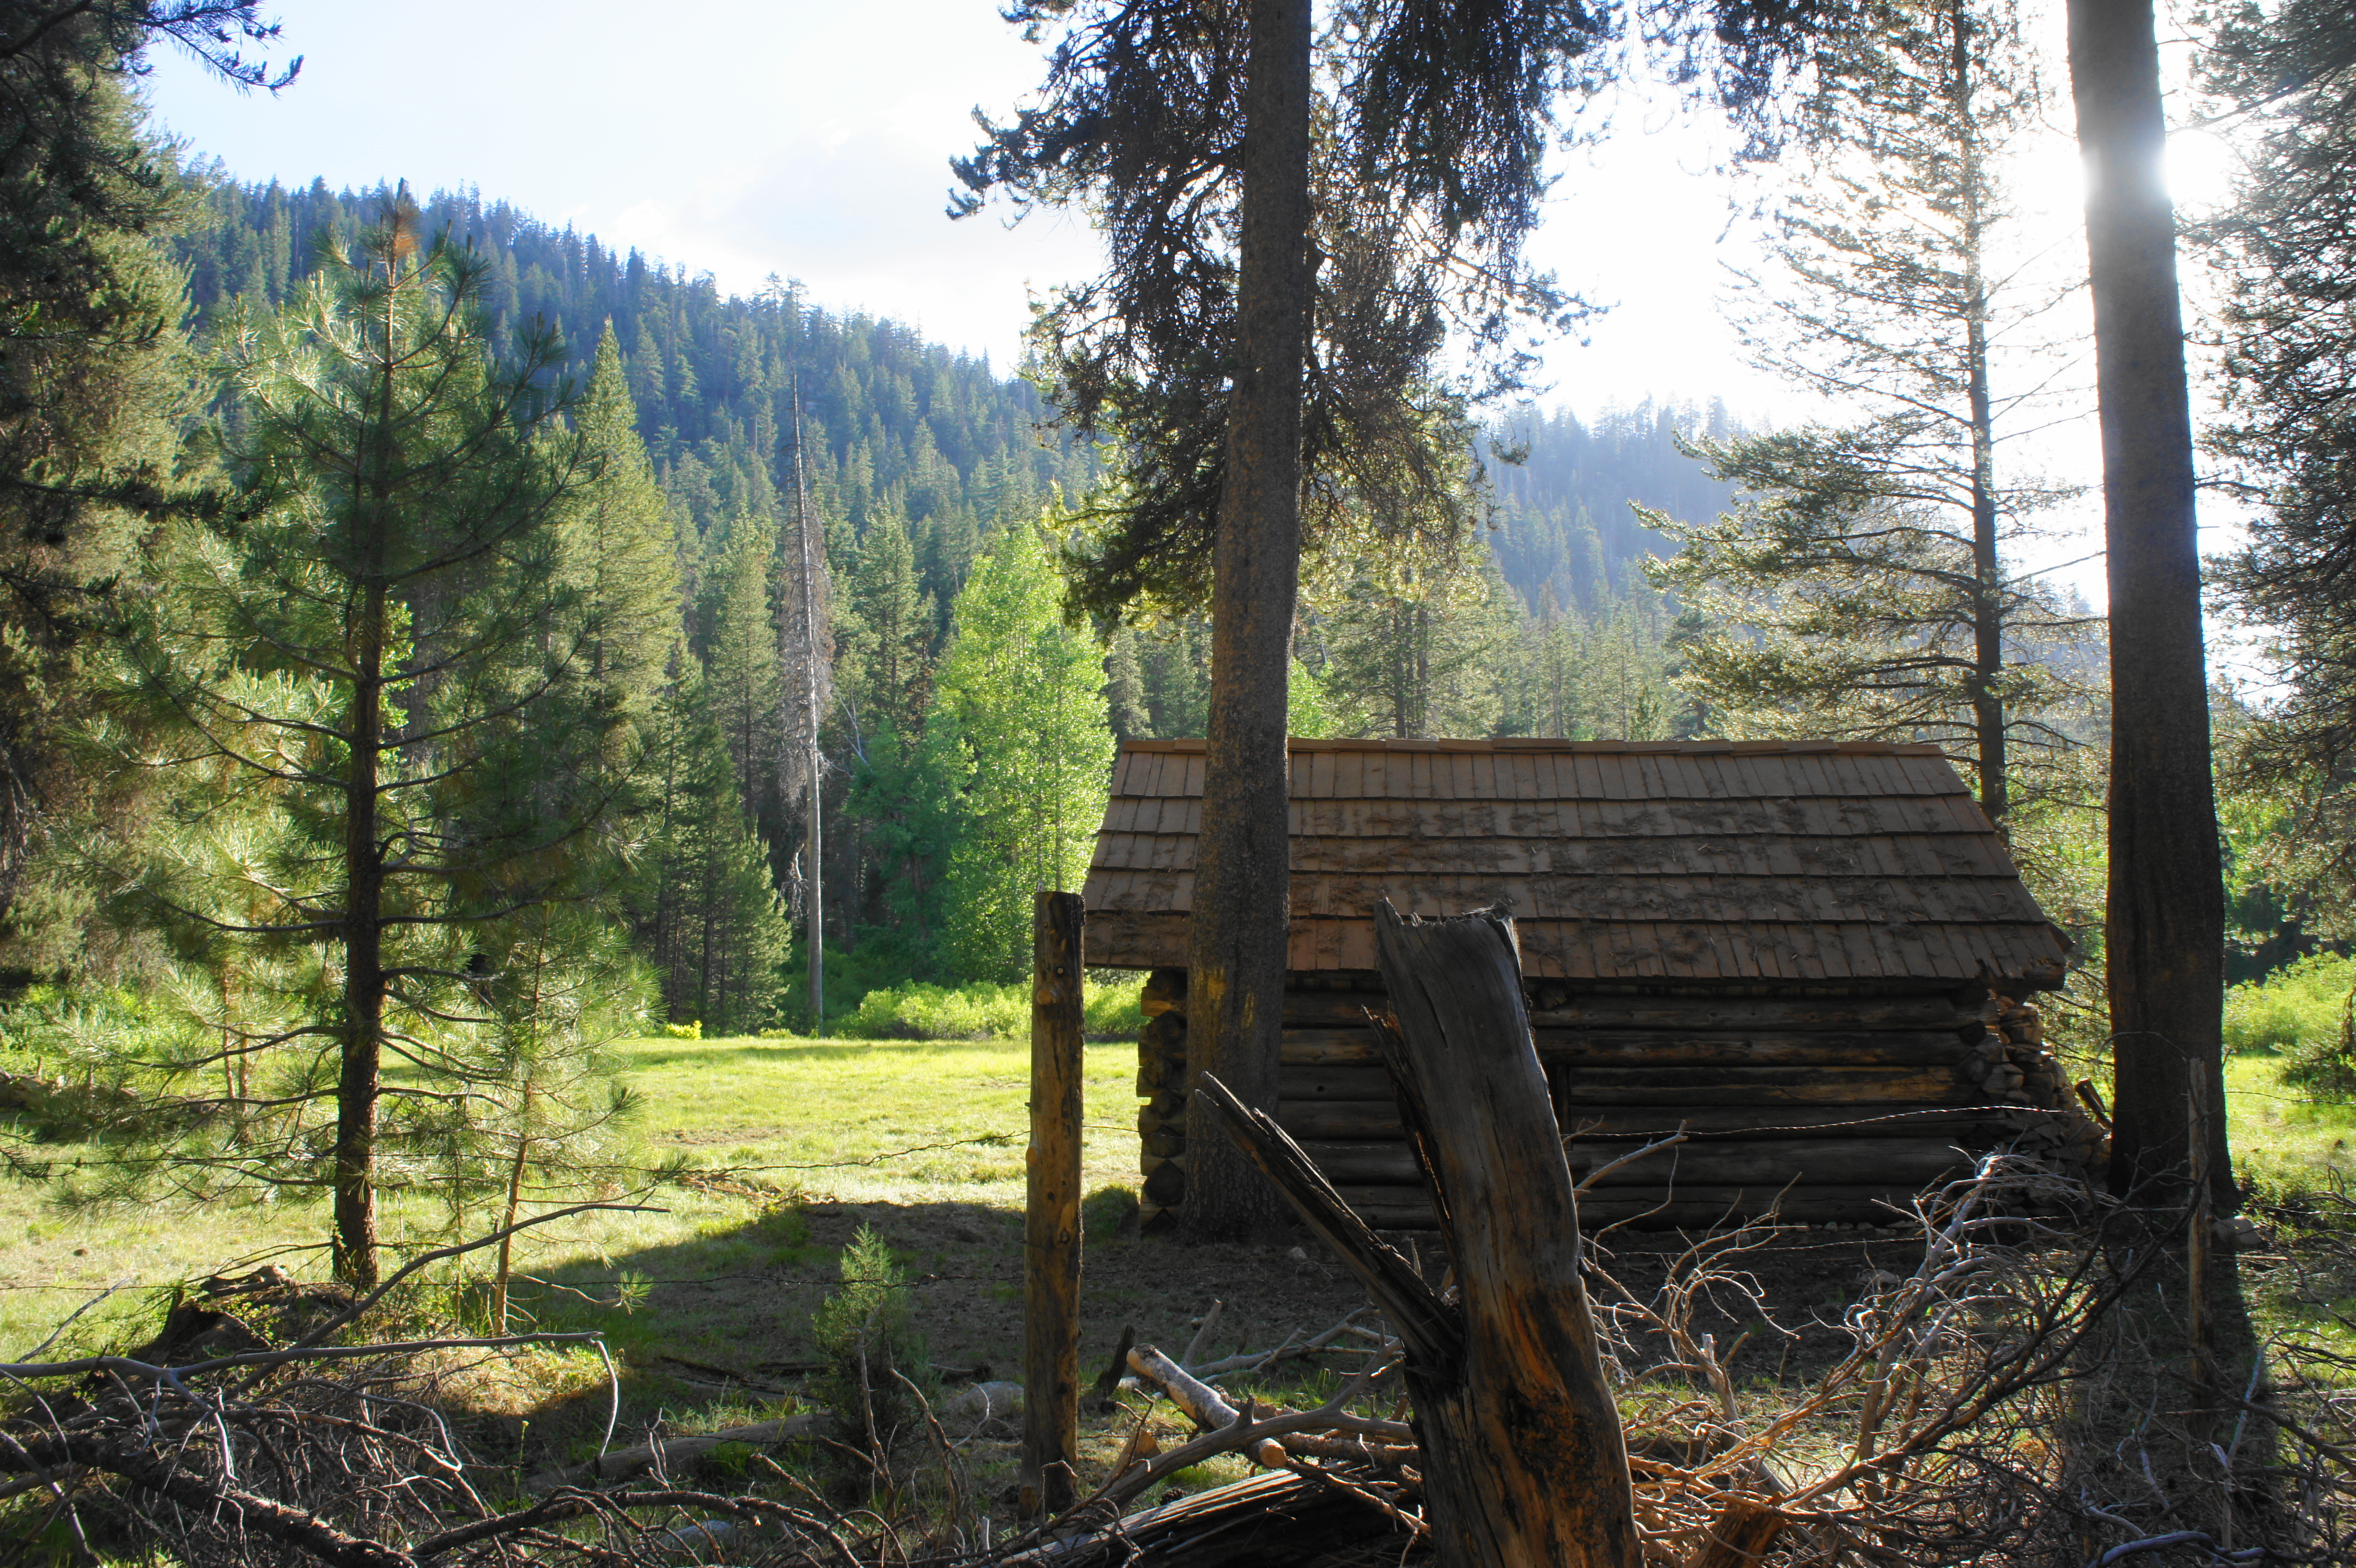
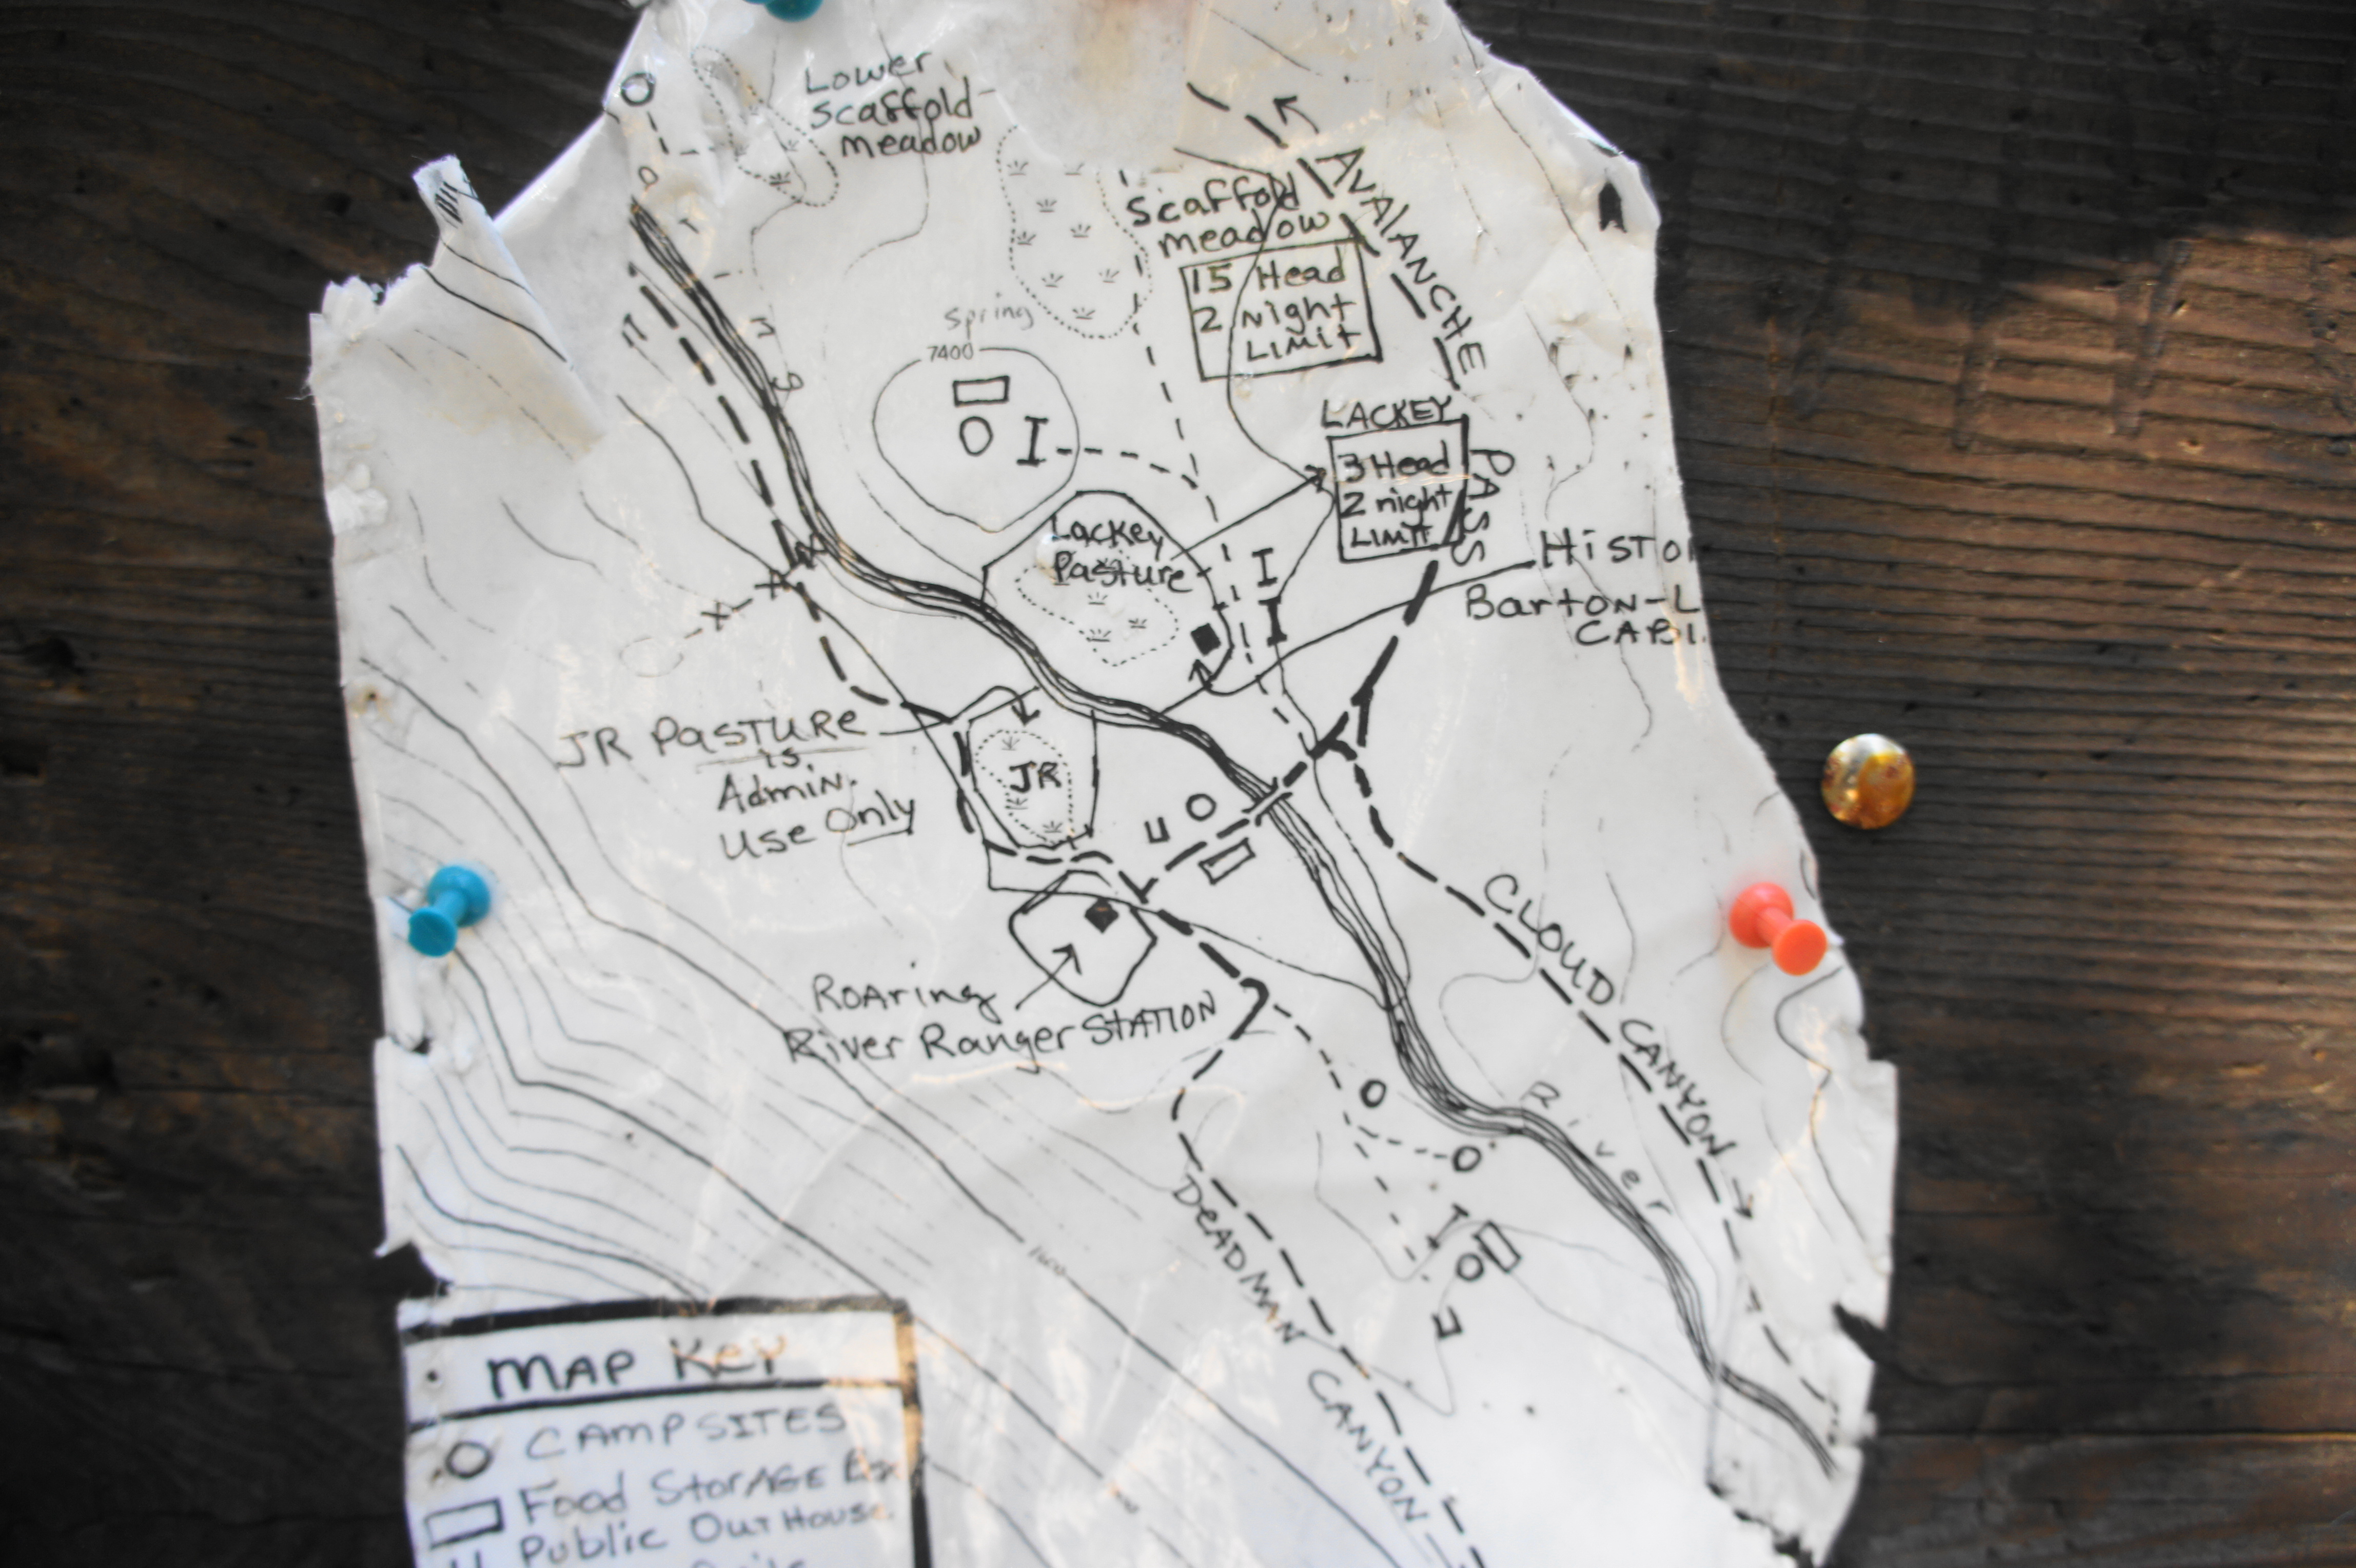
A crudely-drawn map at the trail register shows the various intersecting trails, with most of the camping options across the river to the east. Pass over the sturdy bridge to find a nice campsite alongside the river on the left; further on, taking a left leads to Scaffold Meadows, a popular spot for large pack groups and also suitable for camping (although more buggy). There is also a historic cabin at Lackey Pasture, although it is off-limits to hikers. The Colby Pass Trail through Cloud Canyon bears right (southeast) around here, while the Avalanche Pass Trail heads off to the left (north). The route to Deadman Canyon is back on the south side of the river, past the ranger station. Hikers can press on or set up camp here after a 10-mile day.
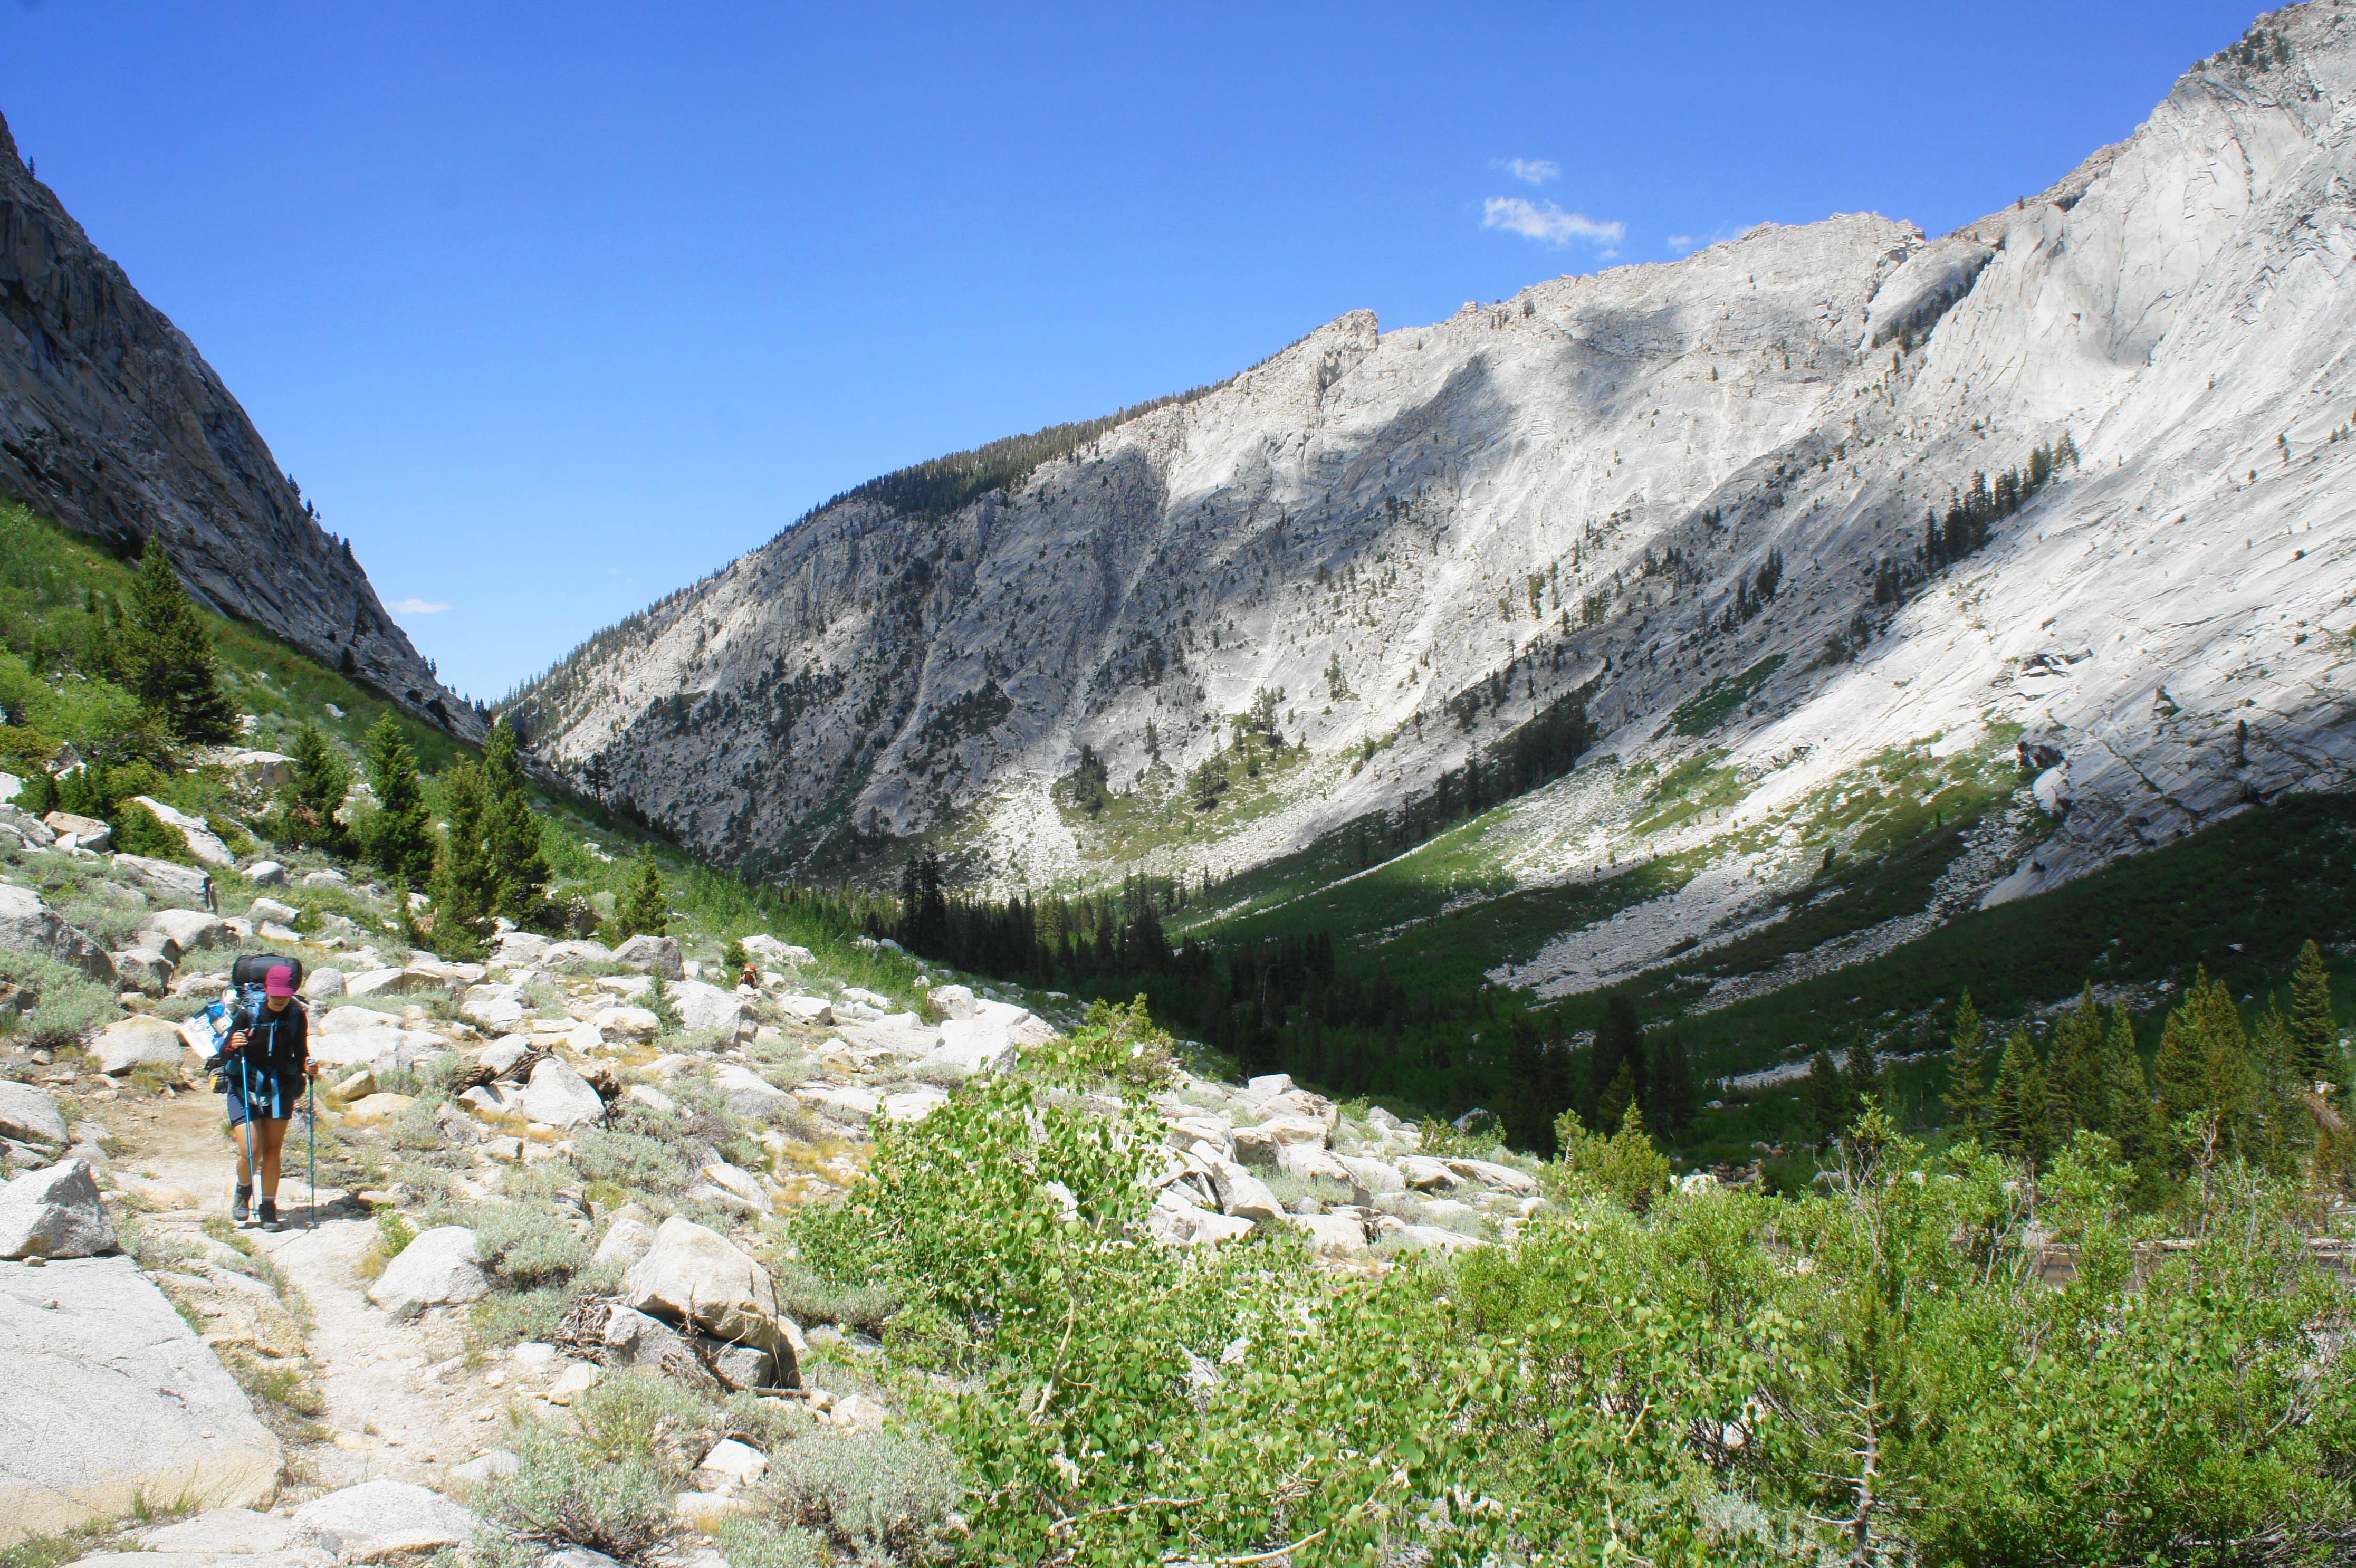
DAY 4: Roaring River to Upper Deadman Canyon (6.75 miles)
The Roaring River Ranger Station acts as a gateway to the high country, with trails leading off in three directions for various mountain passes, including Avalanche Pass (10,040’), Colby Pass (12,000’), and Elizabeth Pass (11,371’). On Day 4, hikers should head south on the Elizabeth Pass Trail into Deadman Canyon, the loop’s namesake and key highlight of the multi-day hike.
From the ranger station, the route into Deadman Canyon heads south, immediately moving away from the river and gaining elevation, rising to a shelf with partial views of the Great Western Divide and Cloud Canyon. After a stout ascent of about 200 feet, the trail enters the Deadman Creek drainage and skirts the flowing creek on the left at about ¾ mile.
After passing through a wooden gate, the mostly-shaded Elizabeth Pass Trail drops to cross Deadman Creek, requiring a lengthy rock-hop to clear the stream. Following the crossing, the path rises to a granite slab and continues to ascend mildly into the canyon. After nearly another mile of walking, the trail finally emerges from the woods and cuts left, switchbacking up a scrubby slope, revealing the first great views of Deadman Canyon. The unnamed peak on the right boasts a wall of granite rivaling that of El Capitan in Yosemite Valley. Off to the left, the canyon is bounded by the high slopes of Glacier Ridge.
After bounding up the switchbacking slope, hikers reenter the forest again, but the ascent continues, reaching another wooden gate in about 1/3 mile. Beyond, as the trail skirts the winding creek, beautiful views can be had of the high walls to the west, rising more than 1,000 feet above the canyon floor.

Unnamed peaks on east flank of Deadman Canyon 
Lunch spot in Deadman Canyon
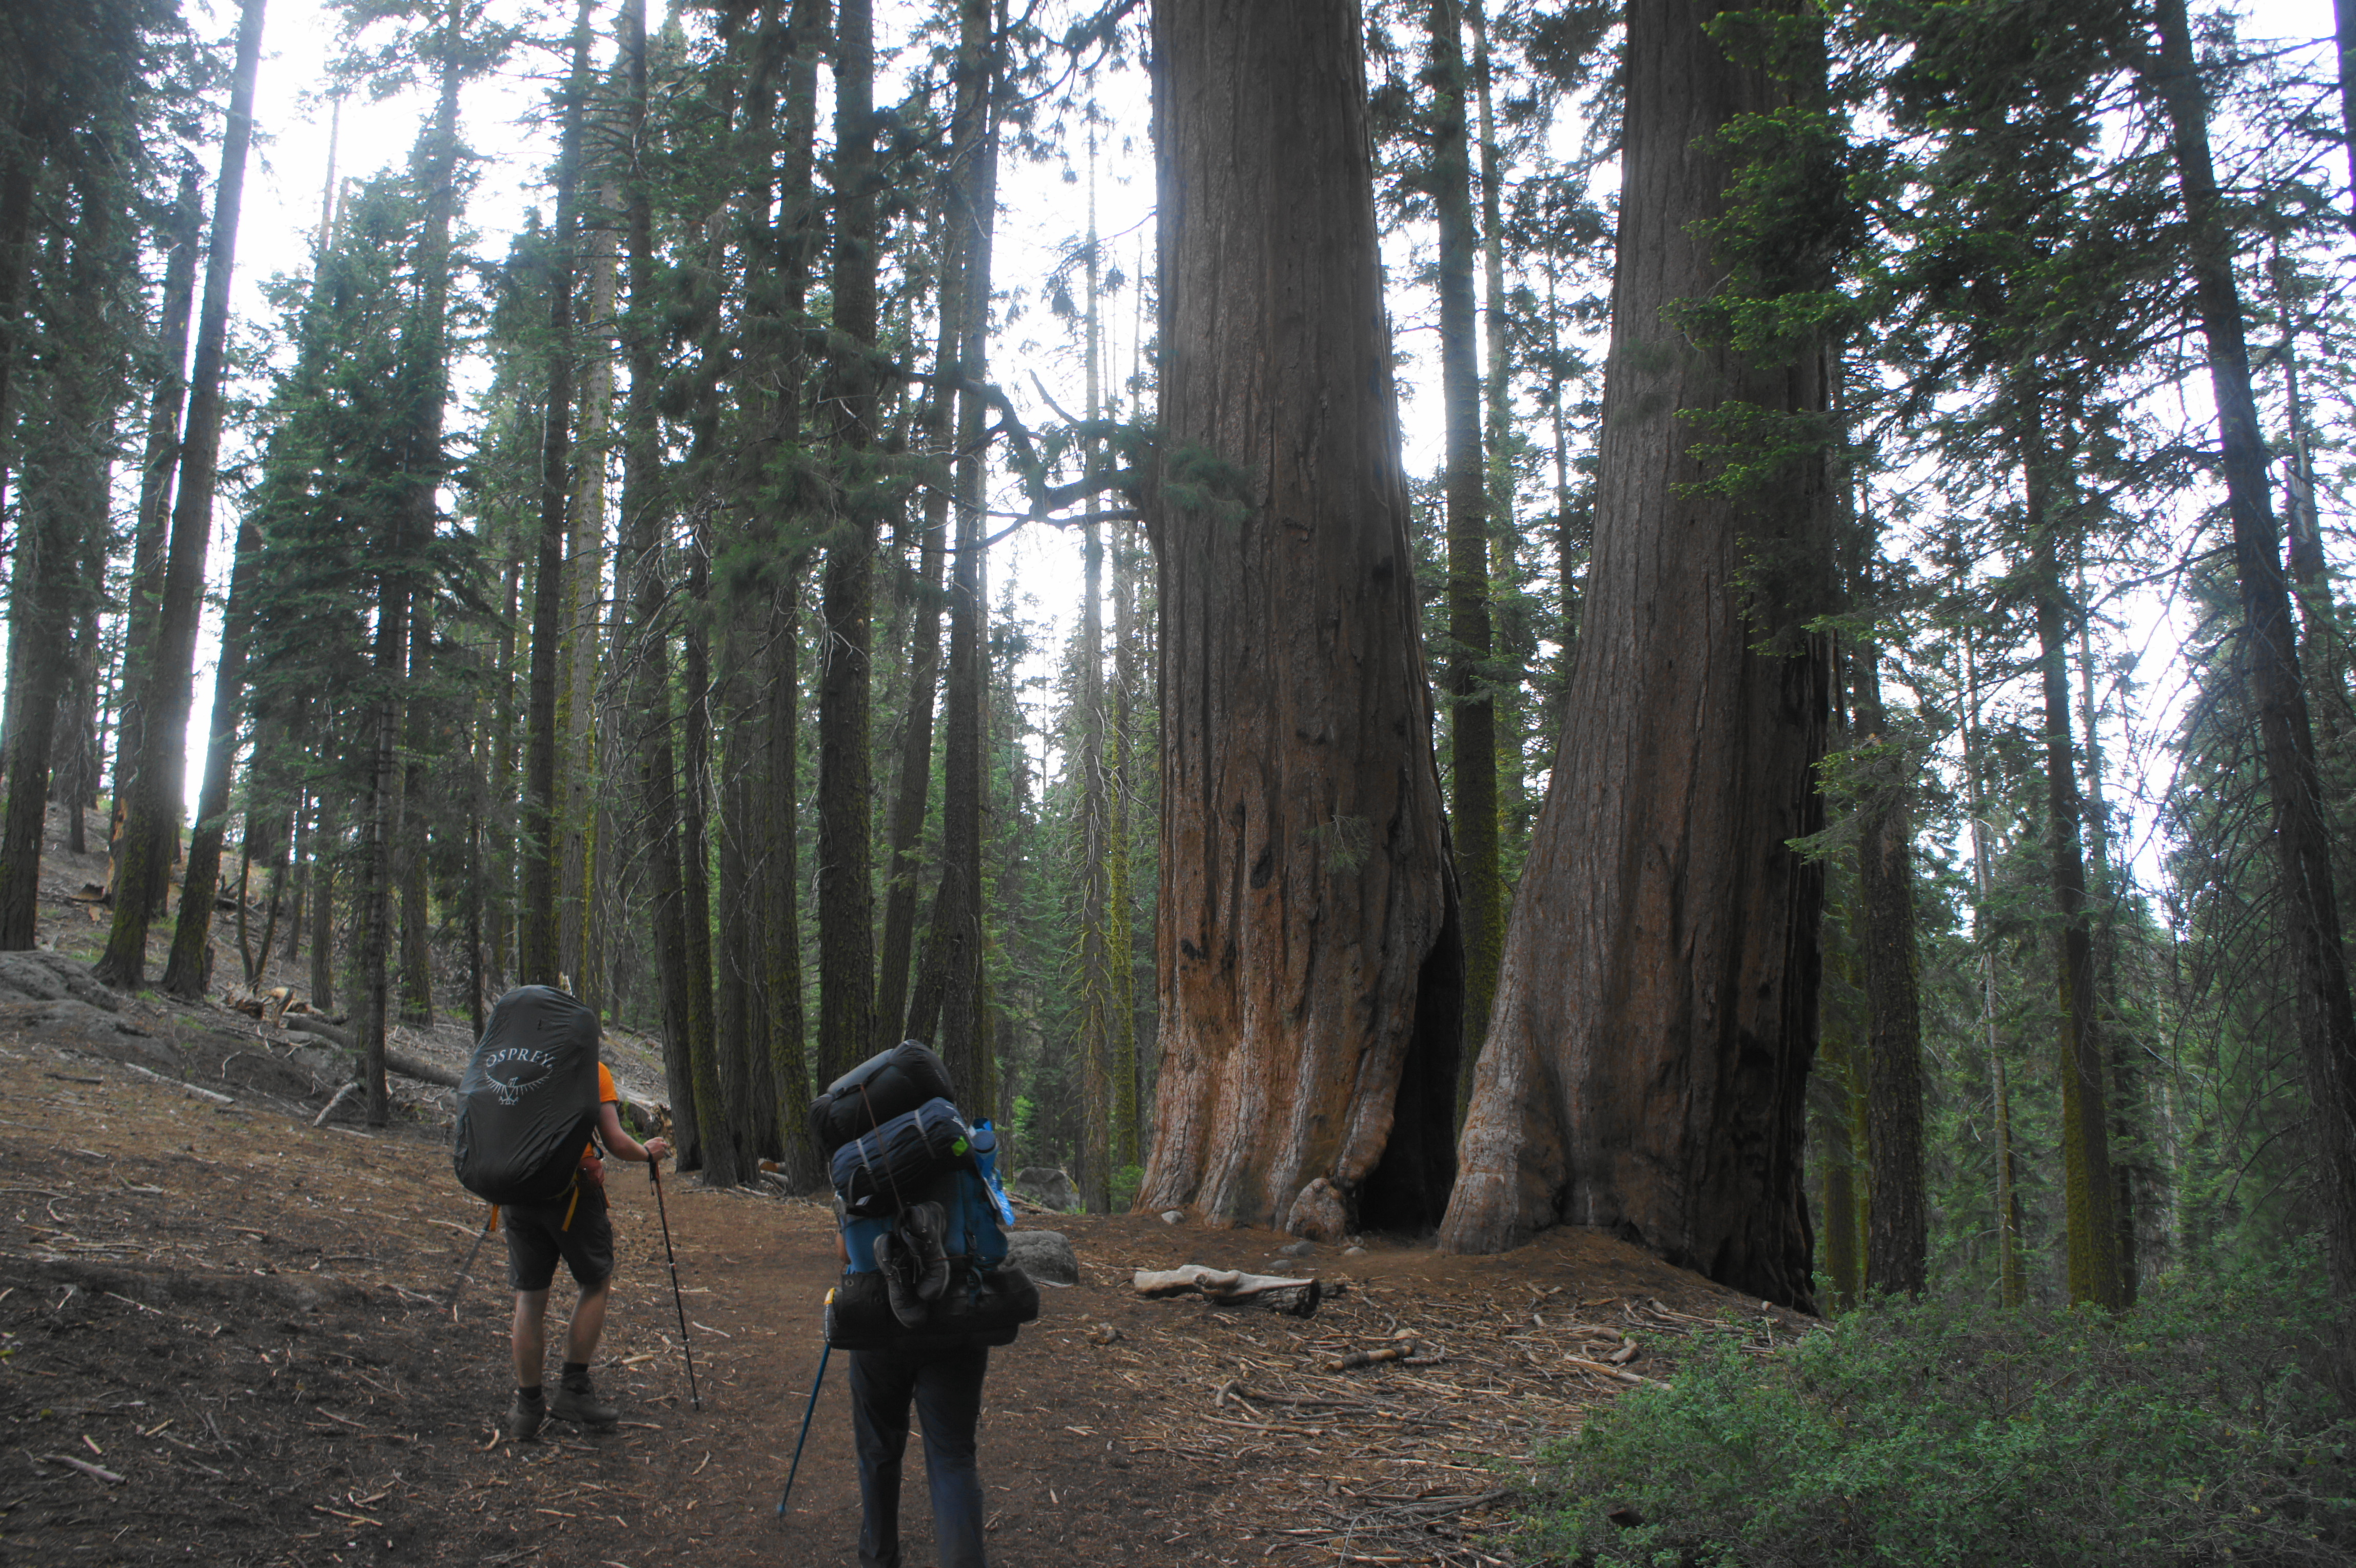
Soon enough, hikers reach the legend beyond the canyon name: the grave of a deceased shepherd, very faded and weathered, on the left. The wooden headstone reads: “HERE REPOSES ALFRED MONIERE, SHEEPHERDER, MOUNTAIN MAN, 18—TO 1887.”
Approaching the headstone 
Grave of Alfred Moniere, sheepherder & mountain man

Shortly thereafter, the Elizabeth Pass Trail crosses back to the west side of Deadman Creek, where the path will remain for the next 2.5 miles. A beautiful meadow adorned with corn lilies lies off to the left, serving as a nice streamside lunch/snack spot. Beyond this point, the trail briefly becomes more difficult to discern due to the overgrown vegetation. The onward path comes up to the creek but does not cross it, making way toward a tree-lined crest ahead.
At about four miles on the day, the ever-ascending trail reaches the base of a long and broad granite slide, with Deadman Creek racing down the slope toward the lower canyon. An open rock field offers nice views looking back to the north.

Large water slide along Deadman Creek 
Ascending Deadman Canyon

Upon reaching the top of the slide, the trail cuts through another thicket of conifers and brush, briefly following a branch of the main stream where the creek seems to split in two, forming a highly vegetated island in the middle.
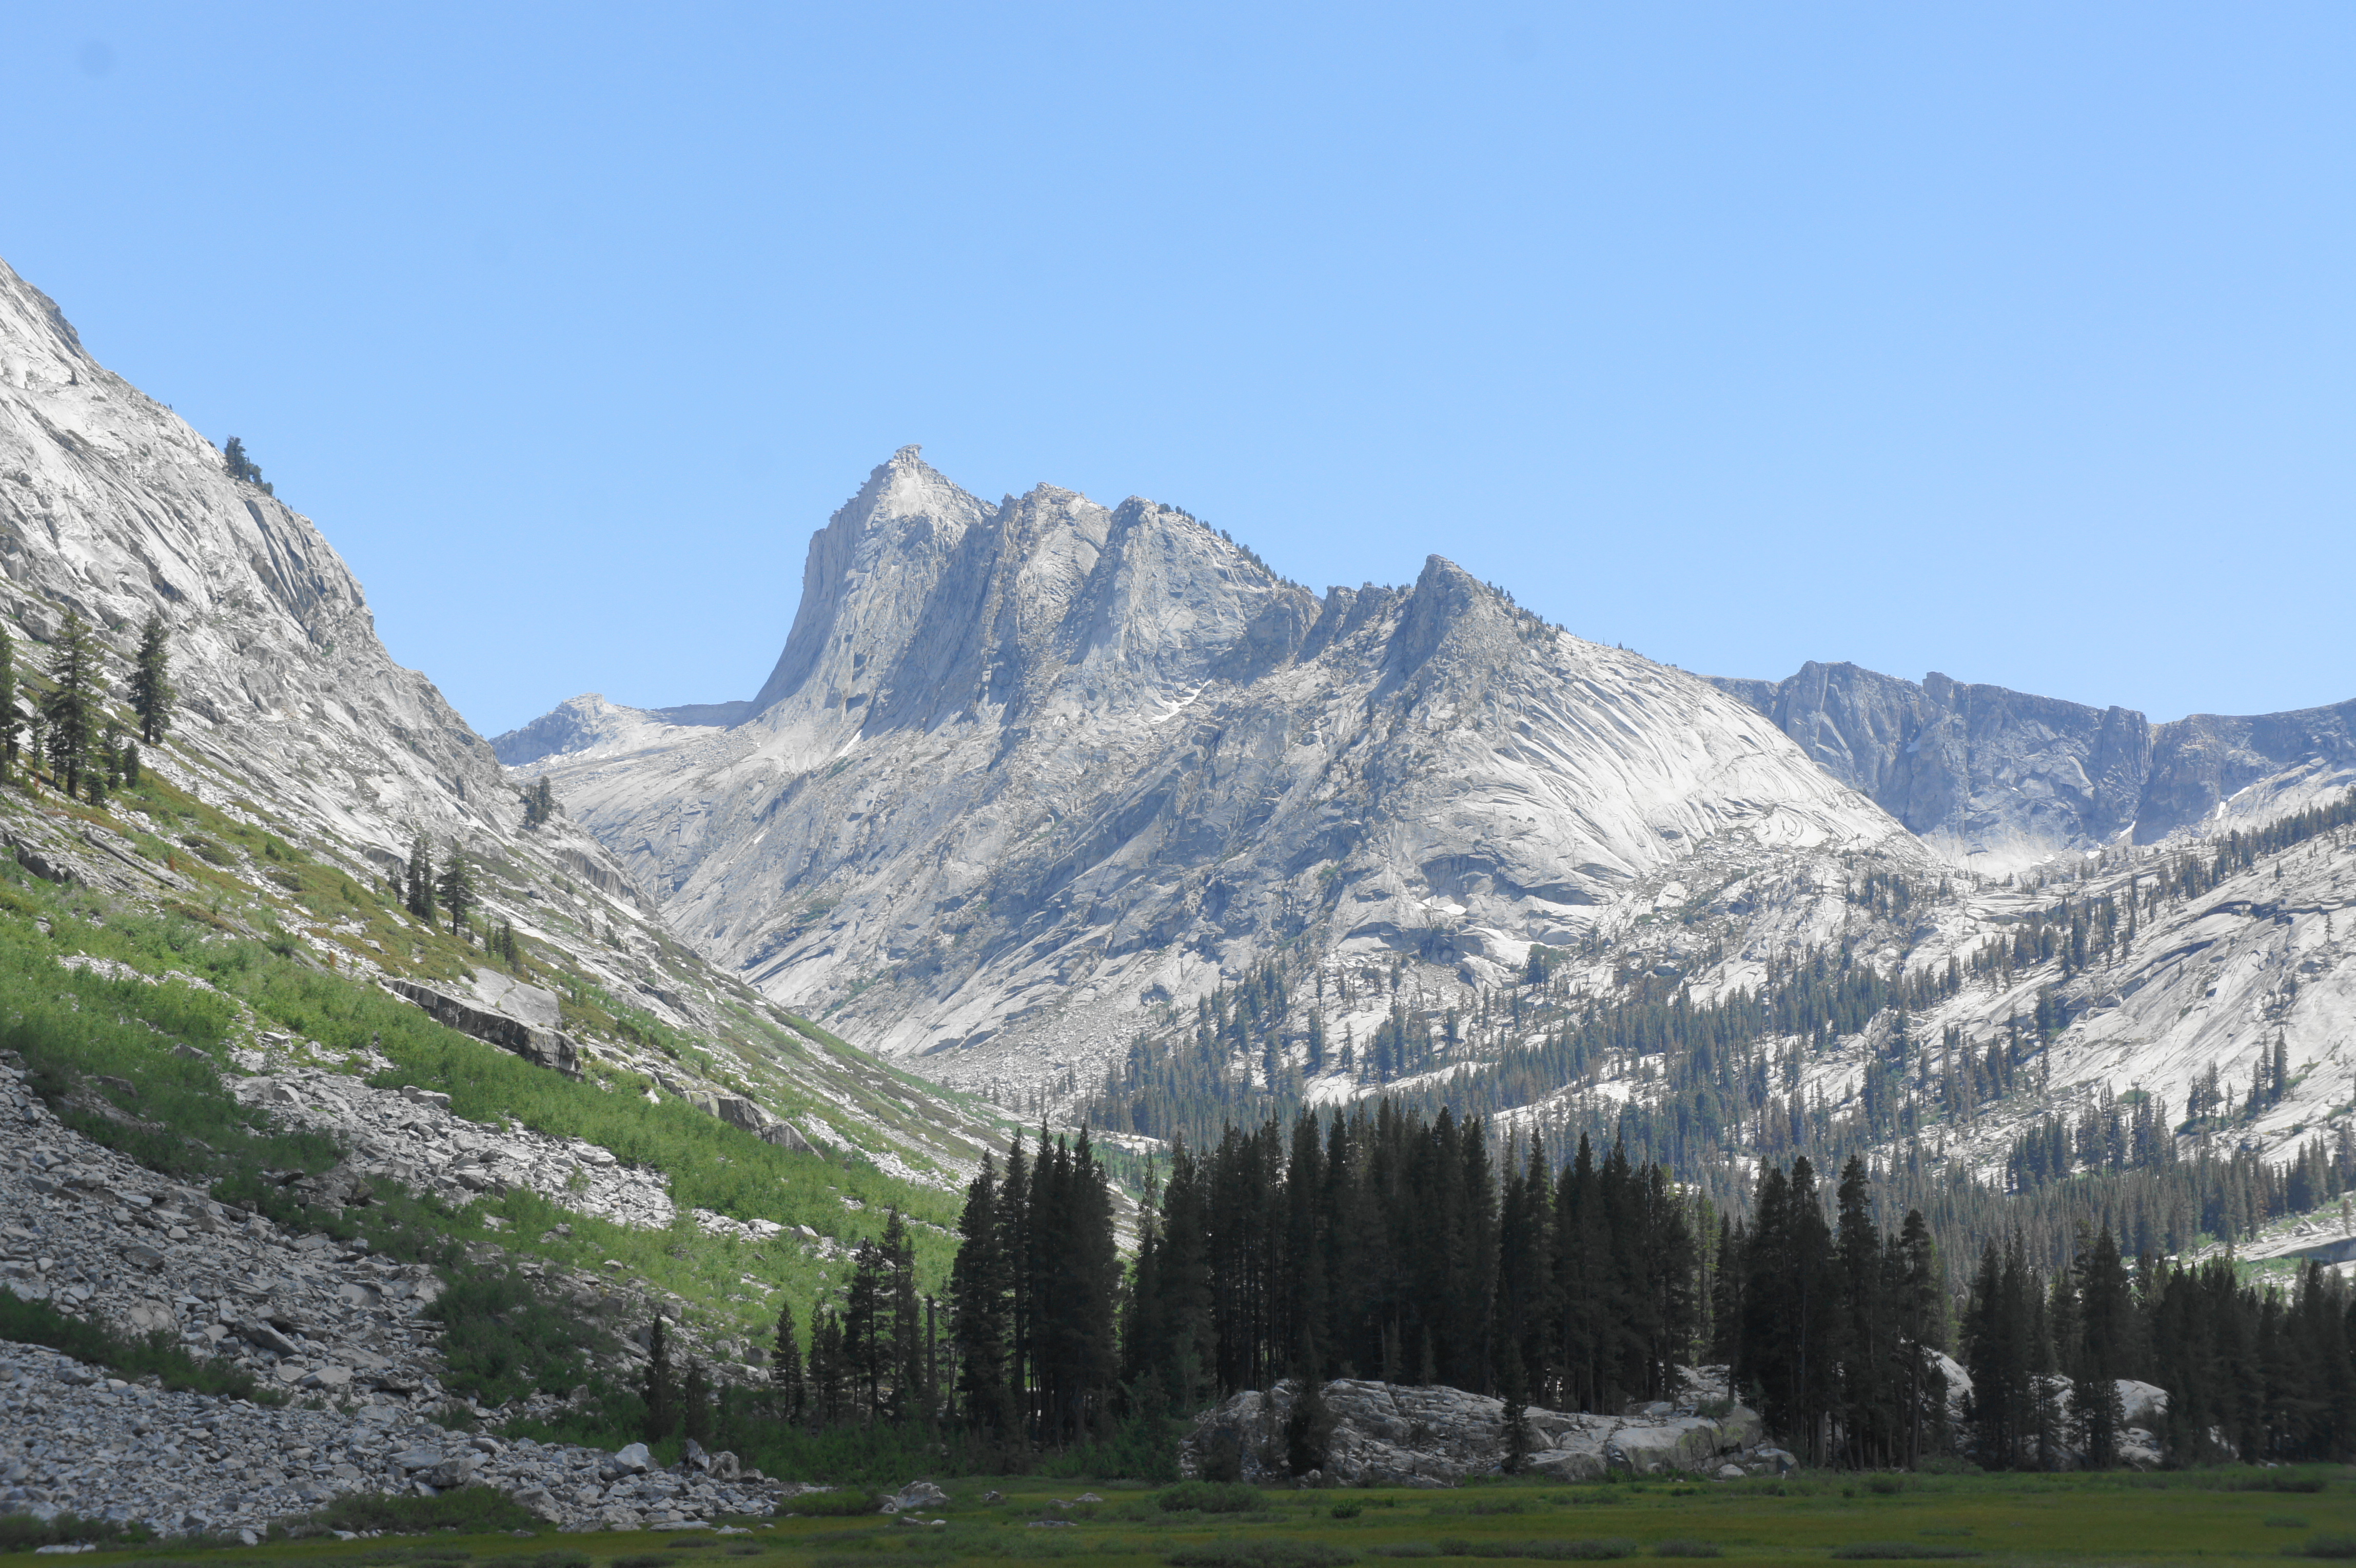
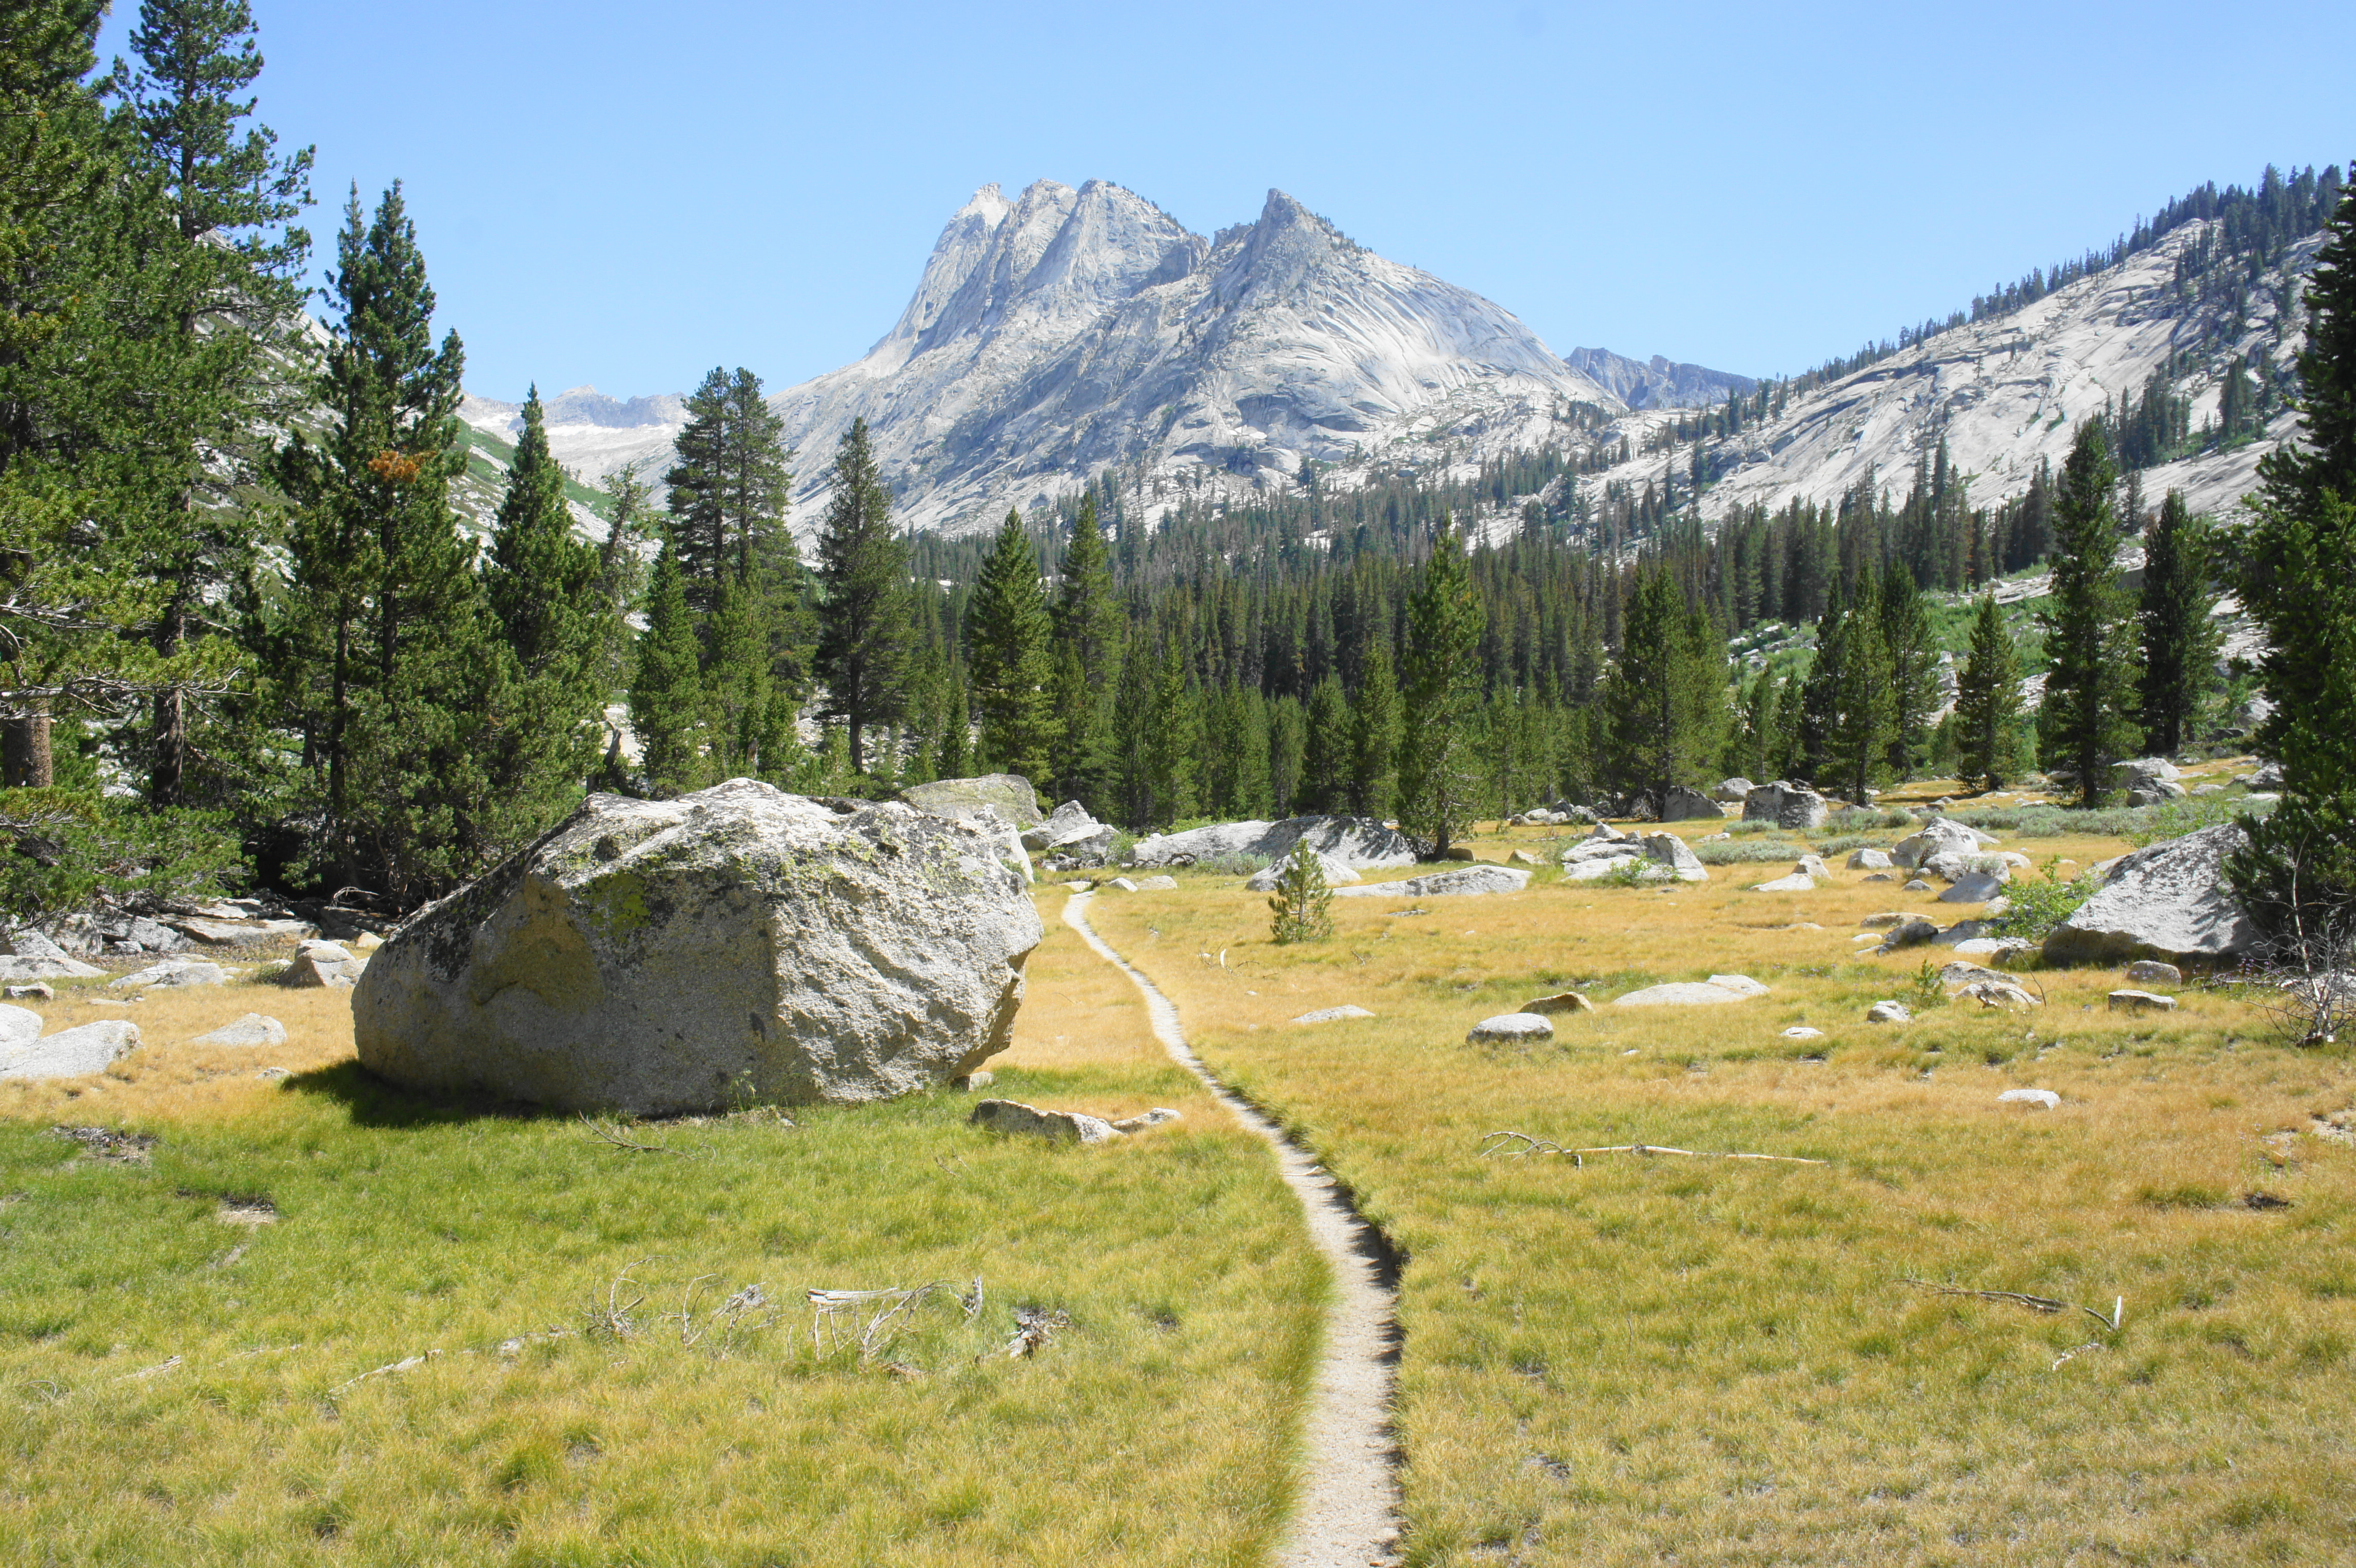
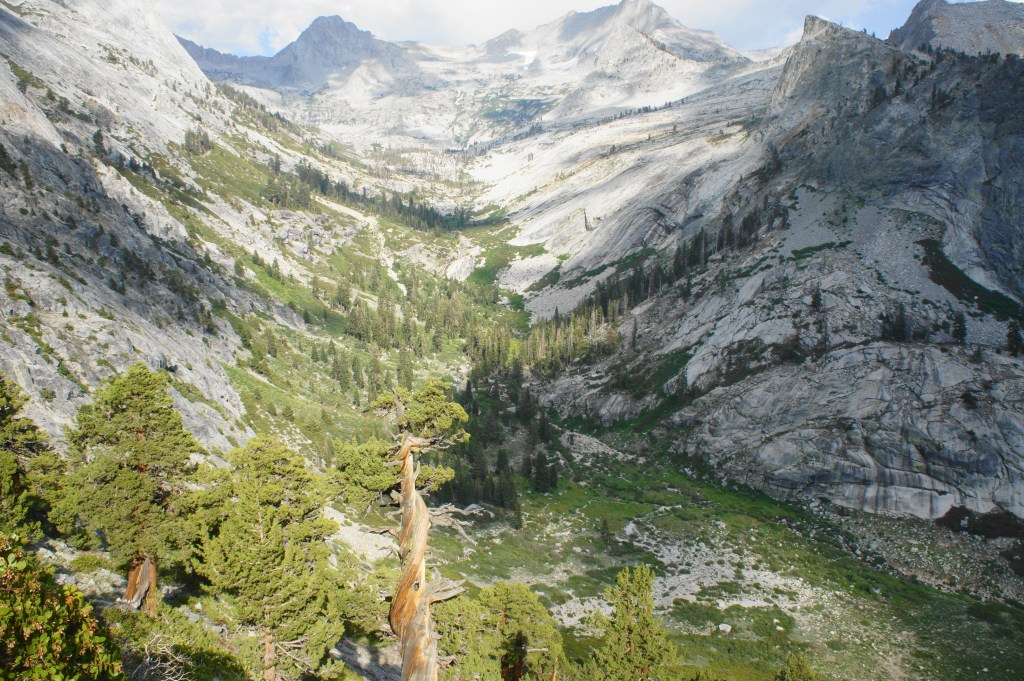
Finally, at about 4.7 miles, the Elizabeth Pass Trail crests an uphill and the trees wither away, revealing a broad and dramatic expanse with a stunning landscape beyond. This is Ranger Meadow, an absolutely picturesque spot and one of the best destinations on the entire hike. (Note: Believe it or not, the striking, multi-knobbed peak has no official name but rises to around 11,600 feet, forming part of the Kings-Kaweah Divide.)
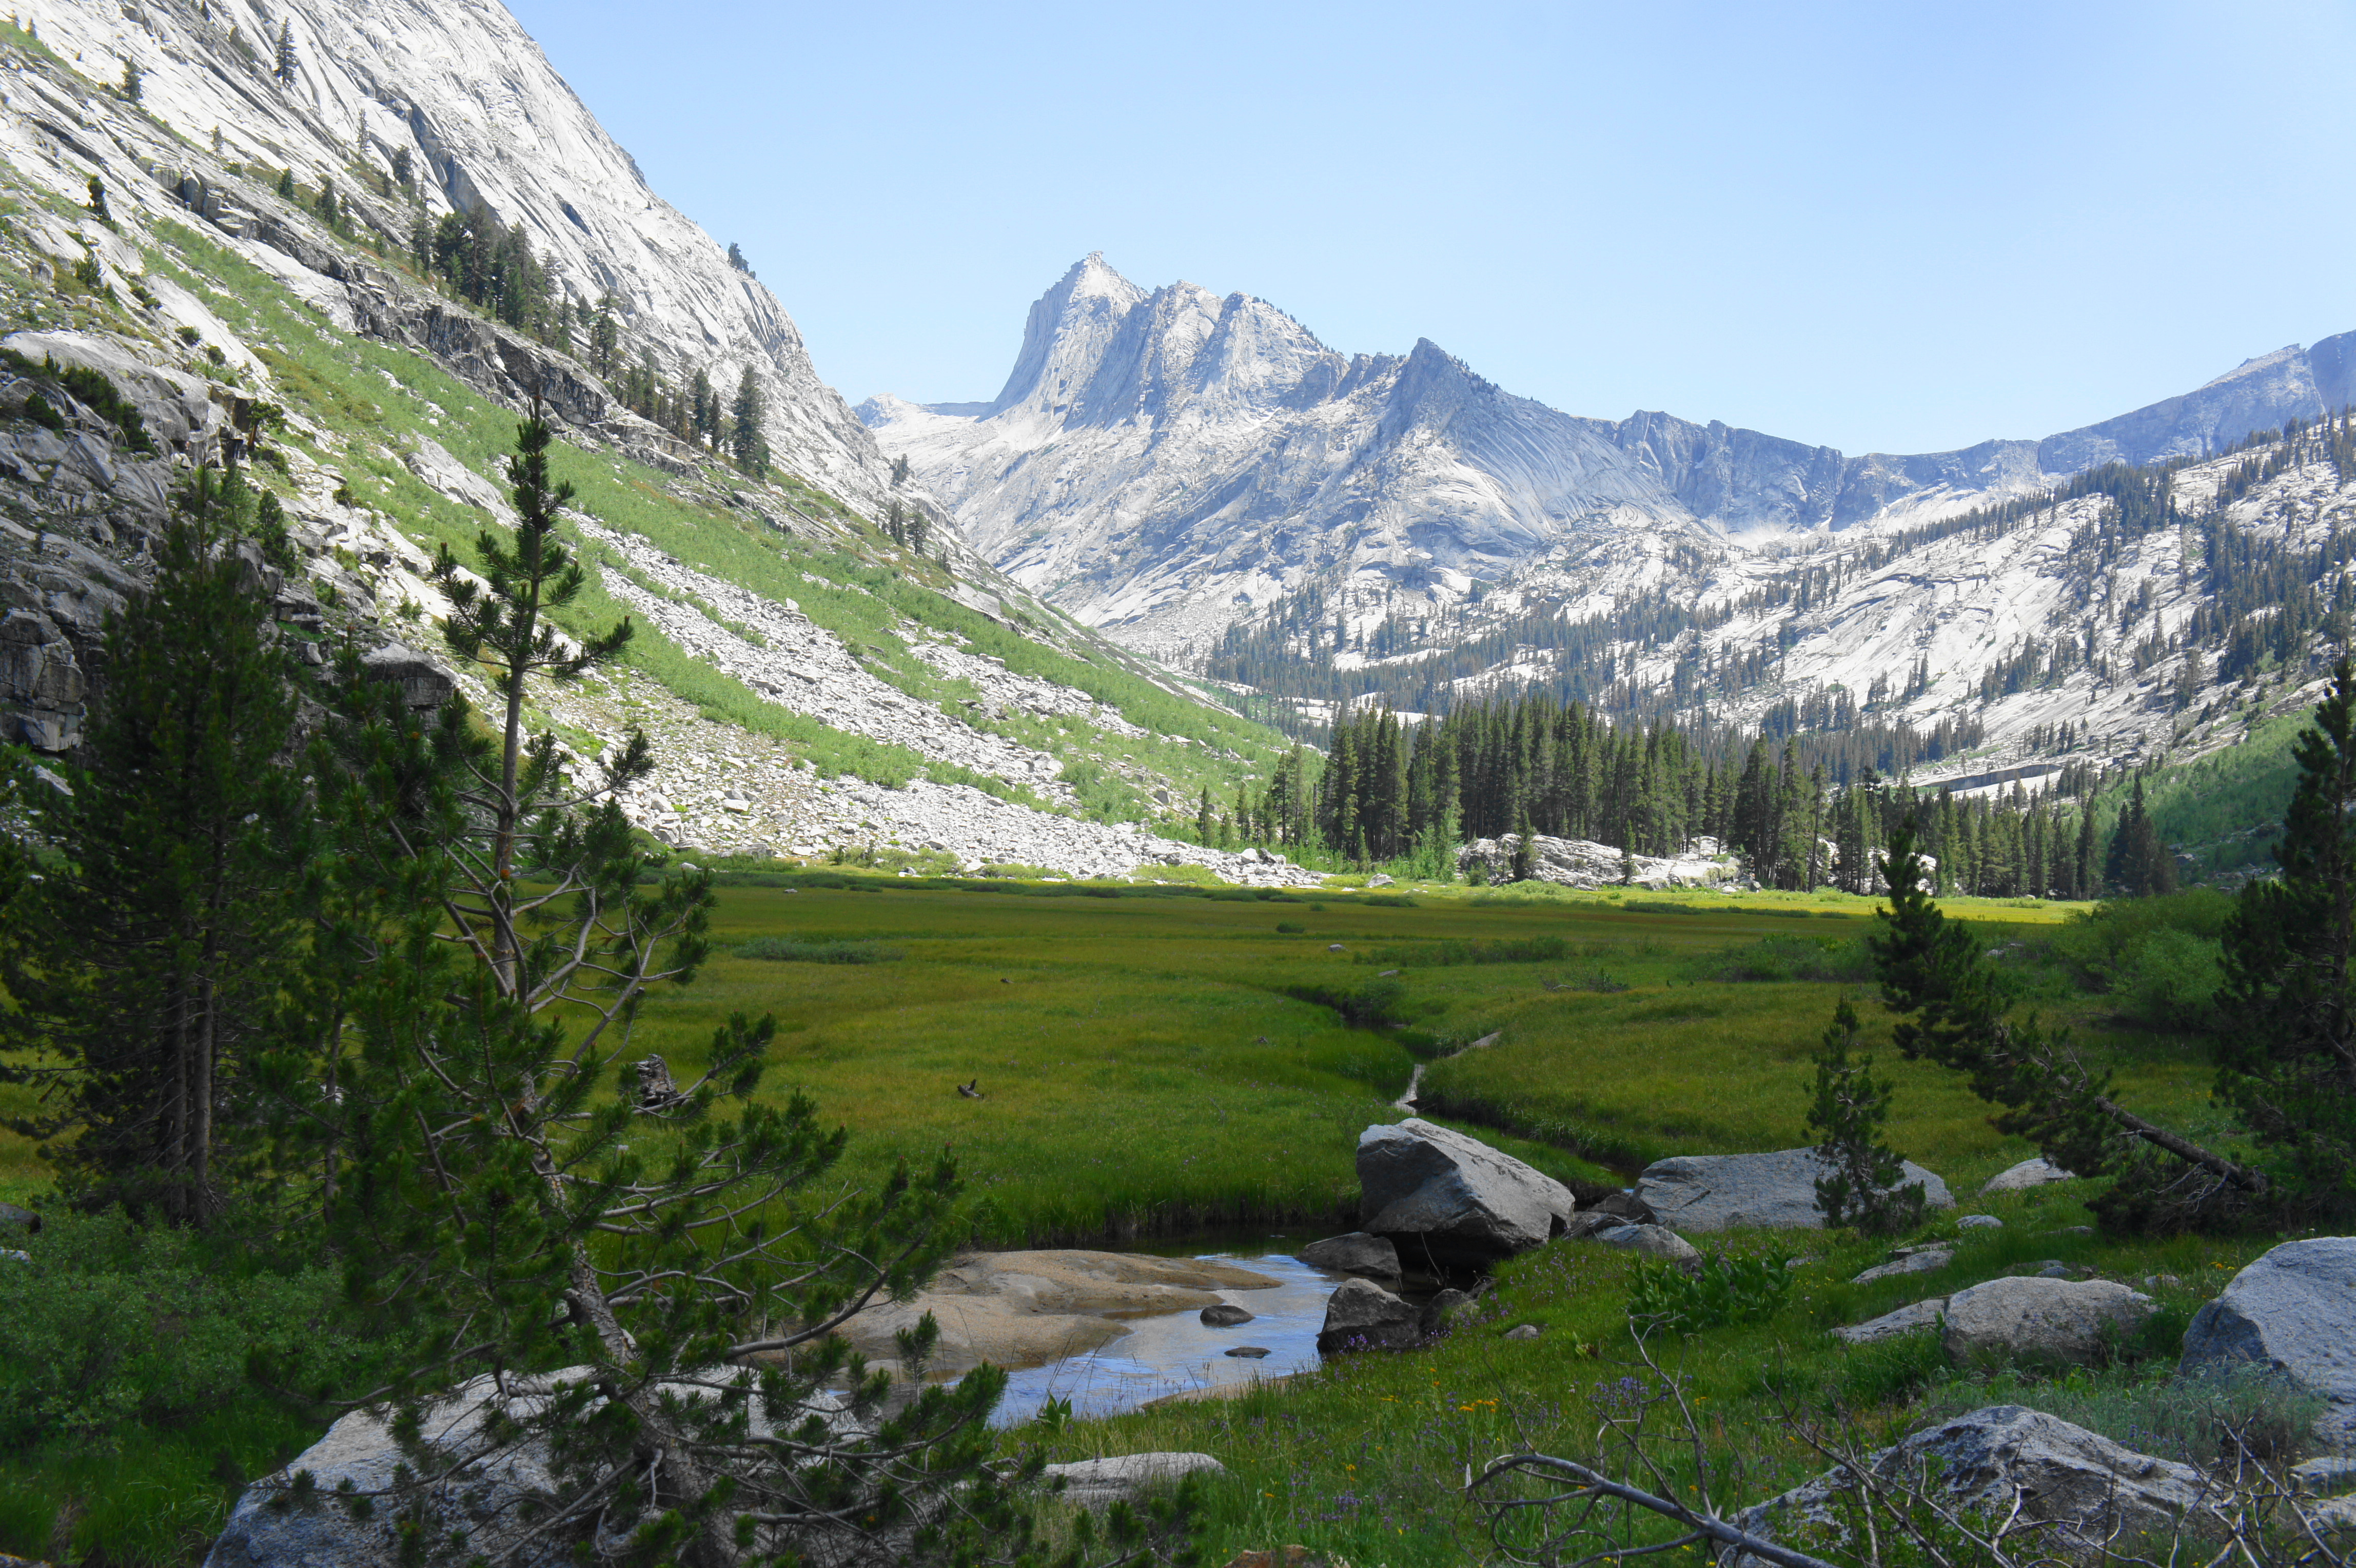
Unnamed peak (11,600′) south of Ranger Meadow 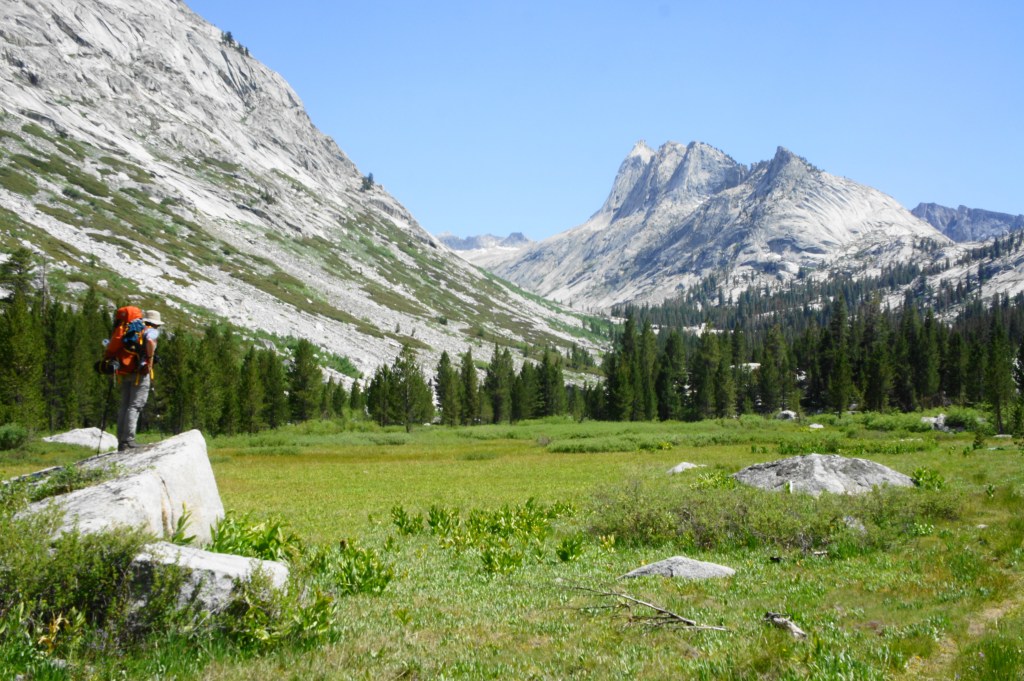
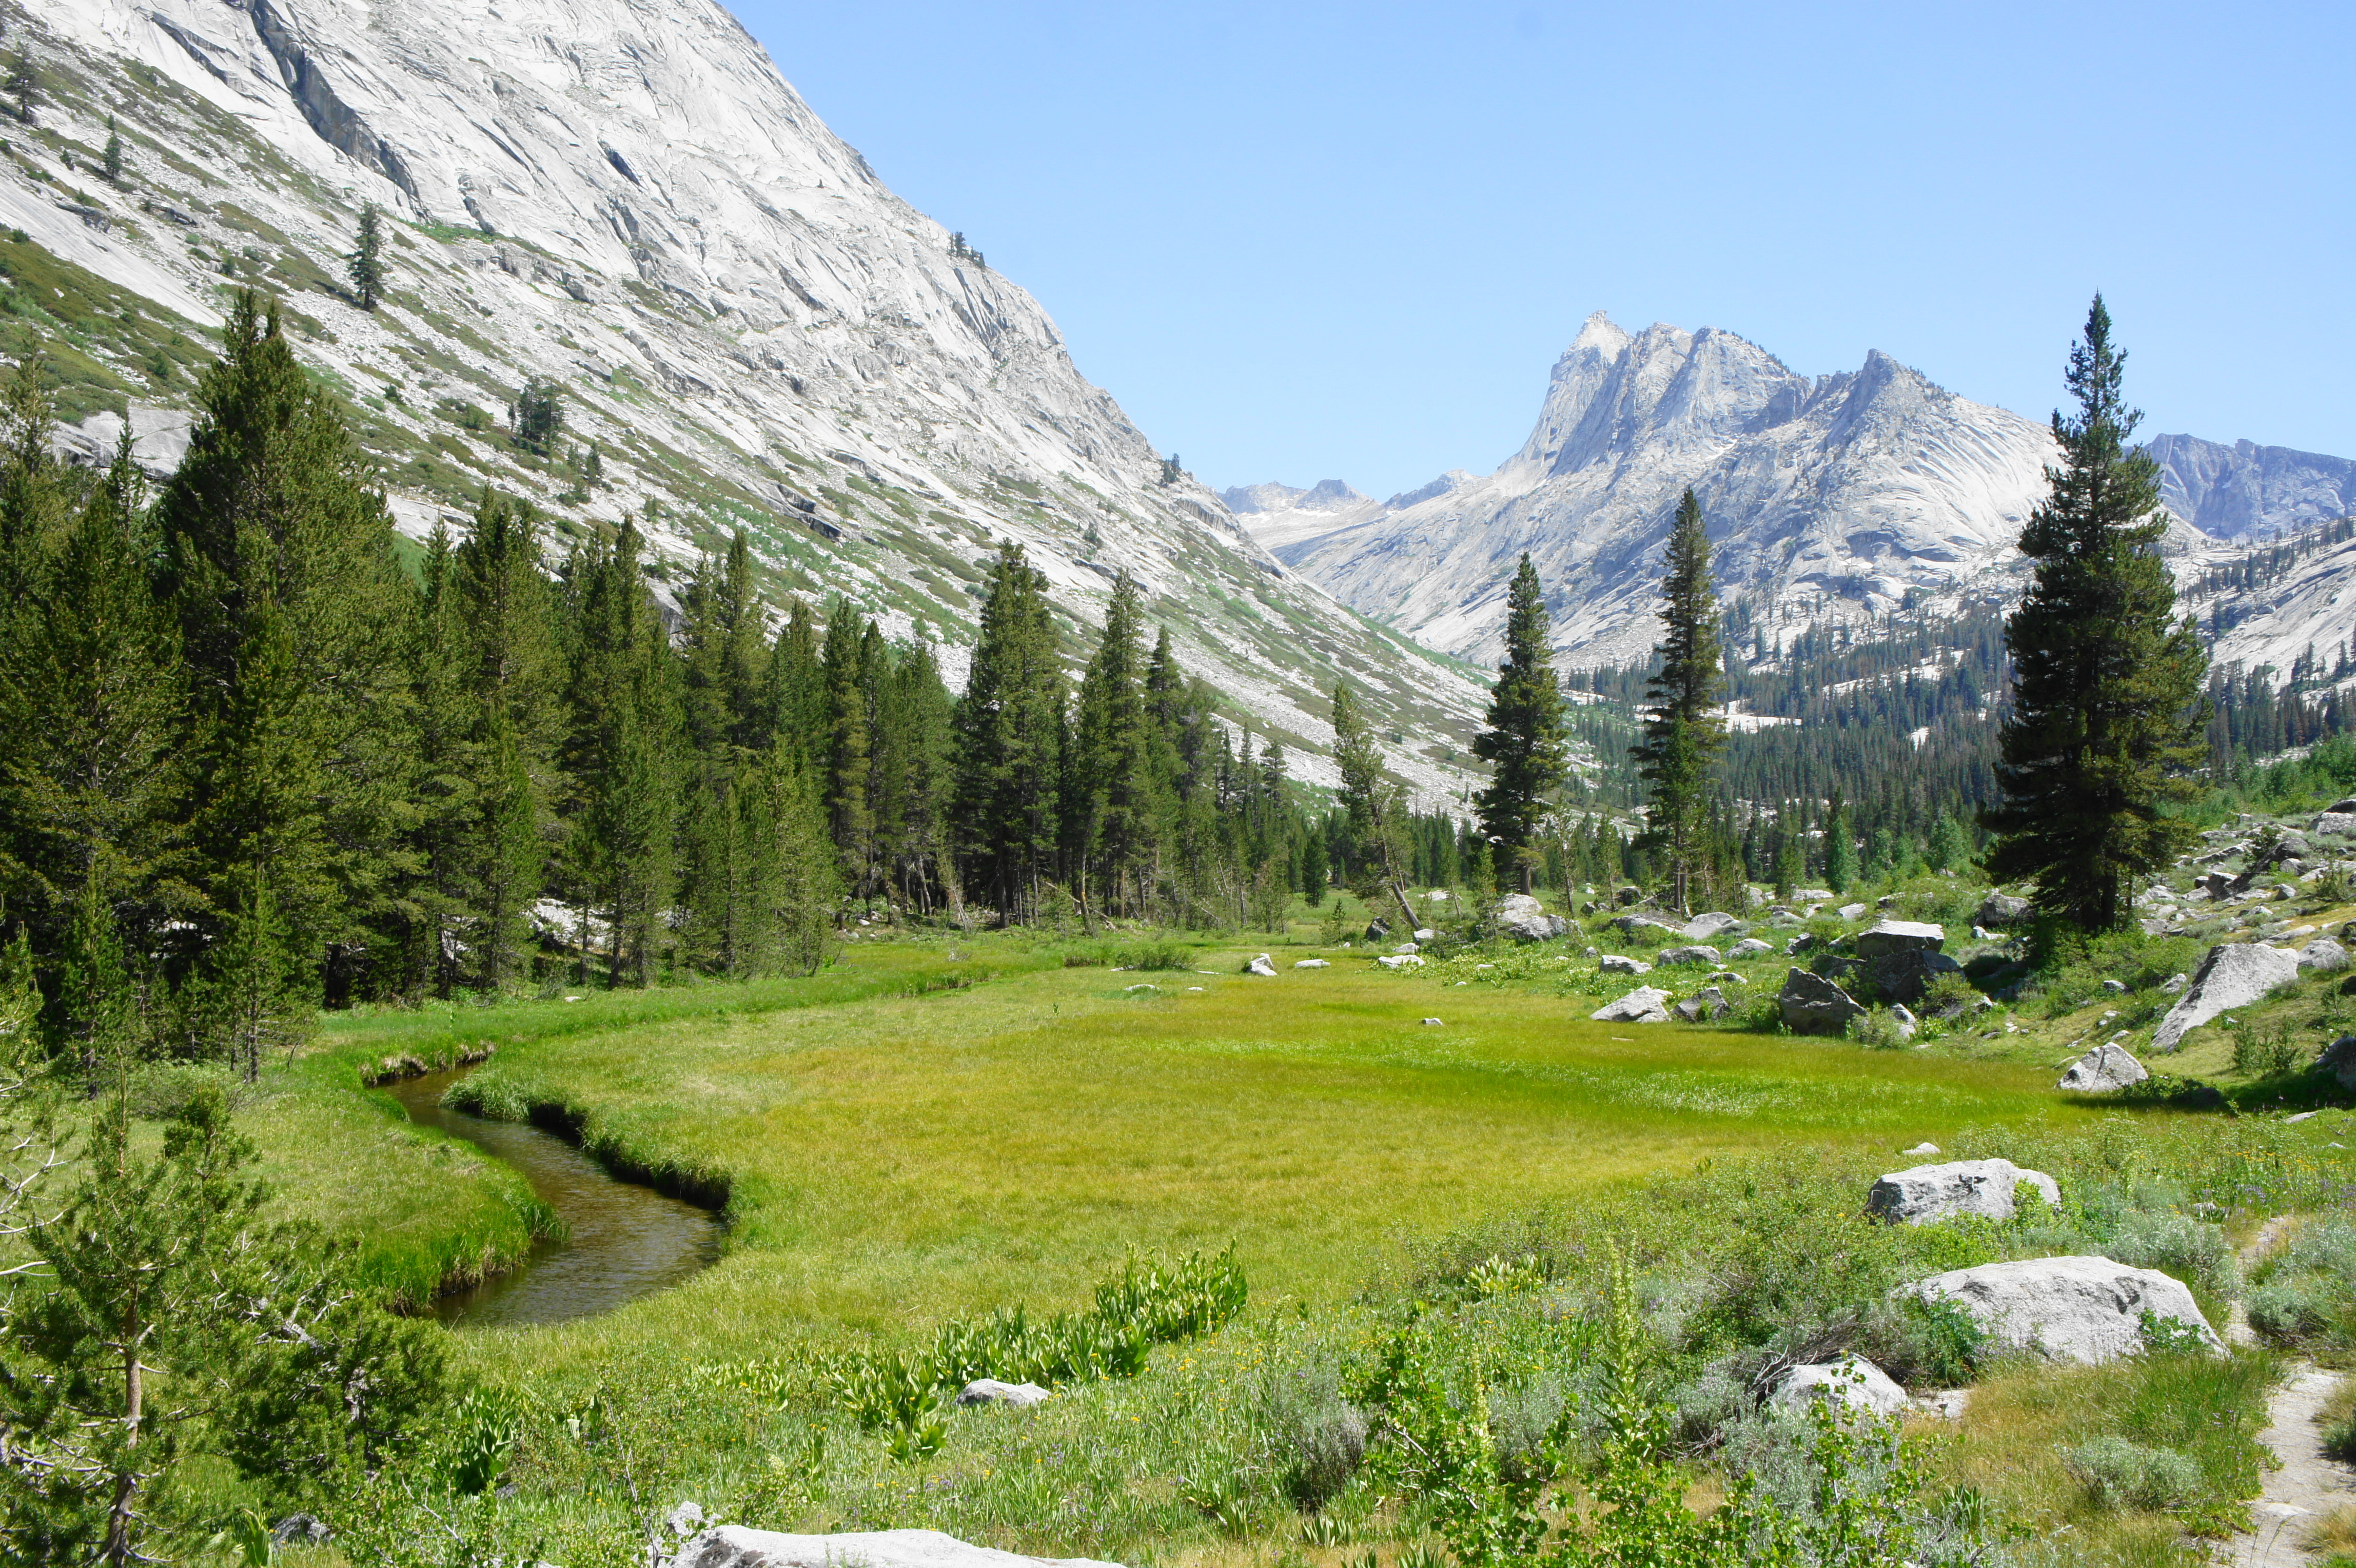
Upper Ranger Meadow

The onward path skirts the west flank of Ranger Meadow, offering excellent views for the next mile. After briefly cutting through the trees, the path rises to another open platform with a couple nice campsites but more distant from the water, now rushing through cascades some 50 feet below.
Above Ranger Meadow 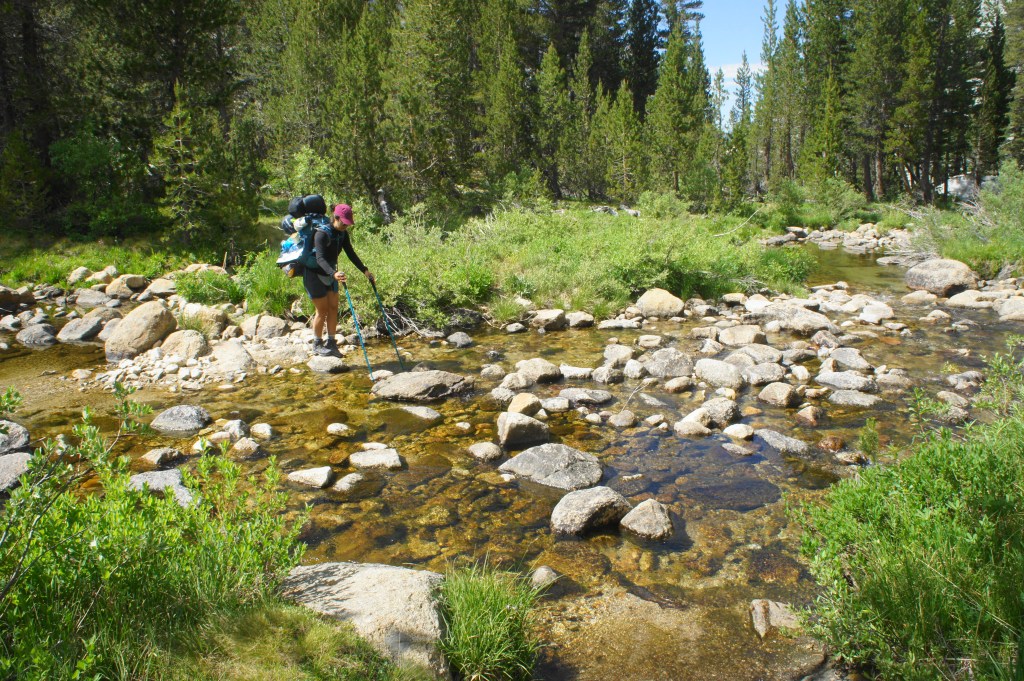
Crossing Deadman Creek again

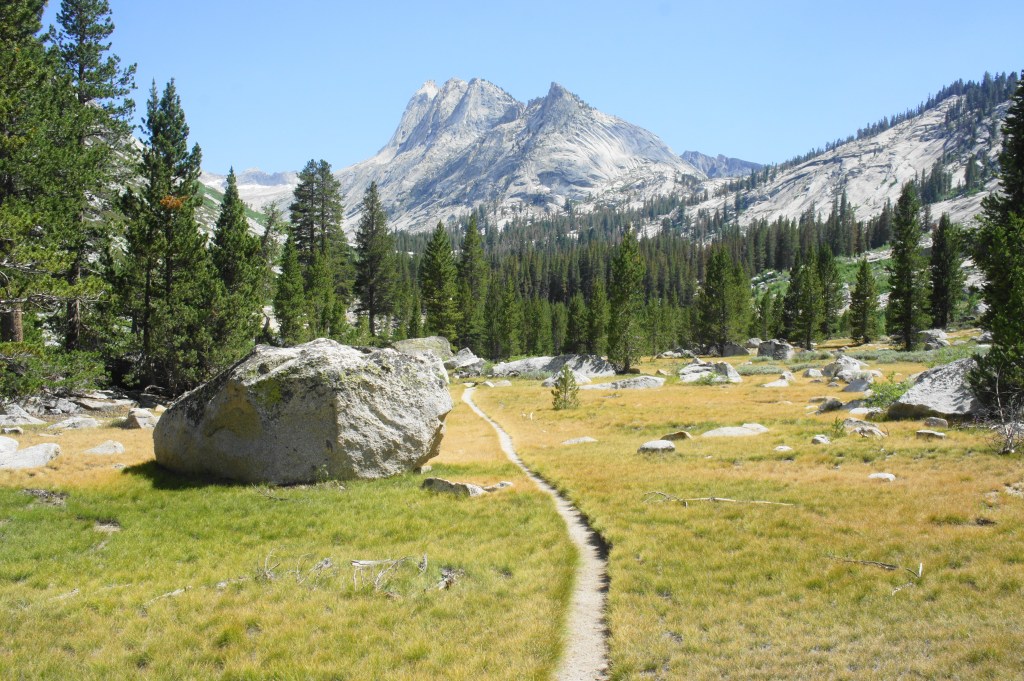
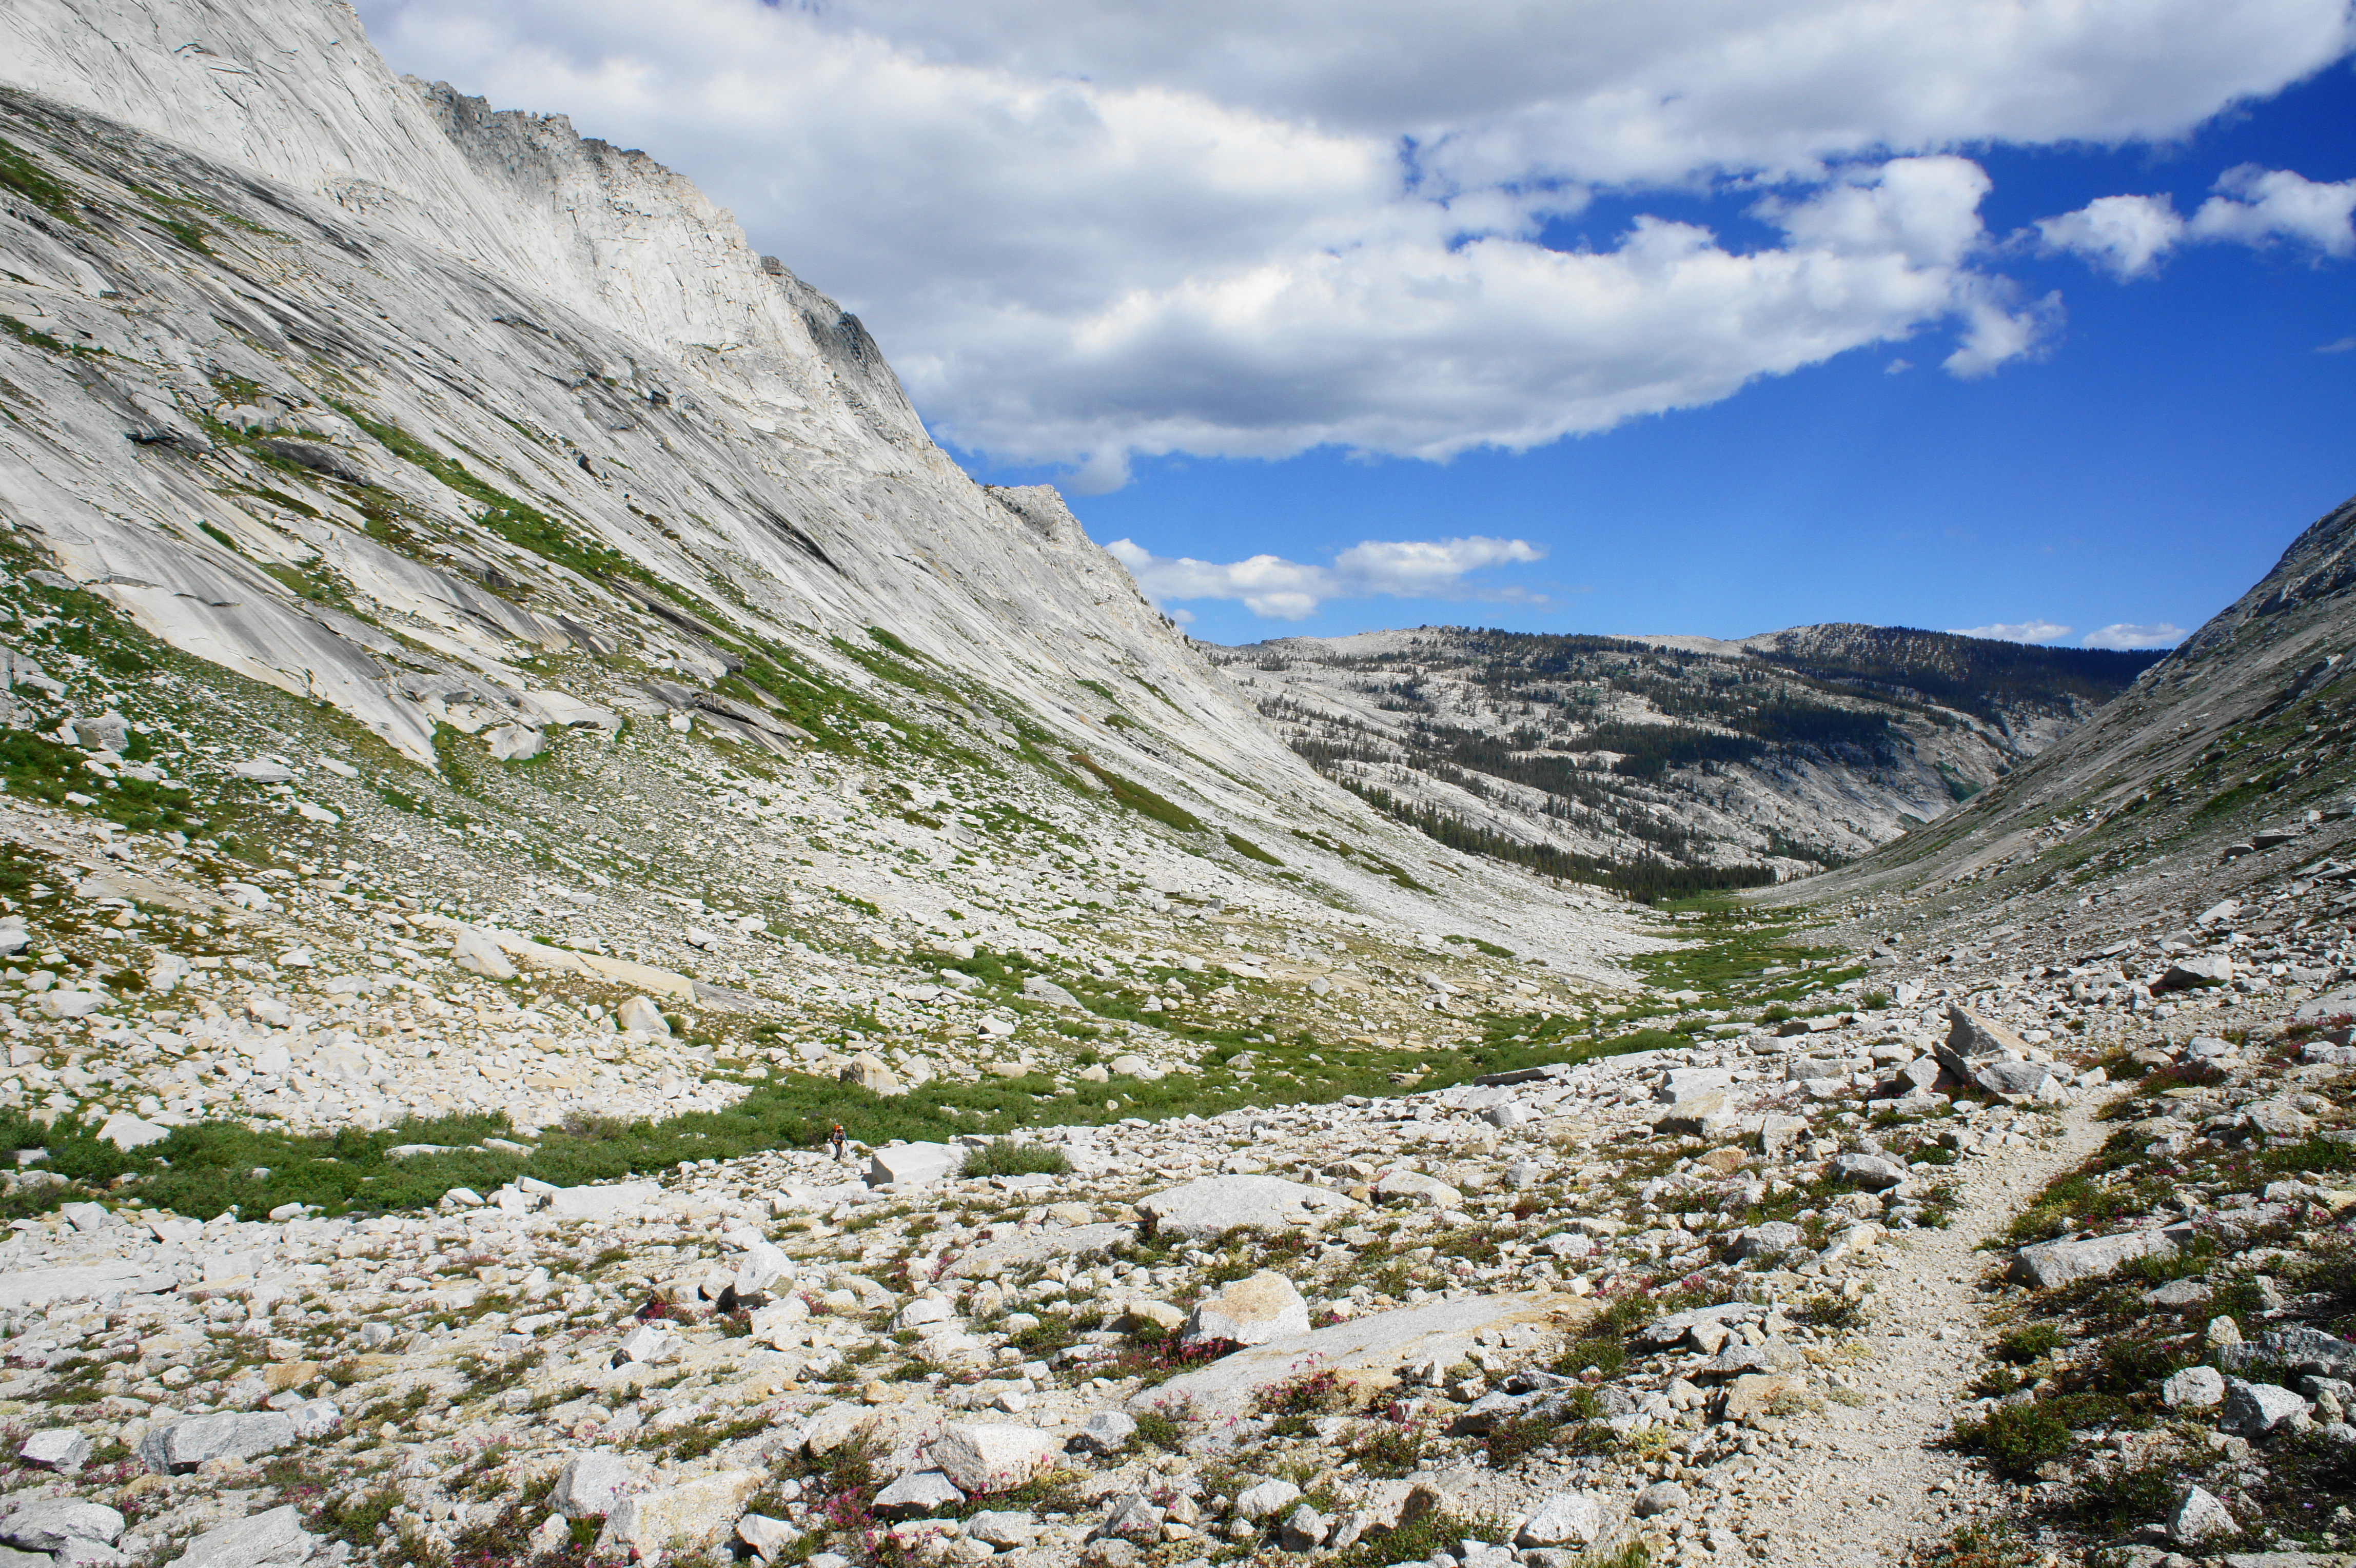
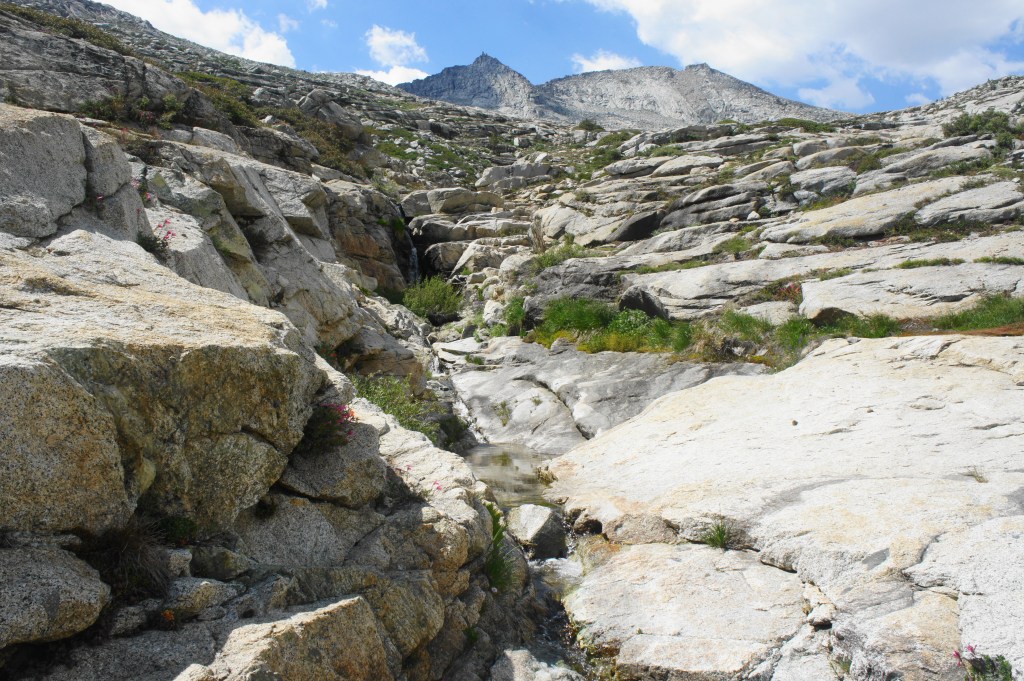
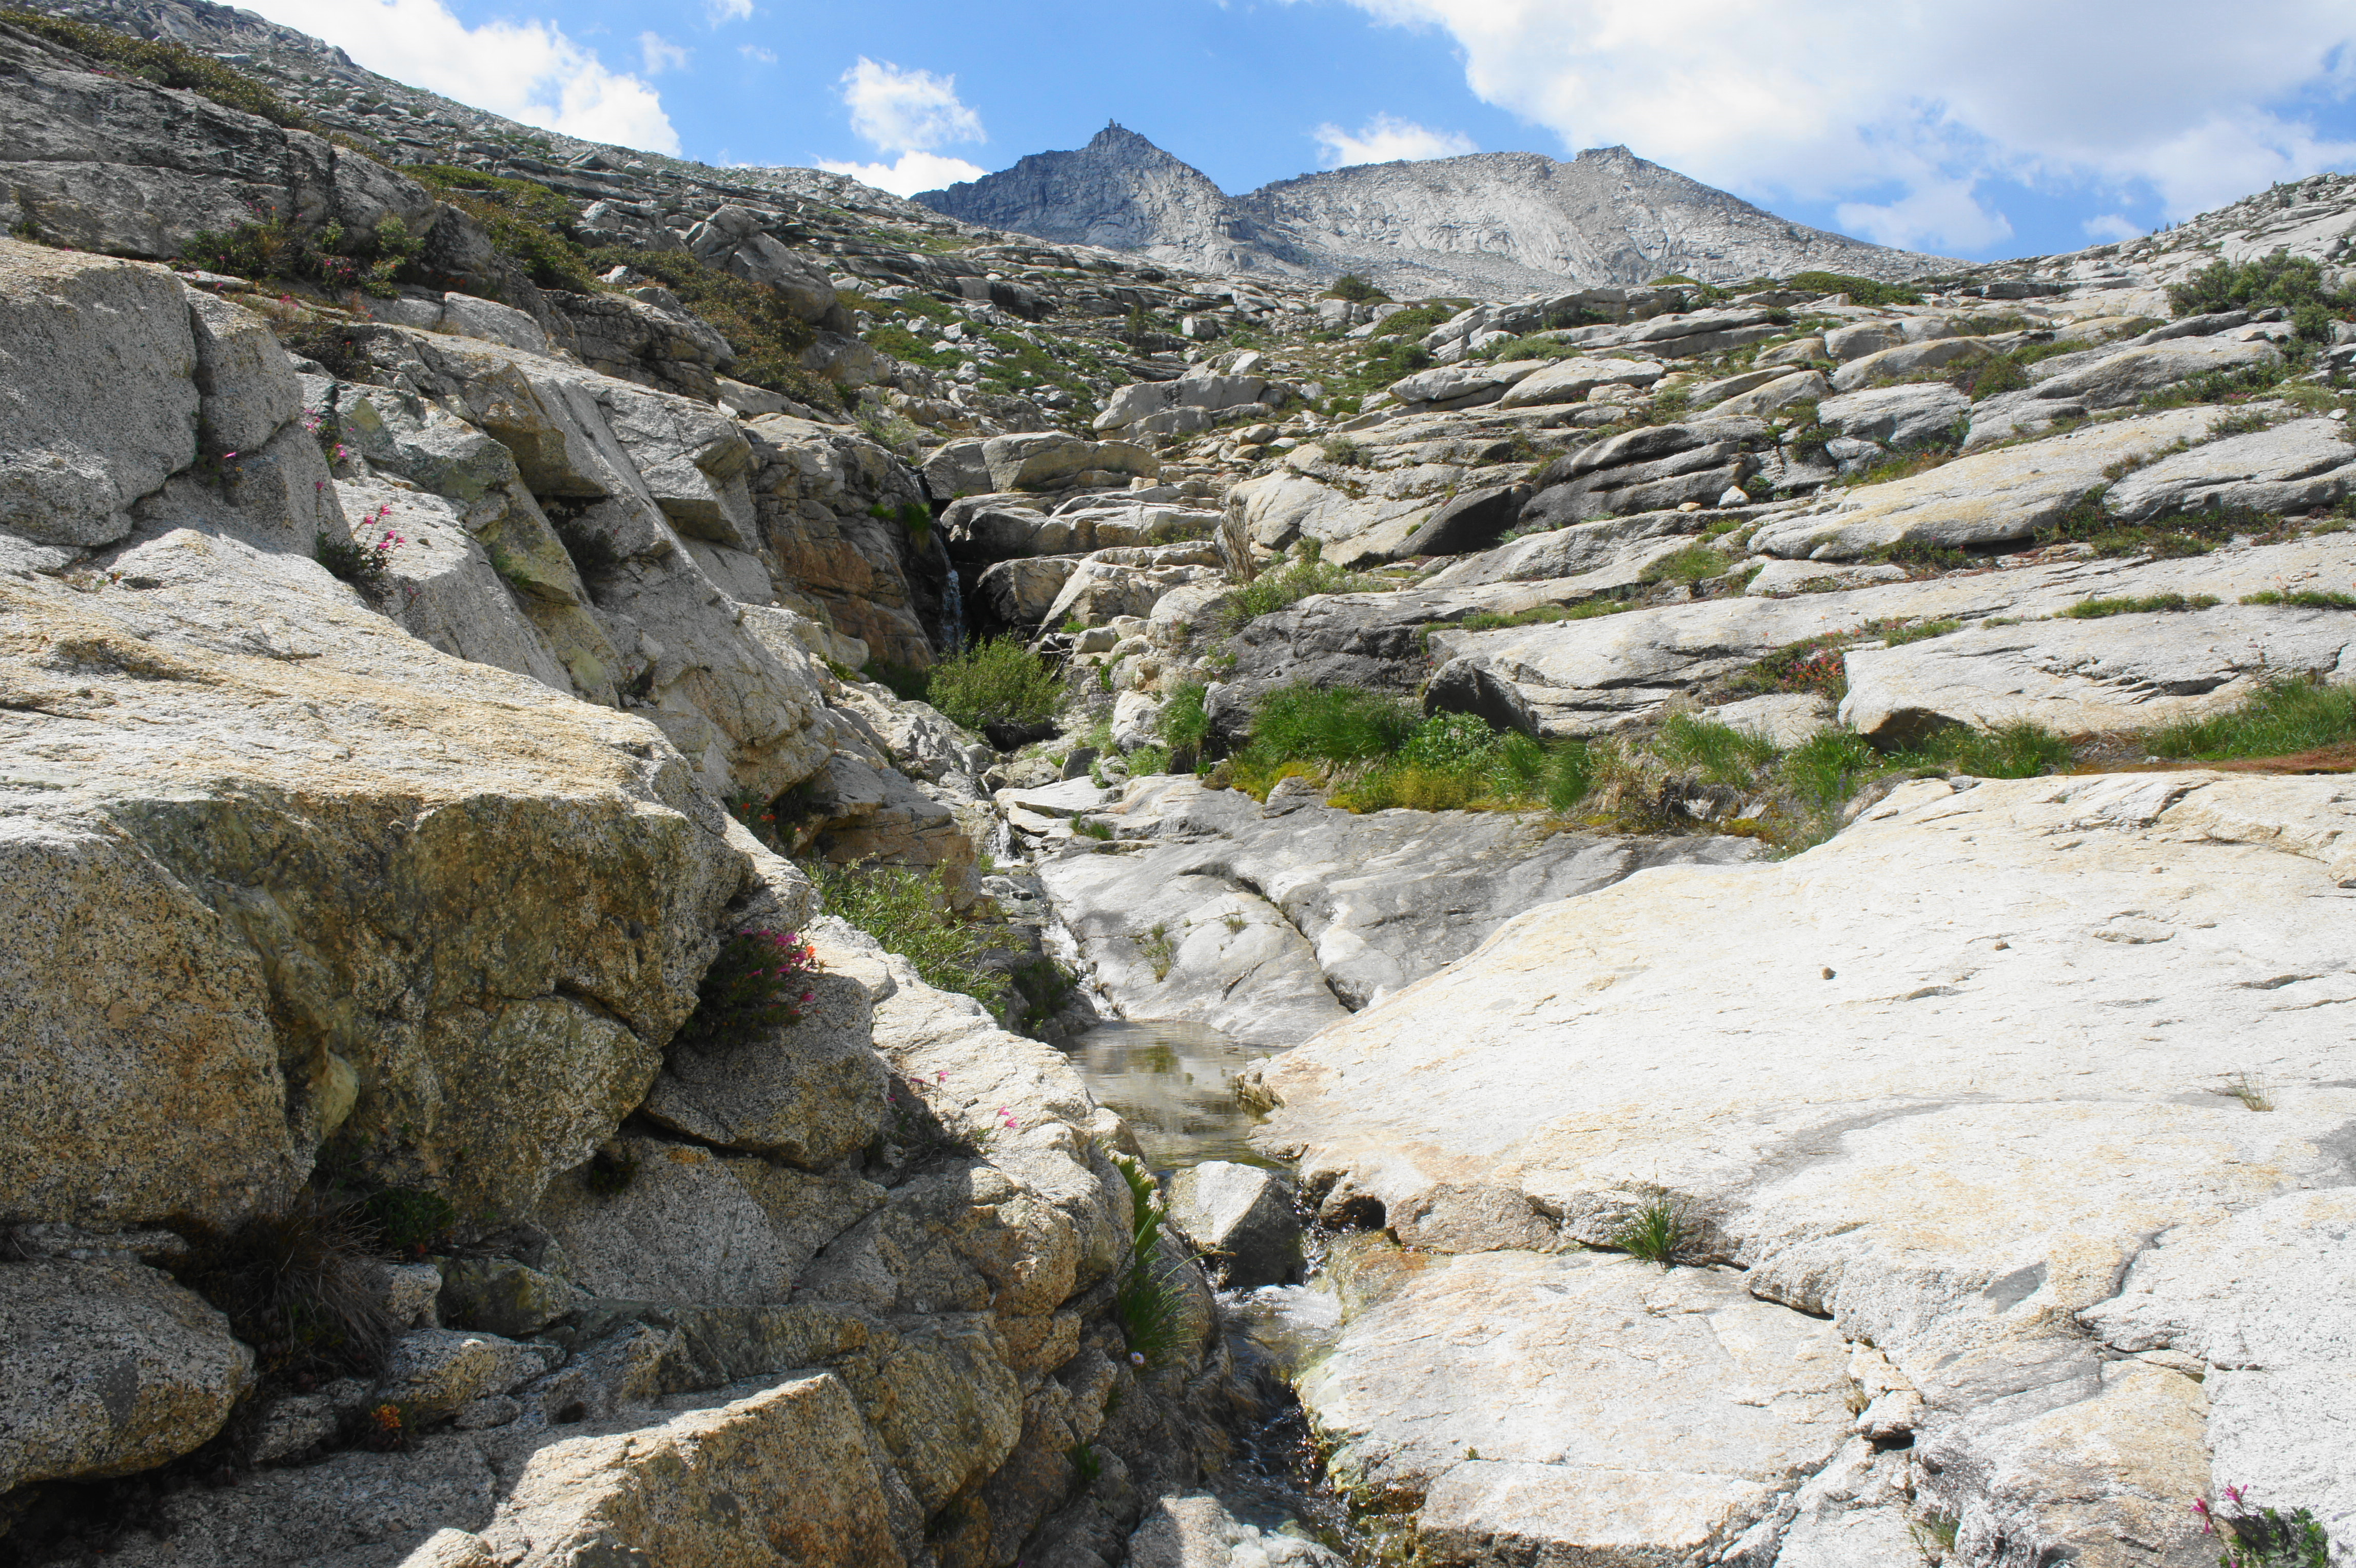
Nearing closer to the dramatic peak (11,600’), the trail reenters the thick pine forest again, rising again for a stretch and then ascending a wildflower-dotted slope and crossing Deadman Creek once more. At about 6.75 miles on the day, hikers reach the end of the trees, with open meadows—and a view of Upper Deadman Canyon—ahead. (Note: Off to the right is a notch leading up to Big Bird Lake, though this requires a rigorous, off-trail hike.)


Up Deadman Canyon toward Elizabeth Pass 
High peaks above Deadman Canyon

It is around here that hikers may look to set up camp for the night, cashing in on a short but scenic day. There are a couple campsites right at the edge of treeline and some flat and weathered spots on the plain about 1/10 mile farther up the trail.


DAY 5: Upper Deadman Canyon to Tamarack Lake via Elizabeth Pass (8.7 miles)
Day 5 is arguably the hike’s most spectacular day—but also the most difficult, requiring a more than 2,000-foot ascent to Elizabeth Pass, followed by a relentless downhill shedding 3,000 feet, and capping off the day with a laborious 1,000-foot climb to reach Tamarack Lake. (Note: Again, hikers may choose to skip the Tamarack Lake detour, saving two miles each way, in which case one should continue on toward Bearpaw Meadow to the southwest.)

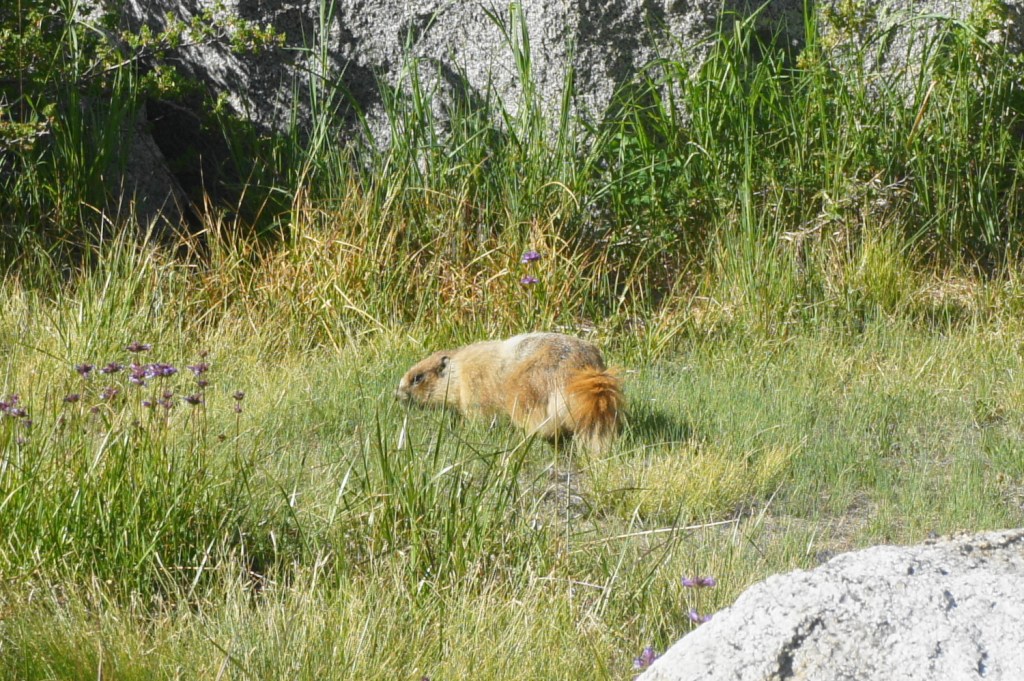
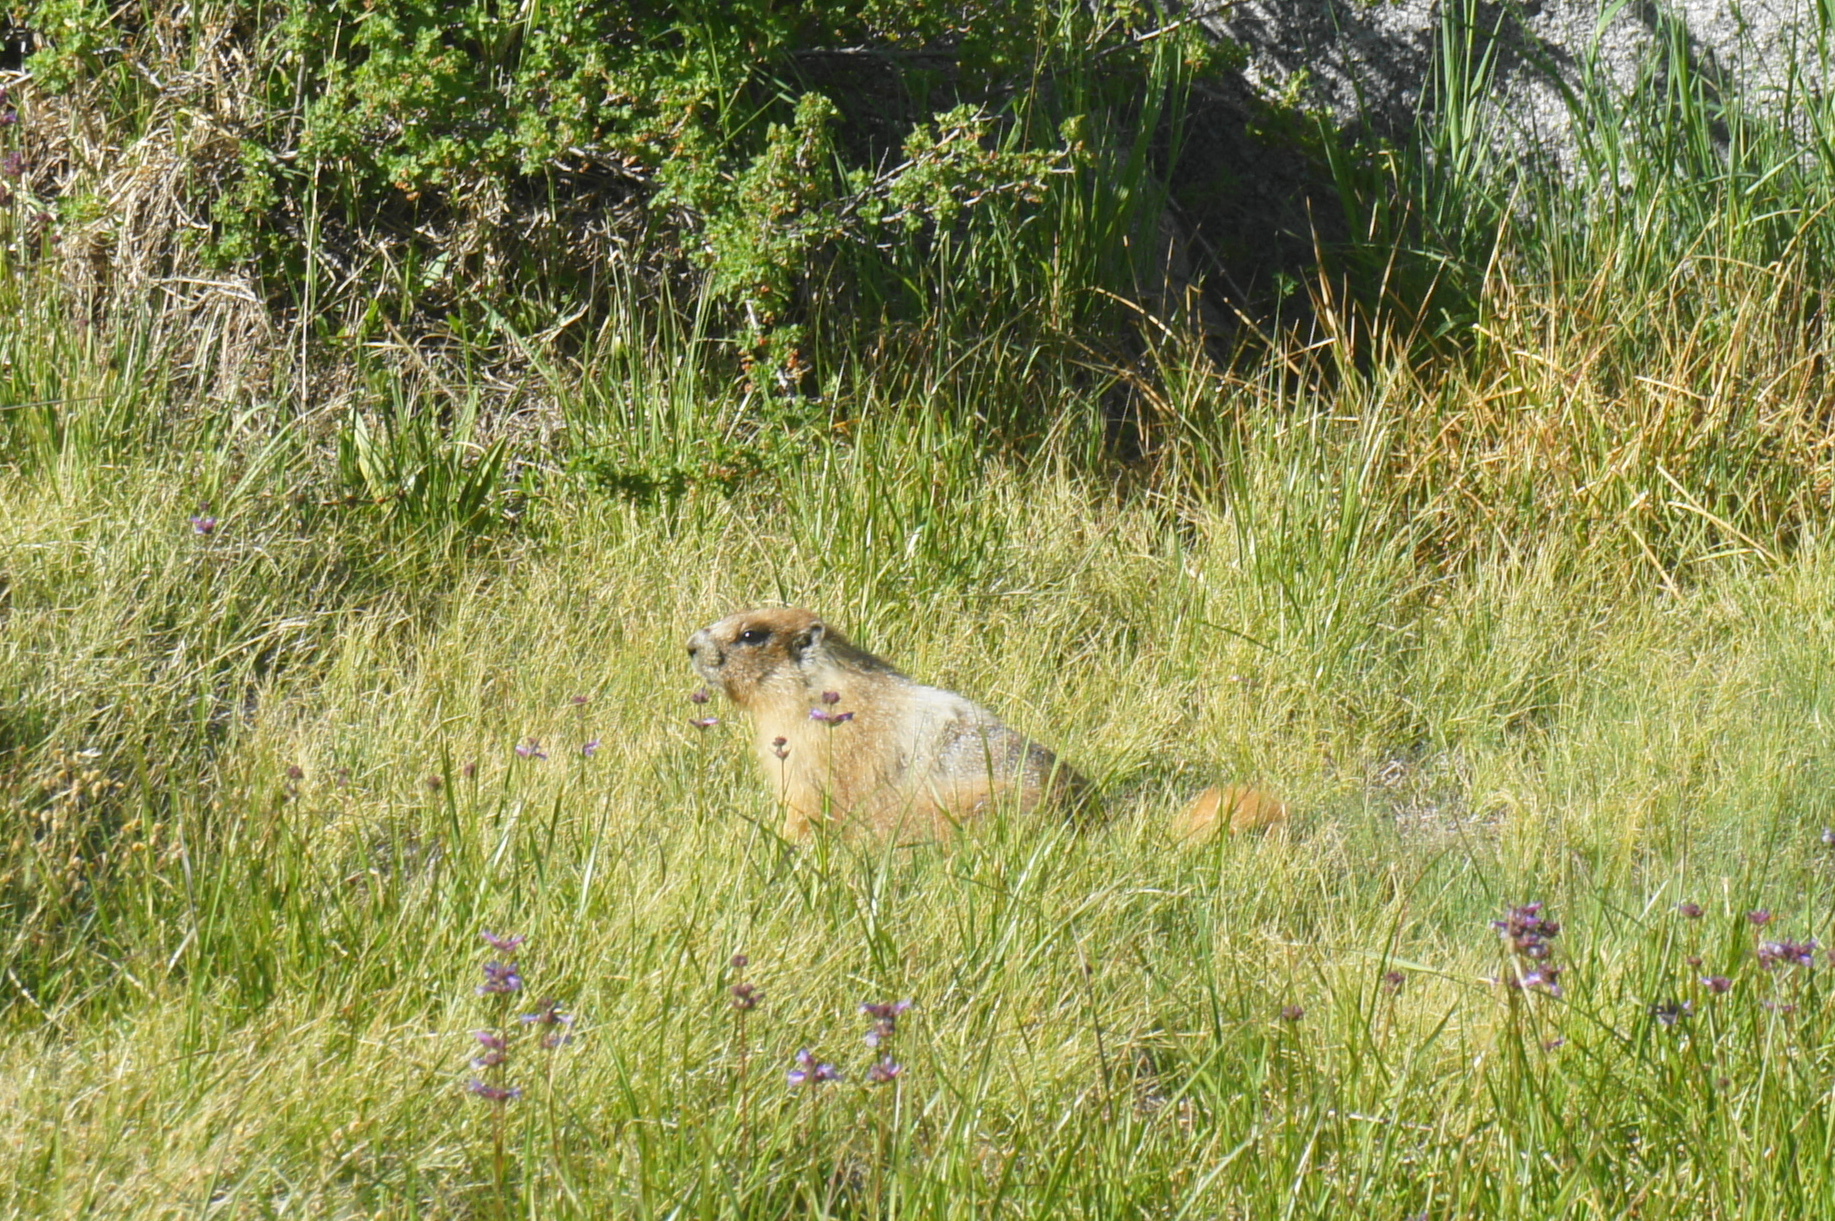
Mandatory marmot pics 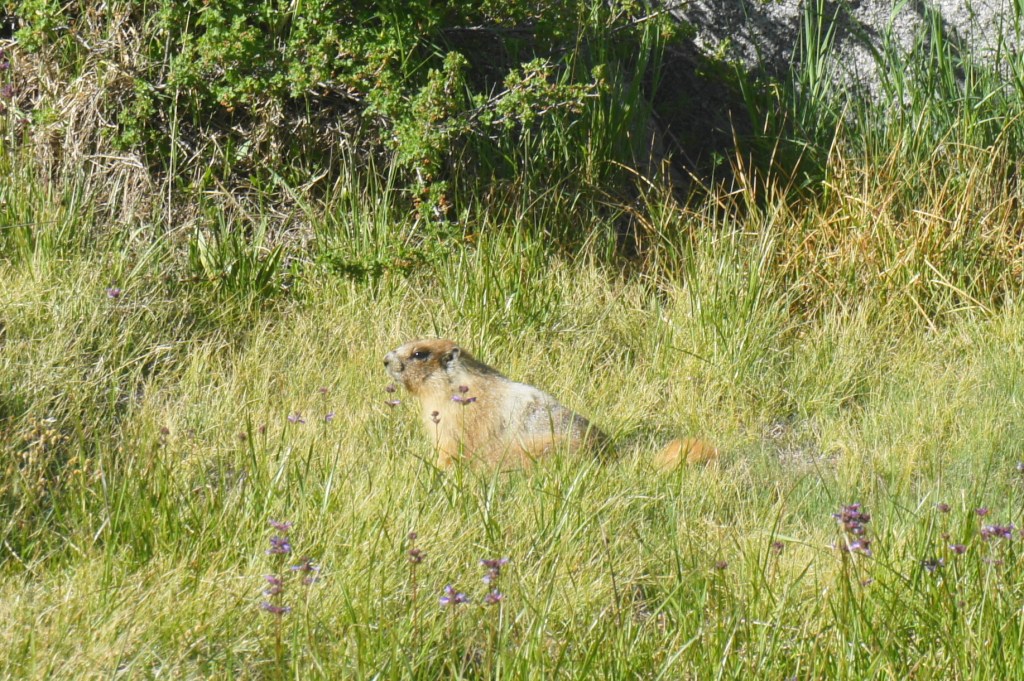
Marmot in Deadman Canyon

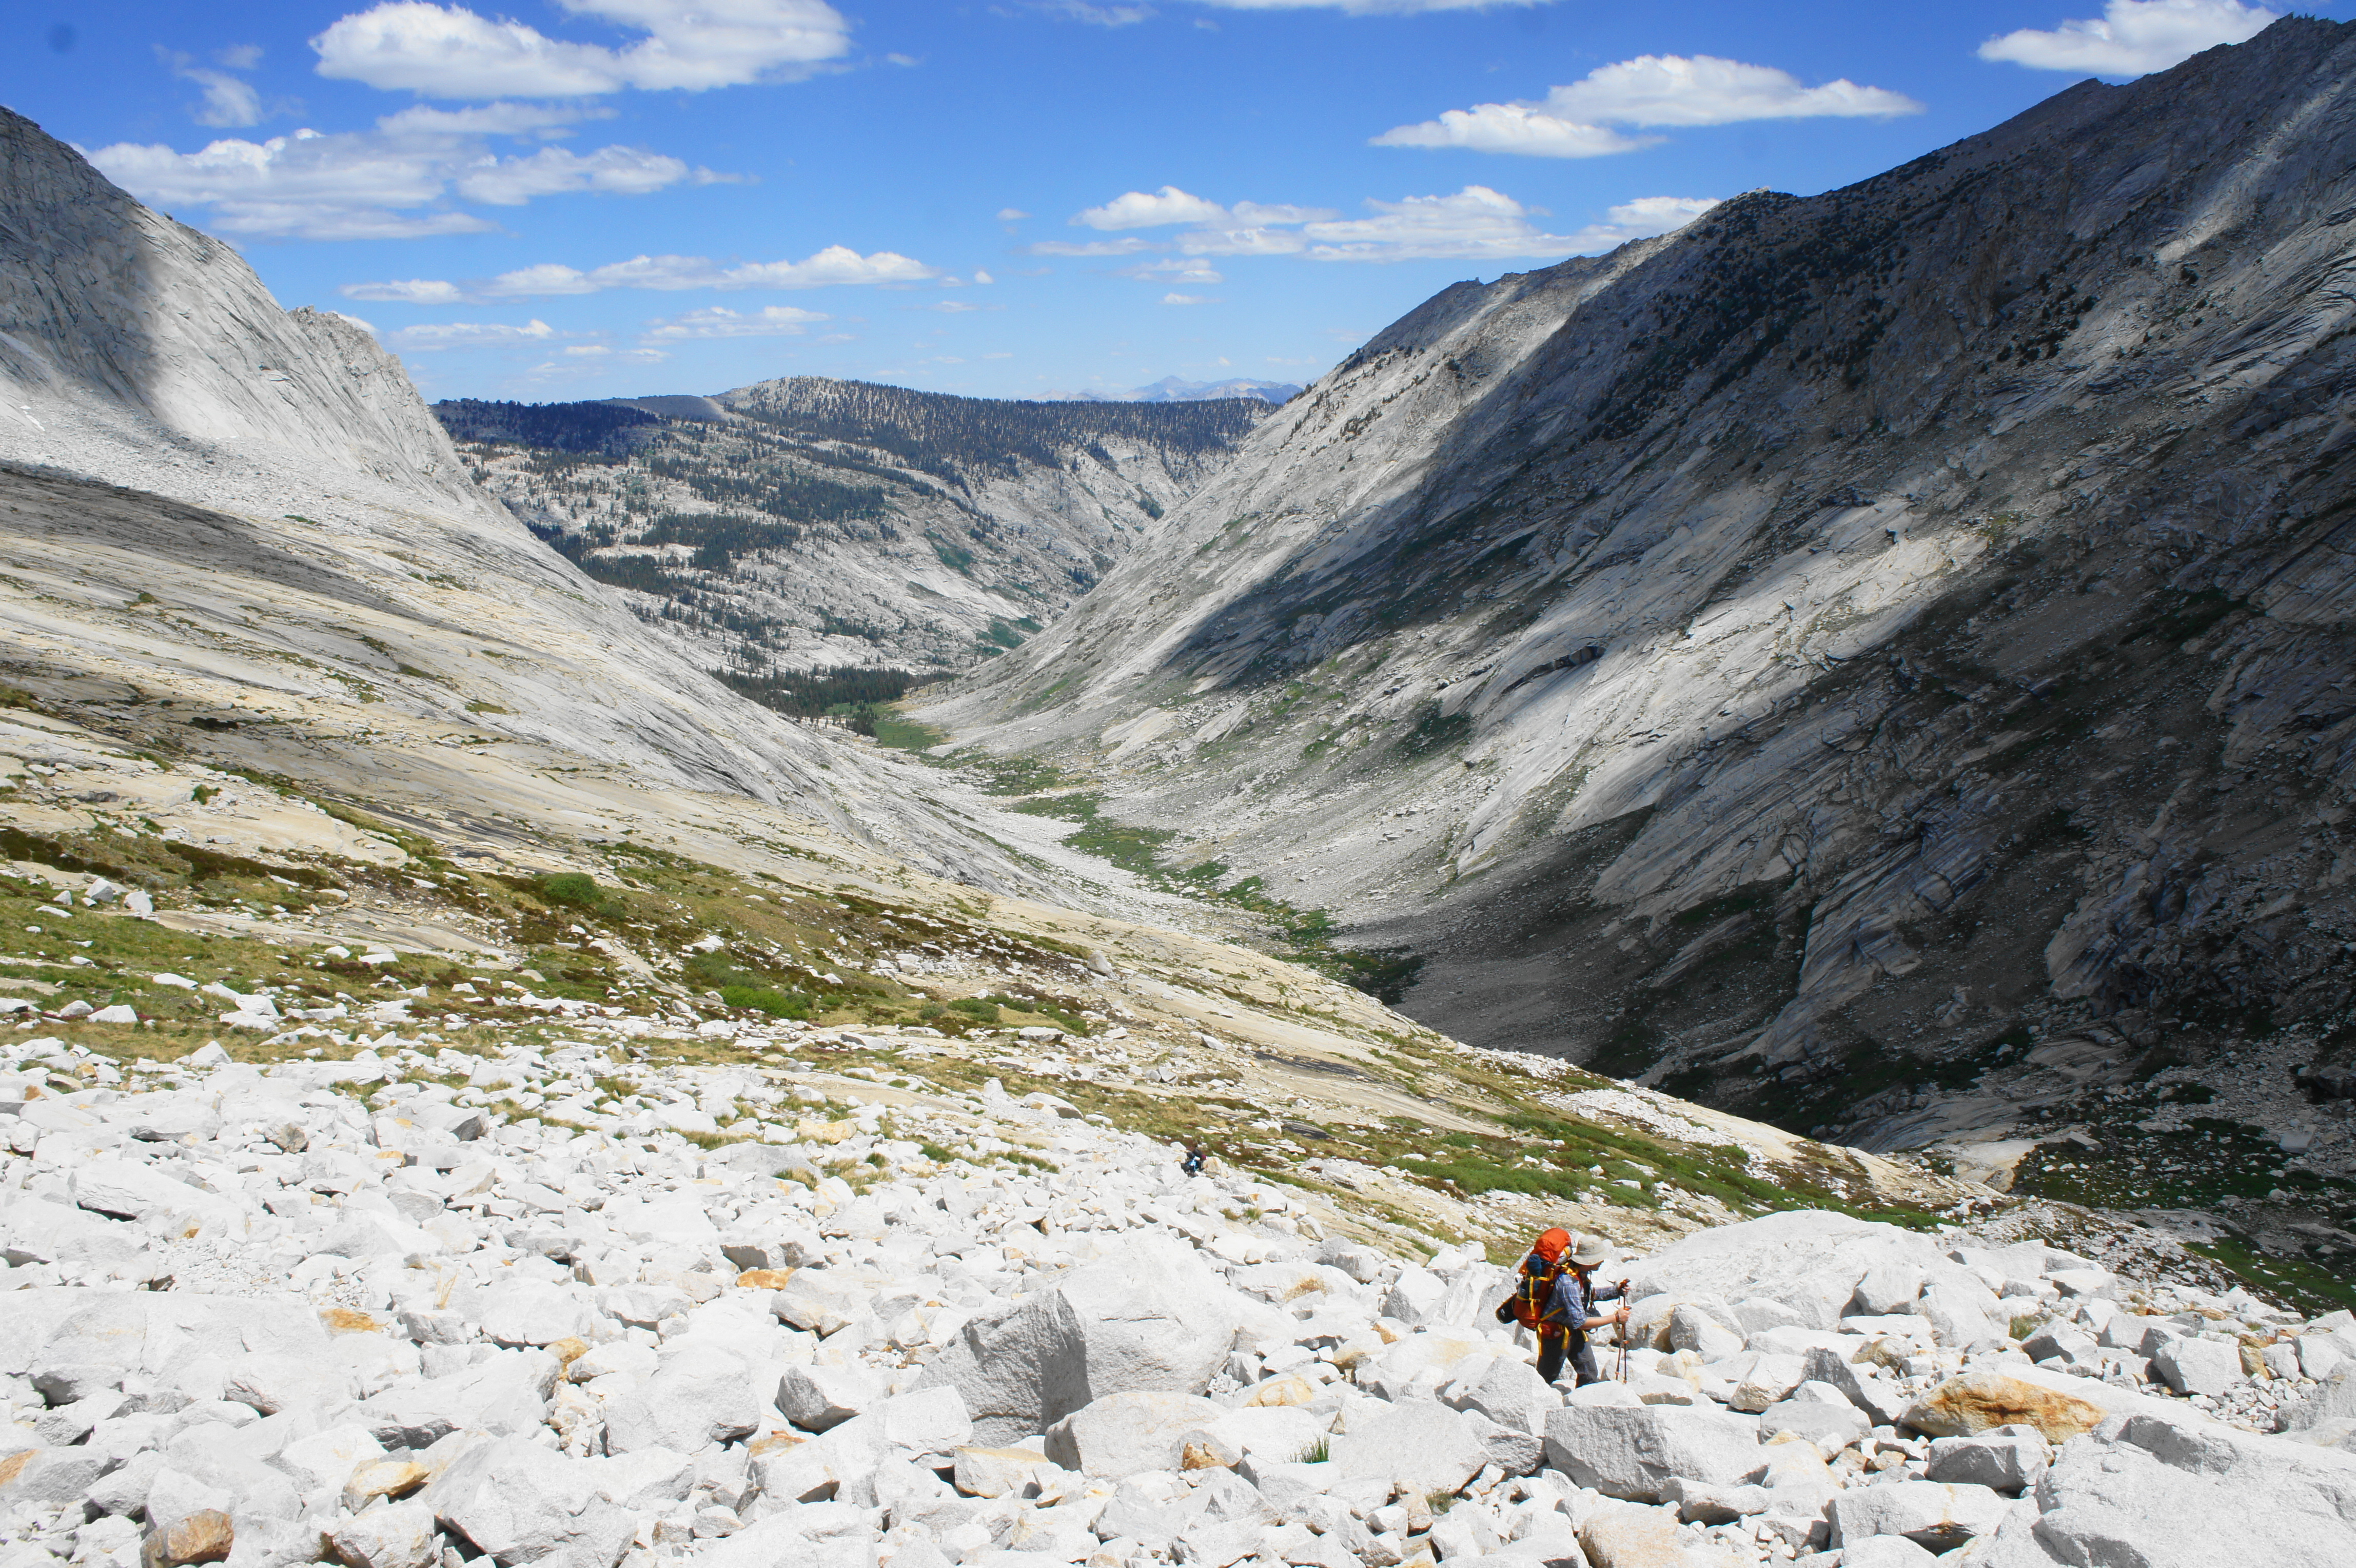
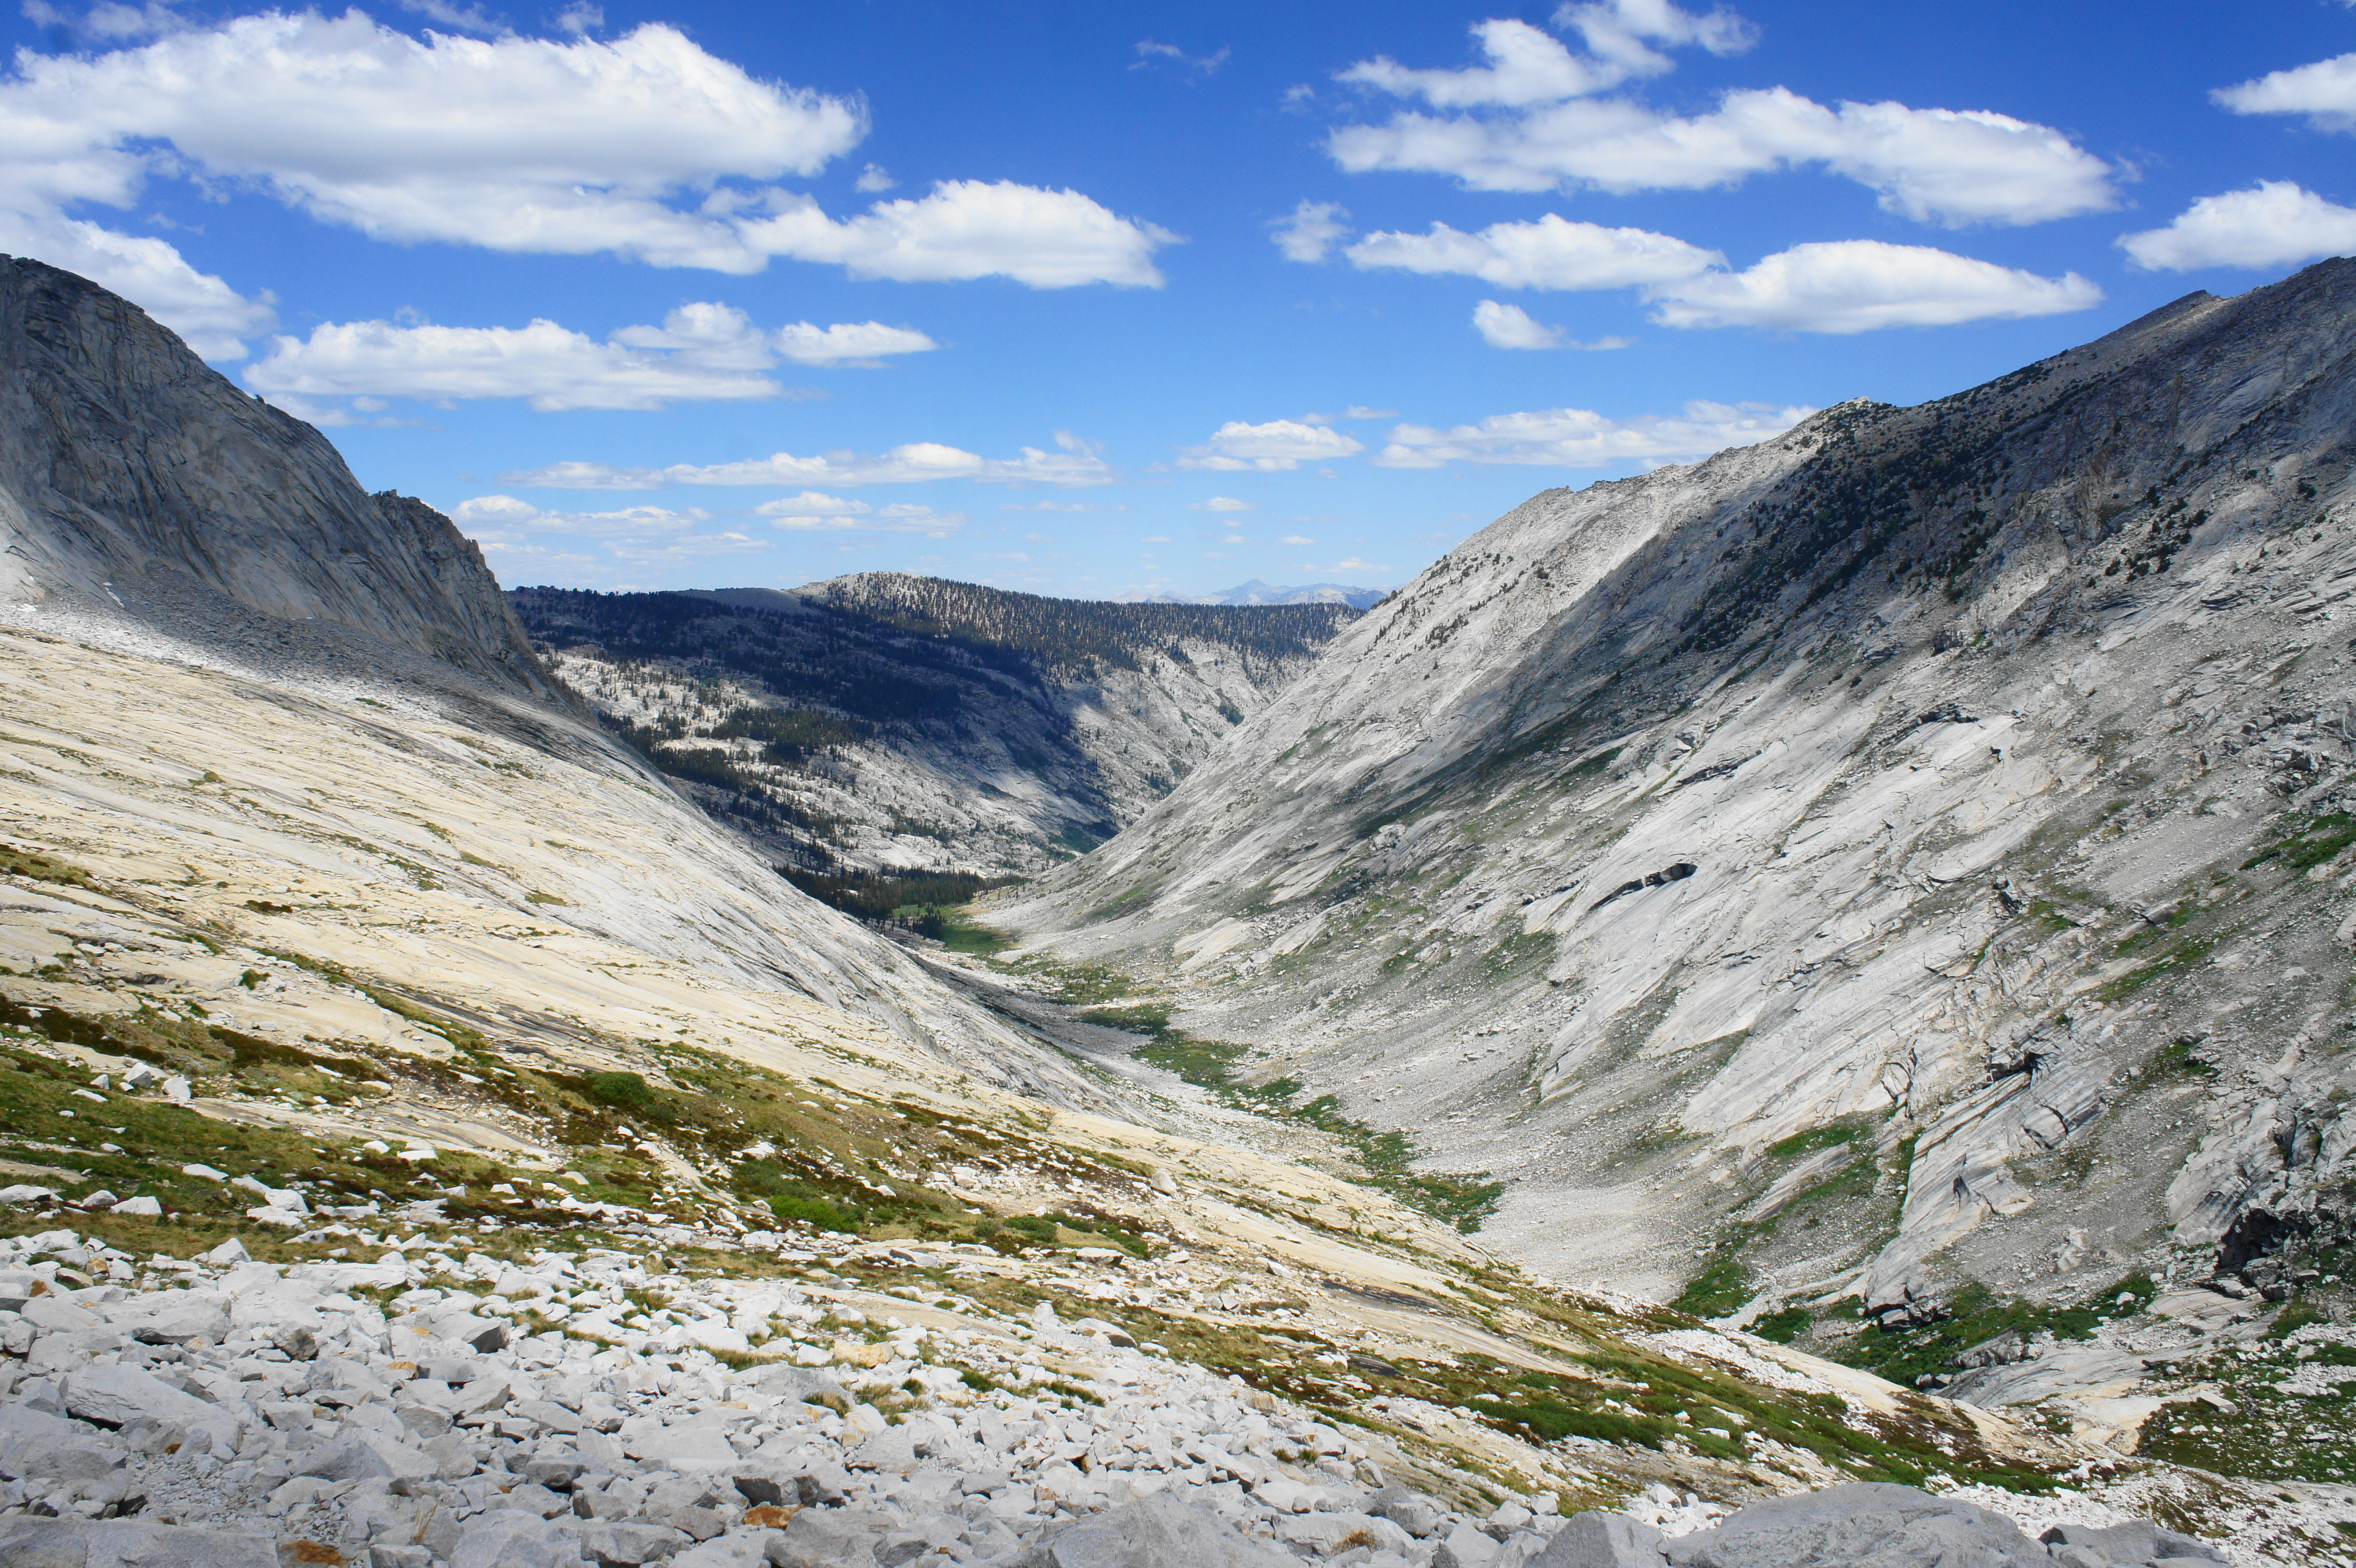
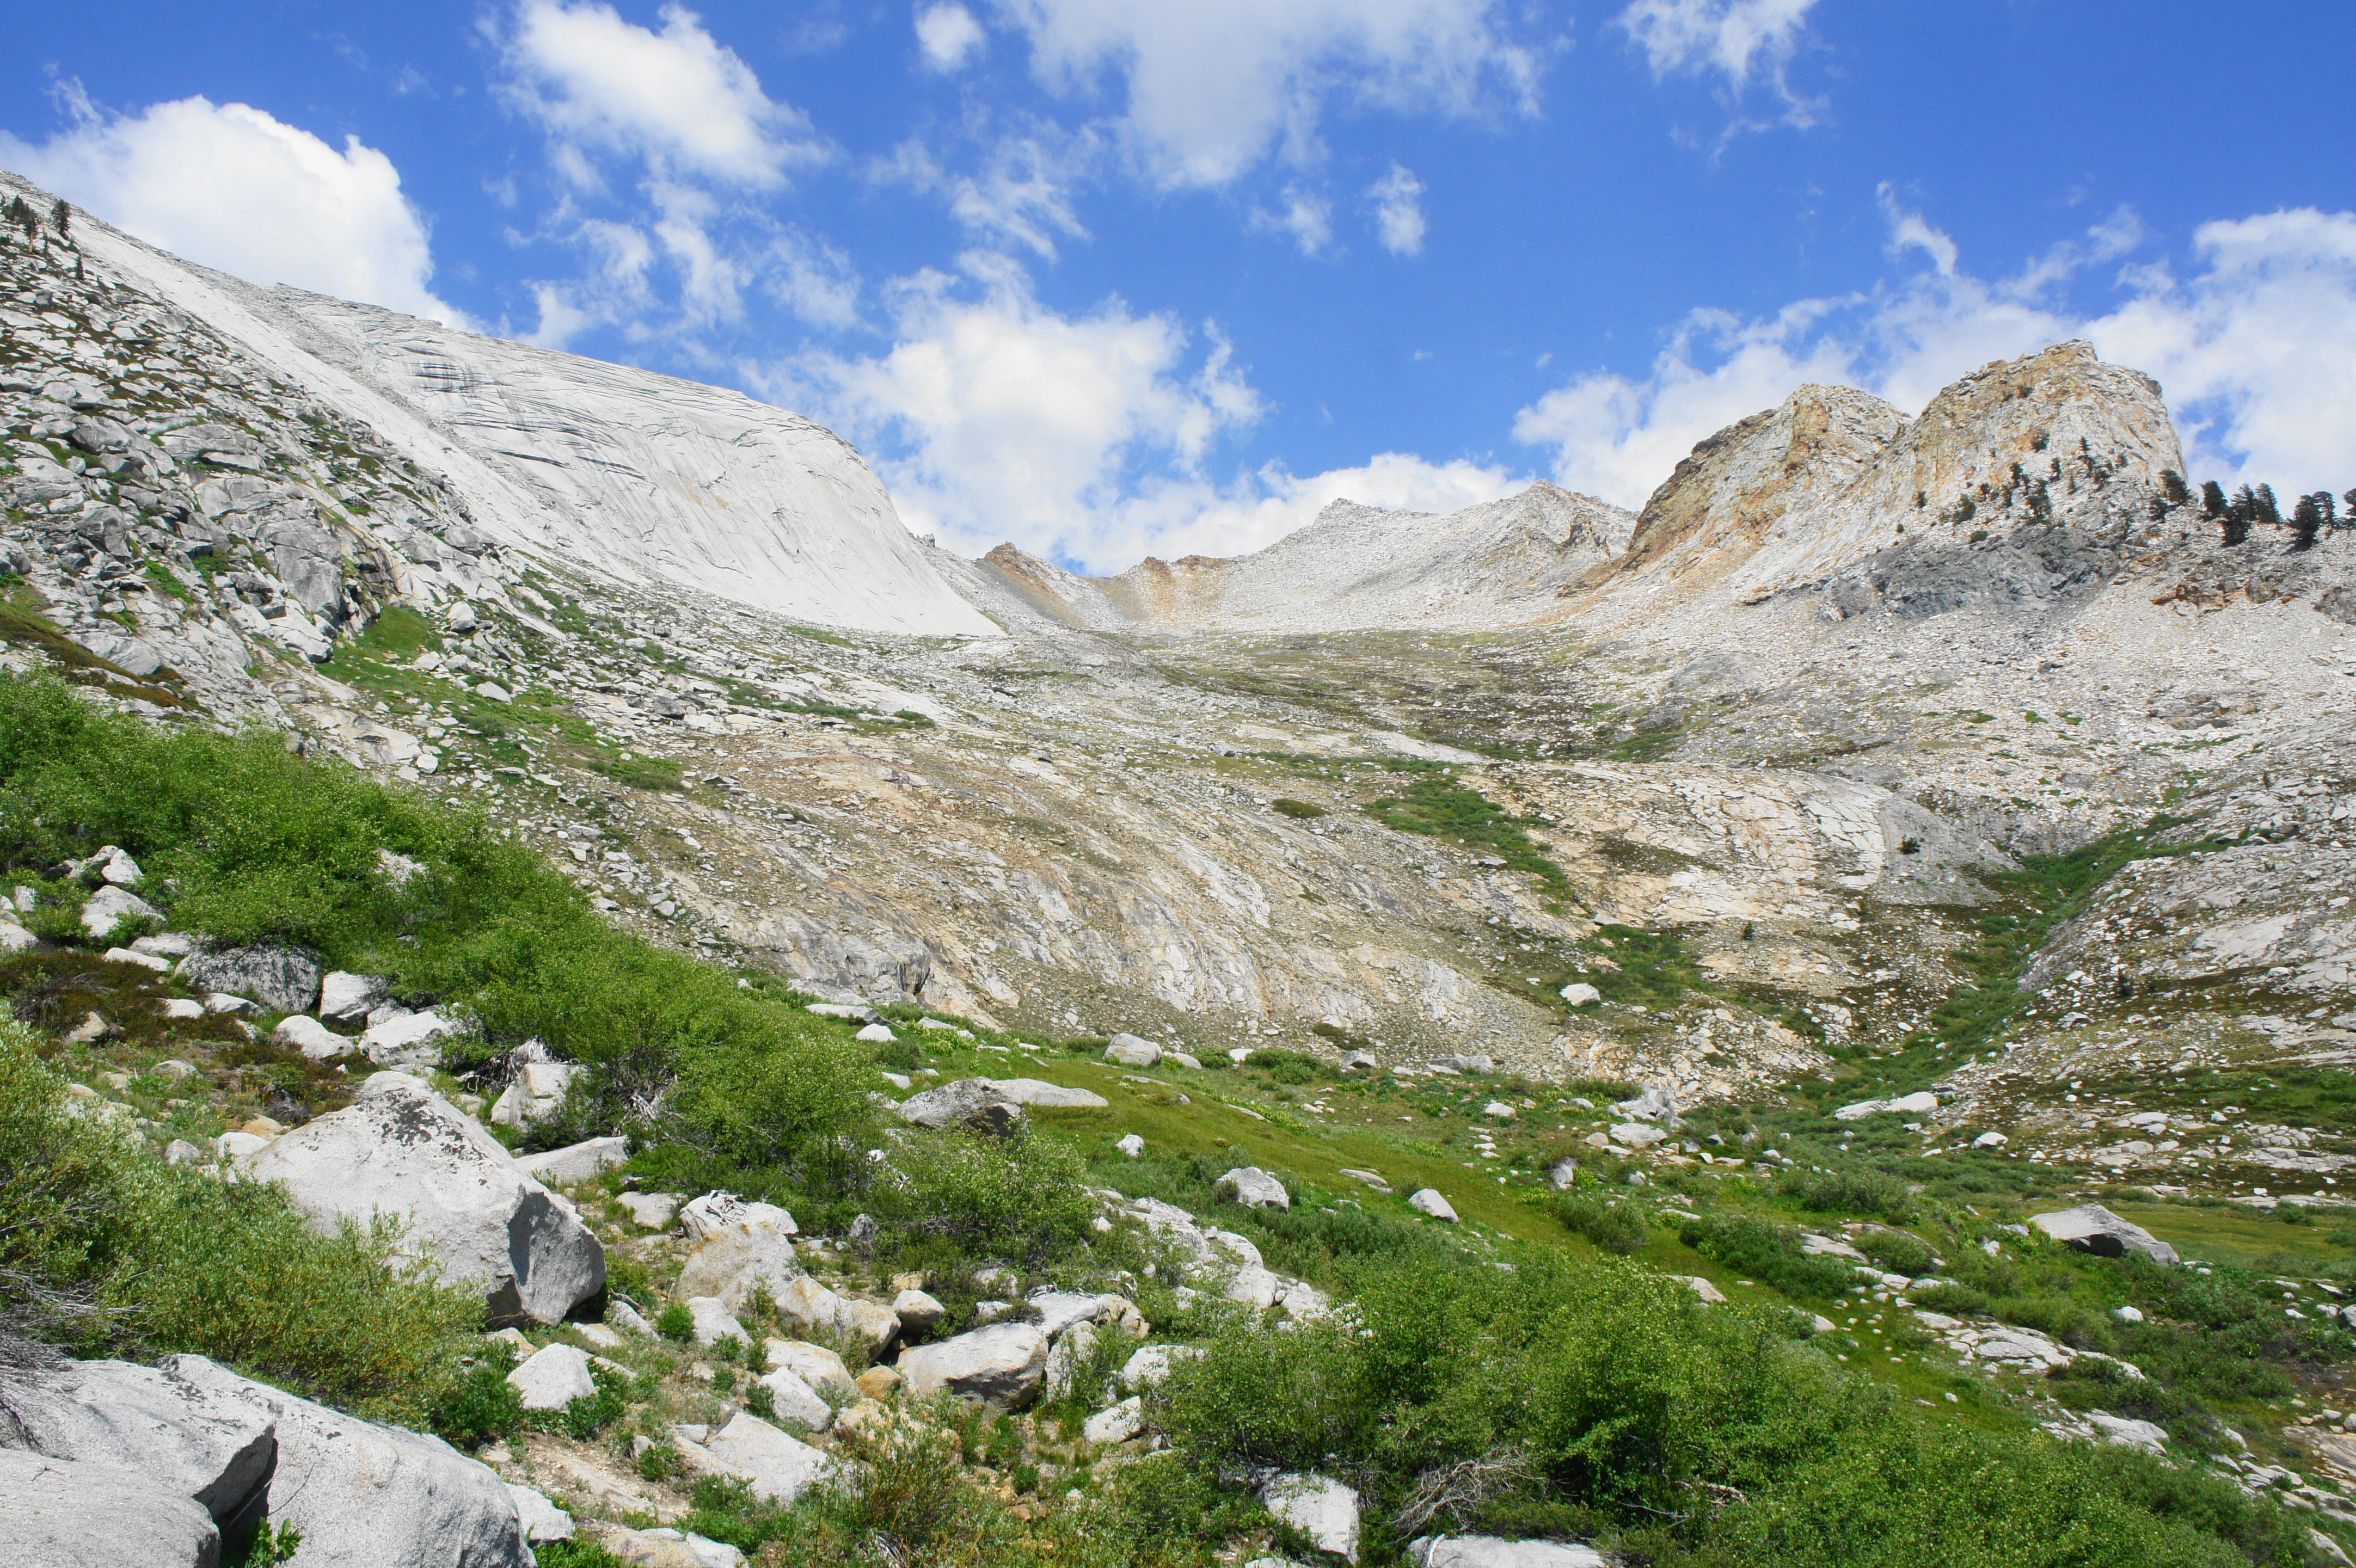
The morning begins in Upper Deadman Canyon, where the sun takes awhile to shine over the U-shaped valley, blocked by the high peaks of Glacier Ridge to the east. Eventually the shadows recede as hikers make their way up into the alpine bowl nestled in the Kings-Kaweah Divide. With the flowing waters of Deadman Creek off to the right, the path leaves the woods behind and traverses a pair of rock fields, followed by a bustling meadow that is a favorite of cheeping marmots.
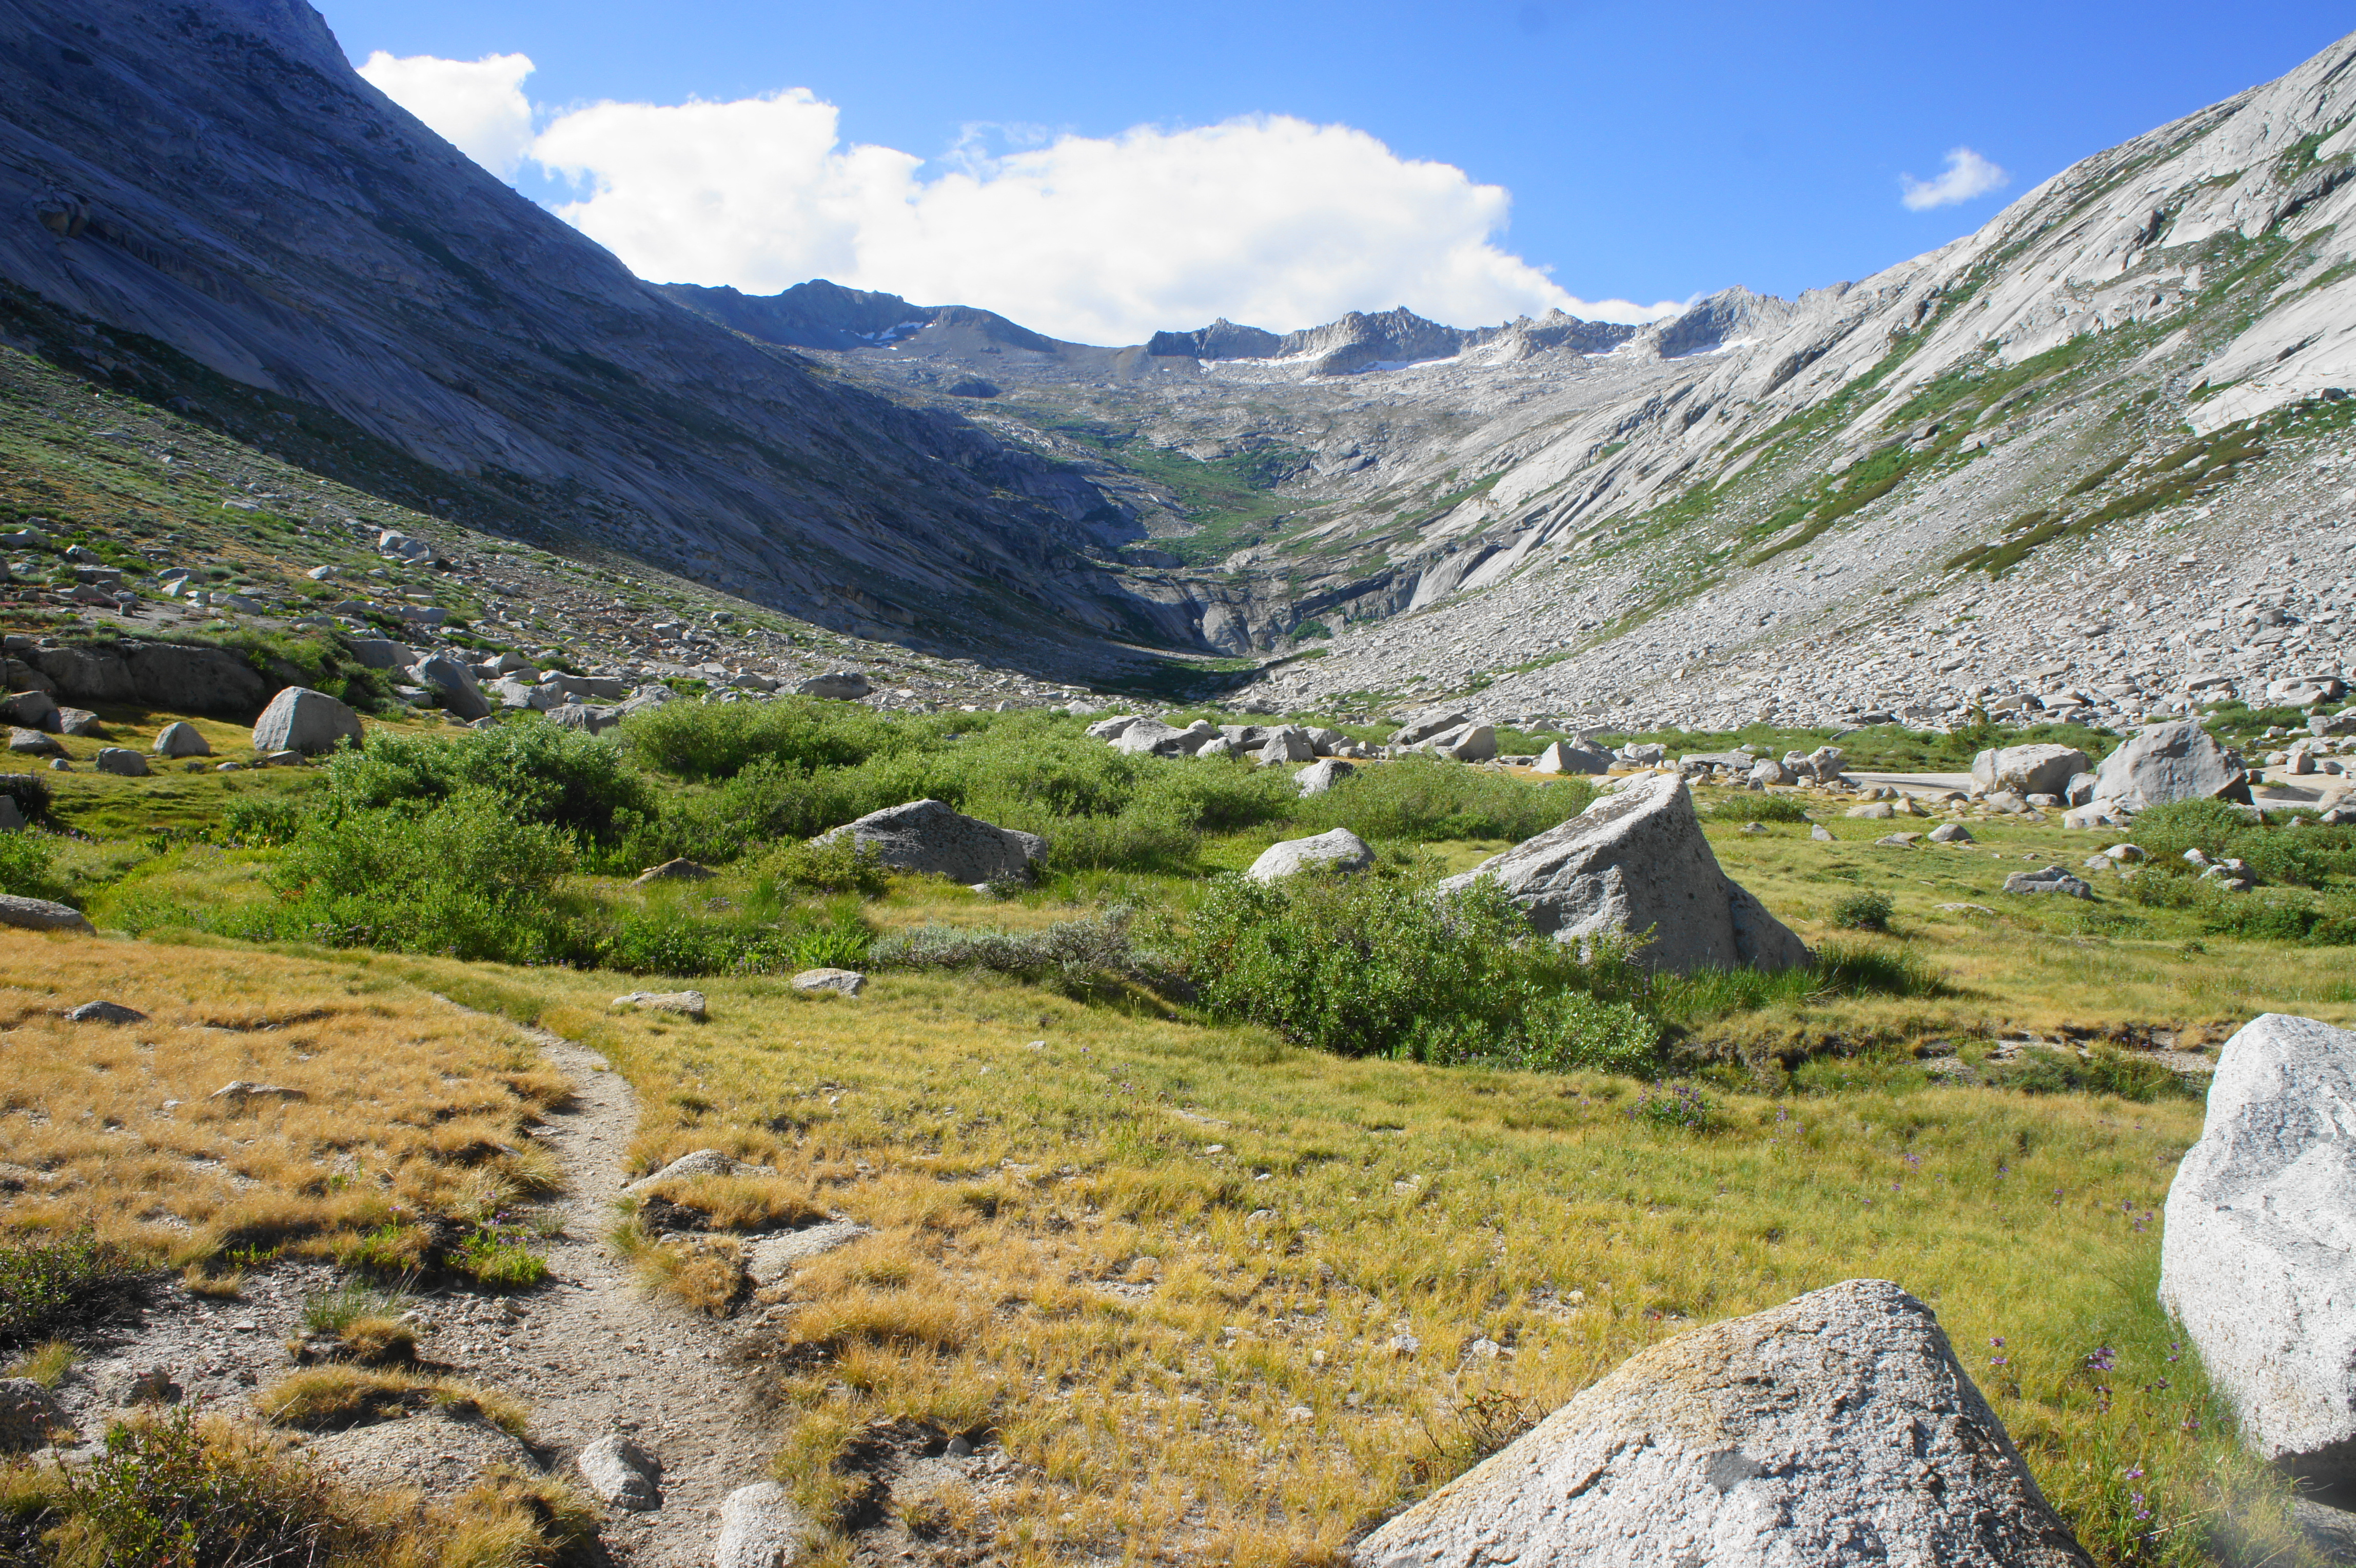
Gradually gaining ground, the narrow single-track passes more open meadows with low scrub before finally starting to switchback up a west-facing slope at around 1.6 miles. Ahead, the trail moves toward what looks at first like an impenetrable funnel of granite. By 1.8 miles, however, it becomes clear that there is a small, brushy notch on the left flank of the canyon bowl that offers onward passage. This section is no joke, however, boasting perhaps the hike’s steepest stairstep climbs, made more difficult by melting snowmelt and muddy puddles. Take your time with this section, eventually emerging above the notch and onto a shelf with excellent views looking back down canyon.
From here it is a short walk to the final crossing of Deadman Creek, just above a 200-foot cascade. Take a break here to catch your breath before readying for the slow and somewhat monotonous ascent through a chalky boulder field, constituting much of the remaining ascent to Elizabeth Pass.
The ascent continues steadily, skirting the scrubby tundra with good views east to Copper Mine Pass (12,345’), one of the taller peaks in the area. By about 2.5 miles on the day, hikers have already gained more than 1,200 feet, a welcome thought that makes the subsequent switchbacks slightly easier.
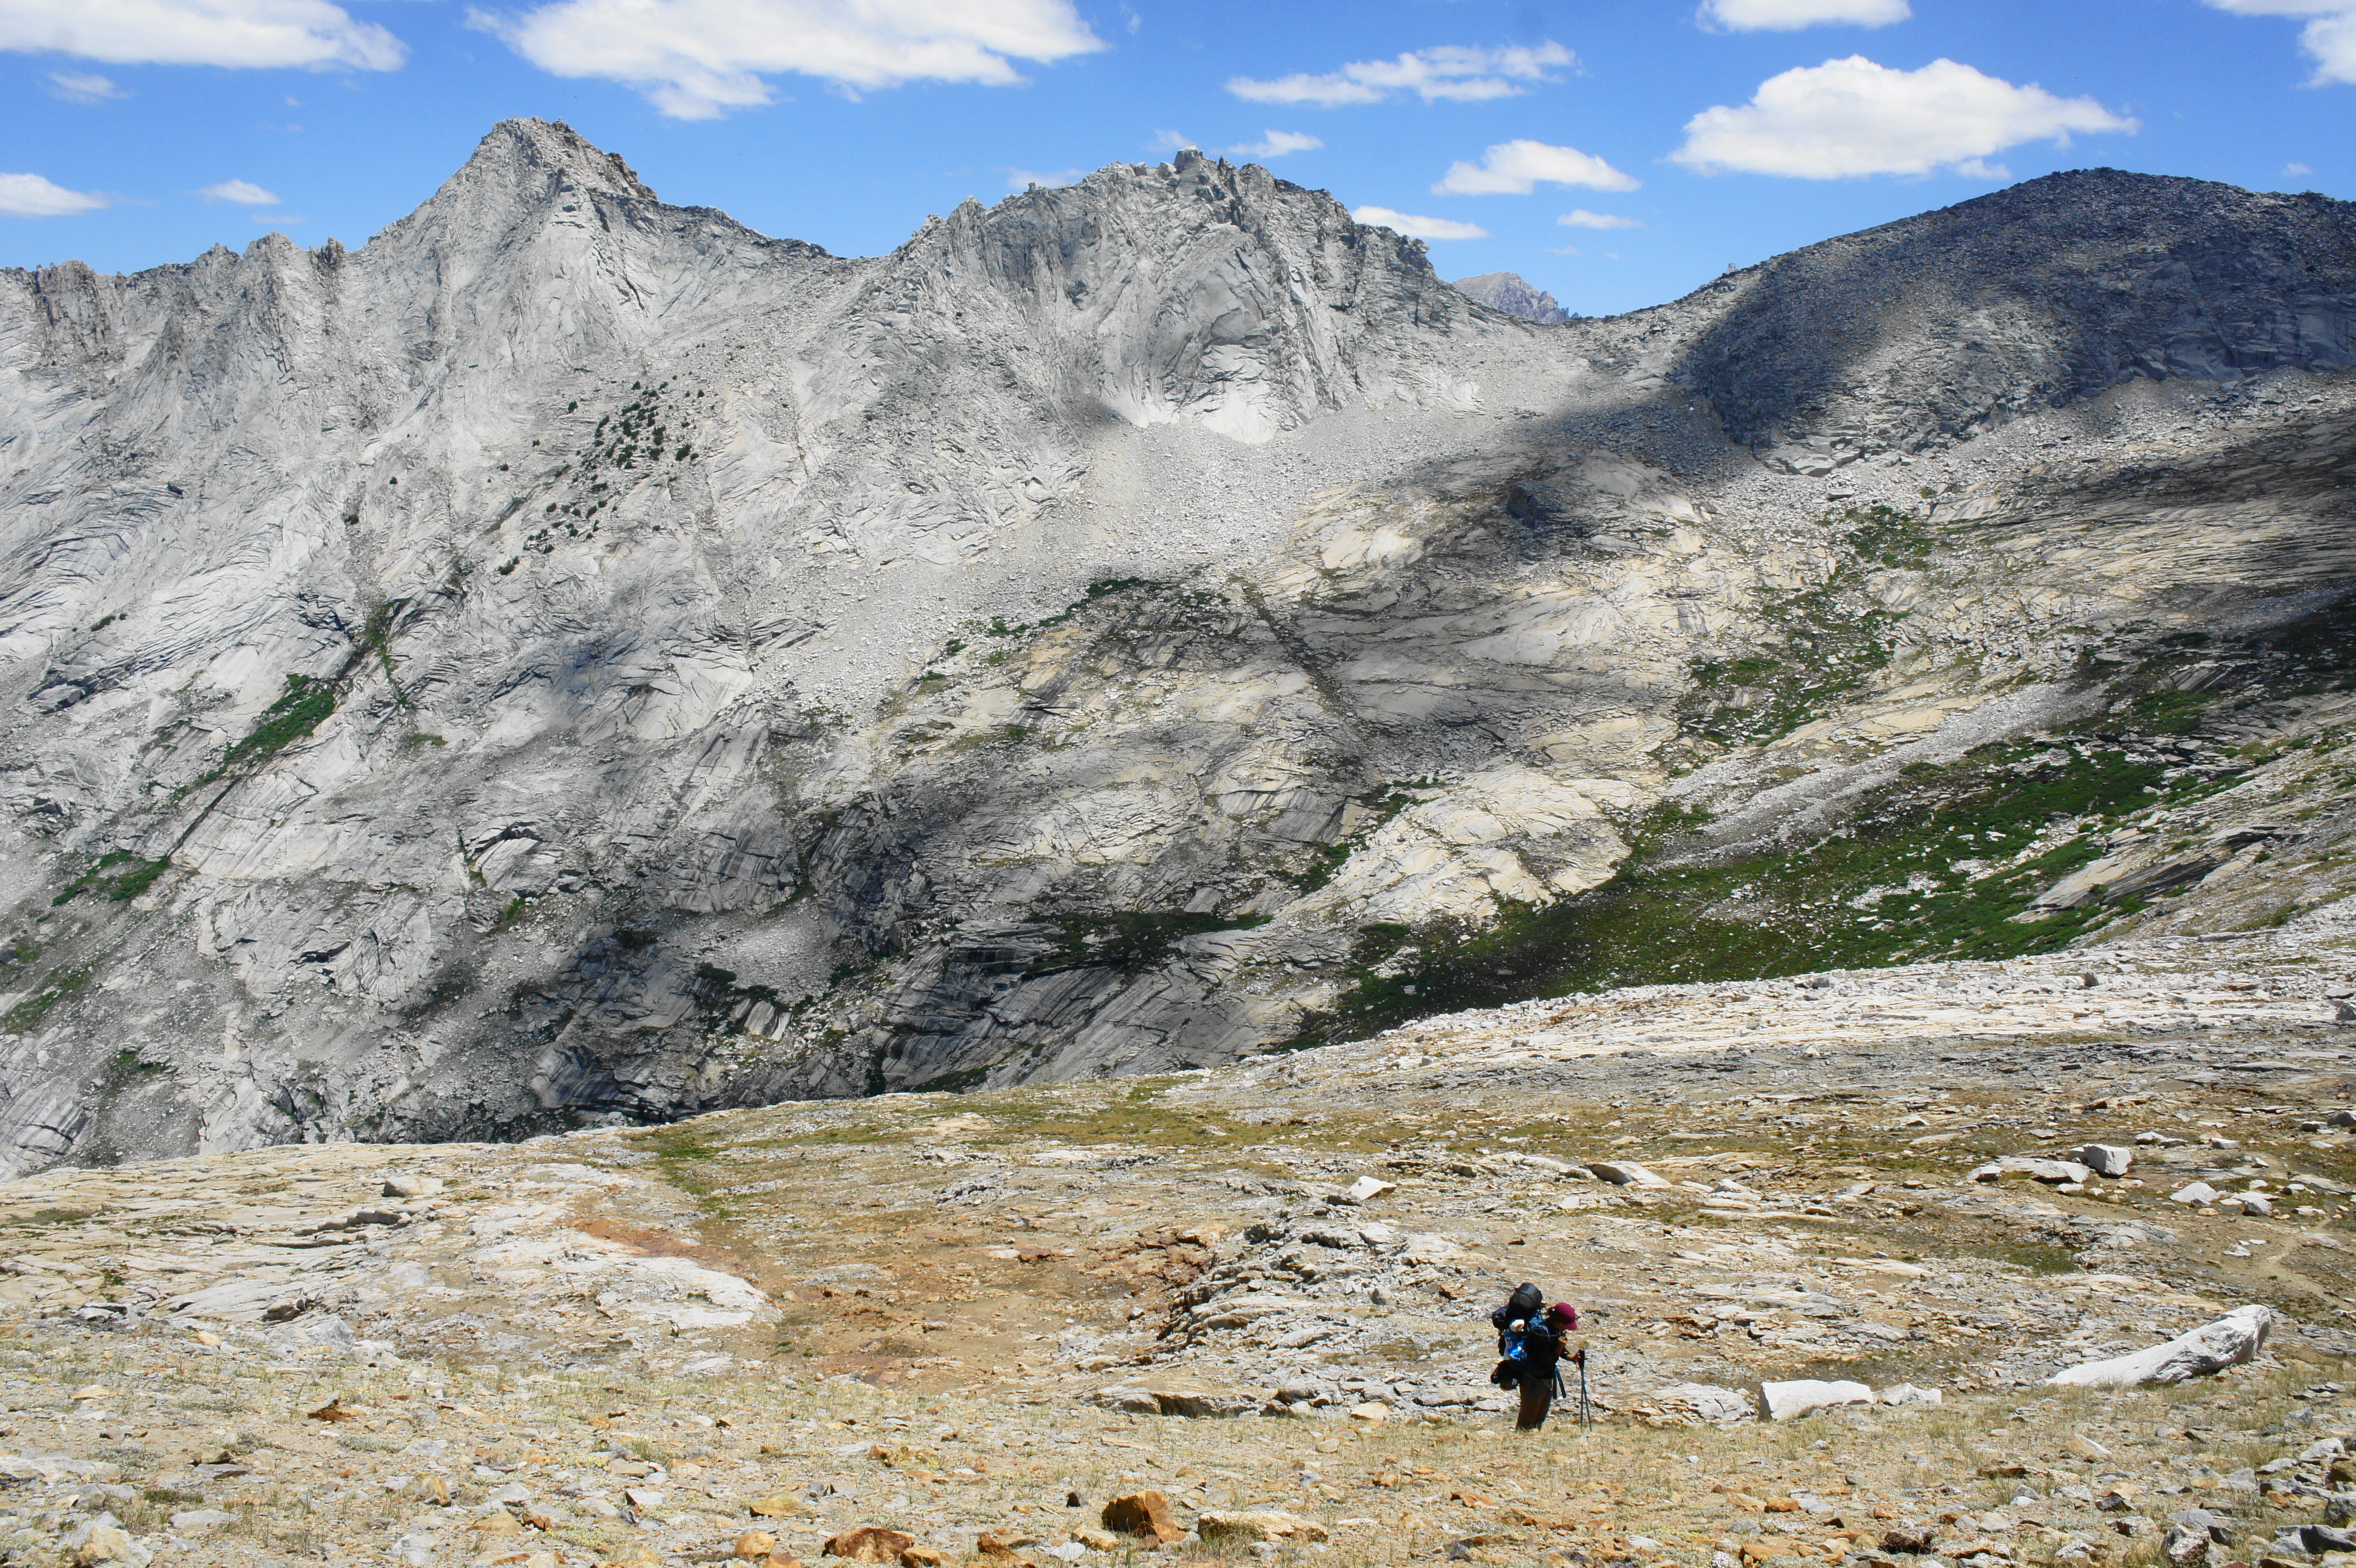
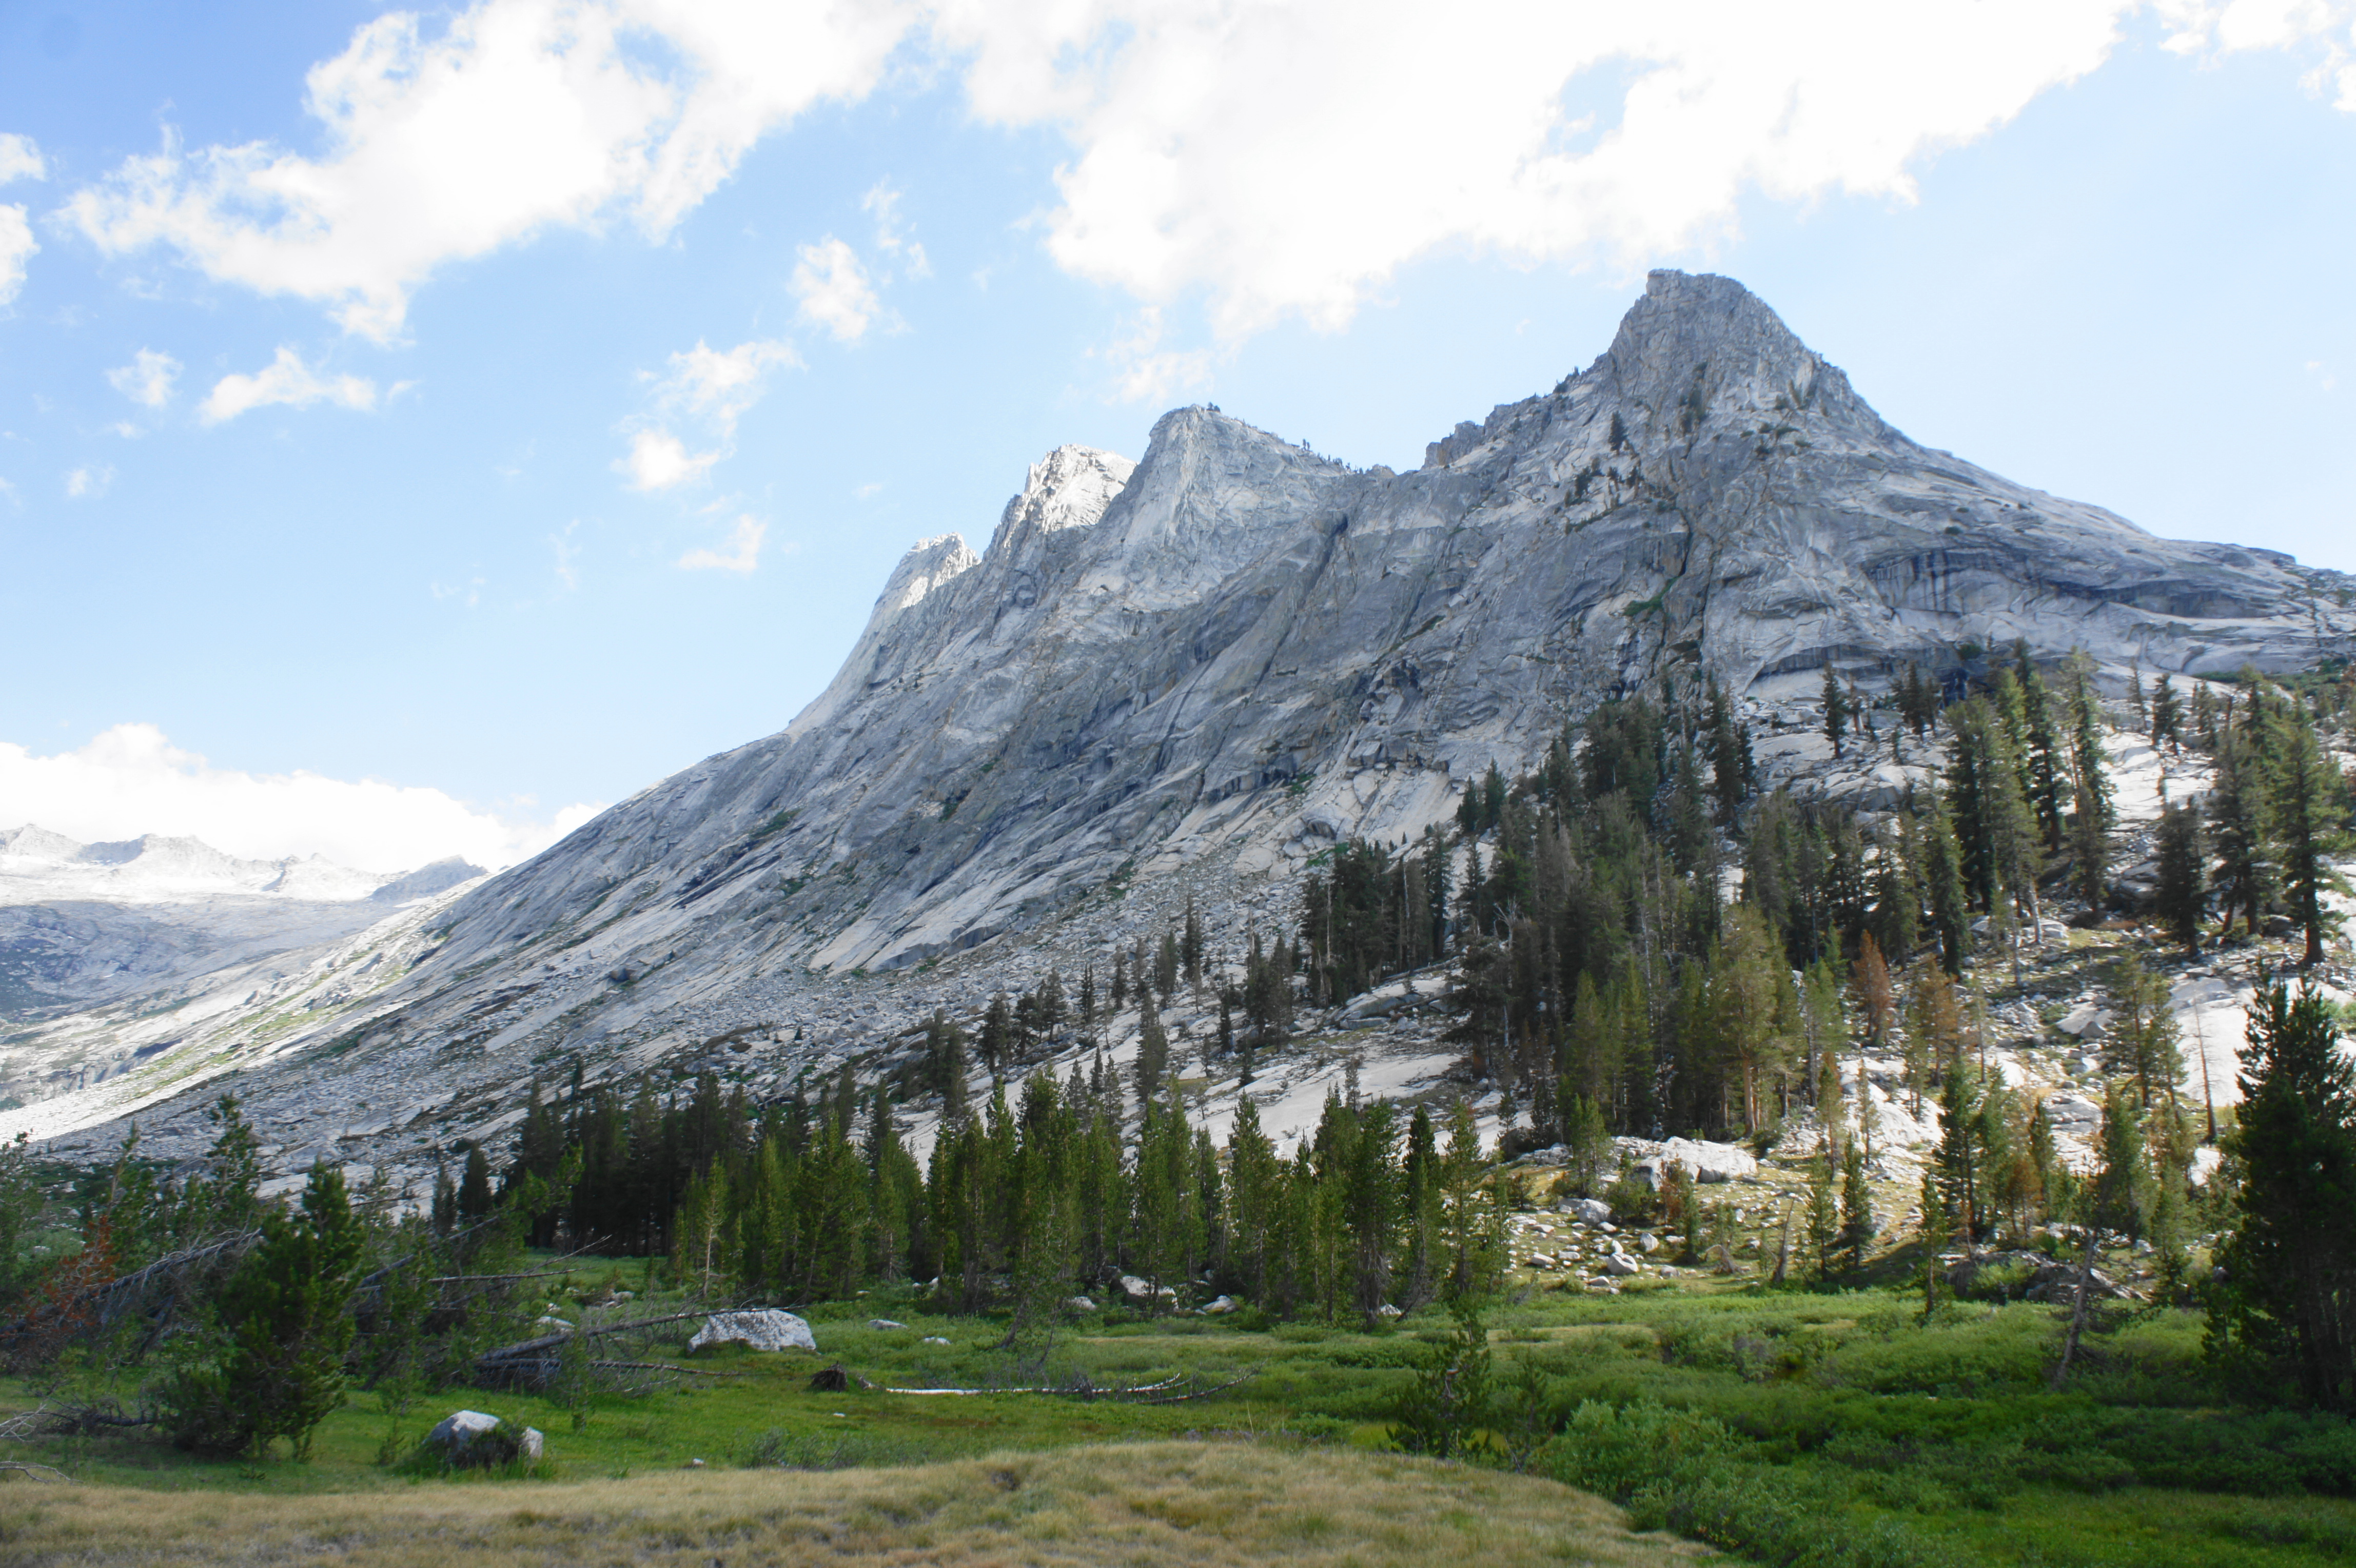
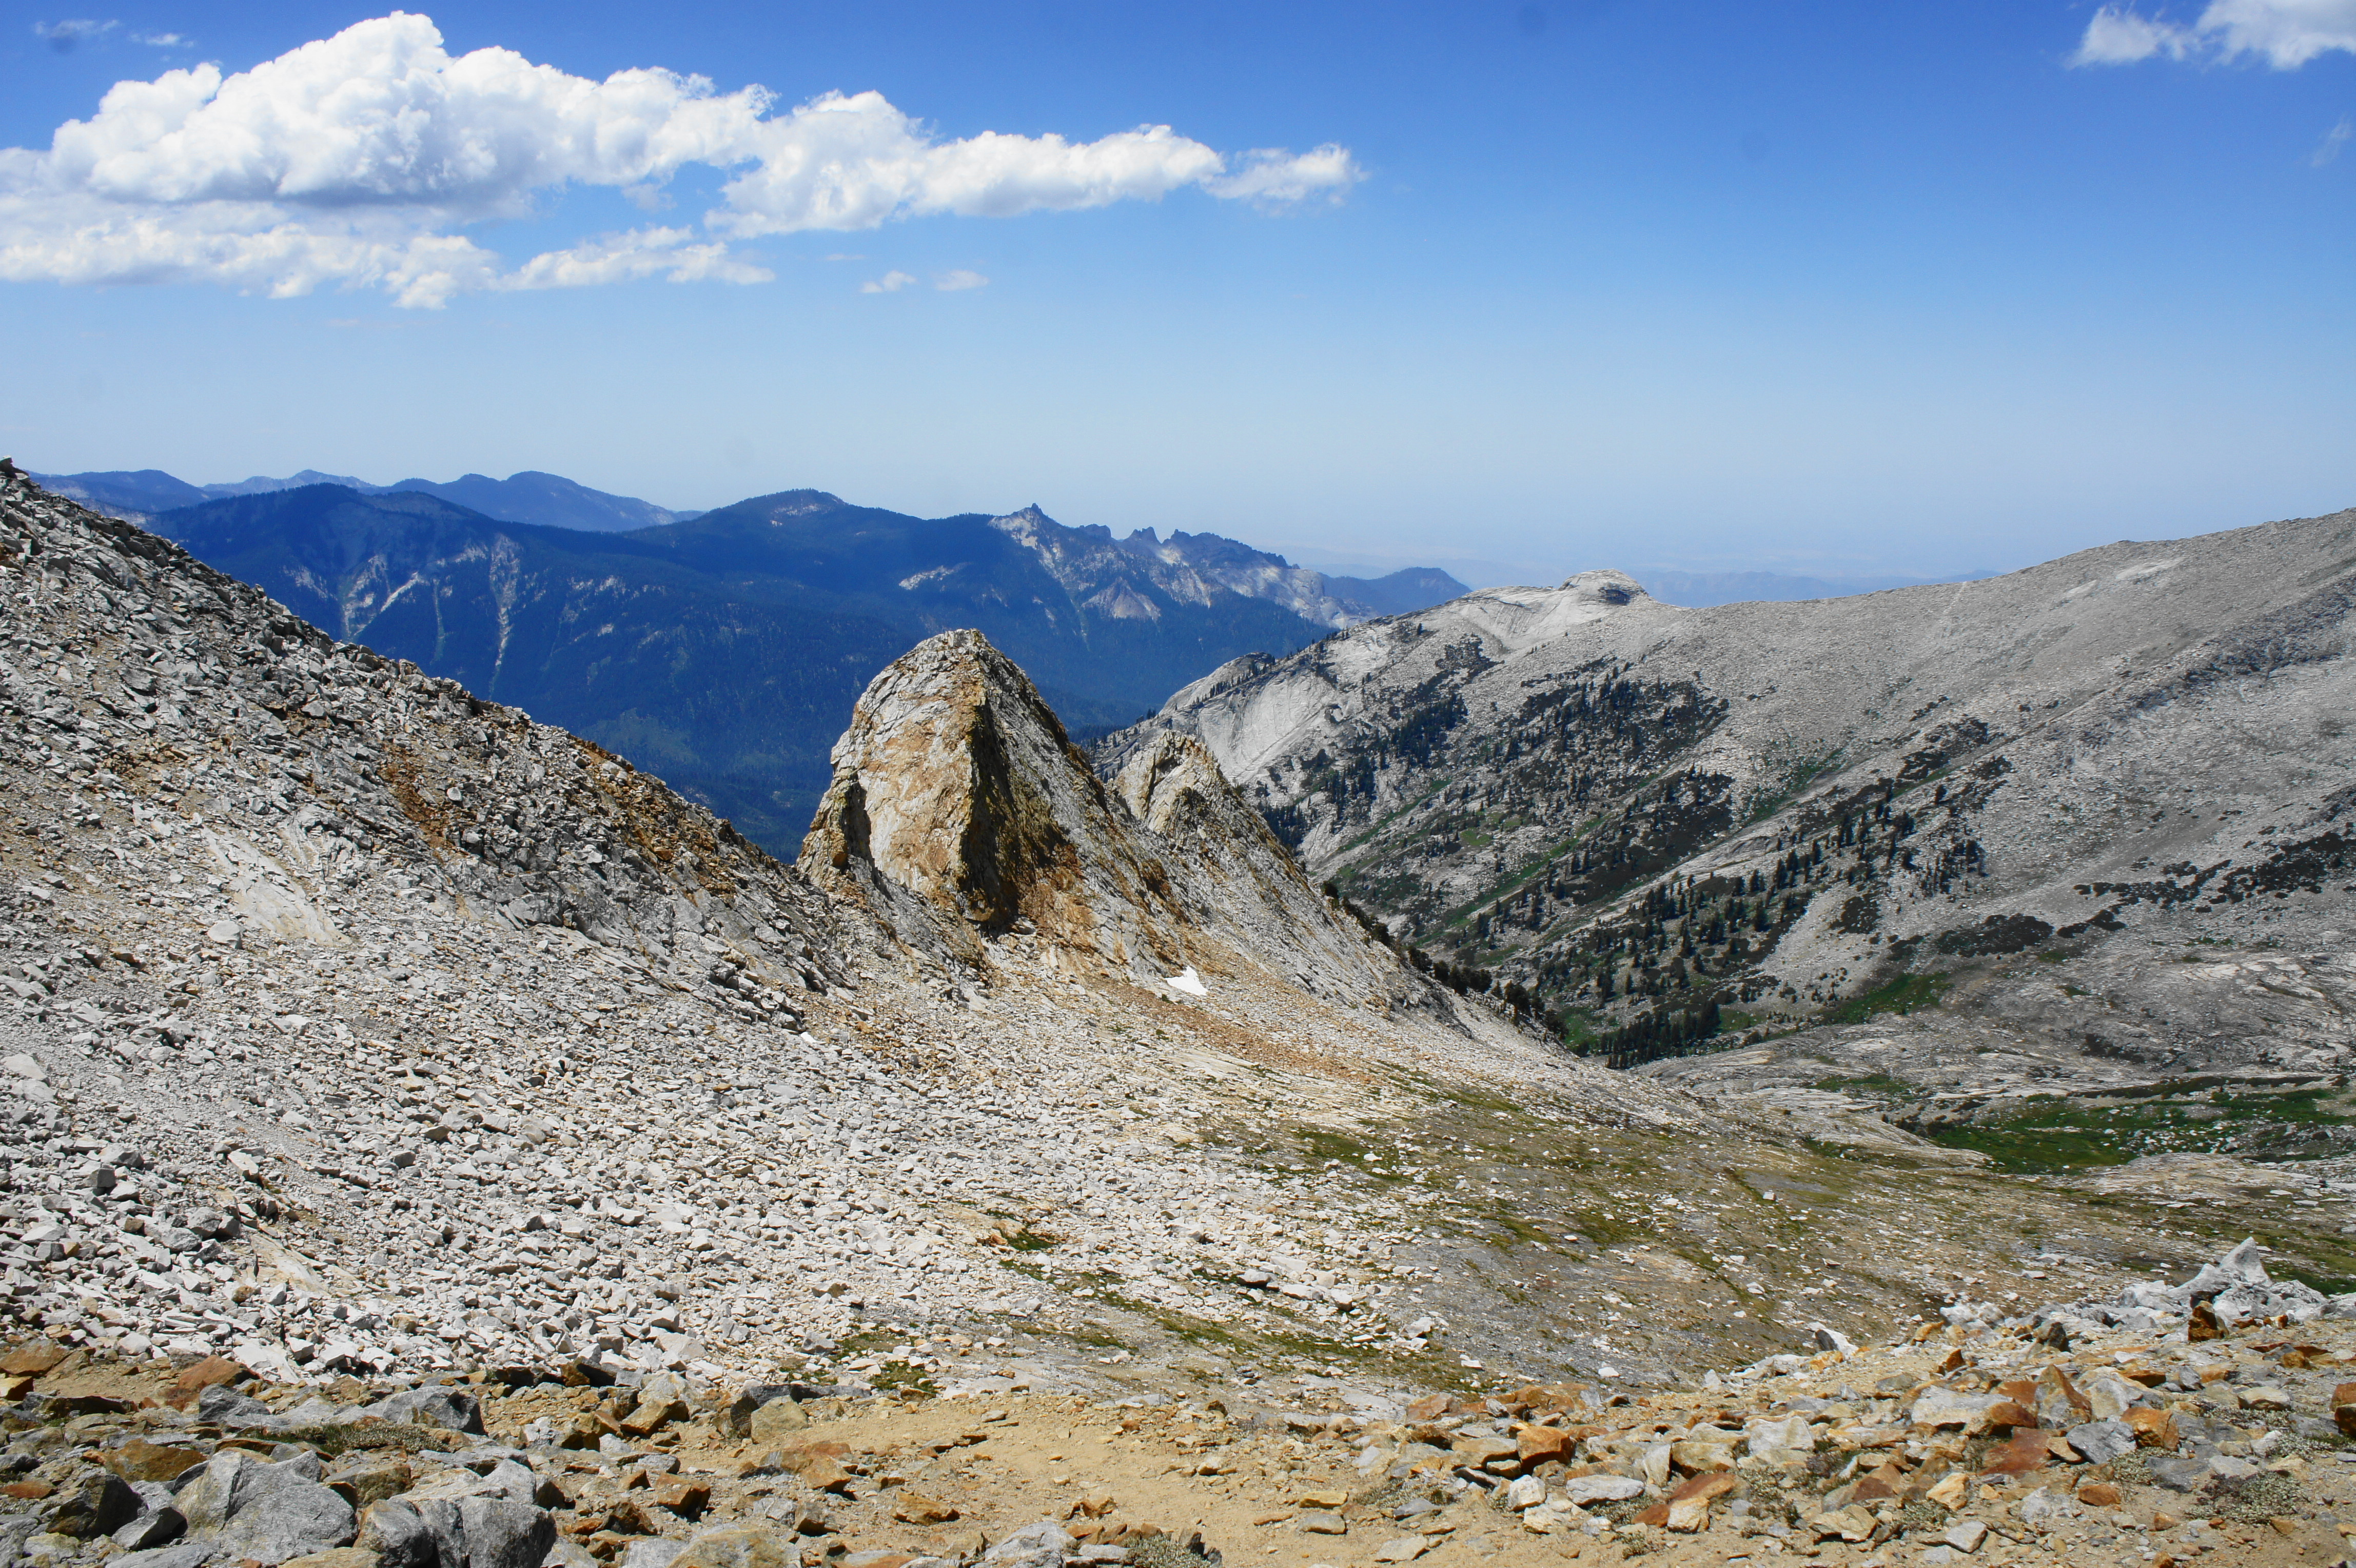
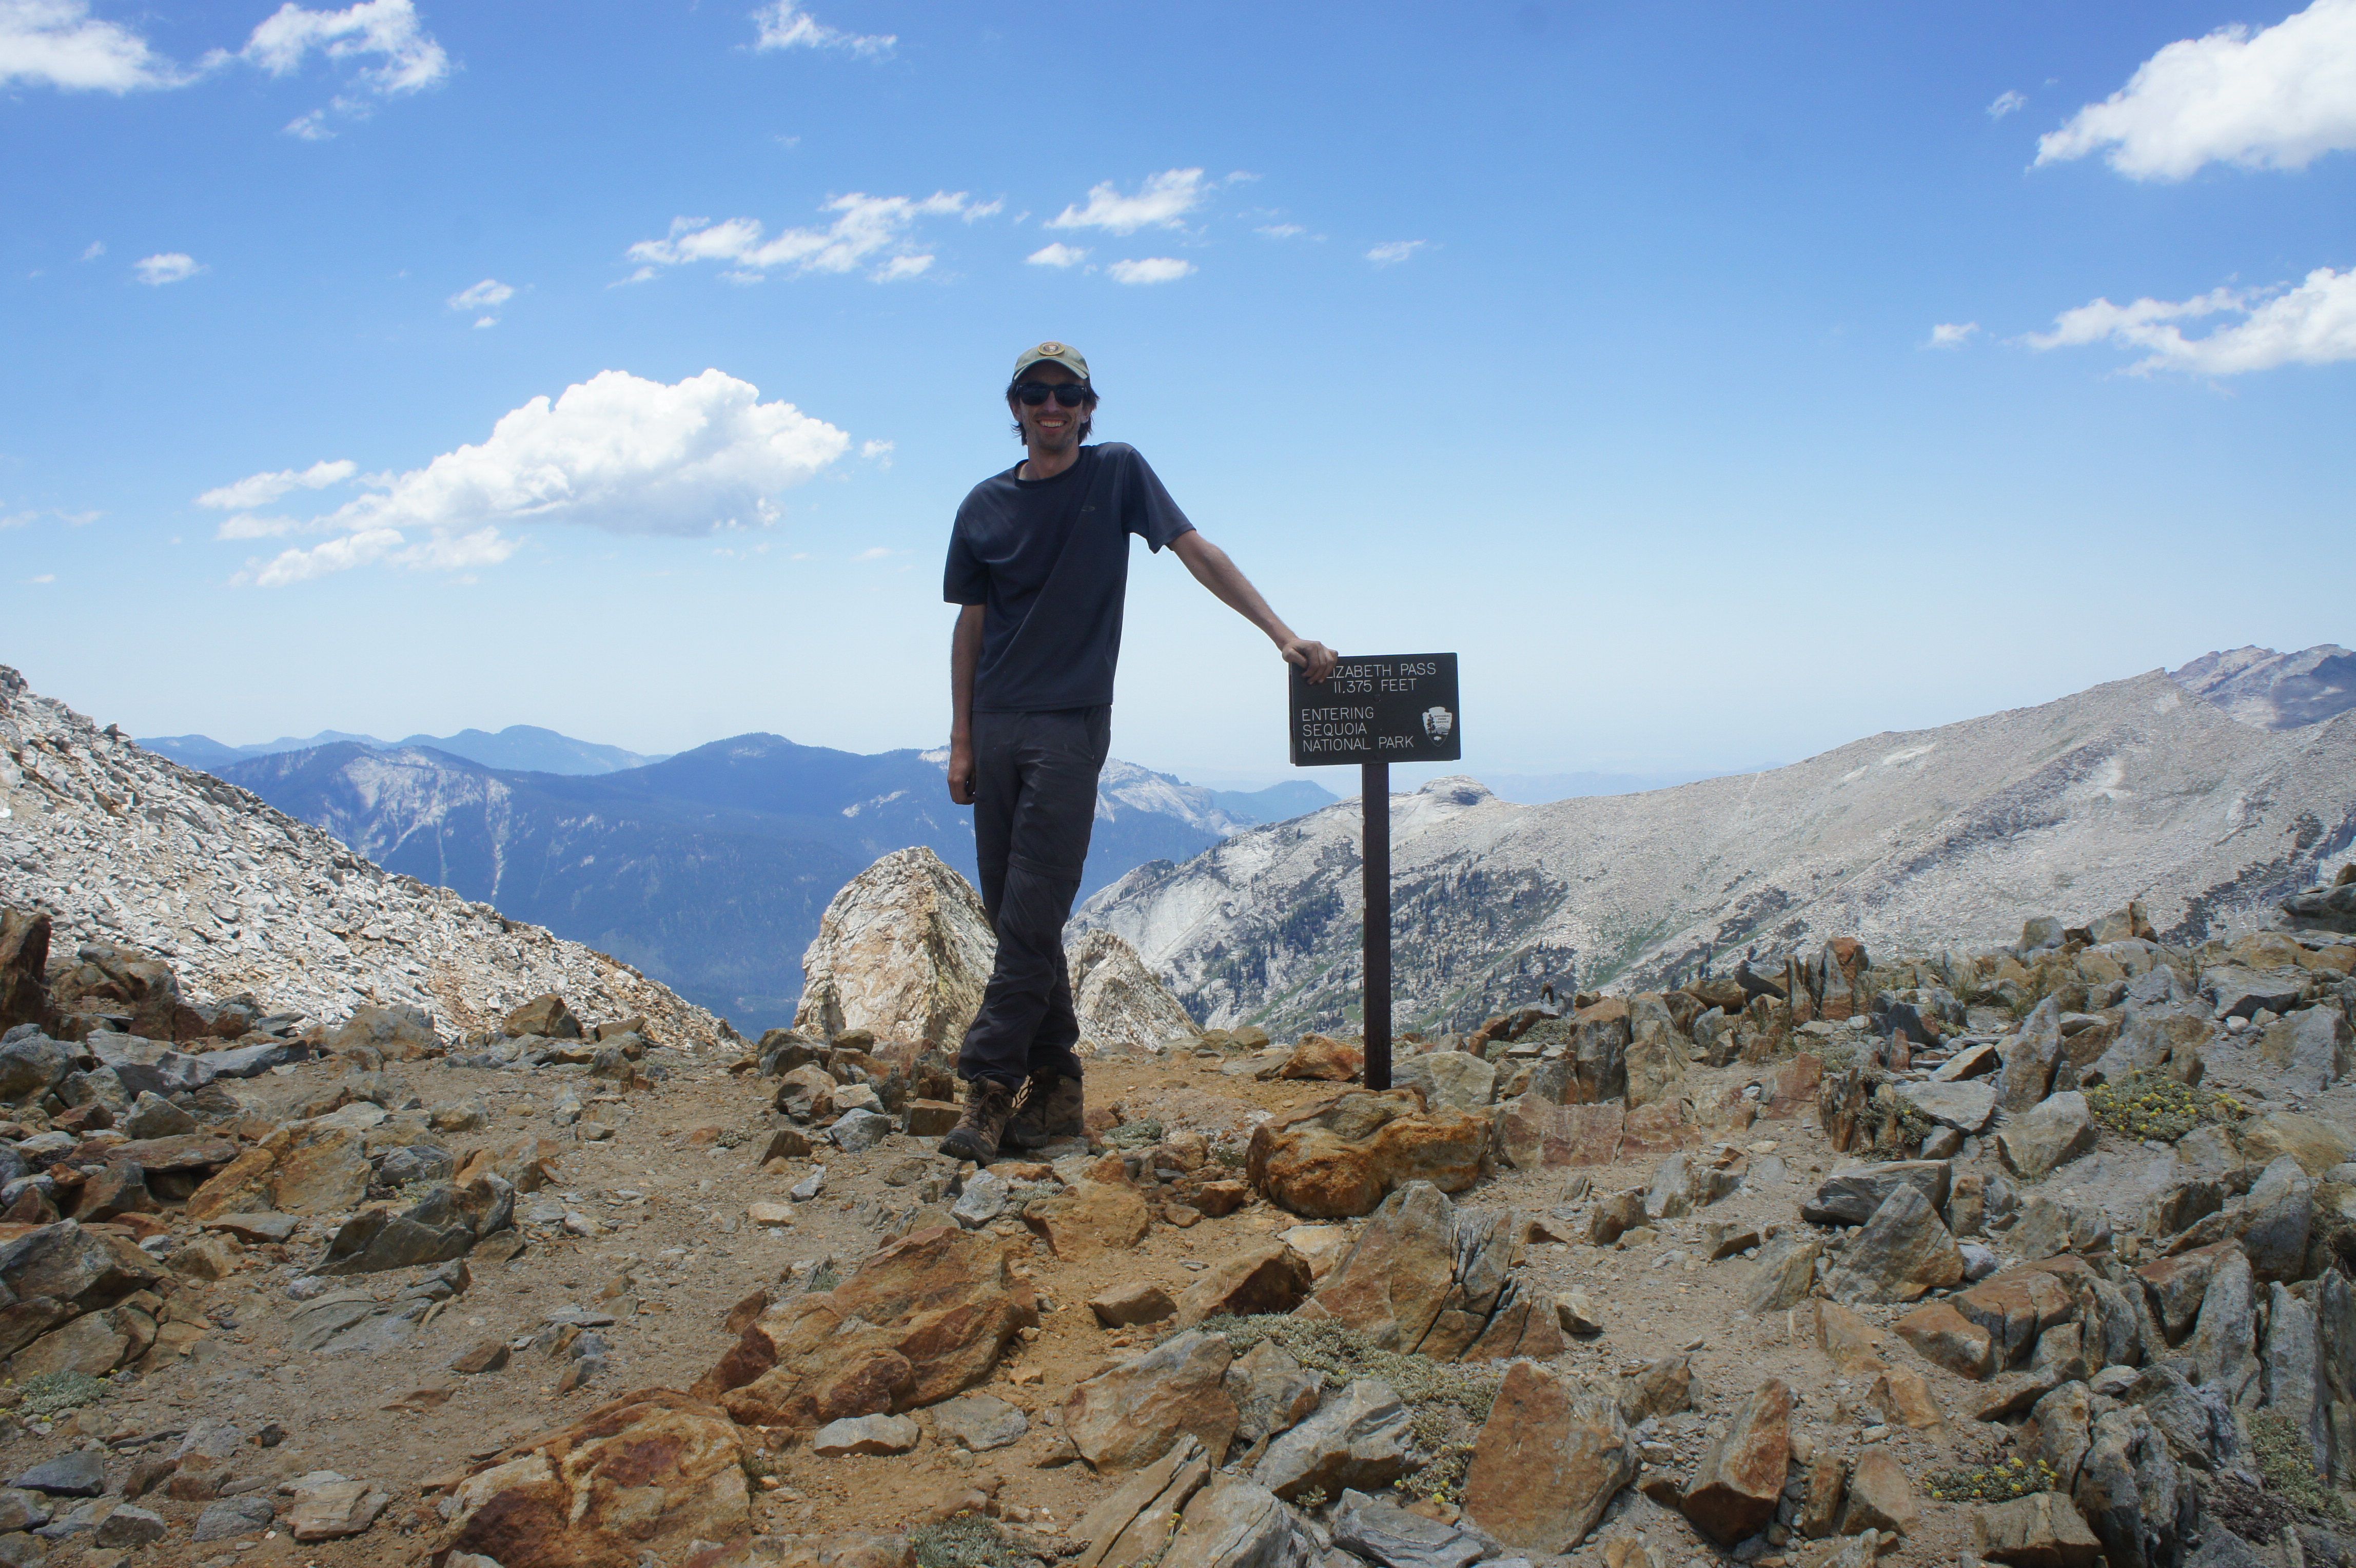
As hikers enter the desolate boulder field, the trail underfoot is packed with chunky gravel stones, which serve to stabilize the trail but make for awkward footing. The next mile requires seemingly endless, long switchbacks, before finally the trail crests a slope and the notch of Elizabeth Pass comes into view. After skirting a perched outcrop with large, iron-tinged blocks, the trail briefly levels off before embarking on the final, brutal ascent to Elizabeth Pass. One short section reaches a very arduous grade, after which a quartet of switchbacks leads at last over the crest of the pass, nearly 11,400 feet above sea level and more than 2,000 feet above the canyon floor.
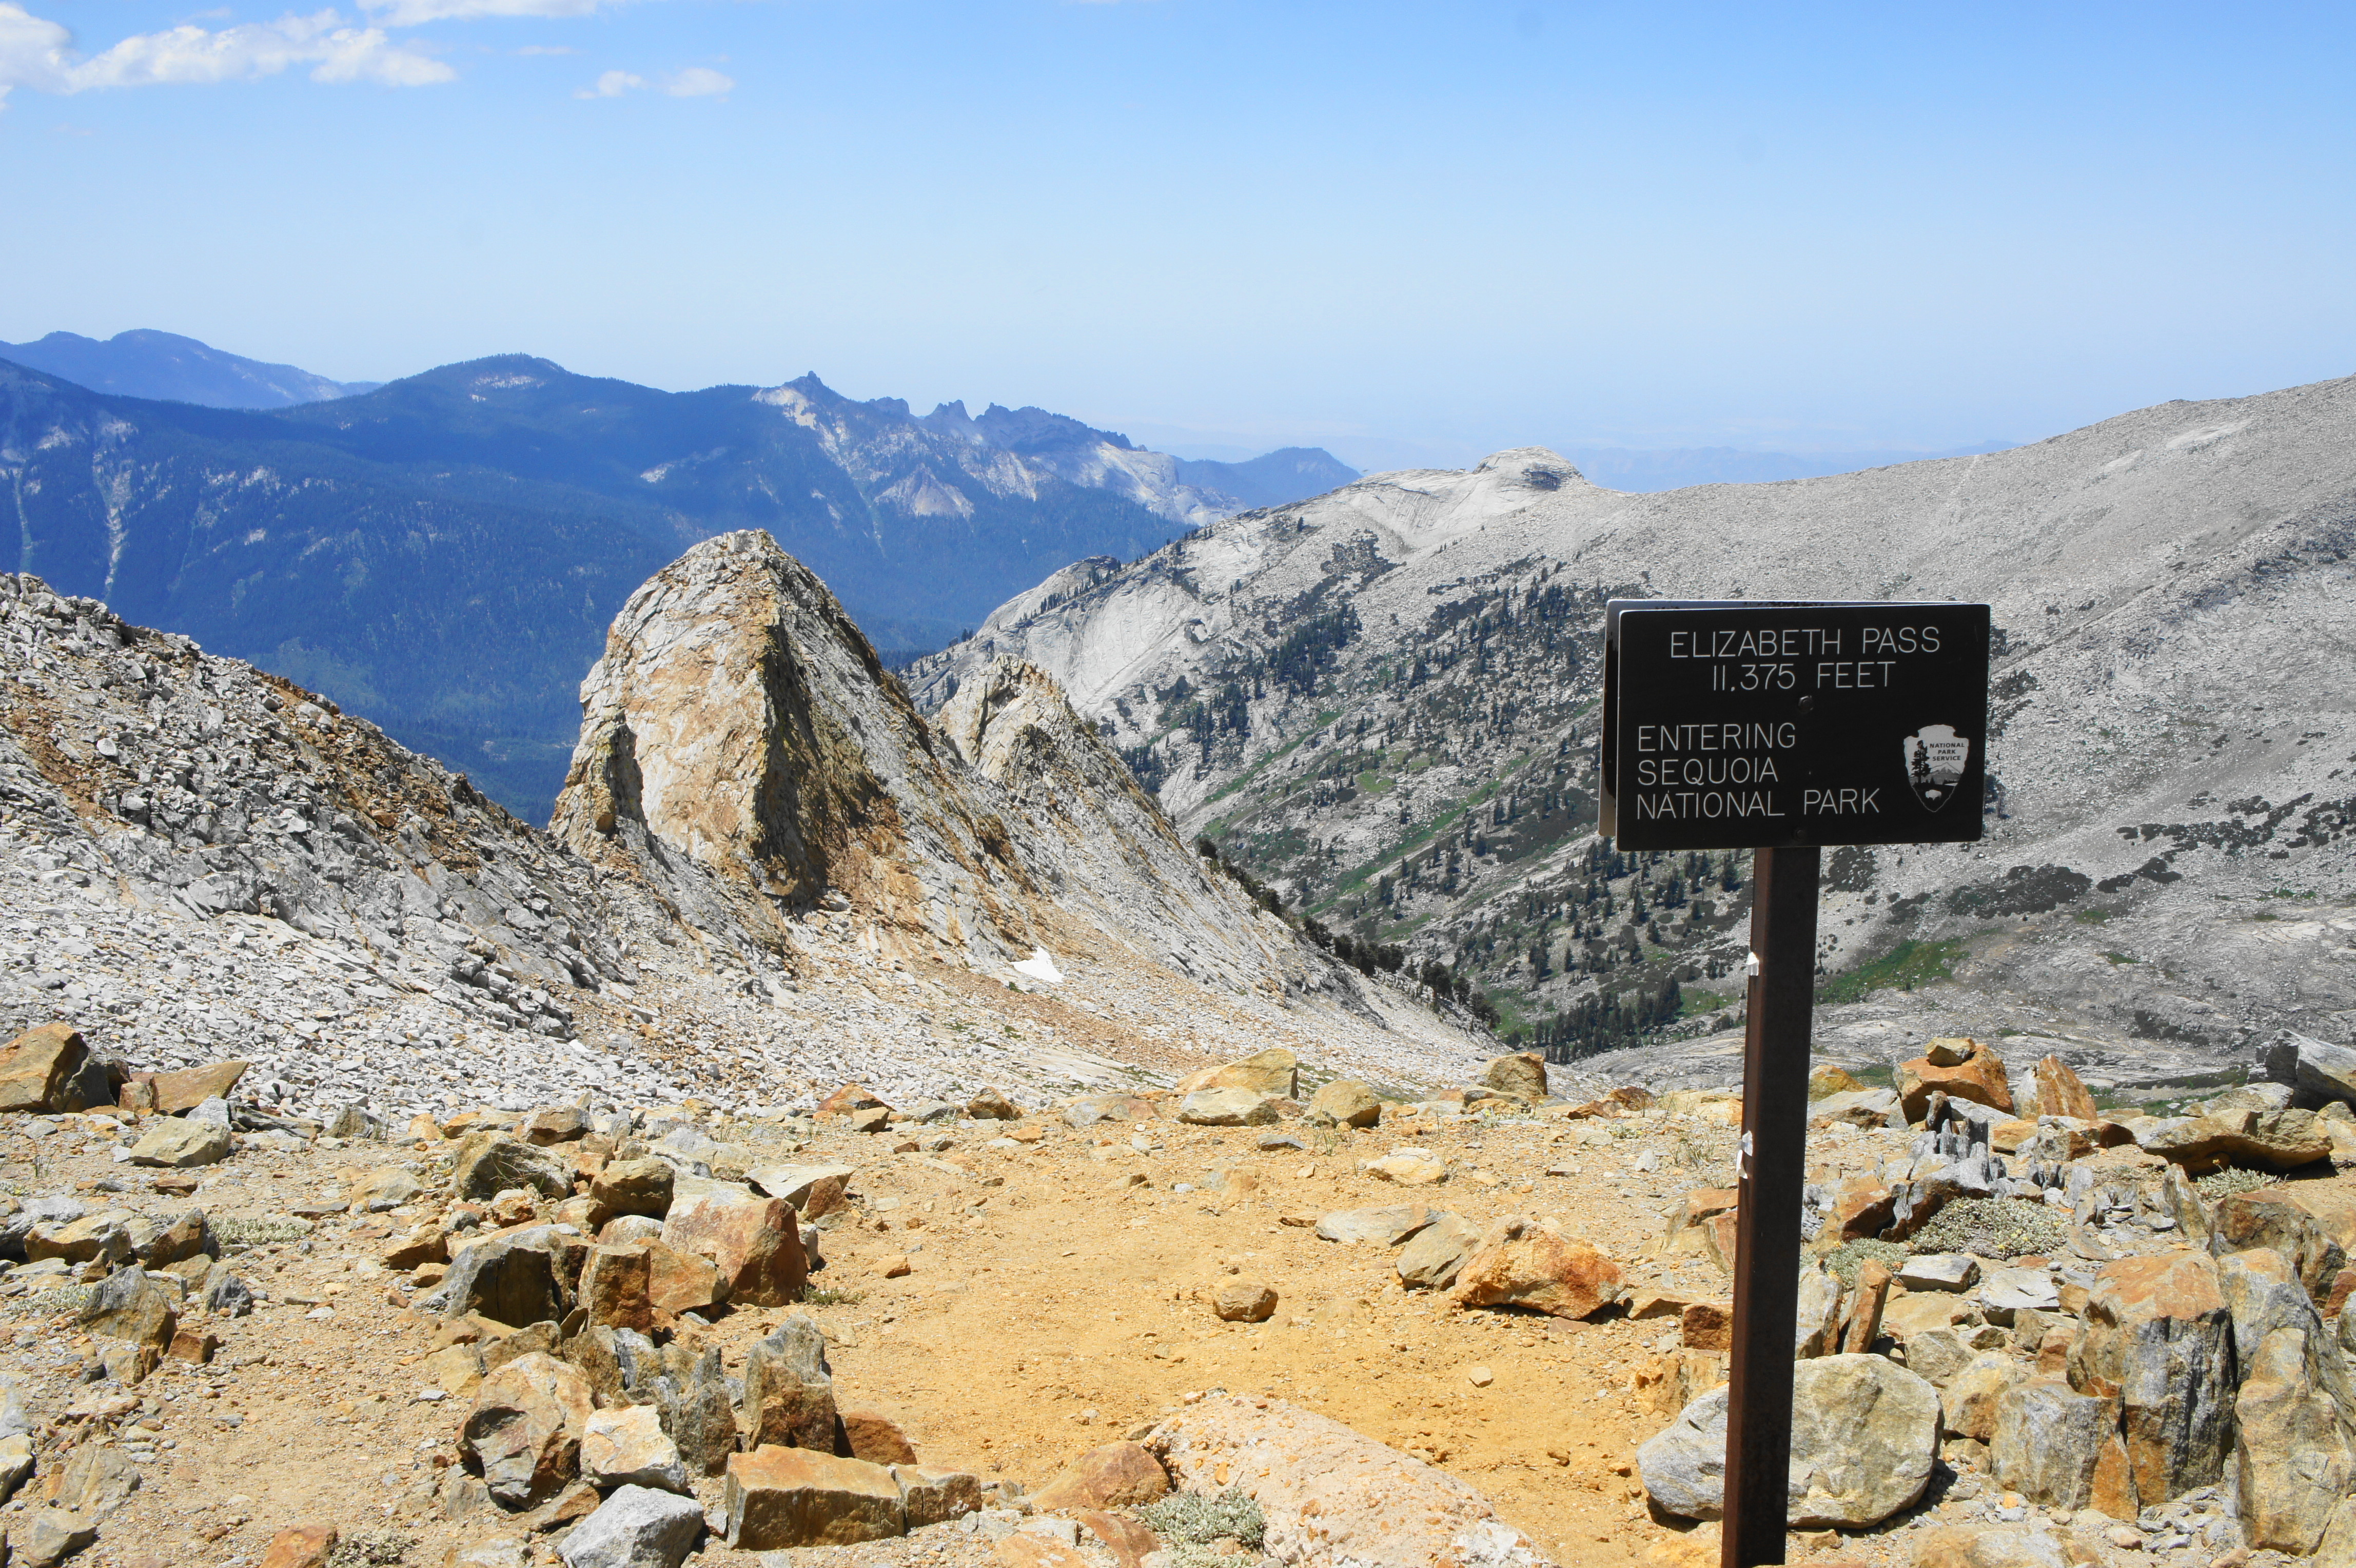
The views from Elizabeth Pass, though well bounded by the high crags to the north and south, are nonetheless still excellent. Looking back down Deadman Canyon, one can see north to the Monarch Divide and Sierra Crest of upper Kings Canyon National Park. Peering south into Sequoia National Park, the slope gives way to two towering knobs in the foreground, with the broad Kaweah River drainage and Castle Rocks beyond. Amid the gray granodiorite of the Tablelands to the west, one can make out the faint outlines of a blue lake: this is Moose Lake, accessed only by off-trail scrambling.

Yours truly at the pass 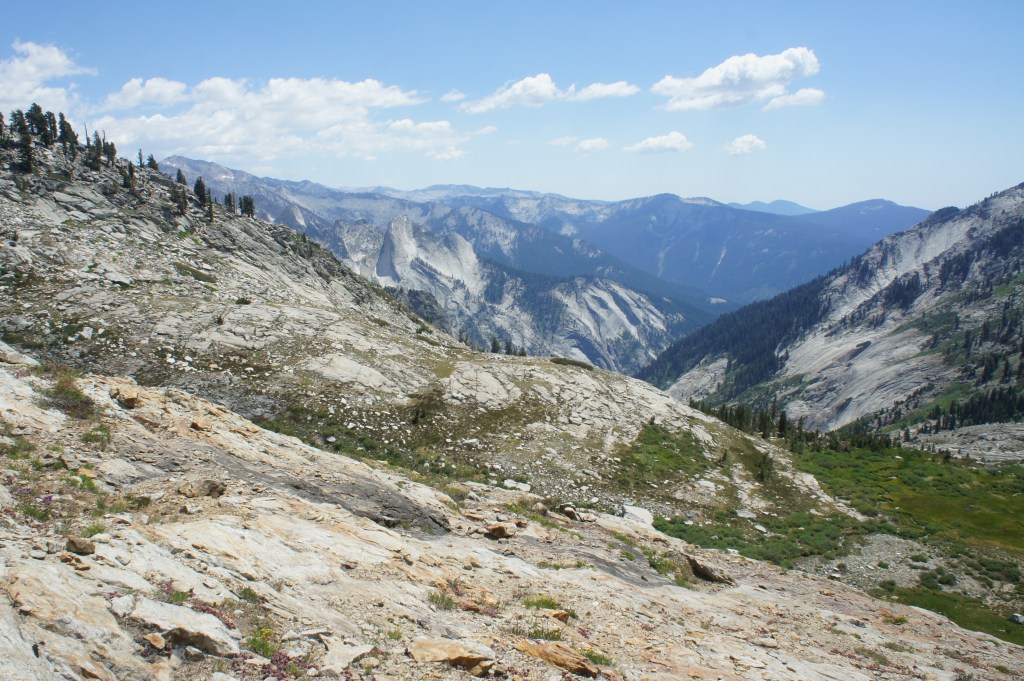
Looking down toward the Lone Pine Creek drainage
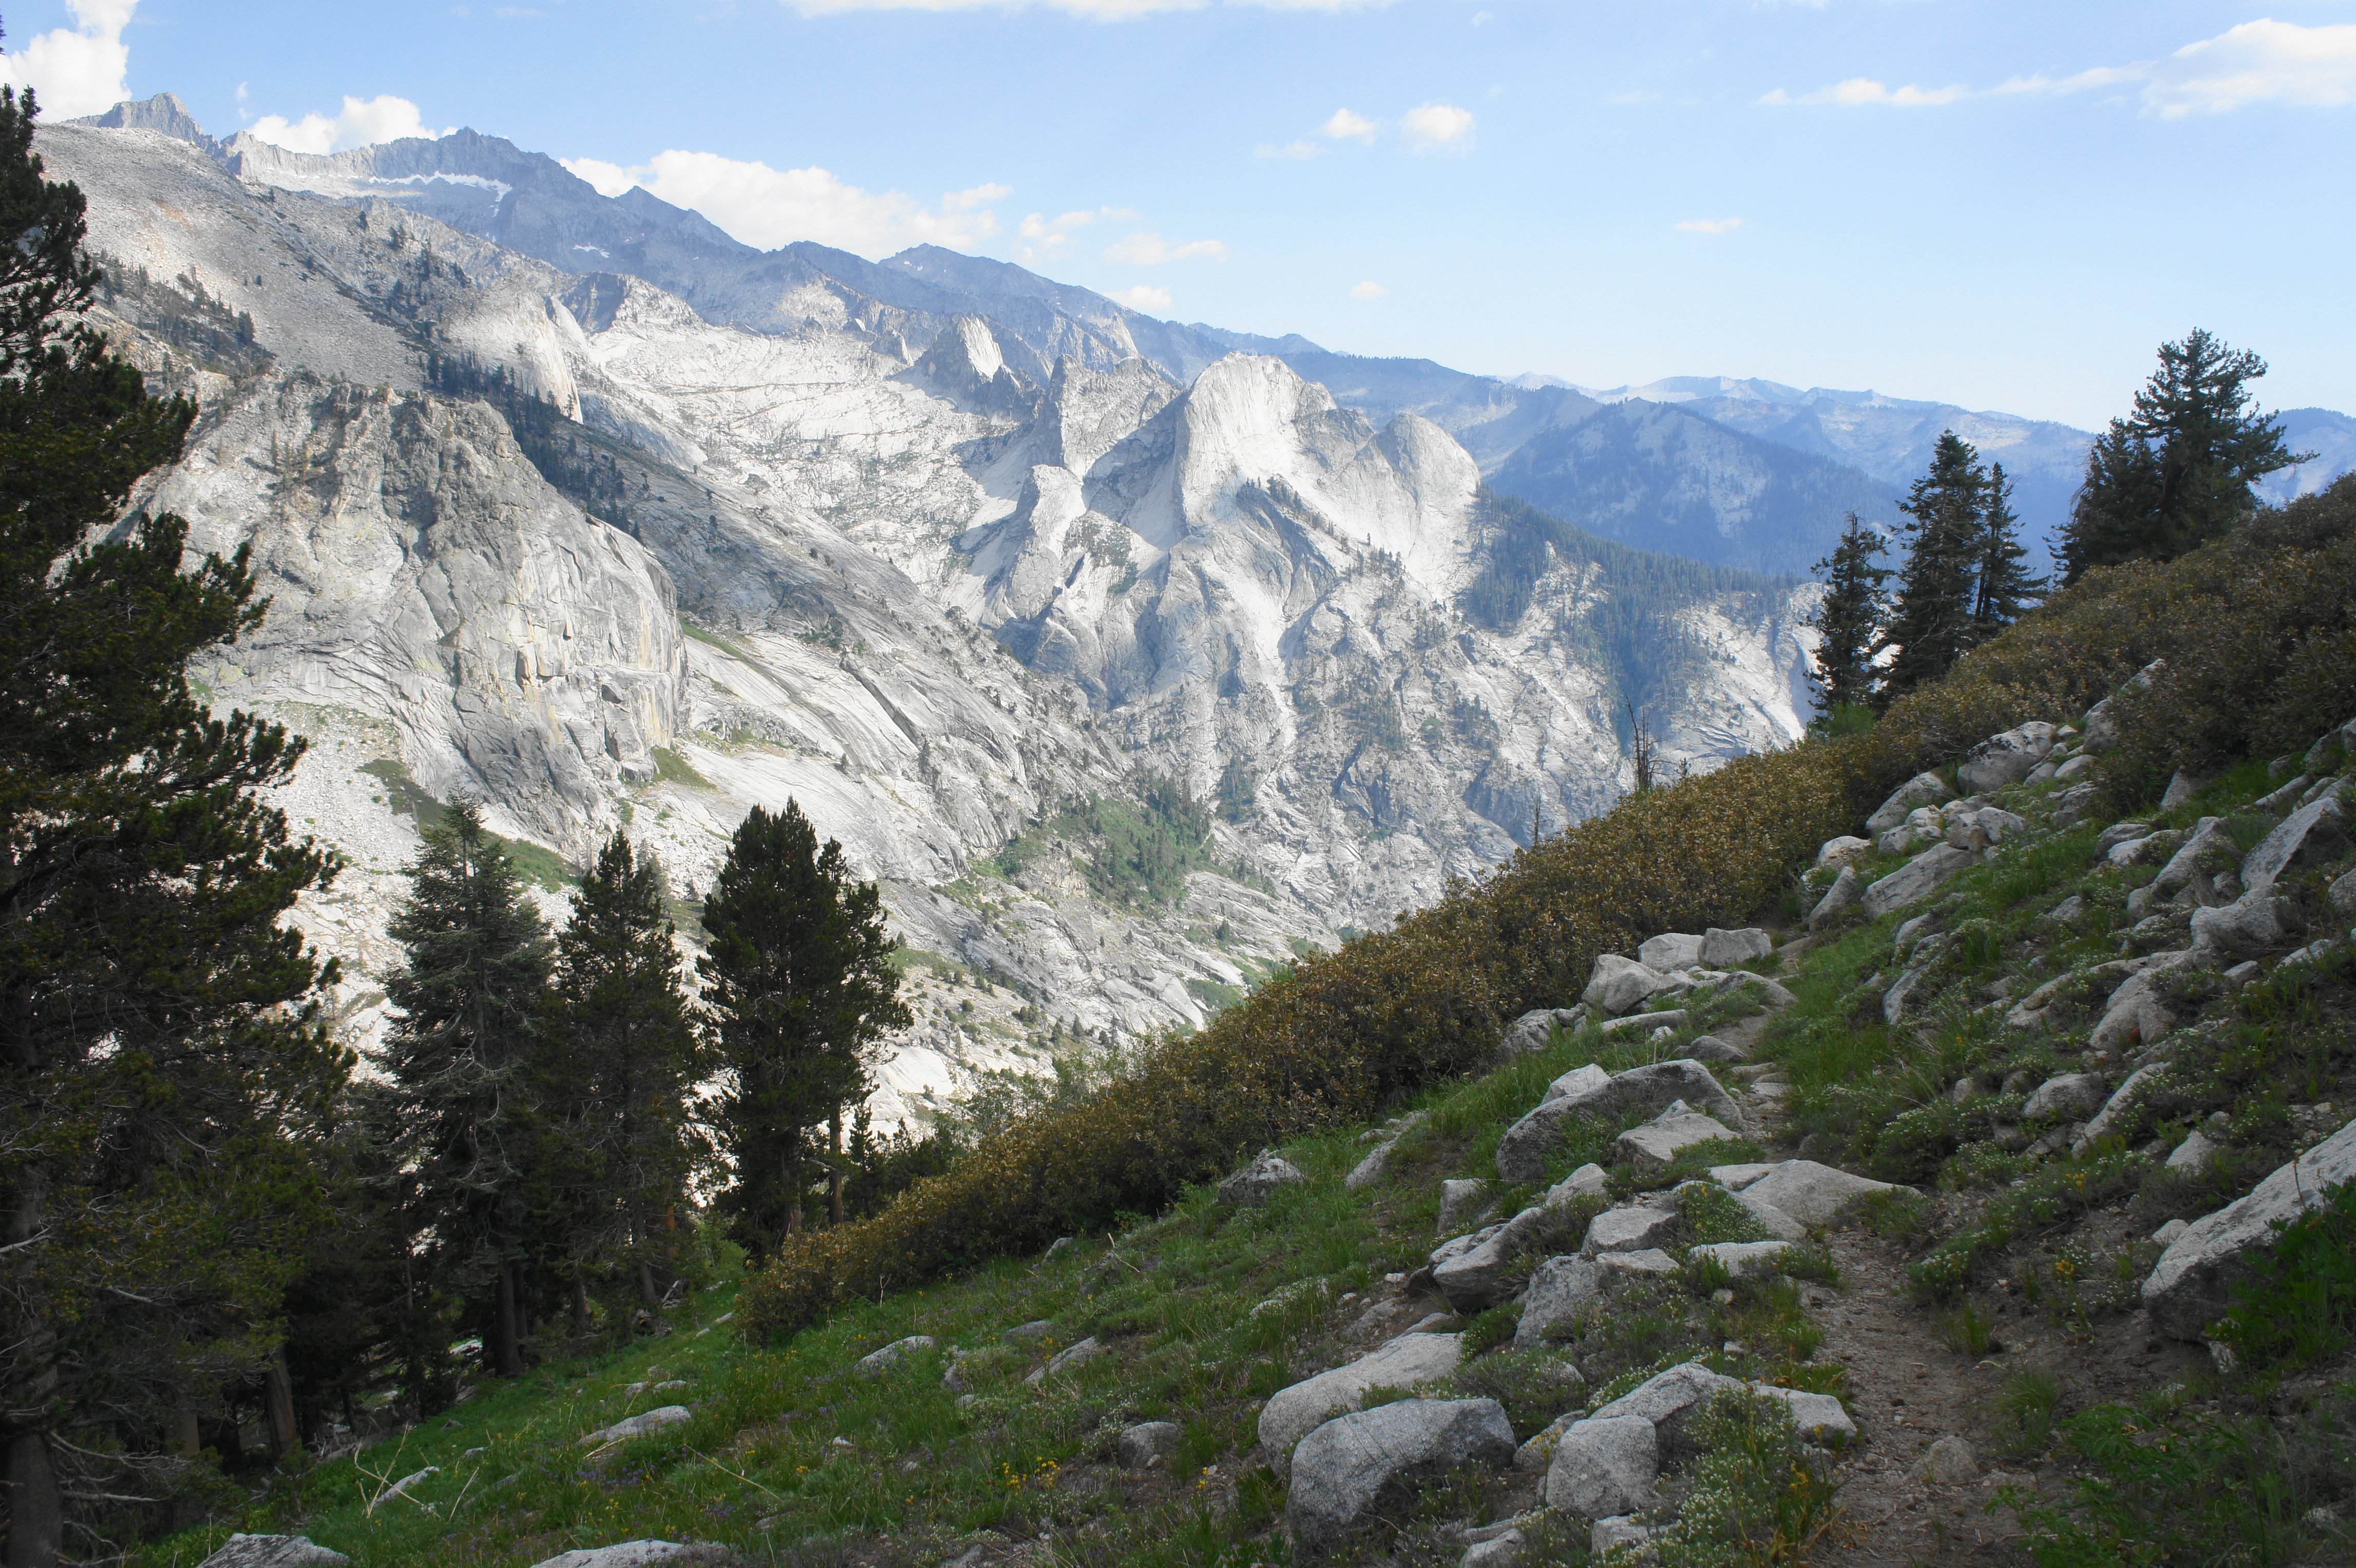
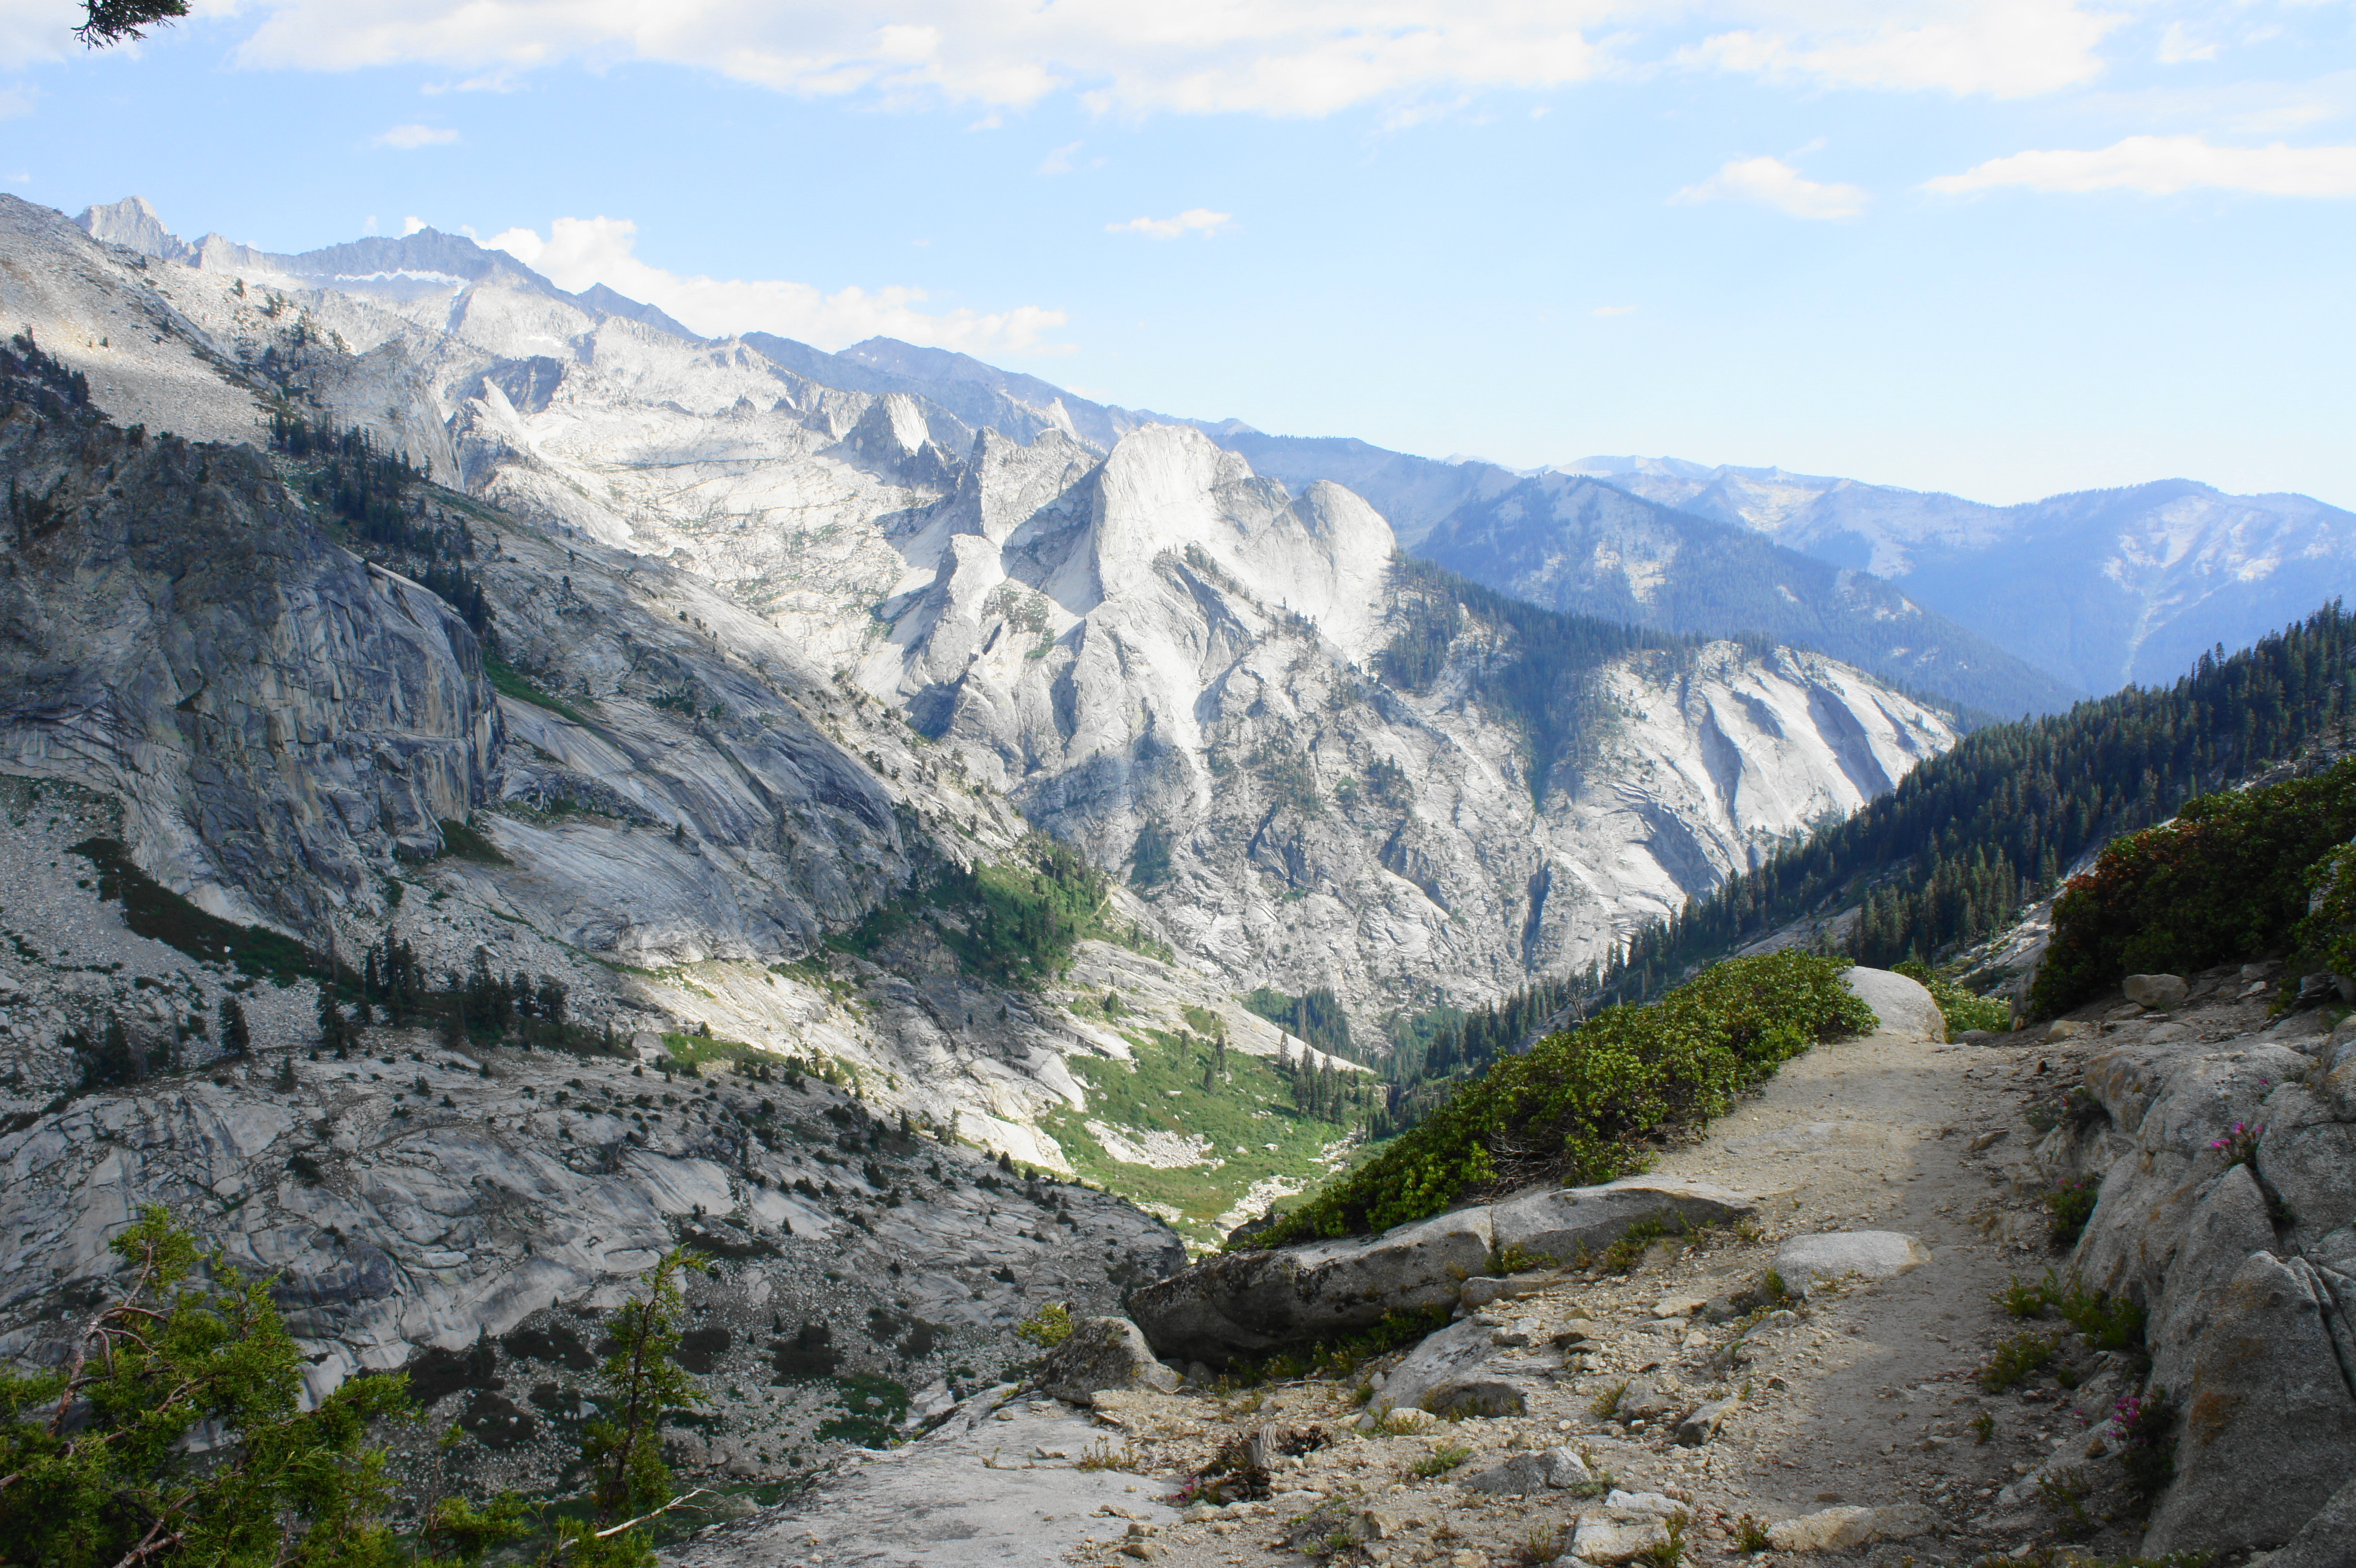
After the relentless uphill to Elizabeth Pass, a downhill section is welcome, although the subsequent descent back into Sequoia National Park can be a knee-buster as the trail sheds more than 3,000 feet in elevation in just three miles. The initial switchbacks from the pass are rough and challenging, dropping down blocky stairs that require careful footing. After this initial stretch, boulders are interspersed among windswept shrubs and seasonal streams trickle in and out of the trail.
As the route proceeds, the Elizabeth Pass Trail becomes more difficult to discern. About 3/10 mile below the pass, hikers enter a rocky, culvert-like drainage which briefly doubles as the trail before the route leads up and out to the right. Follow the small cairns as the trail continues downward, swinging back and forth amid the rubble, with excellent views of the sheer granite cliff to the north, again competing with the likes of the towering walls of Yosemite Valley.
About one mile from the pass, the trail has already dropped around 1,300 feet and swings relatively far to the right, allowing for a better look down into the various drainages of the Kaweah River watershed, where a spectacular landscape of granitic knobs unfolds. The most dramatic features are the high crags of Valhalla, a popular backpacking destination in its own right. The high summits of the Great Western Divide eventually also come into view, including Mount Stewart (12,025’), Eagle Scout Peak (12,040’), Lippincott Mountain (12,265’), and Mount Eisen (12,160’). This stretch of peaks effectively bisects Sequoia National Park, with the Kern River drainage and even higher Sierra Crest beyond to the east.
Creek and cascades below Lonely Lake 
Valhalla and the Great Western Divide
After coursing westward for a good distance, the trail bends south and follows a scenic ridgeline between two drainages and then drops and crosses a beautiful stream fed by Lonely Lake, situated in the top of the valley to the north, some 1,300 feet above. Here the flowing stream tumbles down a series of cascades and slivers through a narrow notch with several small reflecting pools.
It’s hard to believe given the terrific views from up on this high shelf, but the best is yet to come as the trail edges southwest, bypassing some impassable granite slides en route to a more forgiving slope. The valley below is the Lone Pine Creek drainage, culminating at the base of Mount Stewart and Lion Rock to the east. This area hosts Tamarack Lake, the destination for tonight’s camp.
At around six miles on the day, the trail begins its final descent, capping off the 3,000-foot descent with 16 scenic switchbacks. This section is simply magnificent, descending from the subalpine scrub down into the montane forest and finally a layer of manzanitas, with excellent vistas along the way. At about switchback 11, there is a particularly twisted and photogenic incense cedar tree, towering high above the valley. At last, with about 6.8 miles in the books, hikers reach a trail junction, set in an open paddock.


View from the switchbacks 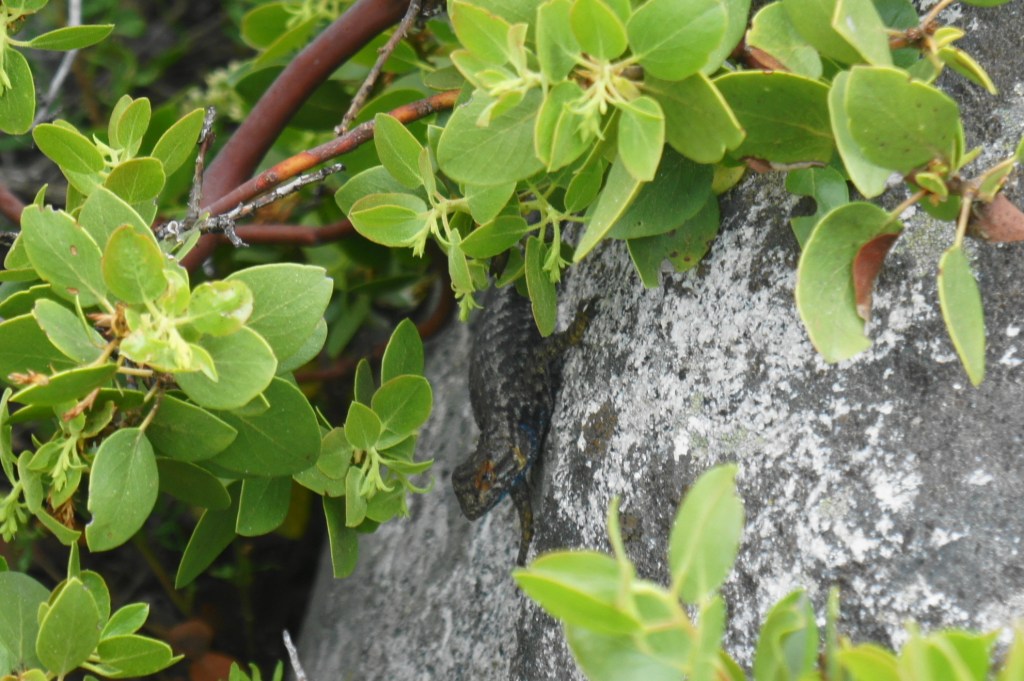
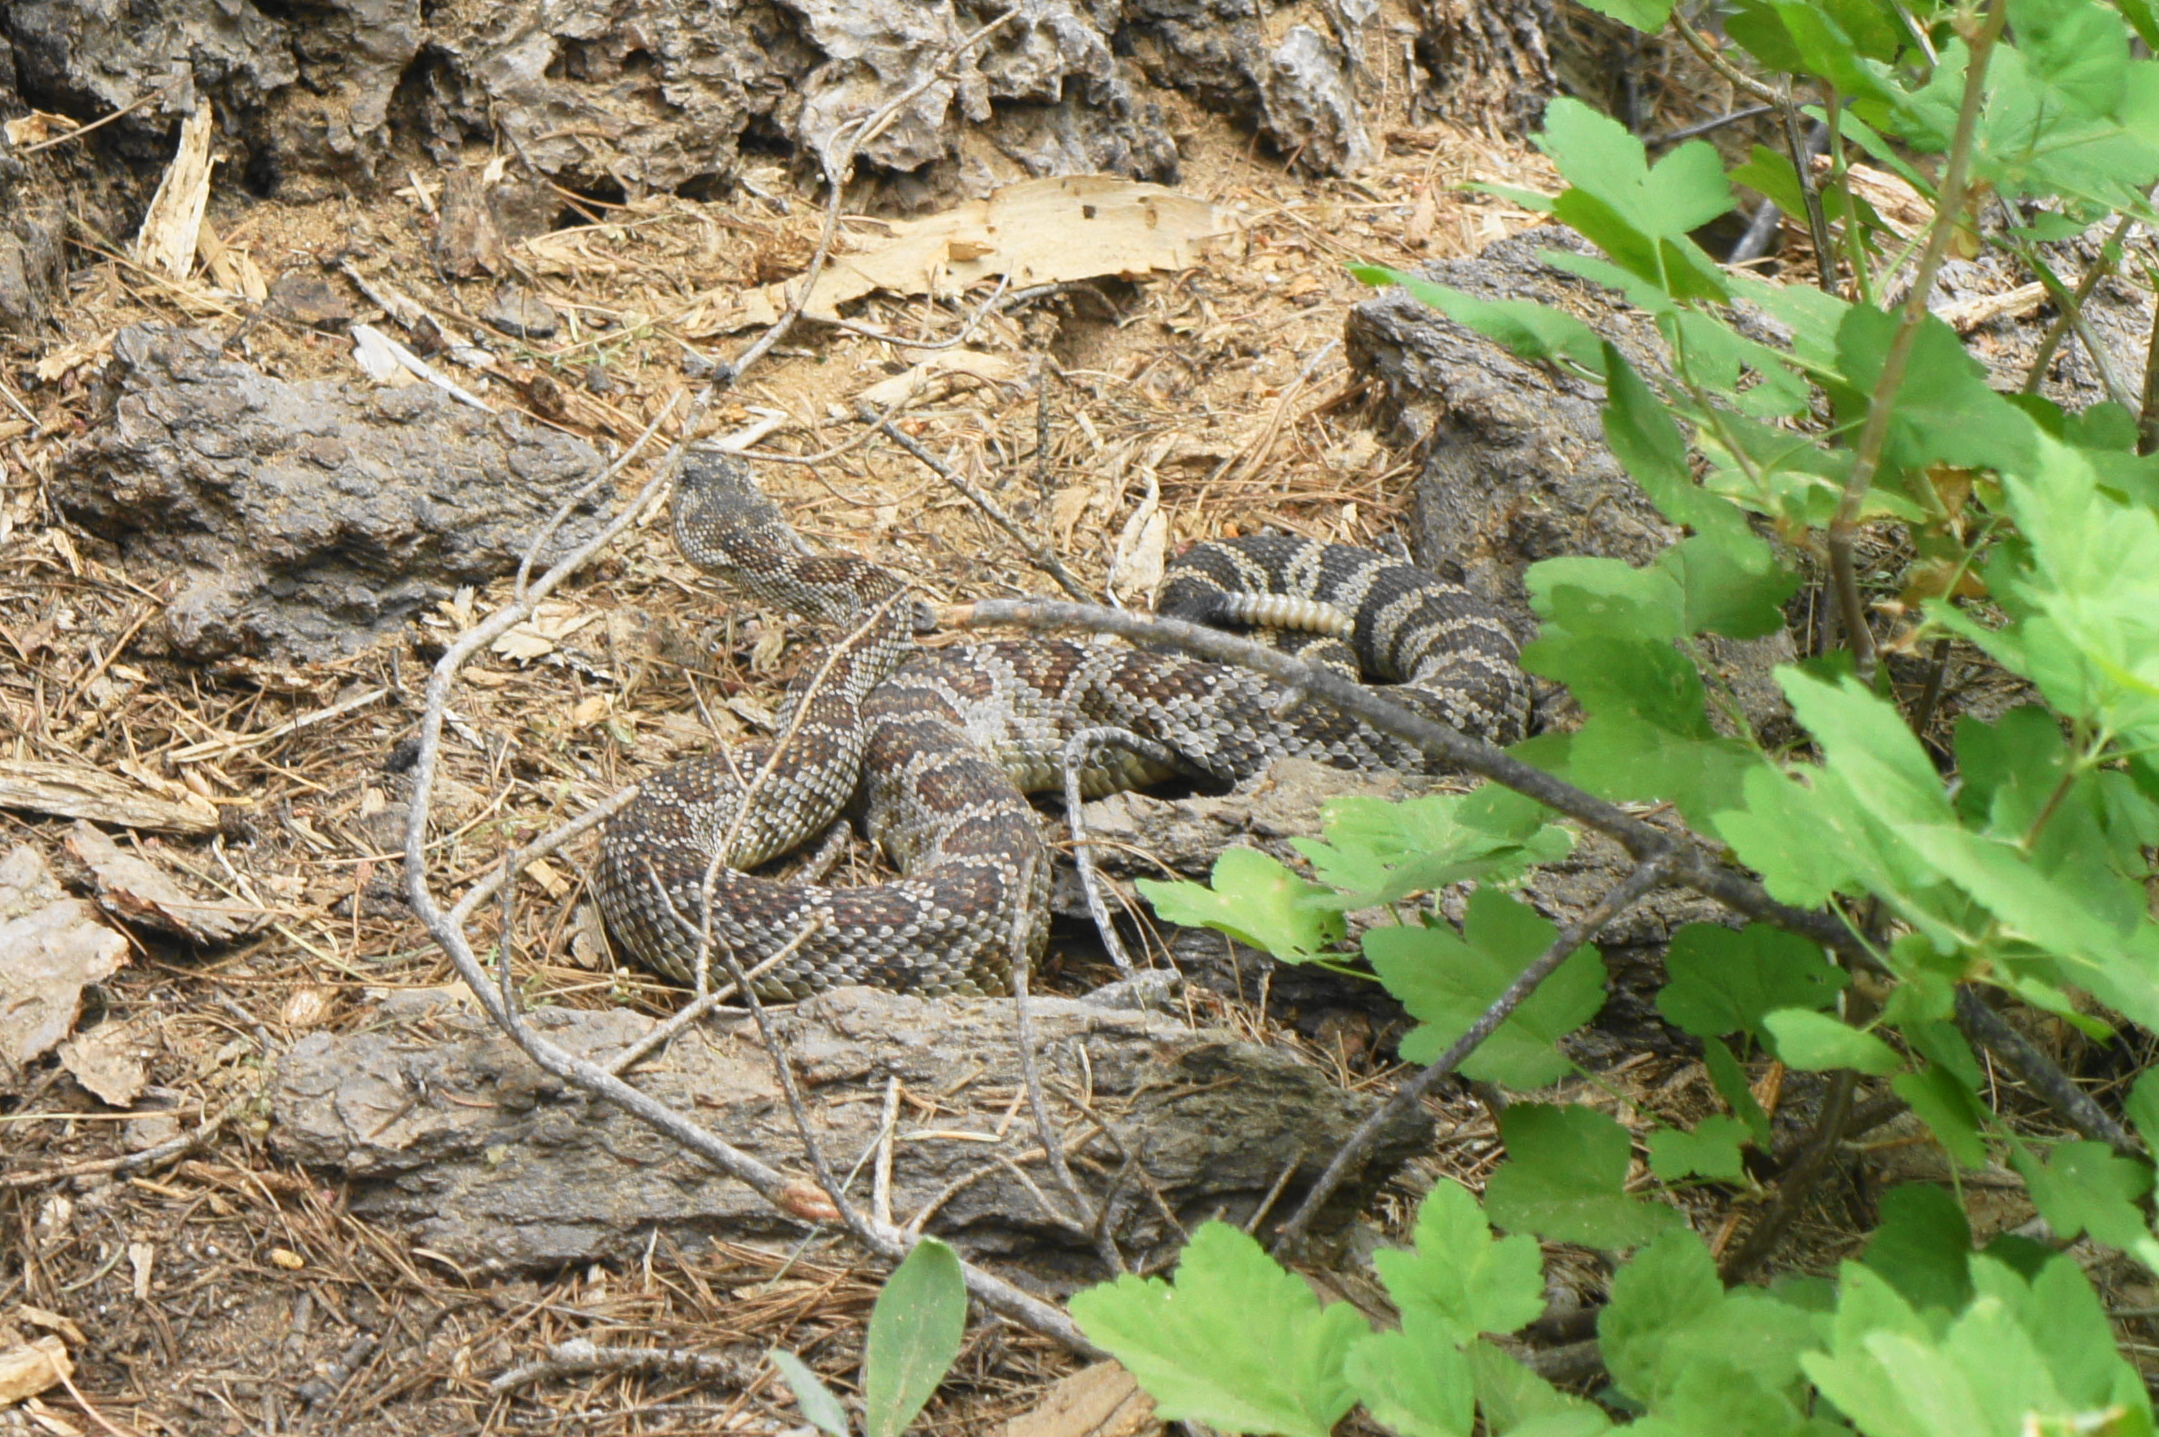
Large black lizard

Here hikers have a choice, either to head left and climb the Tamarack Lake Trail to its namesake, or head right to skip this detour and continue onward toward the High Sierra Trail and Bearpaw Meadow.
Looking east toward Lion Rock and Tamarack Lake 
Granite knobs of Valhalla

The eastward hike toward Tamarack Lake begins with a pleasant descent through the montane scrub, culminating at the edge of the trees, where there are two nice campsites. From here, the ascent begins, skirting the banks of Lone Pine Creek, which tumbles amid cracks in the bedrock down a series of pleasant cascades. As the trail continues, the shrubs around the trail grow thicker (pants recommended!), and the path rises—now in the open sun—to clear a second, higher set of cascades.
Above, on the south side of the canyon, lurks an imposing spire on the backside of Valhalla; off to the north, cream-colored pinnacles rise out of the granite hulk, including the two knobs visible from Elizabeth Pass hours prior.
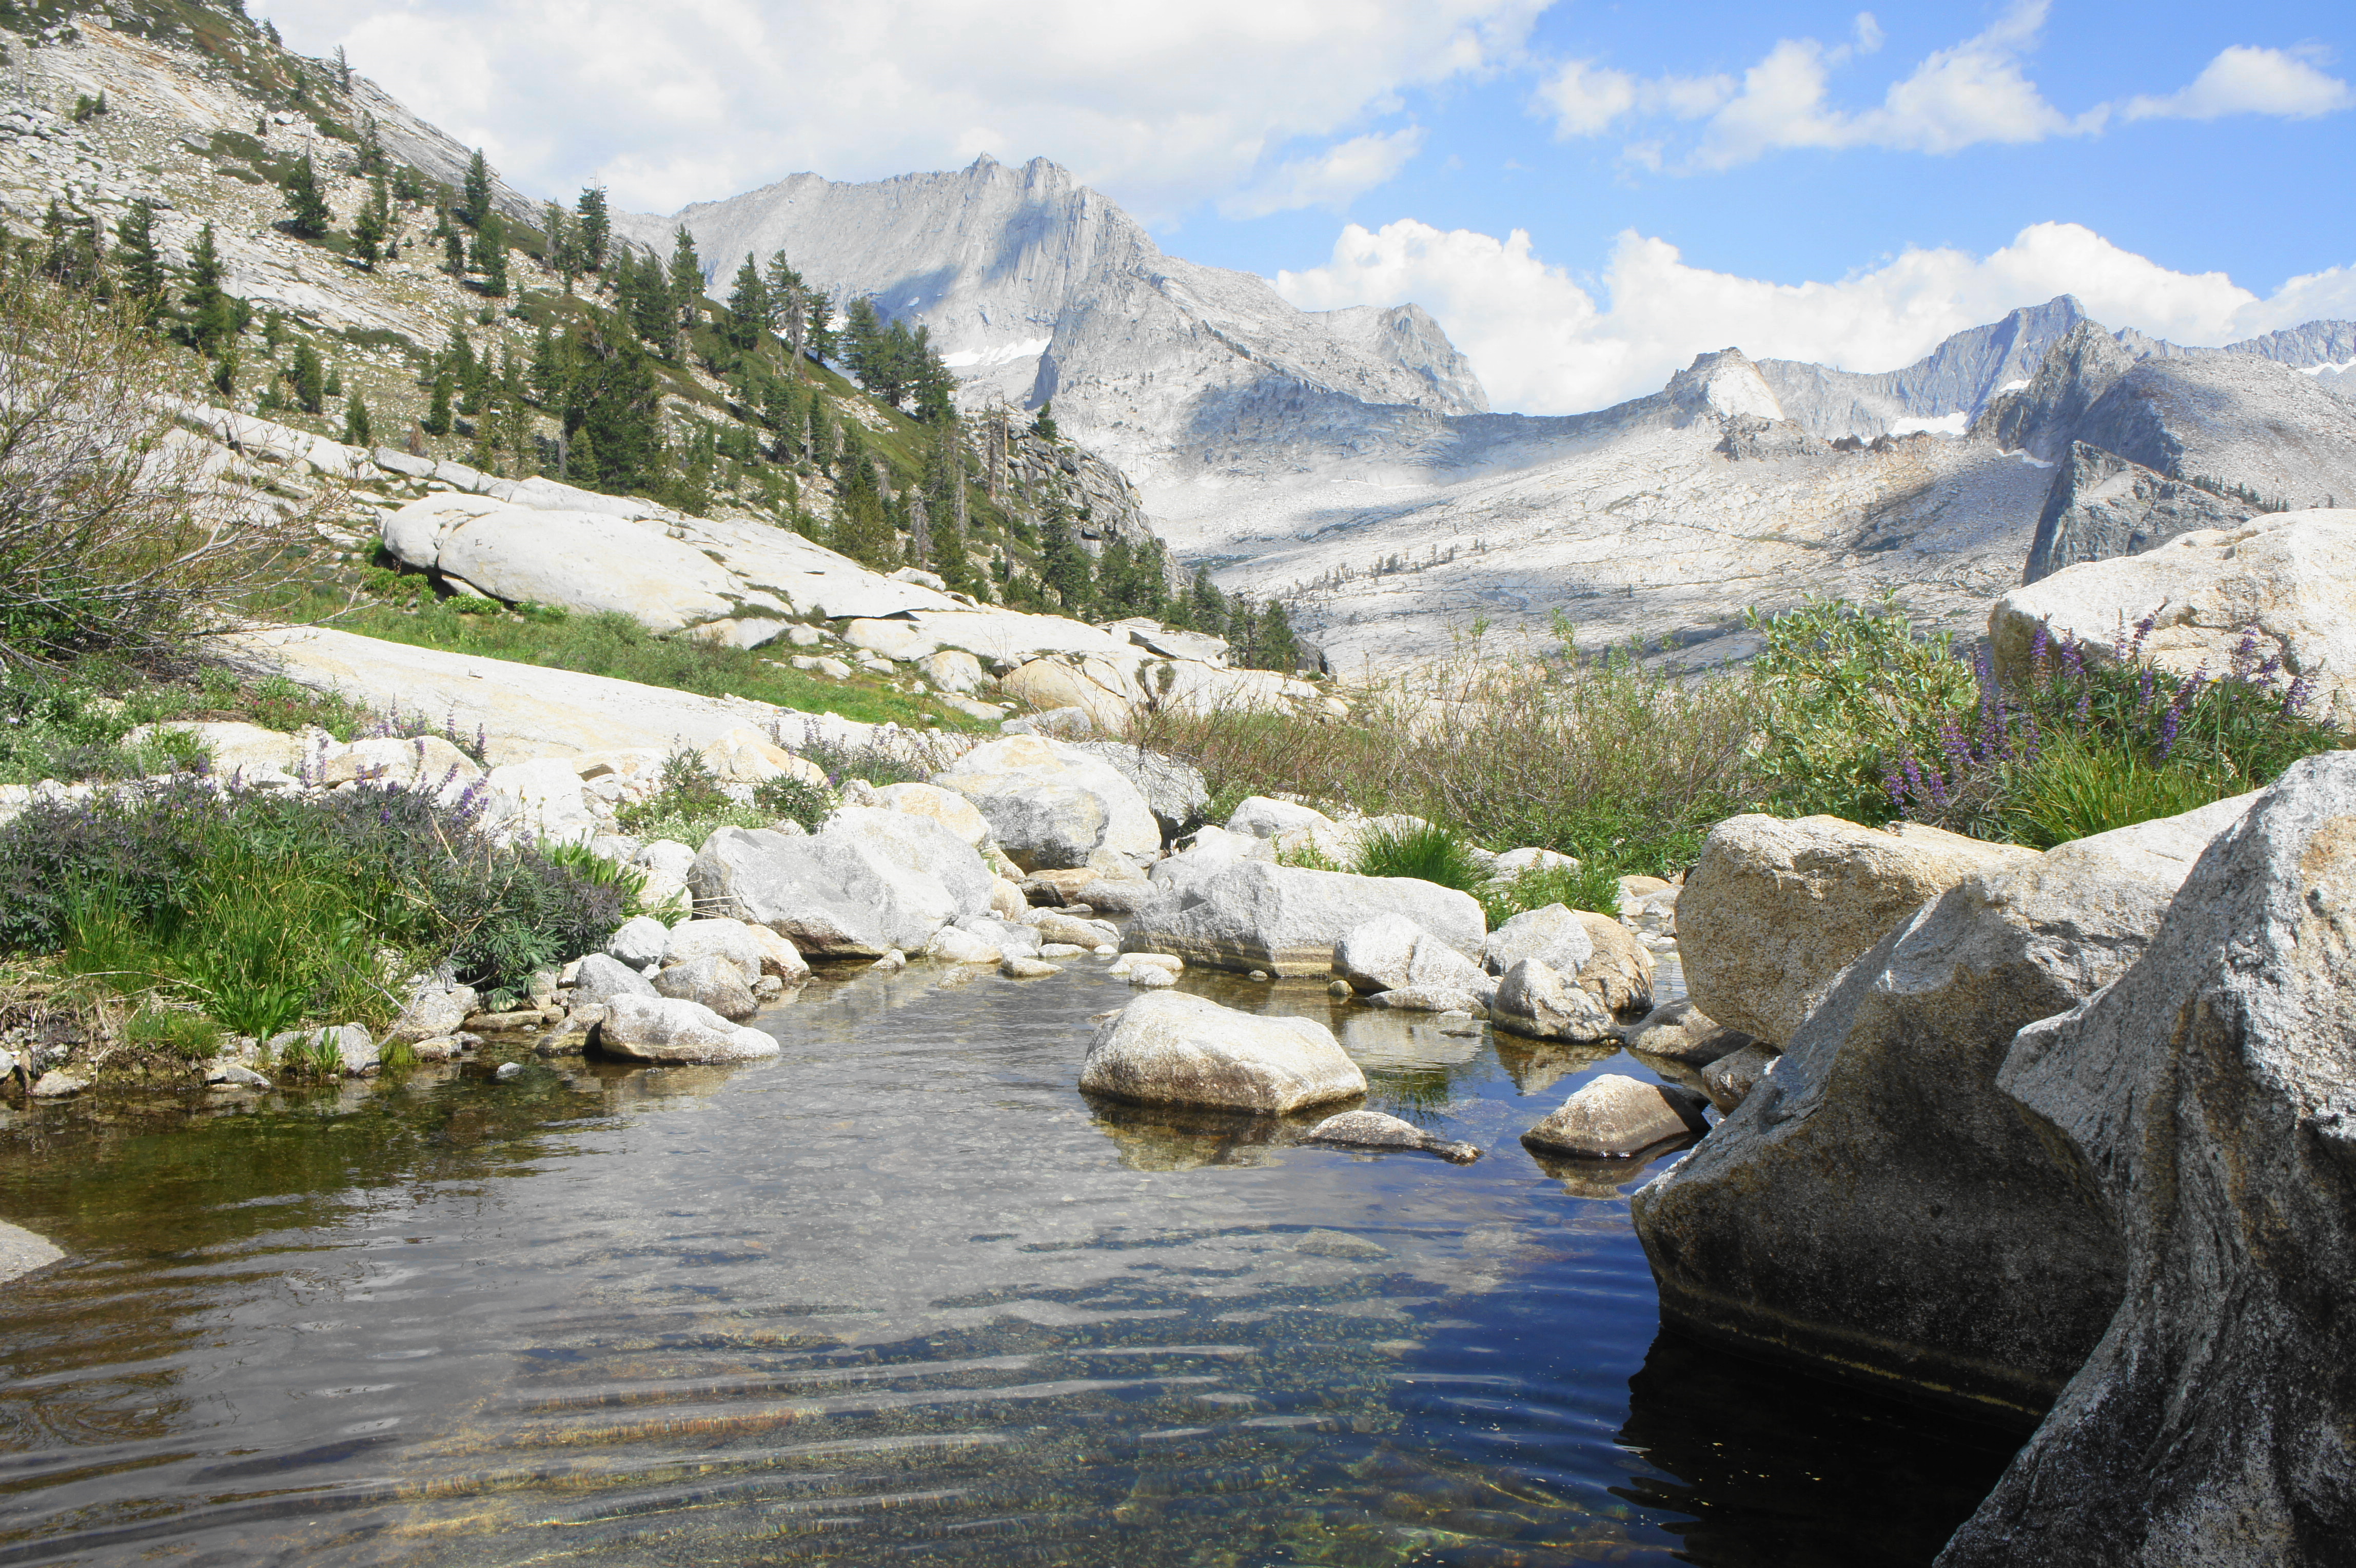
About two-thirds of the way up the spur trail, the Tamarack Lake Trail approaches Lone Pine Meadow, a verdant spot set at the base of a rock slide to the south. Here, streams of water flood the landscape, and hikers will be required to make at least three creek crossings.

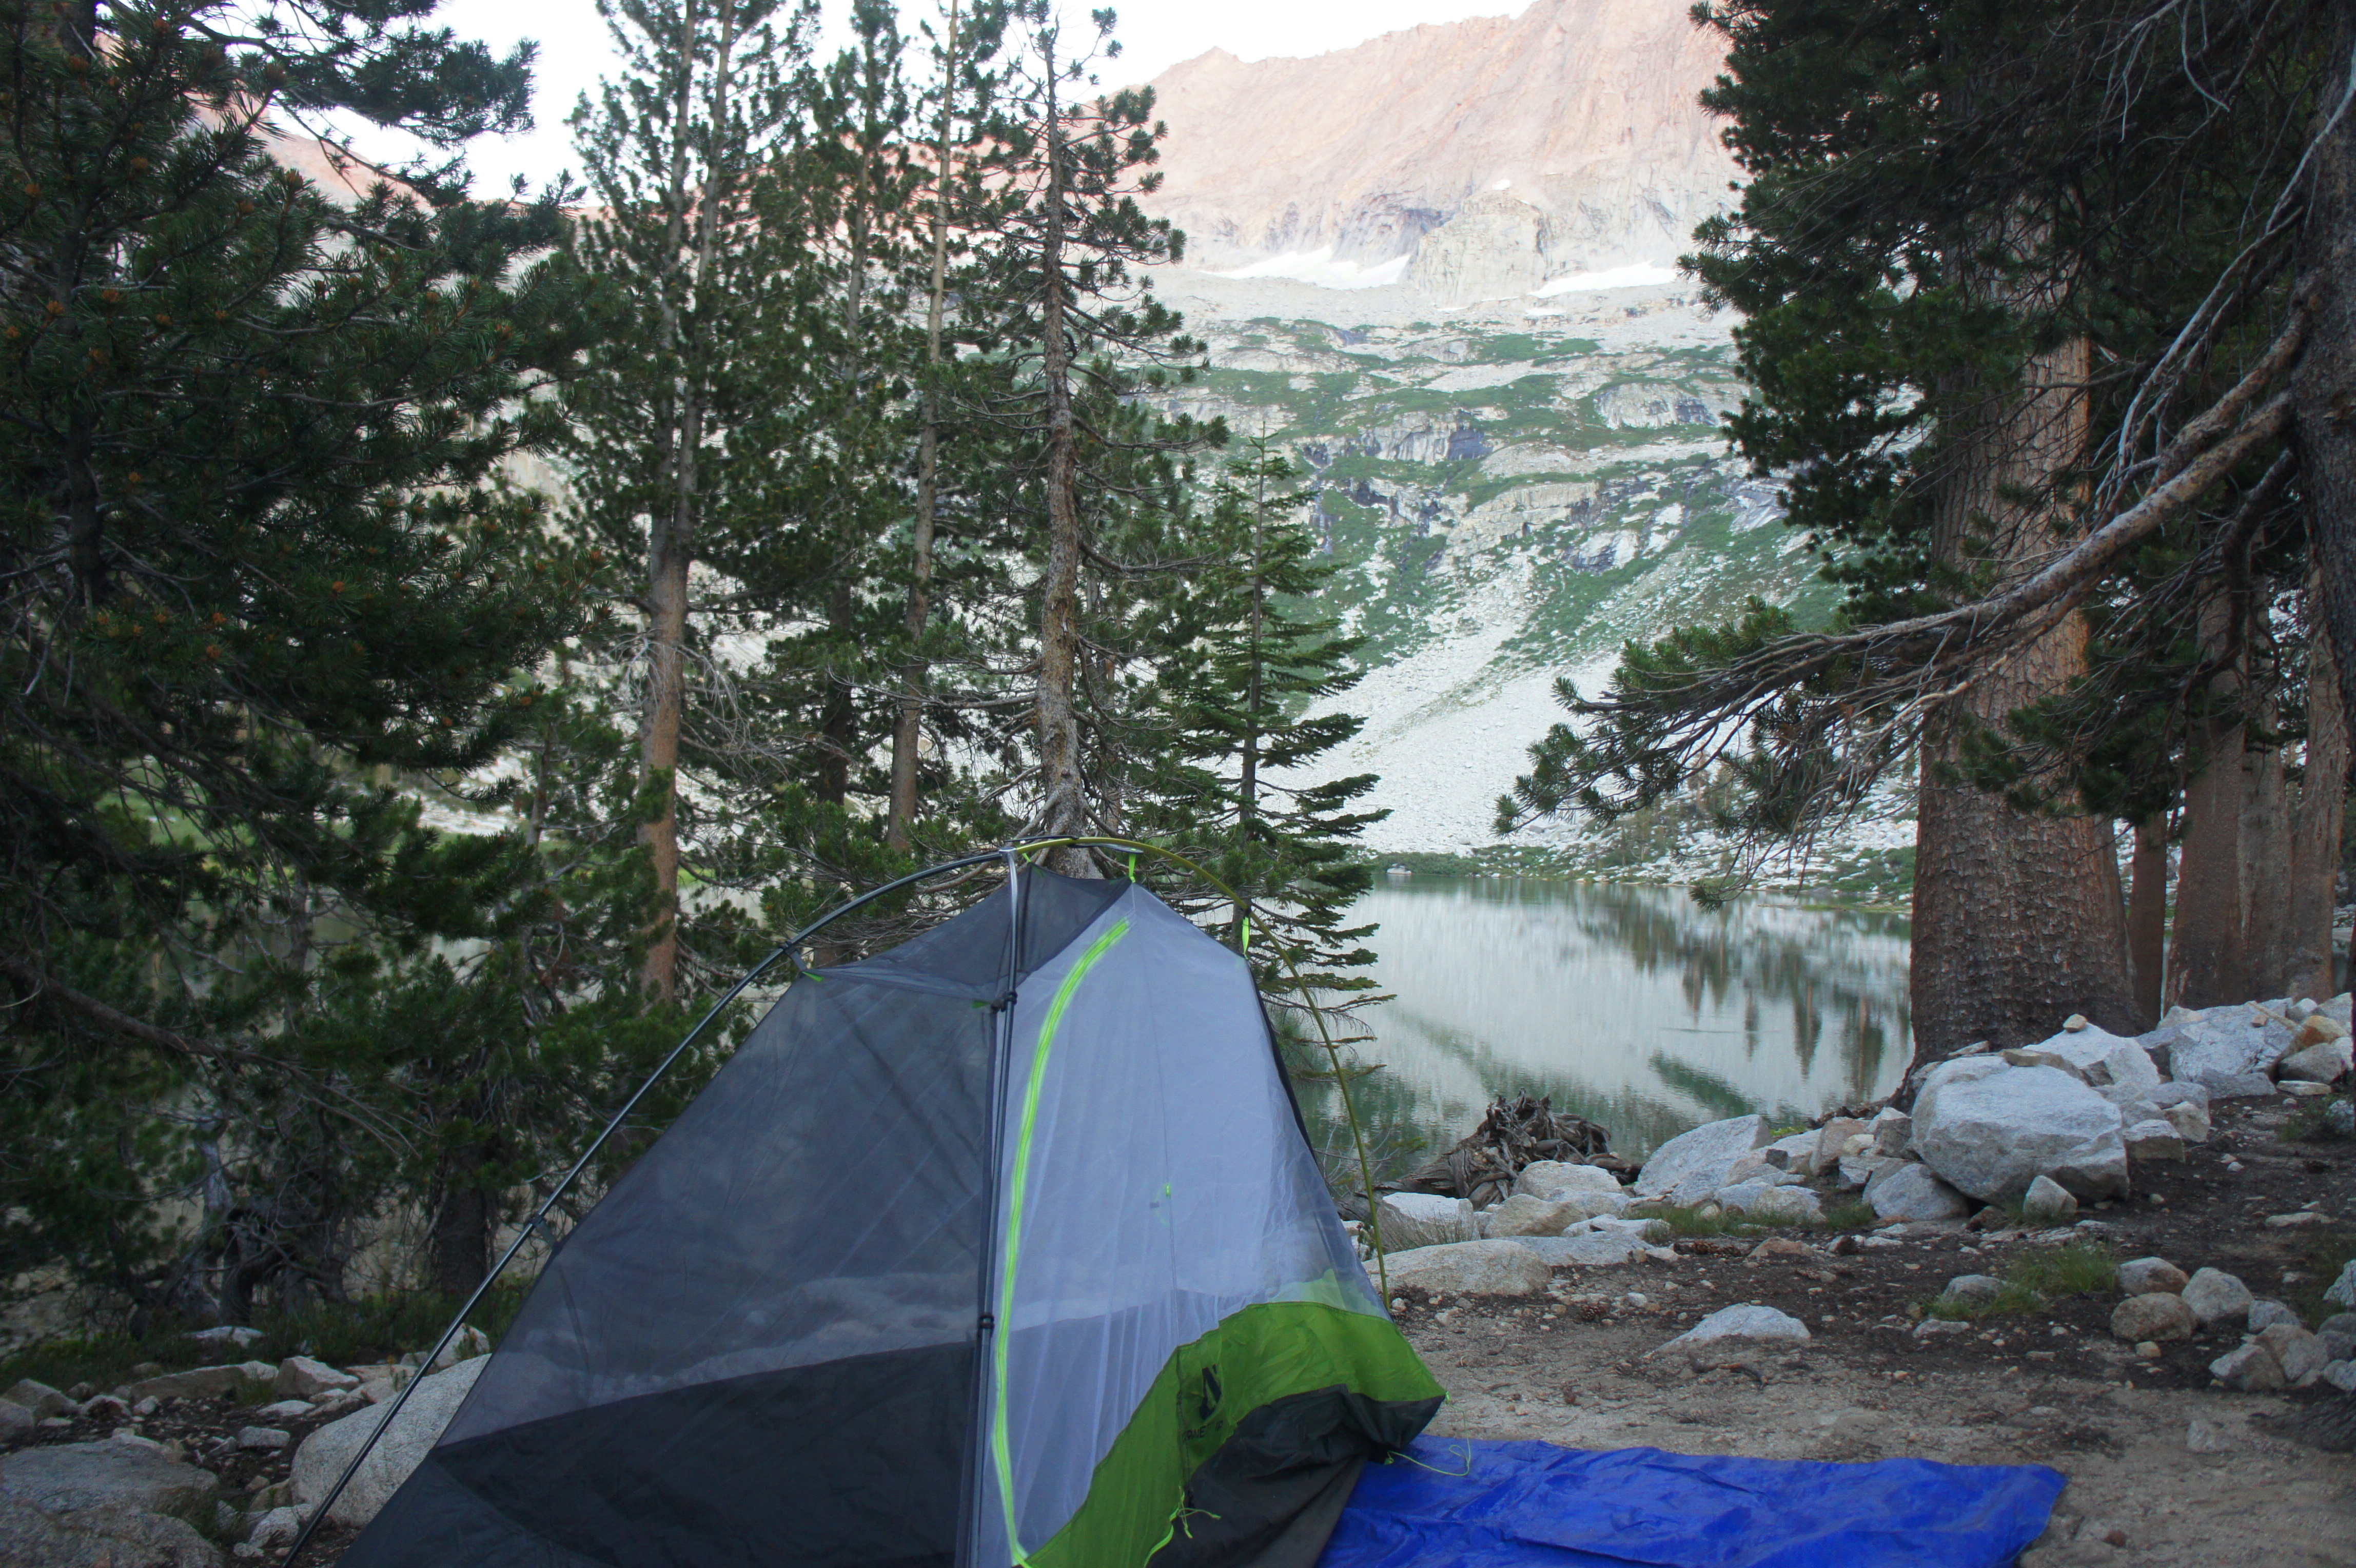
Beyond is what feels like a never-ending hill, finally culminating in the final bowl in which Tamarack Lake sits. There is no bear box or campfires at the lakeshore, but several camping sites can be found along the west banks, in addition to a lovely swimming hole at the base of a small cascade near the lake’s outlet.
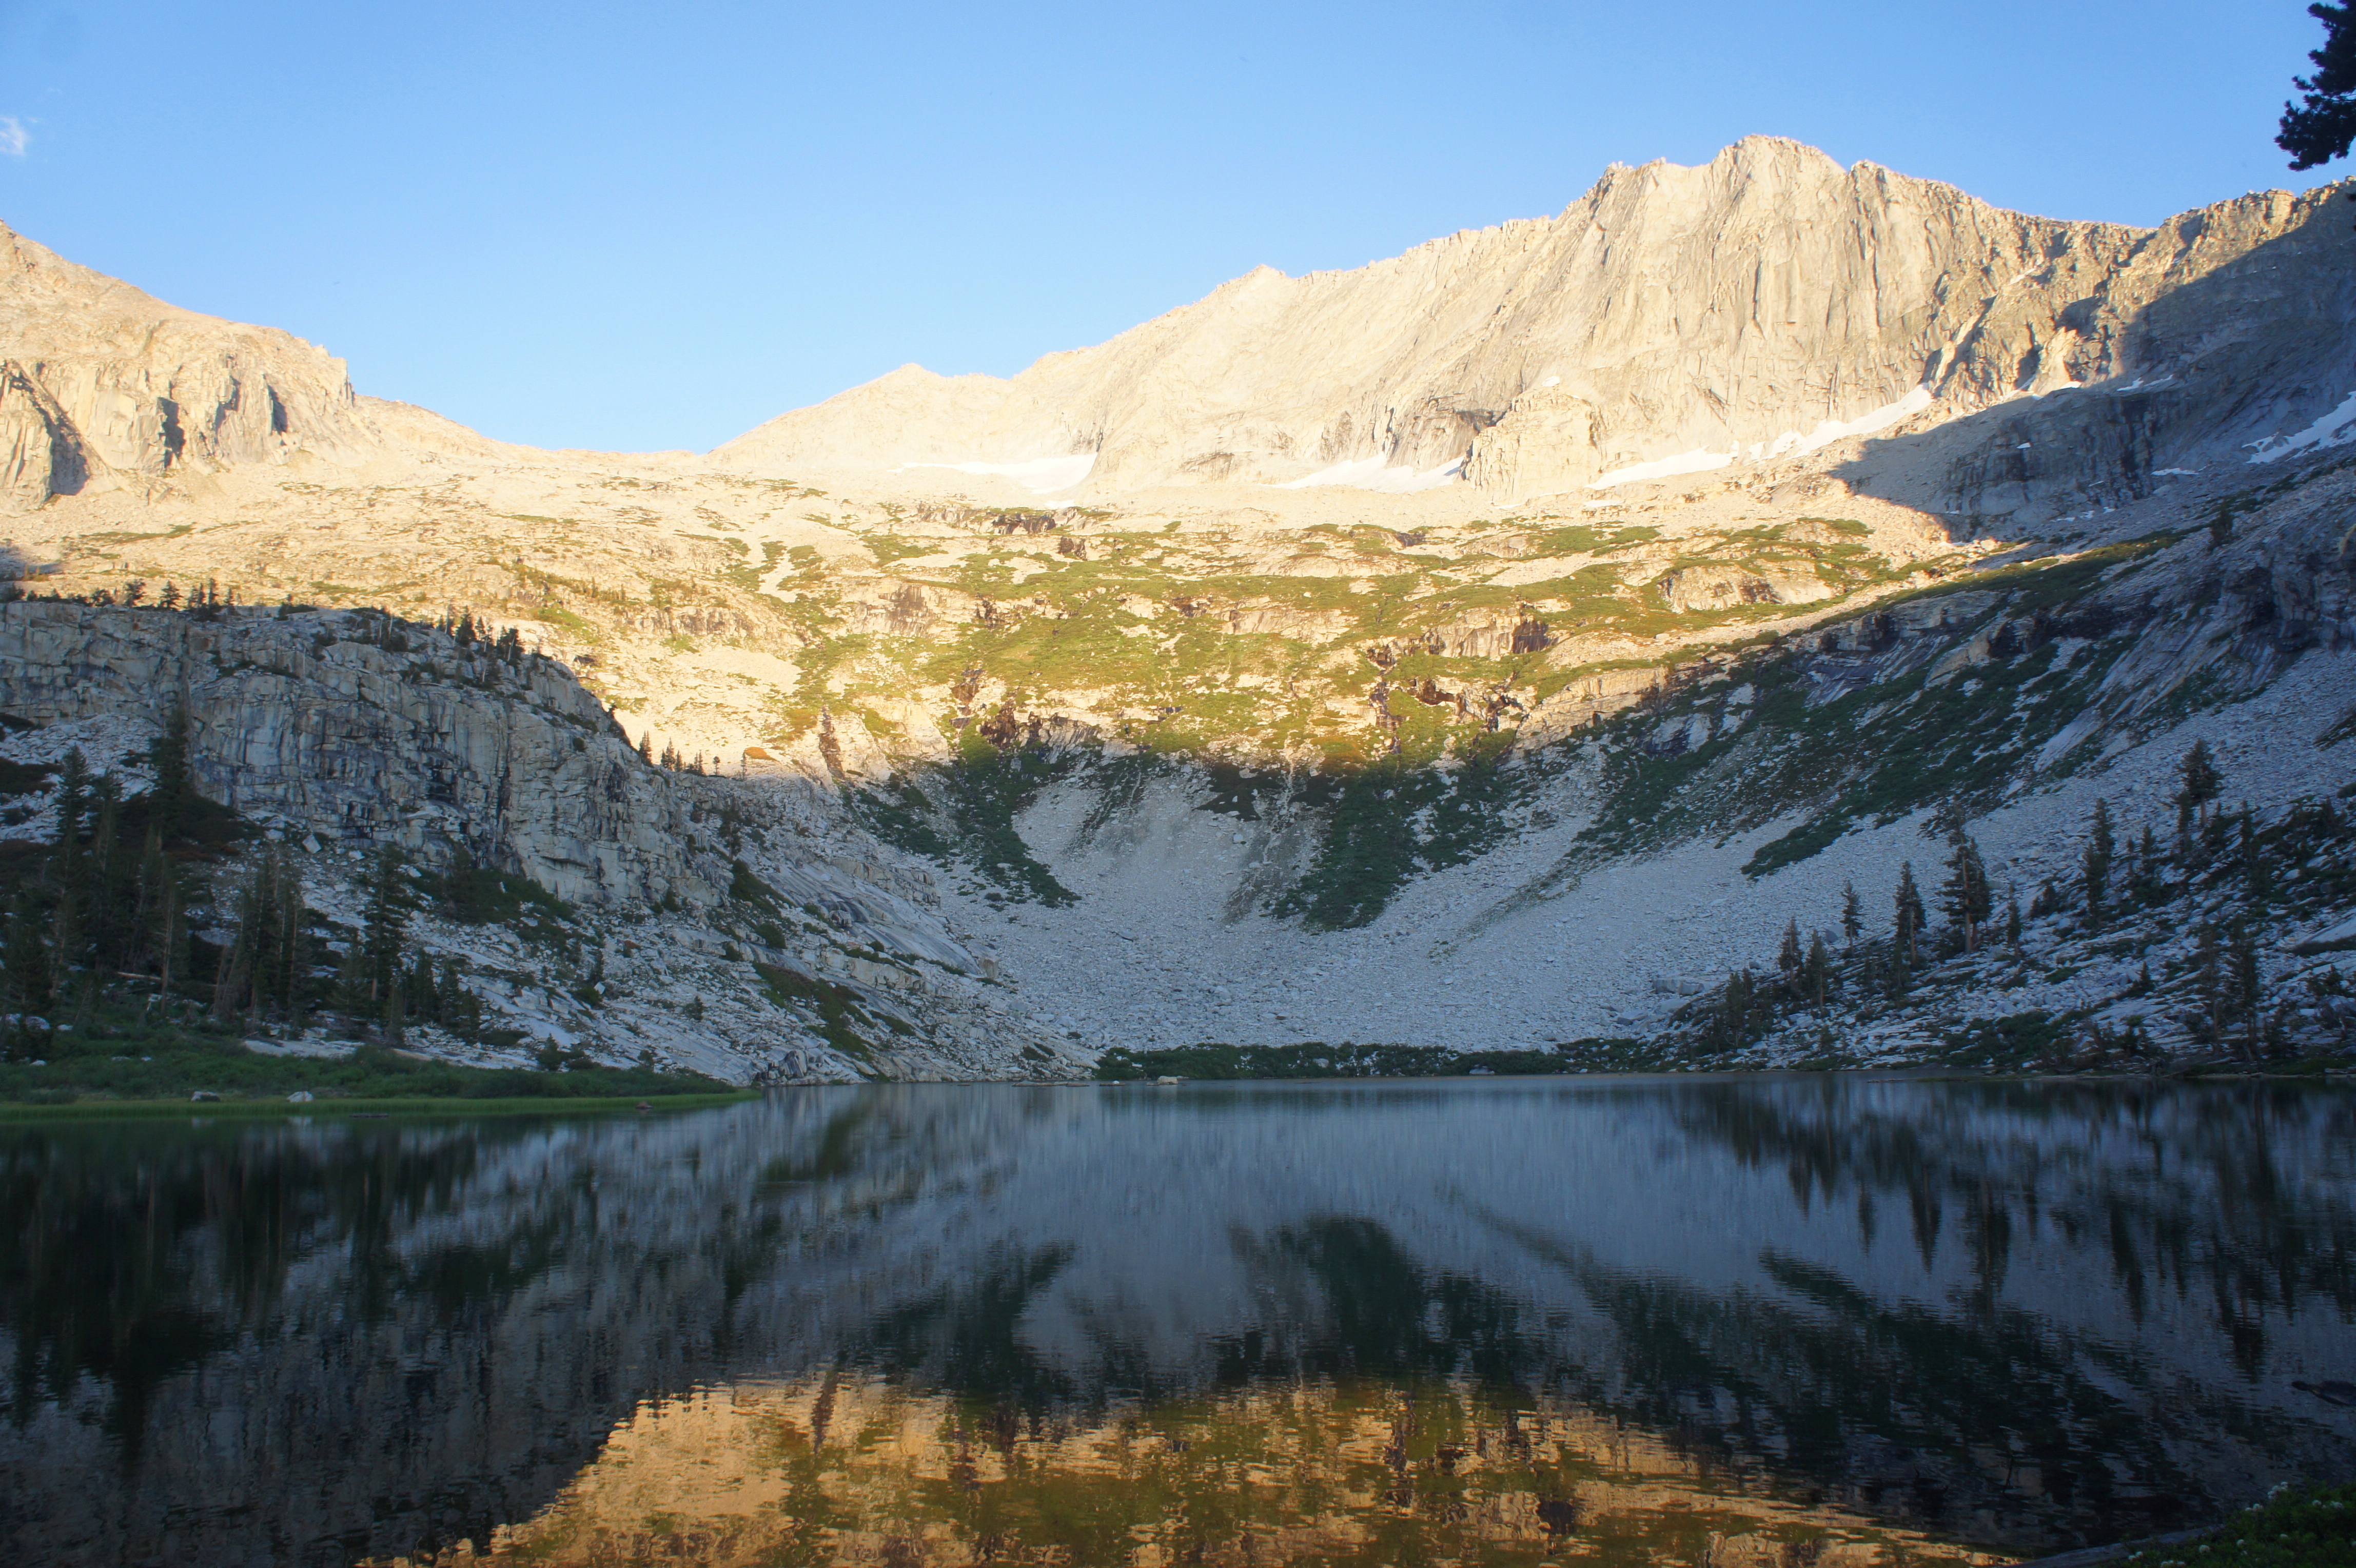

Lion Rock and Tamarack Lake 
Camp at Tamarack Lake

The lake itself is situated in a picturesque, glacier-fed depression below Mount Stewart (12,025’), fed by snowmelt and Lone Pine Creek, which continues upstream toward Lion Lake (not visible) to the northeast.
DAY 6: Tamarack Lake to Mehrten Creek via Bearpaw Meadow and High Sierra Trail (9.0 miles)
After five days in the wilderness, it’s time to start making one’s way back toward civilization and the start of the hike. Day 6 brings hikers from remote Tamarack Lake toward the final destination of Crescent Meadow and the Giant Forest via popular Bearpaw Meadow and the renowned High Sierra Trail. This entire stretch would a be a long haul for one day, however, so it is split into two days.
From Tamarack Lake, hikers should retrace their steps from the day before, hiking roughly two miles and descending 1,100 feet back to the junction with the Elizabeth Pass Trail in the Lone Pine Creek drainage. At the junction, turn left, descending a wildflower-studded slope to the banks of Lone Pine Creek, which is now tumbling steadily down a narrow chute, producing modest cascades.
Lone Pine Creek 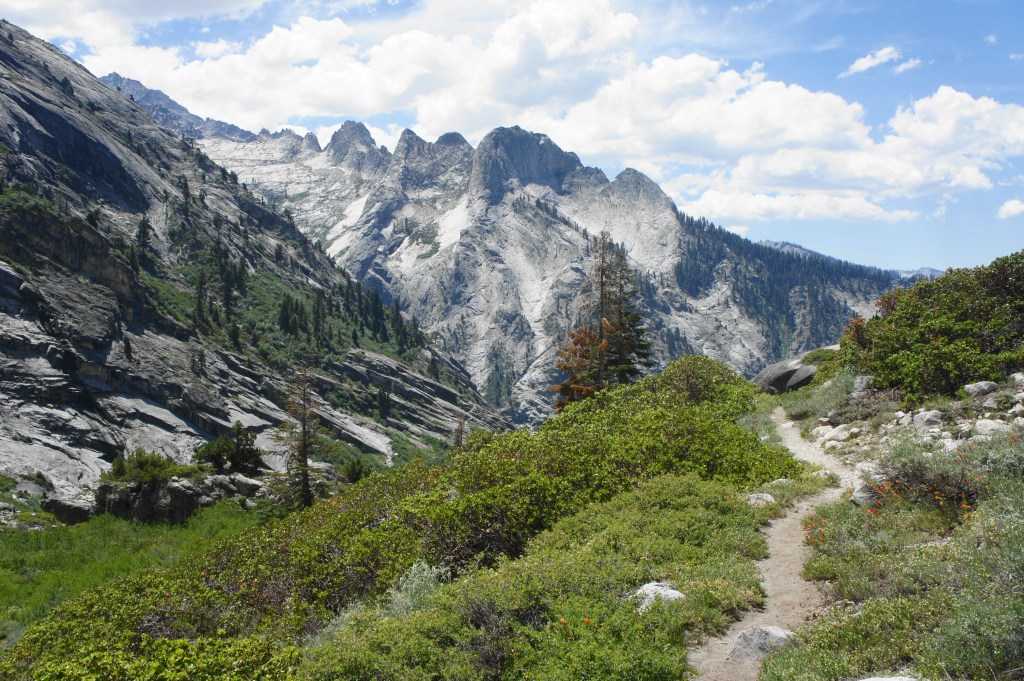
Onward trail heading toward Bearpaw Meadow

Follow the signs for Bearpaw (right), embarking on a two-mile stretch that climbs partway up a forested slope and then drops to Bearpaw Meadow. This section is surprisingly steep, beginning with a set of very sharp climbs to clear a granite slab and dry drainage. After a brief rest, the ascent continues in earnest, ascending to clear a second drainage and dropoff, rising to a shady, wooded slope.
After a brief walk through the coniferous forest, the path emerges at one of the most remarkable vista points on the hike: a magnificent eastward view of the Great Western Divide, including a look up the gut of the Hamilton Creek drainage toward Valhalla, Hamilton Lakes, and Kaweah Gap. To the south, the drainage forms the deep, forested River Valley, which in turn feeds the broad canyon of the Middle Fork of the Kaweah River.

Following the awesome viewpoint, the views somewhat diminish as hikers take on one more uphill stretch before the trail levels off and descends through thick brush, then scattered pines. After clearing a set of switchbacks down, the trail forks at about the day’s four-mile mark. Head left to check out the Bearpaw Meadow Ranger Station and High Sierra Camp, where there are decent views of the valley and Great Western Divide. Or continue right to bypass this detour, bearing west on the High Sierra Trail in the direction of Crescent Meadow and Generals Highway. There is another junction soon after the first, with a steep path leading south to a relatively unattractive but popular campground, which offers a water spigot in case hikers need to fill up.
Beyond this second junction, the High Sierra Trail descends mildly, gradually clearing a set of long switchbacks notable for their relative absence of obstacles (rocks, steps, etc.), making for easy and welcome walking. The path descends into Buck Canyon, a prominent side drainage, and crosses a footbridge over Buck Creek, where there are again some campsites and a bear locker.

On the other side of the creek, the trail climbs again and settles into its westward course, spending most of its time in the trees. One prominent outcrop offers nice views of Sugarbowl Dome (7,881’) to the south, after which the path descends to clear the first of two forks of the Nine Mile Creek drainage.
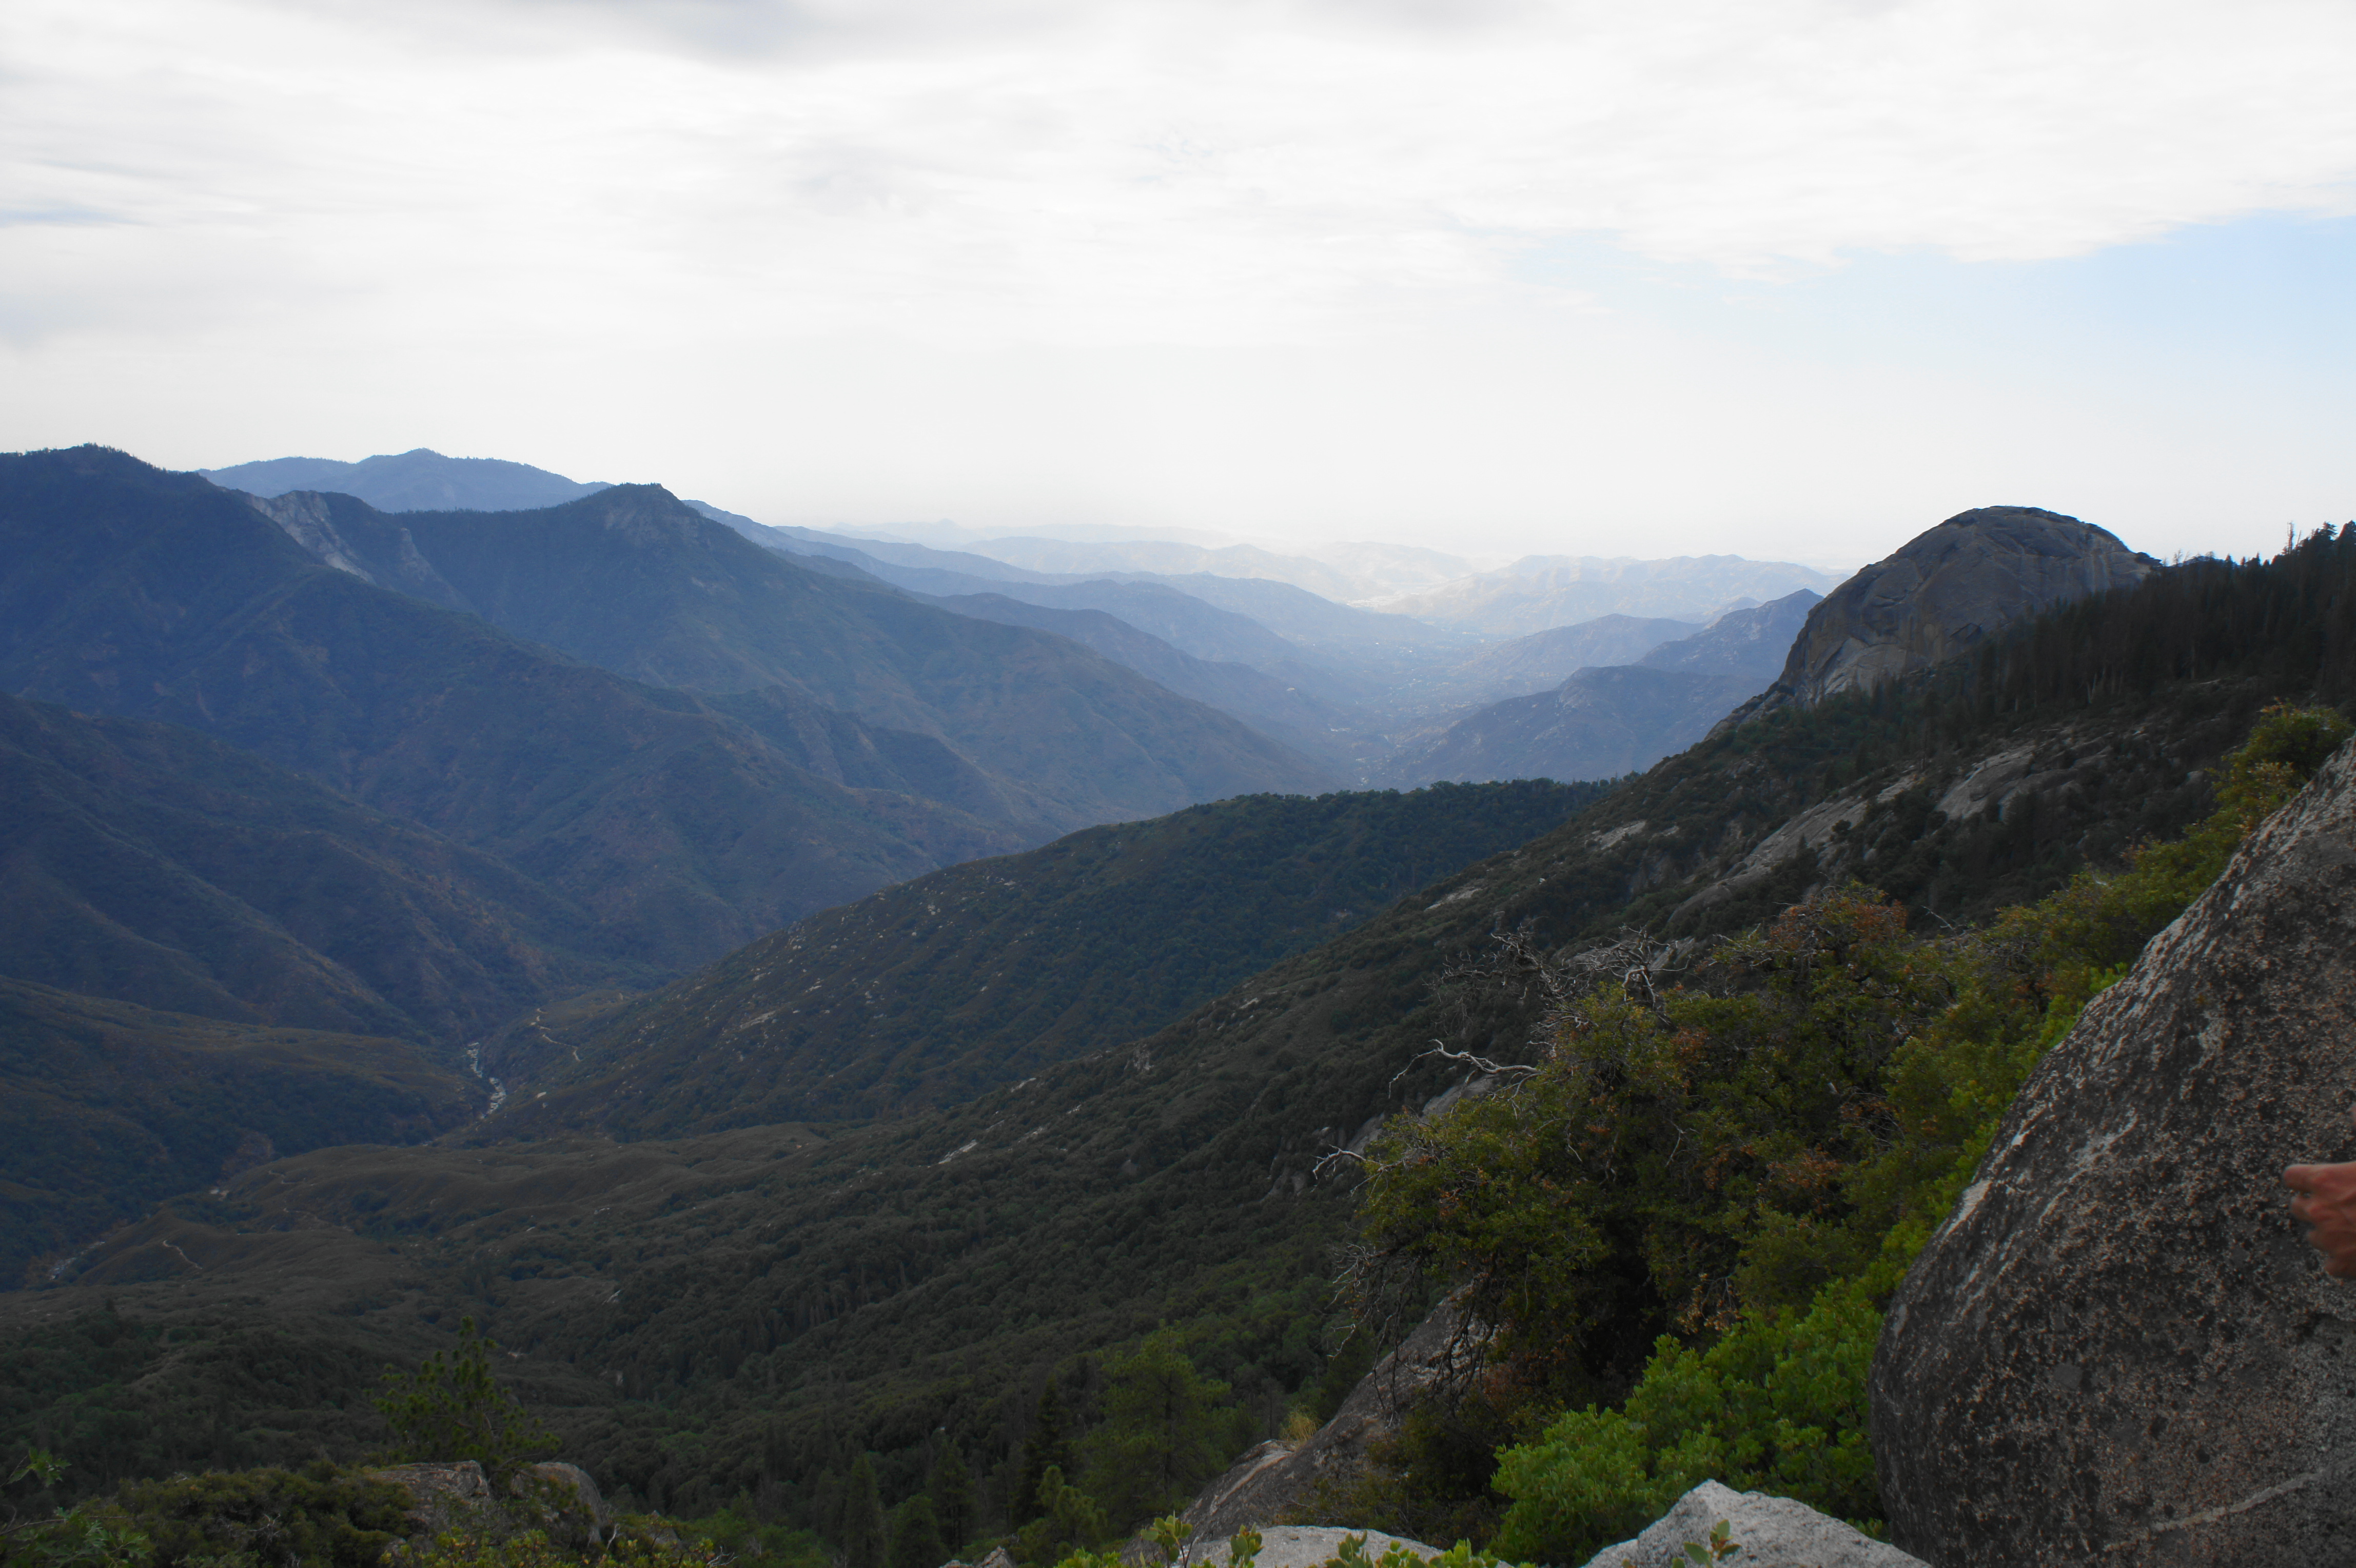
After a second drainage, the trail ascends again, with occasional views of the valley below. At about seven miles, hikers cross another side drainage below Alta Meadow, and then gives way to a climb to a viewpoint overlooking Little Blue Dome (7,725’), another granite protrusion. Shortly thereafter, the High Sierra Trail reaches one of its most iconic sections: a series of exposed ledges, carved into the high walls, with expansive views across the Kaweah River drainage. To the south, the landscape is dominated by the oft-seen but rarely-explored Castle Rocks (9,081’), with the Mineral King area beyond. To the west, the Great Western Divide remains visible, although ever more distant.

Ledges section 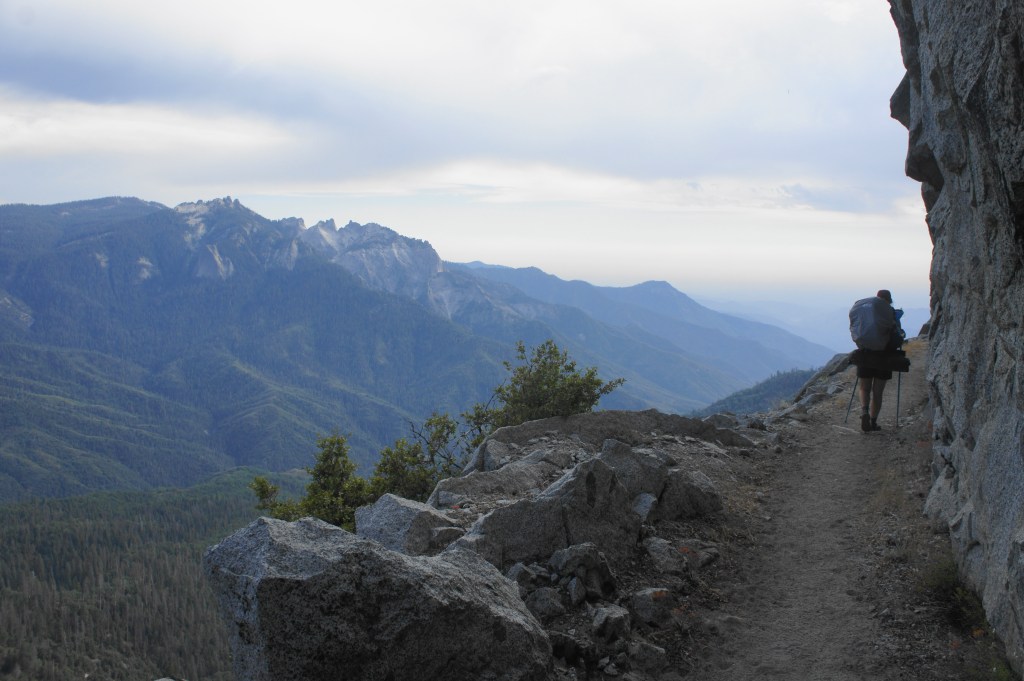
More open views from the High Sierra Trail

The trail is a magnificent feat of construction, with the near-vertical walls interrupted by a 4- to 5-foot wide flat where the trail resides. Hikers with a fear of heights will not like this section, although the exposed ledges pass relatively quickly.
After the initial cliff section, the trail returns to more forested terrain and a sustained uphill before embarking on a second set of ledges. Upon rounding a corner heading north, hikers get a good view of Moro Rock in the distance to the west, as well as the Mehrten Creek drainage, the destination for tonight. Mehrten Creek drops rapidly down a series of cascades, crossing the trail at about the day’s nine-mile mark, coming just after a junction with the path to Panther Gap and the Alta Trail. (Note: Turn right here to complete the “proper” loop up and over Panther Gap to Lodgepole, or stay left to continue toward Crescent Meadow.)

Mehrten Creek has a very faded map indicating the presence of a bear locker and campsites. To find these sites, ignore the map, which is relatively unhelpful, and continue upstream, hugging the left flank until one can climb up to the outcrop west of the stream, where one will find the bear locker and a couple of flat campsites with decent, partly obstructed views of the Kaweah River Valley.
DAY 7: Mehrten Creek to Crescent Meadow (5.6 miles)
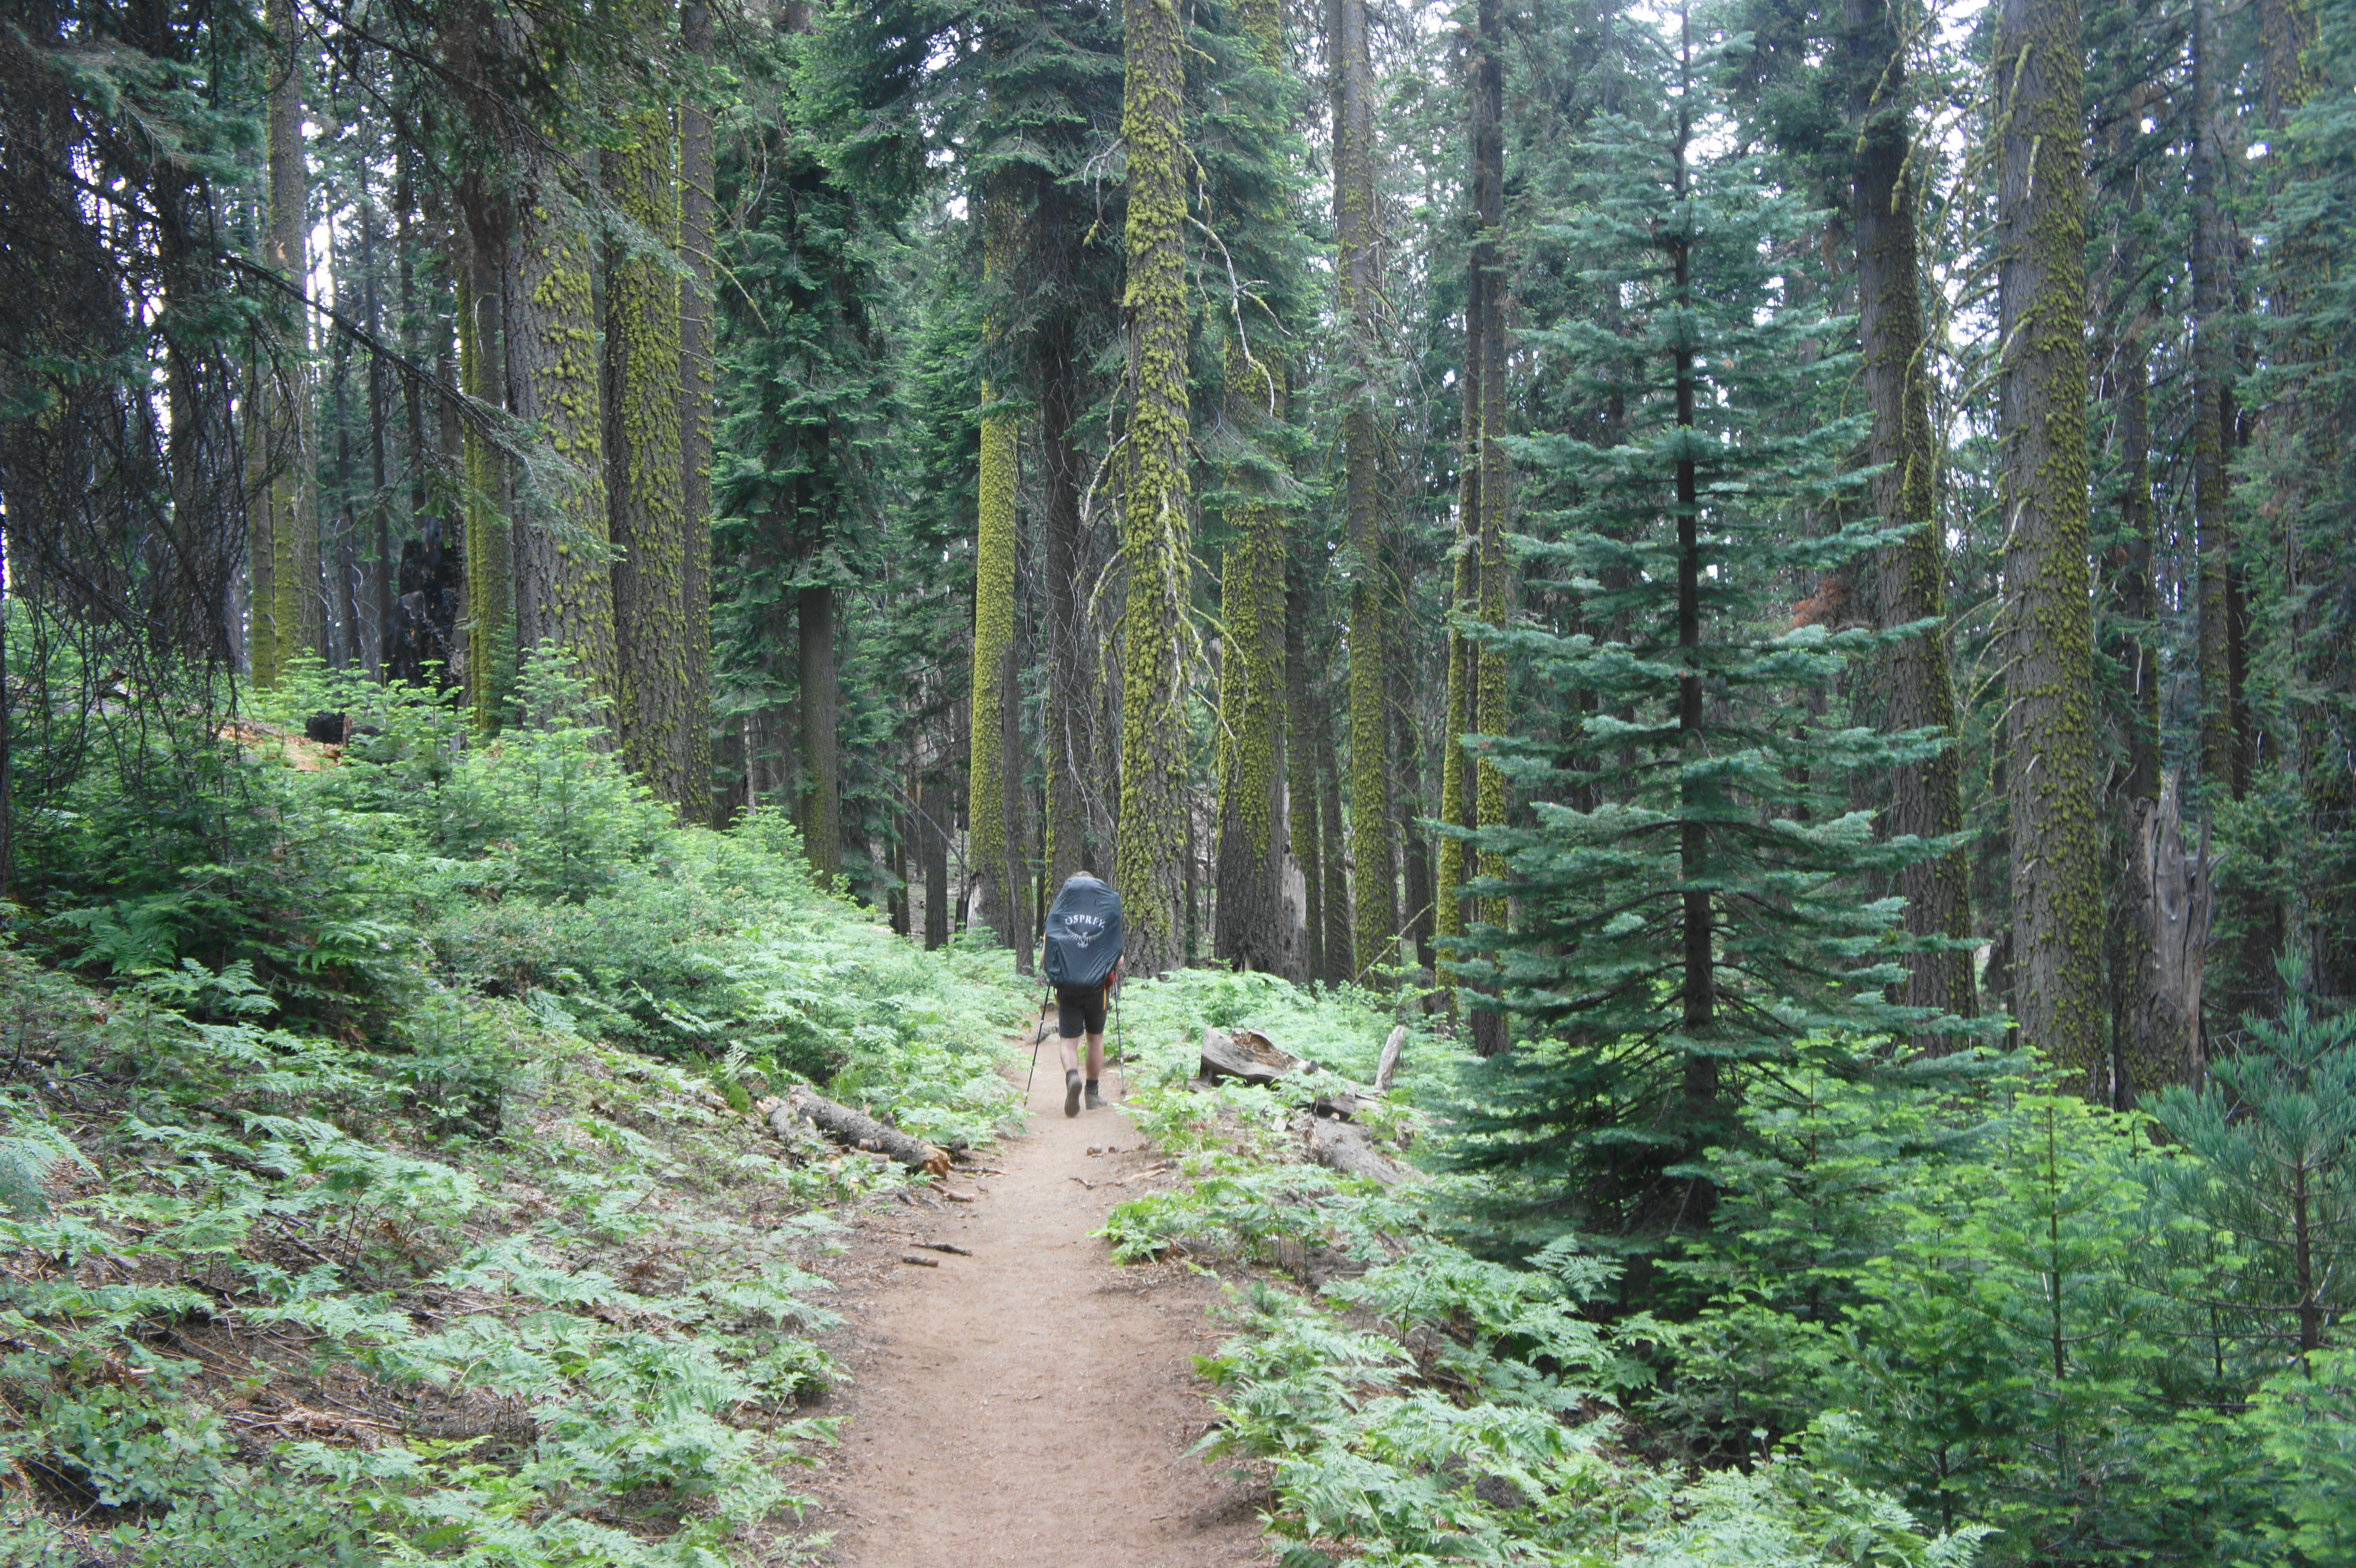
The final day involves only a few hours of hiking, extending west from Mehrten Creek to the popular Crescent Meadow Trailhead at the southern end of the Giant Forest. Hikers can take the shuttle bus (if it is running) from Crescent Meadow back to Lodgepole or the Giant Forest Museum.
From Mehrten Creek, the High Sierra Trail continues westward, largely downhill, to Sevenmile Hill, a woody finger that juts out into the Kaweah Valley. A mild incline leads north from here to a series of stream crossings: the various forks of Panther Creek, which fan out around a broad, wooded gap that takes more than two miles to traverse.
After about three miles of walking on the day, the trail splits, with a spur trail heading right toward the Giant Forest and General Sherman Tree. Stay left, continuing toward Crescent Meadow by way of an undulating, up-and-down path heading southwest. At about four miles, the trail abruptly descends a set of short switchbacks and then makes headway toward Eagle View, an unmarked viewpoint overlooking the Kaweah Valley, Eagle Rocks, and Moro Rock.

High Sierra Trail past the Panther Creek drainages 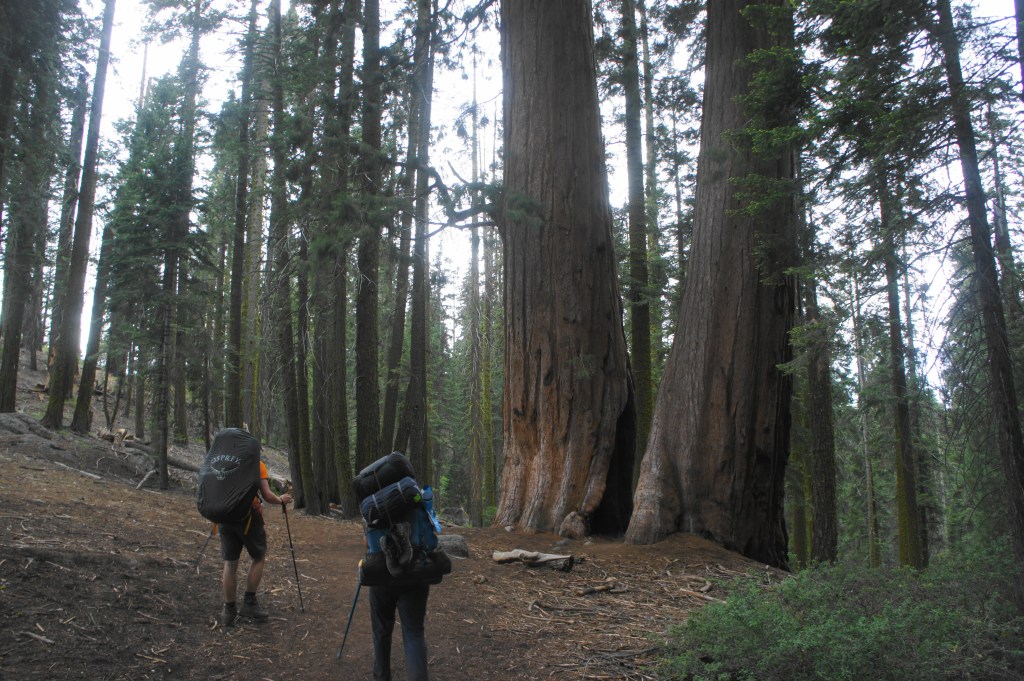
Giant sequoias
By now, the day hikers start trickling in, and the trail soon reaches a junction at the southern fringes of the Giant Forest, the world’s largest collection of giant sequoia trees. While there are multiple routes to Crescent Meadow from here, the shortest and most efficient way is to continue on the High Sierra Trail, which courses west, passing the so-called Burial Tree on the right and then descending mildly to the vicinity of Crescent Meadow, passing junctions for Log Meadow, Tharp’s Log, and the Trail of the Sequoias. At last, at about 5.5 miles, the trail drops to meet a paved path, which skirts Crescent Meadow and ends at the bustling trailhead, where day hikers, picnickers, and backpackers converge. Here there is a shuttle bus which connects with Lodgepole and Giant Forest Museum. (Note: As of 2021, due to Covid-19, this bus was not stopping at Crescent Meadow, requiring us to add about 2.5-3 miles through the sequoias to get to Giant Forest Museum, where the bus was running to Lodgepole as normal.)
And so ends the multi-day journey across Sequoia and Kings Canyon National Parks, one of the area’s finest hikes that nonetheless remains relatively undiscovered. Allot 4-7 days for this hike, depending on pace and appetite for the various spur trails.

Wow, this looks absolutely amazing! I especially love Lost Lake and Deadman Canyon (that campsite, whoa 😍), but it’s all so scenic. What a great trip and accomplishment, thanks for giving me a new backpacking trip to add to my to-do list.
Pingback: Top 10 Hikes in 2021 | Live and Let Hike
It should be noted that travel on the HST between Seven Mile Hill and Kaweah Gap may not be allowed, depending on your wilderness permit. Permits for the Alta Trail explicitly state this. An alternate route would take you over Horn Col, Pterodactyl Pass, and then join the Alta Trail back to Wolverton.
Pingback: Chilnualna Falls Trail (Yosemite National Park, CA) | Live and Let Hike
Thank you for posting this fantastic fantastic guide. Reading your article inspired me to do this trip (at the end I did this loop and then went east on the HST to Whitney instead of west to go to back to Lodgepole). I printed out most of the text of your guide and it was INVALUABLE on the trail. I read it at every break to see what was coming up, where was water, where were bear boxes, etc. And the trip itself was great; everything was beautiful and lived up to your descriptions and pictures.
I did this in July-August 2024. Almost all the information included was still current. Here are a few things I would add for anyone planning to do this trip:
The first leg from Lodgepole up to Silliman is a long slog especially with all your food. I got to Twin Lakes early in the afternoon hoping for a longer first day but was totally pooped. Conversely, from Silliman to Roaring River is mostly flat or downhill. I did Twin Lakes to Roaring River in one very long day, though I wouldn’t necessarily recommend it.
From Lodgepole until the Sugarloaf junction the trail was in very good shape. The one exception was that the trail Beville, which appeared to be totally overgrown. But I didn’t look too hard and might have missed something. From Sugarloaf to Roaring River the trail was maintained and clear, but many parts were overgrown from low traffic. Be careful in the meadowy parts from the junction to Comanche Meadow, you often cannot see where you are stepping and there can be holes and rocks. Roaring River to the tree line in Deadman Canyon was mostly OK but some spots had major blowdowns that were very annoying to get around. And the path was often overgrown, but 90%+ of the time it was discernable if you looked closely.
The way down from Elizabeth Pass to the HST totally sucked. In many places the trail was indiscernible. Is this the trail or a creek bed, who knows! And even if you could find it it was steep and rocks. Once you get closer to the big switchbacks the trail becomes easier to follow but many parts are still very steep, eroding, rocky, overgrown, or all of the above. I didn’t do Tamarack, but the reports I heard was that was very overgrown too. But it is supposed to be spectacular, so hopefully next time.
Expect to get your feet wet in some of the stream crossings. Rock hopping is not always feasible. Not a big deal, but be prepared for that.
Wow what an awesome trip report. Thanks for taking the time to post. I’m glad my initial description was helpful, and I hope your update is helpful as well for future users. I agree completely about the first leg to Twin Lakes being quite challenging!
Pingback: Tokopah Falls Trail (Sequoia National Park, CA) – Live and Let Hike
Pingback: Mist Falls (Kings Canyon National Park, CA) – Live and Let Hike
Pingback: Little Baldy Trail (Sequoia National Park, CA) – Live and Let Hike
Amazing photos, I want to do this hike now!